
Are you looking for the perfect way to customize and add a creative touch to your nails? Gel nails are becoming increasingly popular in today’s beauty world due to their versatility and long-lasting shine. Not only can gel give your nails that extra sparkle, but it is also an easy process that requires minimal effort. With the right supplies and preparation methods, you, too, can have salon-quality gel manicures at home any time!

Beauty is in the eye of the beholder; for some, that means having beautifully manicured nails. Whether you’re prepping your own nails for a special event or just looking to jazz up an everyday look, gel nails are a great way to add some flair.
In this blog post, we will provide all of the tips needed on how to prep nails for gel. Read on to learn how to get ready for gorgeous gel-polish results in no time!
What Will You Need?
Before you can begin prepping your nails for gel, there are a few supplies that you’ll need to gather:
- Nail clippers
- Nail file
- A cuticle pusher or orange stick
- Hand lotion or cuticle oil
- Cotton balls and acetone remover (if needed)
Once you have all of your supplies ready, you are on your way to having beautiful nails!
10 Easy Steps on How to Prep Nails for Gel
Step 1. Trim Your Nails:
Using your nail clippers, trim your nails to the desired length. If you want shorter nails, use a nail file to shape them further. Make sure that each nail is uniform and flat against the surface of your finger.
Step 2: Push Back Cuticles:
Gently push back cuticles with a cuticle pusher or orange stick. This will help ensure that the gel adheres correctly to the area around your nails. Be careful not to over-push as this can cause damage and irritation.
Step 3: Smooth Out Nail Beds:
Use a fine grit emery board or buffer to smooth out any ridges or bumps on your nail beds. Doing so will give you an even surface on which to apply the gel. Additionally, lightly buff the surface of your nails to remove any residue left from cuticle oil or lotion.
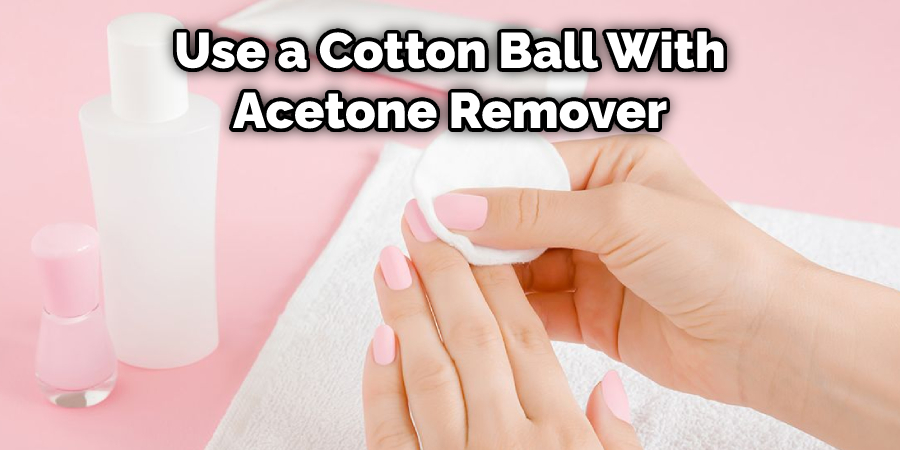
Step 4: Clean Nails Thoroughly:
It’s important to make sure that your nails are clean and free from any dirt or oils before applying the gel. Use a cotton ball with acetone remover (if needed) to wipe away any residue. If you don’t have acetone remover, you could also use a mild soap and warm water.
Step 5: Apply Hand Lotion/Cuticle Oil:
To prevent dryness and cracking, apply some hand lotion or cuticle oil to your hands and cuticles. This will help keep your skin hydrated during the entire process. Don’t forget to wipe away any excess oil before applying the gel.
Step 6: Apply Basecoat:
Now you can start prepping your nails for the actual application of the gel polish. Begin by applying a base coat to each nail. This will help create a smooth and even surface for the gel to adhere to. You can find base coats specifically designed for use with gel polish.
Step 7: Cure with UV/LED Lamp:
After applying the base coat, use a UV or LED lamp to cure your nails. Make sure that the bulbs are at least 6-12 inches away from your fingers. Depending on the type of lamp you’re using, this curing process could take anywhere between 30 seconds and 2 minutes.
Step 8: Apply Gel Color:
Once your nails have cured, apply two coats of gel color (or more, depending on the desired look). Do not forget to seal off the free edges as well so that no polish seeps through onto other areas of your skin. This will help create a clean, professional look.
Step 9: Final Cure with UV/LED Lamp:
After applying the gel color, you’ll need to cure your nails one more time. Place them back underneath the lamp for an additional 30 seconds to 2 minutes until dry. It is important to make sure that the bulbs are 6-12 inches away from your fingers during this process.
Step 10: Apply Topcoat:
The last step is to apply a top coat over the entire nail surface. This will help protect your manicure and give it that extra shiny finish! Allow your nails to sit beneath the lamp for one final cure before you can start enjoying your beautiful new look!
You now have all the basic knowledge needed to prep nails for gel! You can easily create amazing manicures at home with a few simple steps. So don’t wait any longer – get your nails ready for gel and start creating stunning looks today!
5 Additional Tips and Tricks
1. File Your Nail in One Direction Only: This will prevent the nail from becoming jagged and weak. If you change direction while filing, it can cause the nail to become weak and brittle.
2. Ensure Your Nails Are Clean: Wash and dry your hands and cuticles before applying the gel. Removing any dust and oil will help ensure better adherence of the product.
3. Use a Primer: Primer helps to create a stronger bond between the nail plate and the gel. It also helps protect against the discoloration of the natural nails, which some types of gels can cause.
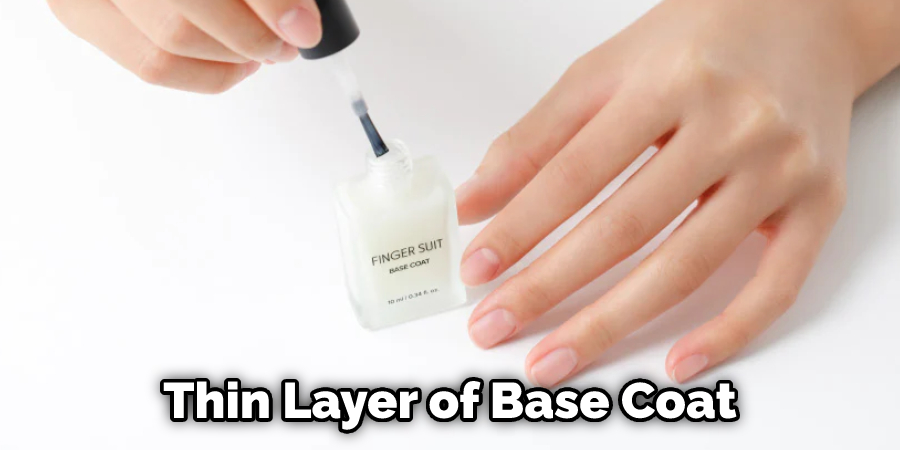
4. Apply a Thin Layer of Base Coat: Applying an even, thin layer of base coat will help ensure that your manicure lasts longer without chips or peeling.
5. Cure in Between Coats: Curing each coating with an LED/UV light helps to make sure it is securely attached to the nail bed, creating a longer-lasting application.
By following these tips and tricks, you’ll be prepped and ready for a perfect gel manicure!
5 Things You Should Avoid
- Do not cut or trim your nails too short. Doing so can cause the gel to lift and eventually pull away from the nail bed.
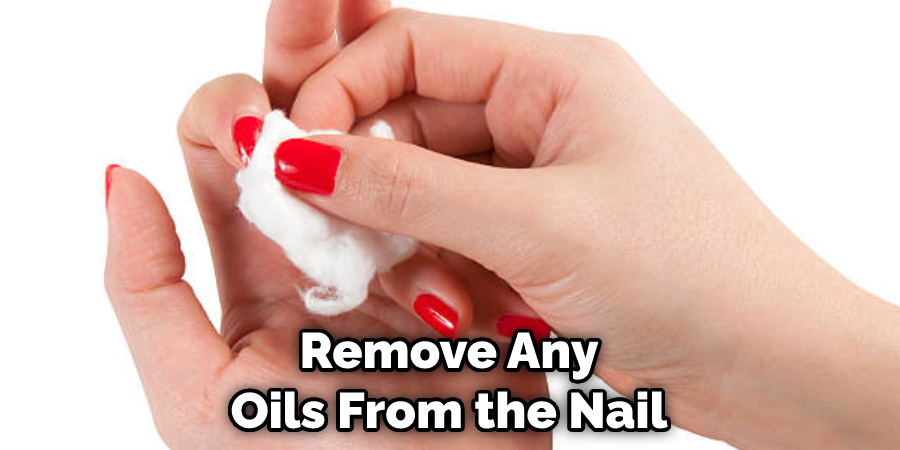
- Do not put gel polish on dirty nails. Before applying the gel, make sure to clean off any dirt and oils from your nail bed.
- Do not use regular nail polish remover with gel polish, as this will strip away the top coat and weaken the bond of the product to your natural nail.
- Do not apply too much pressure when buffing or filing in order to prevent damage to the nail plate.
- Do not over-file the edges of your nails, as this can cause sensitivity and irritation to occur around your cuticle area.
By following these simple rules, you can ensure that your nails will always be properly prepped for a long lasting, beautiful Gel Manicure!
Can You Use Acetone to Prep for Gel Nails?
No, acetone is not recommended as a preparation step for gel nails as it can cause damage to the natural nail plate. Instead, opt for an alcohol-free cleanser or mild soap and warm water. This will help remove any oils from the nail and create a better base for your manicure.
Additionally, using an acetone-based remover after curing the manicure is fine – just make sure that you do not use it during the preparation process.
Instead, use a few drops of rubbing alcohol and gently rub it over the nails to remove any dust or oils for the best bonding results.
By following these tips, you’ll be prepped and ready for a perfect gel manicure! With proper preparation, your nails will look beautiful for weeks to come!
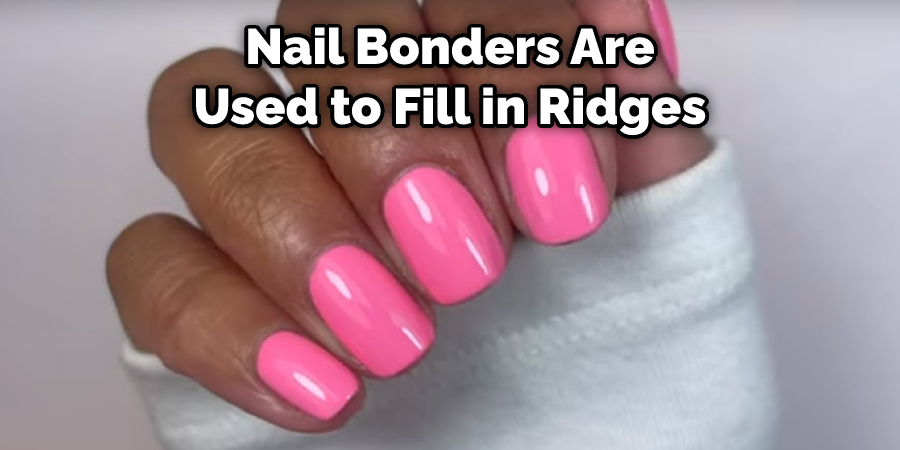
Is Nail Bonder and Primer the Same Thing?
No, nail bonder and primer are not the same things. Primers help create a stronger bond between the natural nail plate and gel polish, preventing discoloration. Nail bonders are used to fill in ridges or imperfections in the nail bed so that the gel will adhere better. While they can both be used to prep nails for gel, they have different functions and should be applied separately.
By understanding these differences and following proper preparation steps, you can ensure that your manicure lasts longer! So make sure to use both products during preparation for the best results.
Conclusion
In conclusion, prepping nails for a gel manicure is an important part of the application process that should not be overlooked. With the right tools and proper technique, you can create a look that lasts similarly to a Gel Bonder or Salon Gel Manicure – with long lasting, magnificent nail color! Start by cleaning your nails with an acetone pad or brush and filing them into a desired shape. When filing, watch out for any hangnails or peeling skin, as they can easily get caught in the buffer strip.
Afterward, buff away the ridges from your nail surface with a light grit buffing block to ensure maximum adhesion. Finally, apply one layer of Gel Bond primer before beginning polishing for a chip-resistant manicure!
Hopefully, the article on how to prep nails for gel has helped you better understand the importance of prepping your nails correctly before applying a Gel manicure. With this knowledge, you can ensure that every manicure will be flawless and long lasting!
About the Author
Jane Hubbard is a passionate beauty expert with a wealth of experience in makeup, hair, and overall beauty techniques. After years of working as a hairdresser specialist, she followed her entrepreneurial spirit and started her own consultancy business.
Jane has always been driven by her desire to help others feel confident in their own skin, and she does this by sharing her knowledge, experiences, and practical beauty tips. Through her consultancy, she empowers individuals to embrace their unique beauty, offering tailored guidance that boosts both self-esteem and personal style.
Professional Focus
Specializes in makeup, hairstyling, and beauty consulting.
Provides personalized beauty advice, tips, and techniques to help individuals feel confident in their appearance.
Dedicated to staying up-to-date with the latest industry trends and developments.
Passionate about creating a comfortable and empowering experience for every client.
Education History
University of Craft and Design – Bachelor of Fine Arts (BFA) in Woodworking and Furniture Design
Woodworking Apprenticeships – Extensive hands-on training with skilled craftsmen to refine carpentry and furniture making techniques
Online Courses & Masterclasses – Continued education in advanced woodworking techniques, design principles, and specialized tools
Expertise:
Makeup artistry, hairstyling, and beauty consulting.
Personalized beauty techniques to enhance confidence and self-expression.
Educating clients on how to maintain their beauty routines at home.