
Are you looking for the perfect way to make your forehead look sculpted and beautiful? Look no further! Contouring your forehead can help to highlight and emphasize its shape, giving you a more polished and sophisticated look. Contouring the forehead, it is easy to accentuate its natural features and give it a polished, professional look.
Whether aiming for natural-looking highlights or dramatic contour lines, mastering the basics of contouring your forehead can go a long way in creating any desired effect. In this post, we’ll explain why contouring is important on the forehead, how to choose the right products for you, and finally – step-by-step instructions on how to contour forehead properly. So don’t miss out – read on to learn all about this great technique!

Necessary Items
Before diving into the steps for contouring your forehead, it’s important to ensure you have all the necessary items. Here are some of the products that you’ll need:
- Contour powder or cream: this can be a few shades darker than your natural skin tone.
- Highlighter: this should be a few shades lighter than your natural skin tone.
- Blush (optional): this can add a pop of color to your cheeks, balancing the overall look.
- Contour brush: This should be angled and soft-bristled to blend the contour powder or cream onto your forehead easily.
- Highlighter brush: A smaller, fluffier brush is best for applying highlighter to specific areas on your forehead.
These items will make the contouring process much easier and ensure you achieve the best results.
Why Contour Your Forehead?
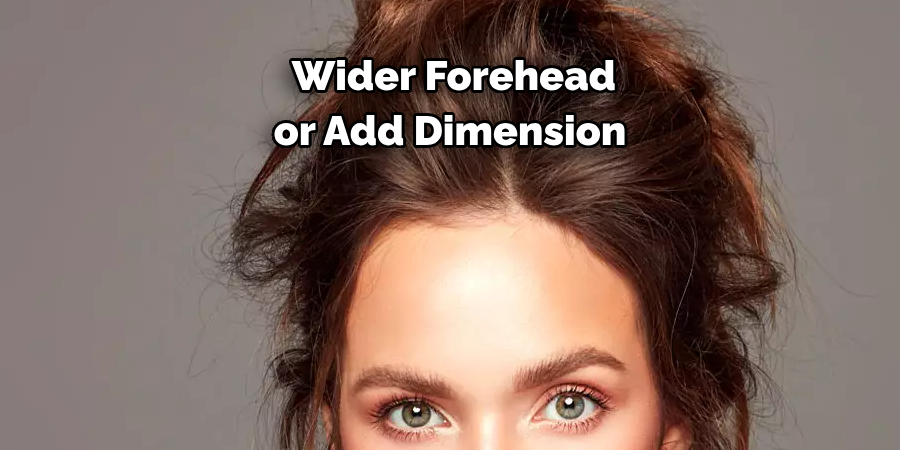
Contouring has become a popular makeup technique in recent years, and for good reason. By applying darker shades to certain areas of your face and lighter shades to others, you can create the illusion of shadows and highlights, thereby altering the appearance of your facial features. In the case of contouring your forehead, this can help to slim down a wider forehead or add dimension and definition to a flatter one.

10 Steps on How to Contour Forehead
Step 1: Choosing the Right Products
When choosing products for contouring, it’s important to consider your skin tone. As mentioned earlier, the contour powder or cream should be a few shades darker than your natural skin tone, while the highlighter should be a few shades lighter. Be sure also to choose products with matte finishes, as shimmery or glittery formulas can create an unnatural and harsh look.
Step 2: Applying Foundation
Before starting the contouring process, applying foundation evenly over your entire face is important. This will provide a smooth base for the contouring products to adhere to and create a more natural look.
Step 3: Mapping Out Your Forehead
Using your contour brush, lightly draw a line on each side of your forehead, starting at the top of your hairline and extending down towards your temples. This will be where you apply the contour powder or cream.
Step 4: Blend Out the Lines
Using a clean, fluffy blending brush or a damp makeup sponge, gently blend out the lines you drew in step 3. This will create a more natural and seamless look.
Step 5: Applying Contour Powder or Cream
Using your angled contour brush, apply the darker shade to the areas you previously mapped out on your forehead. Start at the top of your hairline and blend downwards towards your temples, following the shape of your forehead. Be sure to blend well to avoid any harsh lines.
Step 6: Adding Highlighter
Using a smaller highlighter brush, apply the lighter shade onto the center of your forehead, just above where you applied the contour powder or cream. This will help to create dimension and make your forehead appear more sculpted.
Step 7: Blend Out the Highlighter
Using a blending brush or makeup sponge, gently blend out the highlighter to avoid any harsh lines. Pay special attention to the edges where the highlighter meets the contour powder or cream.
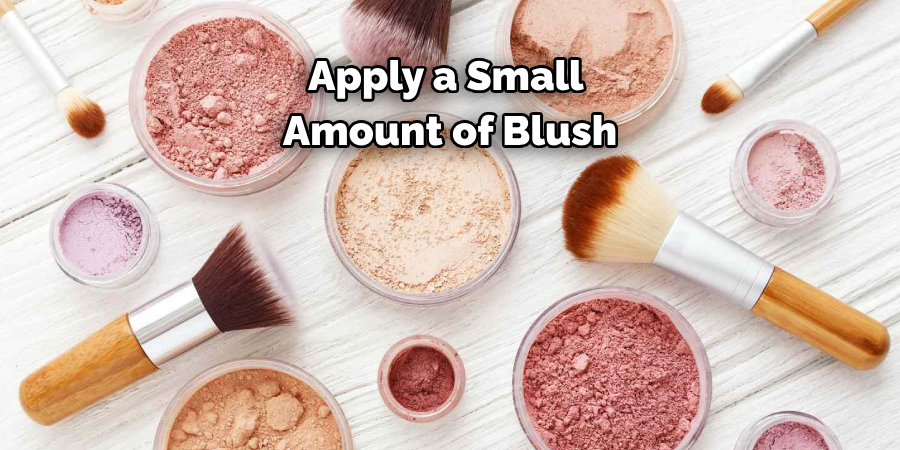
Step 8: Adding Blush (Optional)
If you want to add color to your cheeks, apply a small amount of blush onto the apples. Be sure to blend well for a natural look.
Step 9: Set with Setting Powder
Set it with a translucent setting powder to ensure your contouring lasts all day. This will also help to blend and soften any harsh lines.
Step 10: Final Blending
Using a clean blending brush or makeup sponge, gently blend everything for a seamless and natural finish.
8 Additional Tips and Tricks
1. Choosing Products for Your Skin Type
If you have oily skin, opt for powder products, as they will help to absorb excess oil and stay in place longer. For dry skin, cream products are better as they provide extra moisture.
2. Start Light and Build Up
Adding more product than taking it away is always easier, so start with a small amount and gradually build up to achieve your desired look.
3. Use a Clean Brush for Each Product
Use a clean brush for each product to avoid muddying your contour and highlight shades. This will also help to create a more precise and defined look.
4. Don’t Forget to Blend Your Neck
To avoid any harsh lines or a “floating head” effect, blend your contour and highlight shades down onto your neck for a seamless finish.
5. Blend Outward
When blending, always start in the center of your forehead and blend outwards towards your hairline for a natural finish.
6. Use a Damp Makeup Sponge
Use a damp makeup sponge to blend out any harsh lines for a more natural and seamless blend. The dampness will help to blend the products without removing too much pigment.
7. Experiment with Different Techniques
Everyone’s face shape is different, so don’t be afraid to experiment and find the best contouring technique that works for you.
8. Practice Makes Perfect
Contouring can initially seem daunting, but with practice and experimentation, you’ll soon become a pro at achieving the perfect contoured forehead.
So whether you’re looking to slim down a wider forehead or add dimension to a flatter one, with these tips and tricks, you’ll be able to master the art of contouring your forehead in no time. Don’t be afraid to experiment and have fun with it! With practice, you’ll soon be able to achieve a flawless, contoured look every time. Happy contouring! So whether you’re looking to slim down a wider forehead or add dimension to a flatter one, with these tips and tricks, you’ll be able to master the art of contouring your forehead in no time. Don’t be afraid to experiment and have fun with it.
Frequently Asked Questions
Is Contouring Suitable for All Face Shapes?
Yes, contouring can be tailored to suit any face shape. It’s all about finding the right technique and products that work best for you.
Can I Use Bronzer for Contouring My Forehead?
While bronzer can be used for contouring, it tends to have a more shimmery finish, which may not provide the desired effect. Sticking with matte contour powders or creams for a natural and seamless look is best.
How Often Should I Contour My Forehead?
It ultimately depends on personal preference and how often you wear makeup. However, contouring your forehead once a day is usually sufficient. Remember always to remove your makeup and properly cleanse your skin before bed.
Can I Use Cream Products Over Powder Products?
Yes, you can layer cream products over powder products or vice versa. Just be sure to blend well in between layers for a seamless finish.
How Do I Determine Where to Place the Contour and Highlight Shades on My Forehead?
The placement of contour and highlight shades may vary depending on personal preference and face shape. However, a general rule is to place the contour shade in areas where you want to create shadows or definition, such as the forehead’s temples, hairline, and sides. The highlight shade should be placed where you want to bring forward or add dimension, such as the center of the forehead and brow bone. Feel free to experiment and adjust according to your face shape. Remember, practice makes perfect!

Conclusion
It’s not hard to contour your forehead like a pro. With practice, patience, and the right products, you can create stunning looks that’ll make your cheekbones and forehead look amazing. So why wait? Gather your supplies today and get ready to follow these simple steps on how to contour forehead so you, too, can learn how to master the art of face contouring. And don’t forget – practice makes perfect! It’s all about having fun with makeup and finding out what works best. So experiment away, and you might be surprised at the gorgeous looks you can create with a little courage and a lot of skill! Now show off your beautiful features – we know you have what it takes!
About the Author
Jane Hubbard is a passionate beauty expert with a wealth of experience in makeup, hair, and overall beauty techniques. After years of working as a hairdresser specialist, she followed her entrepreneurial spirit and started her own consultancy business.
Jane has always been driven by her desire to help others feel confident in their own skin, and she does this by sharing her knowledge, experiences, and practical beauty tips. Through her consultancy, she empowers individuals to embrace their unique beauty, offering tailored guidance that boosts both self-esteem and personal style.
Professional Focus
Specializes in makeup, hairstyling, and beauty consulting.
Provides personalized beauty advice, tips, and techniques to help individuals feel confident in their appearance.
Dedicated to staying up-to-date with the latest industry trends and developments.
Passionate about creating a comfortable and empowering experience for every client.
Education History
University of Craft and Design – Bachelor of Fine Arts (BFA) in Woodworking and Furniture Design
Woodworking Apprenticeships – Extensive hands-on training with skilled craftsmen to refine carpentry and furniture making techniques
Online Courses & Masterclasses – Continued education in advanced woodworking techniques, design principles, and specialized tools
Expertise:
Makeup artistry, hairstyling, and beauty consulting.
Personalized beauty techniques to enhance confidence and self-expression.
Educating clients on how to maintain their beauty routines at home.