
Do you hate the smell of monomers? Does it linger in your home after you use it for a project or set nails? Monomers can have powerful odors that tend to stick around. But there is good news – with some simple steps, you can make monomer dry faster and reduce odor!
It is important to note that the drying time of odorless monomers is usually longer compared to regular monomers. This is because it contains a slower evaporating agent, which helps reduce the smell.
In this post, we’ll show you how to make odorless monomer dry faster so that the polymerization process occurs quickly and eliminates foul smells from sticking around for too long. Get ready to learn tips and tricks on making odorless monomers dry quickly!
What Will You Need?
Before we dive into the steps, let’s look at what you’ll need for this process.
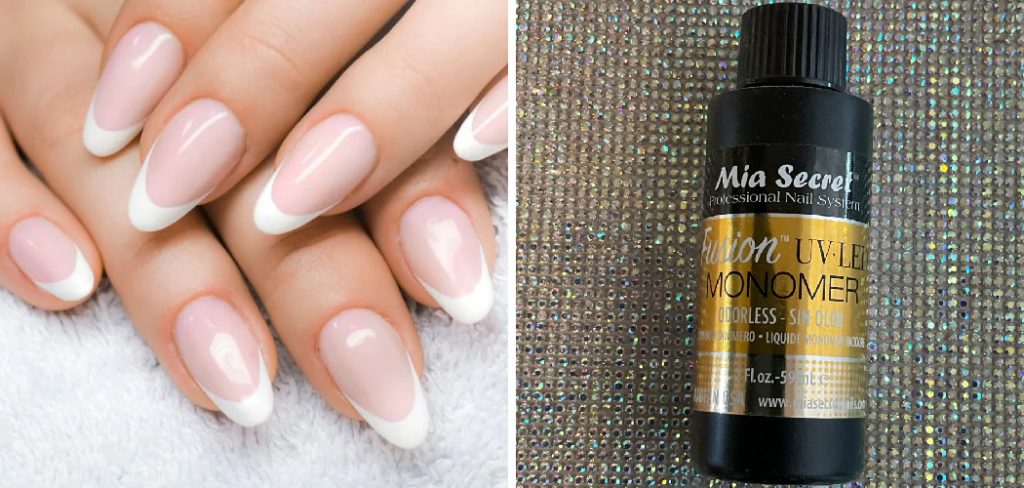
- Odorless monomer liquid
- Polymer powder (acrylic or gel)
- Paper towel or lint-free cloth
- A fan or natural airflow
Once you have these materials, you’re ready to start!
10 Easy Steps on How to Make Odorless Monomer Dry Faster
Step 1: Mix in Moderation
First and foremost, mixing the correct amount of powder and liquid is essential for the best results. Too much monomer can result in longer drying times, so mix in moderation. If you’re unsure how much to mix, follow the manufacturer’s instructions.
Step 2: Use Thin Applications
The thickness of the application significantly influences the drying time. Applying your monomer in thin layers allows for a faster drying process. Not only will this hasten the drying, but it will also ensure a smoother and more professional result. Remember that you can always apply another layer if necessary, but removing an overly thick layer can be more challenging.
Step 3: Utilize a Fan or Natural Air Flow
Expose the application to a fan or natural air flow to speed up the drying process. Do not place it directly under the fan, leading to uneven drying. Rather, ensure a consistent, gentle flow of air that assists in the evaporation of the monomer. This step is beneficial in reducing the odor as well, as the airflow disperses the smell.
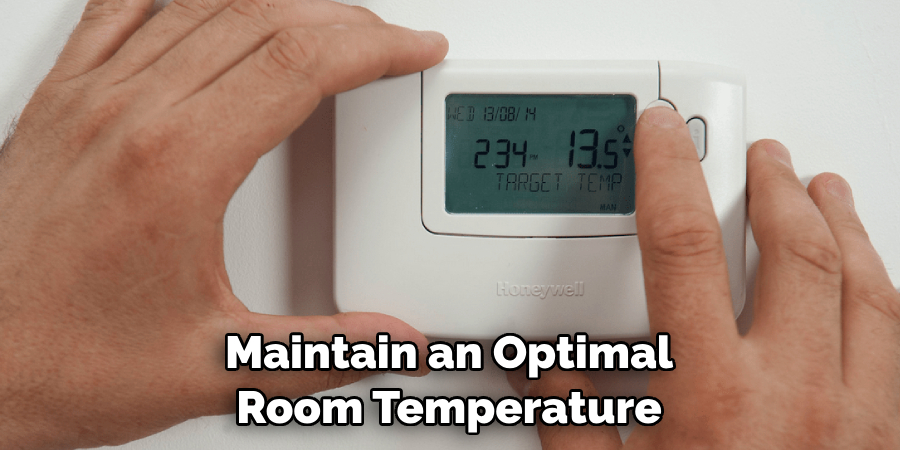
Step 4: Maintain Optimal Room Temperature
The room temperature plays a pivotal role in the drying process of odorless monomers. Higher temperatures accelerate the drying process, while cooler temperatures may delay it. Therefore, maintain an optimal room temperature between 68-74°F (20-23°C) for the best results. Remember, too high a temperature can create bubbles in the final result, so avoid overheating.
Step 5: Use a Dehydrator or Primer
Before applying your odorless monomer, use a dehydrator or primer on the nail surface. These products help remove moisture from the nail, allowing your monomer to adhere better and dry faster. Remember to apply these products sparingly to prevent over-drying, which can lead to cracking or damage to the nail.
Step 6: Absorb Excess Liquid
After application, if you notice any excess monomer, it’s important to absorb it immediately using a paper towel or a lint-free cloth. Doing so helps speed up the drying process and prevents the monomer from spreading and causing a mess. Be careful not to press too hard as it may dent or disrupt the monomer layer.
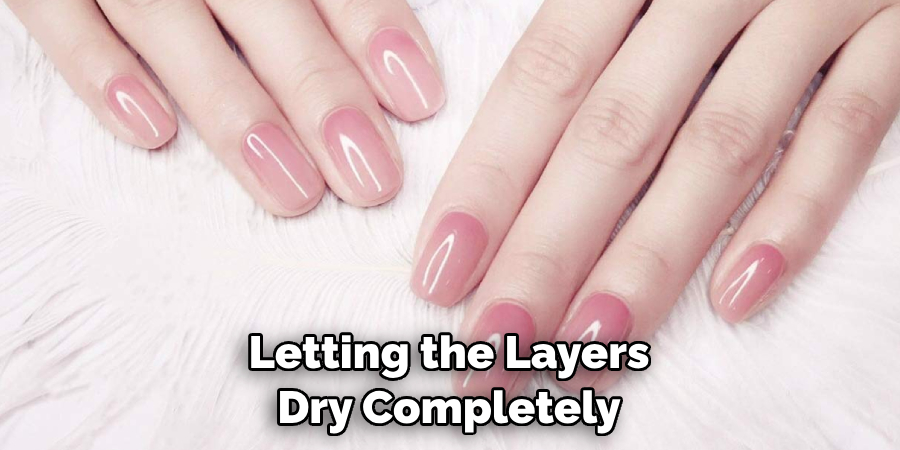
Step 7: Let the Layers Dry Individually
If you’re applying multiple layers of monomer, it’s key to let each layer dry completely before applying the next. If the lower layers have yet to fully dry, they can trap moisture and significantly slow the overall drying process. Patience is key here; allowing each layer to dry will result in a superior finish and faster drying time.
Step 8: Keep Your Tools Clean
Ensure your brushes and tools are clean and free from old monomer residue. Old residue can slow down the polymerization process and increase drying time. Cleaning your tools after each use ensures they’re ready for the next application and helps maintain the best drying conditions.
Step 9: Store Materials Correctly
Proper monomer liquid and polymer powder storage can also affect how quickly they dry. Store these products in a cool, dry place and tightly close the lids after each use to prevent exposure to air and moisture. This helps preserve their quality and efficacy, contributing to faster drying times.
Step 10: Practice Makes Perfect
Finally, remember that practice makes perfect. As you gain more experience working with odorless monomers, you’ll better understand how much to use, how thin to apply each layer, and how to speed up the drying process effectively. Keep going if it takes a little time to get the hang of it; keep practicing, and you’ll see improvement.
By following these steps, you can significantly reduce the drying time of odorless monomers and eliminate unpleasant odors.
6 Additional Tips and Tricks
- Increase Room Temperature: The room temperature can influence the drying time of odorless monomers. A warmer room will accelerate the drying process as it promotes the evaporation of solvents.
- Use a Dehydrator: Nail dehydrators can remove moisture from the surface of the nails, allowing odorless monomers to dry faster.
- Apply Thinner Layers: Opt for multiple thin layers instead of one thick layer. This gives each layer a chance to dry completely, thus reducing overall drying time.
- Use a Nail Dryer: A nail dryer or fan can speed up the drying process. The airflow from the dryer or fan helps to evaporate the solvents quickly.
- Avoid Humidity: High humidity can slow down the drying time. Try to work in a dry environment, or consider using a dehumidifier if the air is naturally humid.
- Add Accelerator Drops: Some manufacturers offer special accelerator drops that can be added to odorless monomers to speed up drying. Be sure to follow the instructions provided by the manufacturer when using these products.
With these additional tips and tricks, you can make odorless monomers dry even faster. Experiment with different techniques to find what works best for you. Remember, practice makes perfect! So don’t get discouraged if it takes some time to master the process. Keep trying, and you’ll soon be able to create flawless nail enhancements quickly.
5 Things You Should Avoid
- Avoid Using Old Monomers: Old or expired monomers may not dry as quickly or effectively as fresh monomers. Always check the expiry date and keep your supplies well-stocked to ensure optimal results.
- Avoid Direct Sunlight: Direct sunlight can interfere with the drying process of the monomer. Working in a shaded area or indoors is best to prevent premature drying or discoloration.
- Avoid Water Contact: Water can slow down the drying process significantly. Ensure that your hands and nails are completely dry before applying.
- Avoid Excessive Application: Too much monomer can lead to longer drying times. Remember, less is more when it comes to applying monomers. Aim for thin, even layers.
- Avoid Distractions: While waiting for the monomer to dry, avoid doing activities that may ruin your work. Letting the layers dry completely before moving on to the next step is crucial.
By avoiding these common mistakes, you can ensure that your odorless monomer dries faster and with better results.
What Happens if You Smell Monomer for Too Long?
The fumes from monomers can be harmful if inhaled for prolonged periods. While odorless monomer is designed to minimize the strong smell associated with traditional monomers, it still contains chemicals that can irritate the respiratory system. If you find yourself smelling monomer for too long, here are some potential consequences:
- Nausea and Dizziness: Inhaling monomer fumes can cause nausea and dizziness, especially if you are sensitive to chemicals.
- Headaches: The strong smell of monomer can trigger headaches for some individuals. This can be worsened by prolonged exposure to the fumes.
- Eye and Throat Irritation: The fumes from monomer can irritate the eyes and throat, causing redness, itchiness, and a burning sensation.
- Allergic Reactions: Some people may develop allergic reactions to monomer fumes, which can cause skin irritation, rashes, and difficulty breathing.
To avoid these potential consequences, it’s important to work in a well-ventilated area and take breaks from smelling monomer.

Conclusion
All in all, if you’re looking for the best way how to make odorless monomer dry faster in a relatively short amount of time, there are plenty of techniques to try out. We recommend beginning with good ventilation, reducing the humidity levels with a dehumidifier, and avoiding higher temperatures.
In addition, think about some helpful tips such as opening the door and windows for fresh air circulation, setting lesser time limits for cure times depending on the specific conditions of your workspace, and using UV lamps or LED Blacklight SATA UVC Sterilizer Wand to accelerate the process.
If you are still having difficulties drying odorless monomers after all this, then it might be necessary to change the product used and look into alternatives. So take action today: apply these useful instructions that we have shared here, make sure you follow safety regulations and correctly use protective gear when handling monomeric products!
About the Author
Jane Hubbard is a passionate beauty expert with a wealth of experience in makeup, hair, and overall beauty techniques. After years of working as a hairdresser specialist, she followed her entrepreneurial spirit and started her own consultancy business.
Jane has always been driven by her desire to help others feel confident in their own skin, and she does this by sharing her knowledge, experiences, and practical beauty tips. Through her consultancy, she empowers individuals to embrace their unique beauty, offering tailored guidance that boosts both self-esteem and personal style.
Professional Focus
Specializes in makeup, hairstyling, and beauty consulting.
Provides personalized beauty advice, tips, and techniques to help individuals feel confident in their appearance.
Dedicated to staying up-to-date with the latest industry trends and developments.
Passionate about creating a comfortable and empowering experience for every client.
Education History
University of Craft and Design – Bachelor of Fine Arts (BFA) in Woodworking and Furniture Design
Woodworking Apprenticeships – Extensive hands-on training with skilled craftsmen to refine carpentry and furniture making techniques
Online Courses & Masterclasses – Continued education in advanced woodworking techniques, design principles, and specialized tools
Expertise:
Makeup artistry, hairstyling, and beauty consulting.
Personalized beauty techniques to enhance confidence and self-expression.
Educating clients on how to maintain their beauty routines at home.