
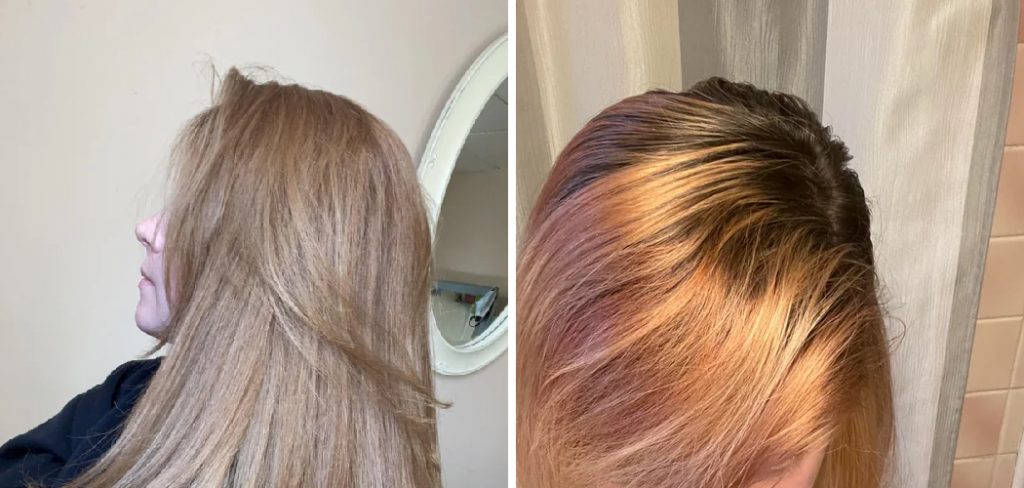
Are you tired of the same old hair color and ready for a change? Ion Permanent Hair Color is an excellent choice for those seeking vibrant, long-lasting colors.
How to use Ion Permanent Hair Color can be a transformative experience, allowing you to achieve a vibrant new look while ensuring long-lasting results. This hair coloring system is designed to deliver rich, fade-resistant color that conditions your hair as you dye. Whether you want to cover grey, experiment with a bold shade, or enhance your natural color, understanding the application process is critical to achieving beautiful results.
This guide’ll walk you through the steps to safely and effectively use Ion Permanent Hair Color, ensuring you enjoy a satisfying and vibrant hair transformation.
What Will You Need?
Before getting started, ensure you have all the necessary tools and products. This includes:
- Ion Permanent Hair Color in your desired shade
- Ion Sensitive Scalp Creme Developer (10 vol, 20 vol or 30 vol depending on your hair’s needs)
- A plastic or glass bowl for mixing the color
- A tint brush for application
- Gloves to protect your hands from staining
- A timer to track processing time
It’s essential to read the instructions in the Ion Permanent Hair Color box before beginning. This will provide specific guidelines for mixing ratios and recommended processing times based on your desired results.
10 Easy Steps on How to Use Ion Permanent Hair Color
Step 1. Preparation:
Before you begin the application process, preparing your hair and environment is essential. Start by ensuring your hair is clean and dry, as excess oils or products can inhibit the dye’s effectiveness. It’s advisable to wash your hair 24 to 48 hours before coloring; this will allow your scalp to produce natural oils that can help protect against irritation during the coloring process.
Next, create a dedicated workspace to avoid mess—lay down a towel or old clothes to catch any drips or spills. Ensure the area is well-lit, as this will help you see the application more clearly. Additionally, gather all your materials close at hand to streamline the process. These prep steps will set you up for a successful and enjoyable hair coloring experience.
Step 2. Mixing the Color:
Once you have your materials organized, it’s time to mix the Ion Permanent Hair Color and the Sensitive Scalp Creme Developer. Start by pouring the desired amount of hair color into your mixing bowl. The ratio of color to developer will depend on the instructions on the box, typically a 1:1 ratio, but be sure to check for accuracy.
Using your tint brush, thoroughly mix the color and developer until you achieve a smooth, consistent mixture with no lumps. This is crucial, as uneven mixing can lead to patchy color results. Once mixed, set aside the bowl and ensure you’re ready to begin the application promptly, as the mixture should be used within a specific timeframe to ensure effectiveness.
Step 3. Sectioning Your Hair:
To ensure thorough and even application, divide your hair into manageable sections. Start by separating your hair down the middle from front to back, creating two large sections. Then, clip each section away, working with one side at a time. For finer hair or longer lengths, you should create additional sections, typically four to six, depending on your hair’s thickness. This will help ensure that every strand is adequately covered with the dye, minimizing the risk of missed spots. Secure the sections using clips or hair ties to keep them out of the way as you work.
Step 4. Applying the Color:
With your hair sectioned and the color mixture prepared, it’s time to start the application process. Begin by putting on your gloves to protect your hands from staining. Take the first section of hair you created and unclip it. Using your tint brush, apply the hair color mixture starting from the roots and working your way down to the tips. Ensure that you saturate each strand thoroughly, as this will help to achieve a more uniform color.
Using a comb or your fingers to help distribute the dye evenly can be beneficial. Repeat this process for each section, applying the color as evenly as possible, paying extra attention to the roots where grey coverage is often needed most. Continue until all sections have been thoroughly coated with the dye mixture.
Step 5. Processing Time:
After applying the hair color, allowing it to process for the recommended time specified in the instructions is crucial. This typically ranges from 30 to 45 minutes, depending on the desired shade and your hair’s texture. During this time, avoid any distractions to ensure you keep track of the timer.
It’s advisable to check your hair periodically but do so gently to avoid disturbing the dye. Depending on your hair’s porosity and chosen shade, you may need to adjust the processing time slightly. Remember, leaving the color on for a short time can lead to undesired results, while adequate processing may affect the vibrancy and longevity of the color.
Step 6. Rinsing the Color:
Once the processing time is complete, it’s time to rinse out the hair dye. Start by thoroughly wetting your hair with lukewarm water, which helps open the hair cuticle gently and allows for easier dye removal. Avoid using hot water, as this can strip the hair of moisture and may impact the longevity of your color. Gradually work through your hair with your fingers to rinse out the color until the water runs clear, indicating that the dye has been completely removed.
After rinsing, apply a generous amount of a sulfate-free conditioner, ideally formulated for color-treated hair, to restore moisture and shine. Leave the conditioner on for a few minutes before rinsing it out with cool water to help seal the cuticle and lock in your new color.
Step 7. Post-Color Care:
After rinsing out the hair dye and applying conditioner, it’s essential to maintain the health and vibrancy of your newly colored hair. Start by gently towel-drying your hair; avoid vigorous rubbing, as this can cause breakage. To preserve your color, opt for sulfate-free shampoos and conditioners specifically designed for color-treated hair.
Additionally, limit the use of heat styling tools in the initial weeks following your color treatment, as excessive heat can fade color more quickly. Incorporating deep conditioning treatments into your hair care routine will help to nourish and hydrate your hair, ensuring it remains soft and vibrant. Lastly, consider scheduling regular trims to eliminate split ends and keep your hair looking fresh and healthy.
Step 8. Enjoying Your New Colour:
Now that your hair is beautifully colored and well cared for, it’s time to enjoy your new look! Style your hair as desired—whether you prefer straight, wavy, or curly styles, your new color should elevate your appearance and boost your confidence. Don’t hesitate to experiment with different hairstyles to show off your stunning color.
Remember to take care of your hair with regular conditioning treatments and color-safe products to maintain its vibrancy. Additionally, wear hats or UV protectant sprays to protect your hair from the sun, as sunlight can fade color over time. Celebrate your transformation and embrace your stunning new hue!
Step 9. Touching Up Roots:
As your hair grows, addressing any regrowth at the roots is essential to maintain a seamless look. Depending on how quickly your hair grows and the color difference between your natural shade and the dyed color, you may need to touch up your roots every four to six weeks.
To do this, use the same hair dye formula you initially applied, focusing primarily on the origins and blending down towards the mid-lengths. Be cautious not to leave the dye on your previously colored ends for too long, as this can lead to damage or undesired color changes. After processing, rinse and care for your hair as you did with your initial color treatment to keep your look vibrant and well-maintained.
Step 10. Exploring New Shades:
Once you’re comfortable with maintaining your current color and root touch-ups, you might want to explore new shades or techniques to enhance your look further. Consider experimenting with highlights, lowlights, or balayage to add dimension and depth to your hair. If you’re feeling adventurous, try temporary colors or fashion shades that allow for a more playful and unique appearance. When changing shades significantly, it’s advisable to consult with a professional stylist, especially if going lighter, to ensure the health of your hair is prioritized.
As always, follow up with appropriate post-care products to maintain the integrity and vibrancy of your updated hue. Embrace the transformation process, and enjoy expressing yourself through your hair color!
By following these steps and tips, you can confidently dye your hair at home and achieve professional-looking results.
Conclusion
How to use Ion Permanent Hair Color can be a rewarding and empowering experience when approached with care and attention.
By following the outlined steps—from preparation and application to post-care—you’re setting yourself up for vibrant and long-lasting results. Remember to choose the right shade that complements your features, and always conduct a patch test before full application to avoid allergic reactions. Consistent maintenance and proper hair care products will help preserve the integrity of your color and keep your hair looking healthy.
Ultimately, embrace the transformation and enjoy the confidence boost that comes with your new look!
About the Author
Jane Hubbard is a passionate beauty expert with a wealth of experience in makeup, hair, and overall beauty techniques. After years of working as a hairdresser specialist, she followed her entrepreneurial spirit and started her own consultancy business.
Jane has always been driven by her desire to help others feel confident in their own skin, and she does this by sharing her knowledge, experiences, and practical beauty tips. Through her consultancy, she empowers individuals to embrace their unique beauty, offering tailored guidance that boosts both self-esteem and personal style.
Professional Focus
Specializes in makeup, hairstyling, and beauty consulting.
Provides personalized beauty advice, tips, and techniques to help individuals feel confident in their appearance.
Dedicated to staying up-to-date with the latest industry trends and developments.
Passionate about creating a comfortable and empowering experience for every client.
Education History
University of Craft and Design – Bachelor of Fine Arts (BFA) in Woodworking and Furniture Design
Woodworking Apprenticeships – Extensive hands-on training with skilled craftsmen to refine carpentry and furniture making techniques
Online Courses & Masterclasses – Continued education in advanced woodworking techniques, design principles, and specialized tools
Expertise:
Makeup artistry, hairstyling, and beauty consulting.
Personalized beauty techniques to enhance confidence and self-expression.
Educating clients on how to maintain their beauty routines at home.