
Are you ready to take down your holiday decorations and return to life? One of the most common seasonal decorations is tinsel, which often gets tangled in our hair.
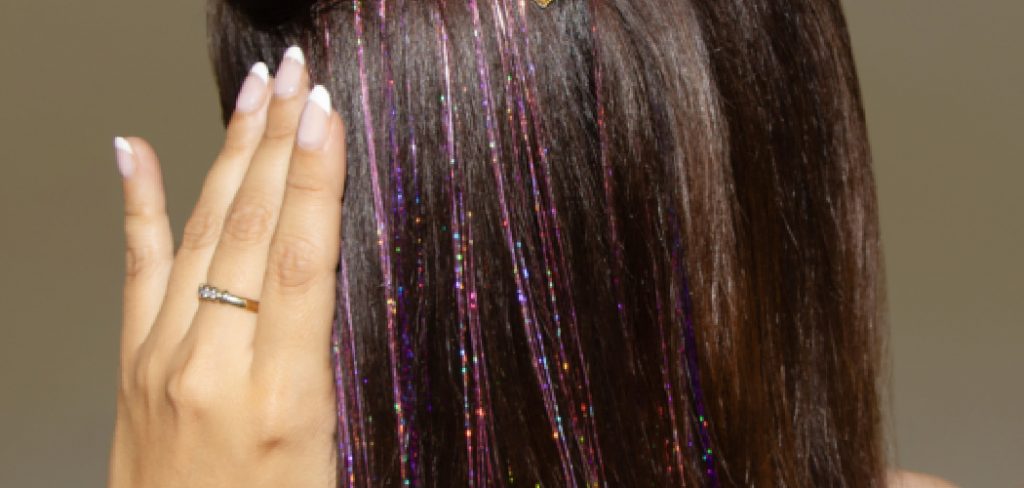
Tinsel hair extensions have become a popular trend, adding sparkle and glamour to hairstyles for special occasions. However, once the festivities are over, knowing how to safely remove tinsel from your hair without causing any damage is essential. As tempting as it may be just to rip it out, proper removal is crucial to maintaining the health and appearance of your hair.
In this guide on how to remove tinsel for hair, we will walk you through the step-by-step process of removing tinsel hair extensions, ensuring a smooth and hassle-free transition back to your natural locks. Say goodbye to the shimmer and hello to your everyday style with ease!
What Are the Benefits of Removing Tinsel for Hair?
While tinsel hair extensions can add a touch of sparkle to your look, removing them once the holiday season is over has several benefits.
- Prevents Damage: Tinsel strands can be pretty harsh on your hair and scalp, especially if left in for an extended period. Removing them promptly helps avoid any potential damage.
- Promotes Hair Growth: Tinsel strands are often attached using small metal clips or beads, which can pull on your hair follicles and stunt growth. Removing the tinsel allows your hair to grow freely without any hindrance.
- Maintains Natural Look: As much as we love the added glitz, it’s always nice to return to our natural hair. Removing tinsel extensions ensures that your natural hair is not compromised and allows you to style it any way you want.
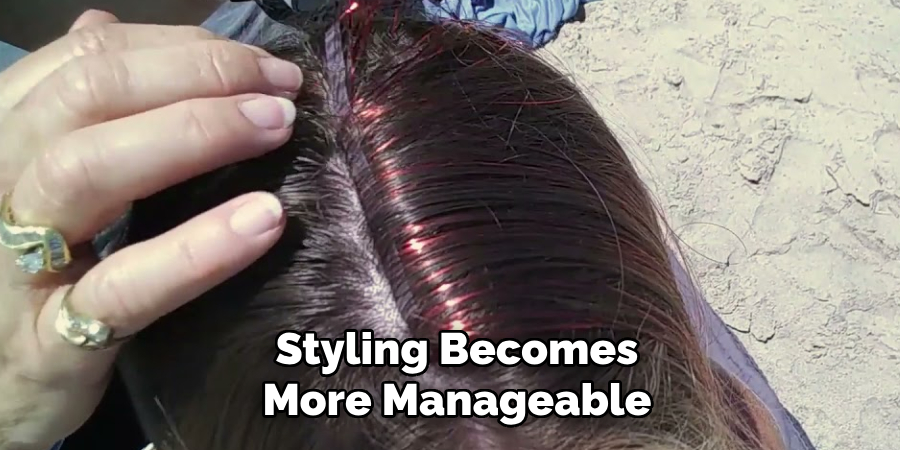
- Eases Maintenance: Tinsel strands can easily get tangled with regular hair, making it challenging to brush or style. By removing them, styling becomes more manageable, and maintenance is saved in the long run.
What Will You Need?
Before you begin the removal process, gathering all the necessary tools and products is essential. Here are some items that will come in handy:
- Wide-tooth comb: This will help you detangle any knots or tangles.
- Hair clips: Sectioning your hair makes it easier to remove tinsel without causing any damage.
- Detangling spray: If your tinsel strands are particularly knotted or matted, it can help loosen them up.
- Scissors: In an emergency, keep scissors nearby to cut out any stubborn tinsel strands carefully.
Once you have all your tools ready, it’s time to remove the tinsel and transition back to your natural hair.
10 Easy Steps on How to Remove Tinsel for Hair
Step 1: Section Your Hair
To begin removing the tinsel from your hair, it’s essential to divide it into manageable sections. Use hair clips or hair ties to separate your hair into smaller sections. This will make the removal process more manageable and help prevent tangles or knots while working with the tinsel strands. Remember to work with one section at a time to maintain control and ensure efficient removal.
Step 2: Apply Conditioner
Take a generous amount of conditioner and apply it to the tinsel strands. This will help to lubricate the hair and make it easier to slide out the tinsel without causing any damage or breakage. Work the conditioner through the tinsel, ensuring each strand is well coated. Leave the conditioner on for a few minutes to soften the tinsel further and smooth the removal process. Alternatively, you can use a detangling spray or hair oil to lubricate the strands.
Step 3: Detangle with Wide-Tooth Comb
Using a wide-tooth comb, gently detangle the tinsel strands. Start from the bottom and work your way up to the roots. This will help loosen any knots or tangles and make it easier to remove the tinsel without pulling on your hair. Avoid using a regular brush as it can cause more tangles and damage your hair.
Step 4: Wet Your Hair
Before proceeding to remove the tinsel, dampen your hair with warm water. This will help soften your hair and the tinsel, making it easier to slide the strands out. Avoid soaking your hair thoroughly; a light misting is enough to achieve the desired effect. Use a spray bottle or simply run your fingers under water and gently apply it to the areas with tinsel.
Wetting your hair can also enhance the effectiveness of the conditioner applied earlier. Wetting your curly or textured hair can also help define your natural curls once the tinsel is removed.
Step 5: Locate the Tinsel Attachment Point
Carefully identify where each tinsel strand is attached to your hair. Tinsel is often secured with small metal beads, knots, or clips. Take your time and use your fingers or a fine-tooth comb if necessary to locate the attachment points. Knowing where the tinsel is secured can help you avoid accidentally pulling on your hair during removal. Use a mirror to better see the attachment points at the back of your head.

Step 6: Loosen the Attachment
Once you’ve identified the attachment point, gently loosen it with your fingers. If the tinsel is held in place with a bead, you may need to use pliers to squeeze the bead and release the strand. Be careful not to tug or apply excessive force, which can cause unnecessary stress on your hair. Patience is key to avoiding any breakage or pulling. Additionally, if the tinsel is tied in a knot, carefully untie it with scissors or your fingers.
Step 7: Slide Out the Tinsel
Carefully slide the tinsel strand out of your hair with the attachment point loosened. Use slow, steady movements to ensure you don’t accidentally tug on your natural hair. If the tinsel resists, reapply conditioner or detangling spray to soften the area further and try again. Be extra cautious around delicate or thin sections of hair. As a last resort, you can cut the tinsel strand close to the attachment point and remove any remaining bits carefully.
Step 8: Repeat for Each Strand
Continue the process by working on one tinsel strand at a time, following the same steps of locating the attachment point, loosening it, and gently sliding out the tinsel. Be sure to reapply conditioner or detangling spray to keep the strands lubricated and minimize potential damage to your natural hair. Take your time and ensure all the tinsel strands are removed from each section of hair before moving on to the next.
Step 9: Rinse Your Hair
Once all the tinsel strands have been successfully removed, rinse your hair thoroughly with warm water. This will help wash away any leftover conditioner, detangling spray, or other product residue. Use your fingers to gently work through your hair as you rinse, ensuring it is clean and free of any remaining tinsel fragments or knots.
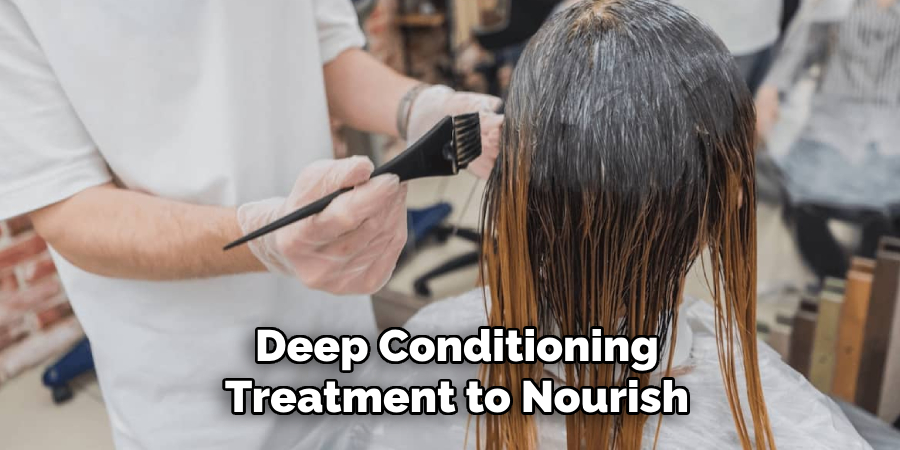
Step 10: Deep Condition and Style
After rinsing, apply a deep conditioning treatment to nourish and restore moisture to your hair. Tinsel removal can sometimes leave your hair slightly dry, so this step helps keep it soft and healthy. Leave the conditioner on for the recommended time before rinsing it out. Once you’ve completed this, towel-dry your hair and style it as desired, enjoying your refreshed and tinsel-free look!
Following these simple steps, you can safely remove tinsel from your hair while protecting its natural beauty and integrity. Remember to take your time, treat your hair gently, and maintain proper hair care routines for long-term health.
5 Things You Should Avoid
When it comes to removing tinsel from your hair, there are certain things you should avoid to prevent any damage or discomfort. Here are five key things to avoid:
- Pulling or Tugging: Avoid pulling or tugging on the tinsel, as it can cause hair breakage or even scalp irritation. Gently untangle the tinsel instead.
- Using Scissors or Sharp Objects: Do not attempt to cut or snip the tinsel with scissors or sharp objects. Doing so can lead to accidental cuts or damage to your hair.
- Using Harsh Chemicals: Avoid using harsh chemicals or adhesive removers to remove the tinsel. These products can damage your hair and scalp.
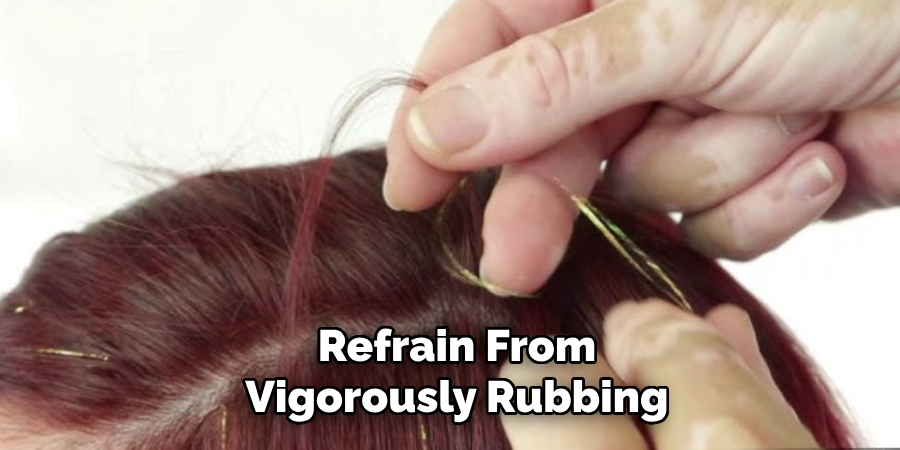
- Rubbing or Scrubbing: Refrain from vigorously rubbing or scrubbing the tinsel. This can cause friction and tangling, making it more difficult to remove.
- Neglecting Professional Help: If you are unsure about safely removing the tinsel, it is best to seek professional help from a hairstylist or salon. They have the expertise and proper tools to remove the tinsel without harming your hair.
By following these guidelines and being cautious during the removal process, you can ensure a smooth and hassle-free experience.
Conclusion
Removing tinsel from your hair can be a fun and festive to add some sparkle, but it’s important to do it safely and carefully. Avoid pulling, using sharp objects or harsh chemicals, rubbing or scrubbing, and neglecting professional help to ensure that the process is gentle on your hair and scalp.
Hopefully, the article on how to remove tinsel for hair has provided you with valuable tips and tricks to make the process easier and more enjoyable. Remember always to prioritize the health and well-being of your hair, and have fun experimenting with different tinsel styles!
So go ahead and enjoy your tinsel while it lasts. When it’s time to remove it, remember these tips for a stress-free removal experience. Happy holidays!
About the Author
Jane Hubbard is a passionate beauty expert with a wealth of experience in makeup, hair, and overall beauty techniques. After years of working as a hairdresser specialist, she followed her entrepreneurial spirit and started her own consultancy business.
Jane has always been driven by her desire to help others feel confident in their own skin, and she does this by sharing her knowledge, experiences, and practical beauty tips. Through her consultancy, she empowers individuals to embrace their unique beauty, offering tailored guidance that boosts both self-esteem and personal style.
Professional Focus
Specializes in makeup, hairstyling, and beauty consulting.
Provides personalized beauty advice, tips, and techniques to help individuals feel confident in their appearance.
Dedicated to staying up-to-date with the latest industry trends and developments.
Passionate about creating a comfortable and empowering experience for every client.
Education History
University of Craft and Design – Bachelor of Fine Arts (BFA) in Woodworking and Furniture Design
Woodworking Apprenticeships – Extensive hands-on training with skilled craftsmen to refine carpentry and furniture making techniques
Online Courses & Masterclasses – Continued education in advanced woodworking techniques, design principles, and specialized tools
Expertise:
Makeup artistry, hairstyling, and beauty consulting.
Personalized beauty techniques to enhance confidence and self-expression.
Educating clients on how to maintain their beauty routines at home.