
Are you tired of constantly dealing with curly ends on your braids? Luckily, you can use a few simple tricks to make them straight and sleek.
If you’ve ever experimented with braided hairstyles, you may have encountered a common challenge: how to transform curly ends on braids into a sleek and straight finish. While curly ends can add a playful and trendy touch to your look, there may be occasions when you prefer a more polished and refined appearance.
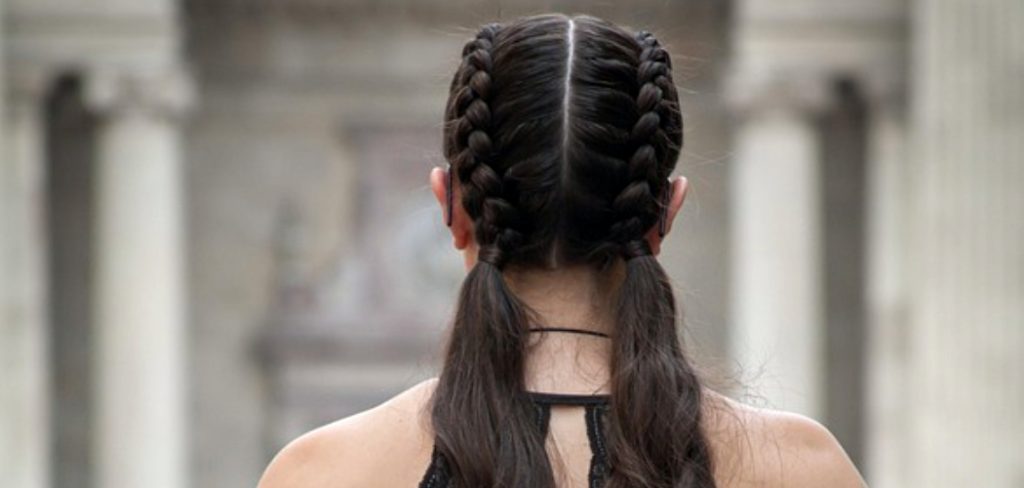
In this guide on how to make curly ends on braids straight, we’ll explore some effective techniques and tips to help you achieve straight ends on your braids, allowing you to effortlessly switch up your style and embrace a sleeker aesthetic. Let’s dive in!
What Are the Benefits of Having Straight Ends on Braids?
Before we discuss the methods for straightening your braided ends, let’s briefly discuss why you may want to achieve this look.
- A More Sophisticated and Polished Finish: While curly ends can be fun and playful, having straight ends on your braids can add an elegant and refined touch to your overall look.
- Versatility in Styling: With straight ends, you can wear your braids either curly or straight, giving you more versatility in how you style your hair.
- Long-lasting Results: Using the proper techniques and products ensures that your straightened braided ends will last longer than their curly counterparts. In the long run, this can save you time and effort, as you won’t have to touch up your hairstyle constantly.
Now that we’ve covered some of the benefits, let’s explore how to straighten curly ends on braids.
What Will You Need?
To achieve straight ends on braids, you will need the following tools and products:
- Flat Iron: A flat iron is a must-have for this process. Use one with adjustable heat settings to avoid damaging your hair.
- Heat Protectant Spray: When using a flat iron, it’s crucial to protect your hair from heat damage, so be sure to have a heat protectant spray on hand.
- Wide-tooth Comb: This will help you detangle and section your braids before straightening them.
- Hair Clips: These will be useful for sectioning your braids and keeping them out of the way as you work.
- Styling Gel or Serum: Adding a small amount of styling gel or serum can help smooth and tame any flyaways or frizz on your straightened ends.
Now that you have all your tools ready let’s move on to the techniques for achieving straight ends on braided hairstyles.
10 Easy Steps on How to Make Curly Ends on Braids Straight
Step 1. Detangling Your Braids:

Before straightening your braids, it’s essential to detangle them to ensure a smooth and even straightening process. Start by gently running a wide-tooth comb through your braids, starting from the ends and working towards the roots. This helps remove any knots or tangles and prepares your hair for straightening. Take your time and be gentle to avoid causing any unnecessary damage or breakage to your hair. Once your braids are detangled, you’re ready to move on to achieving straight ends on your braided hairstyle.
Step 2. Heat Protectant Application:
Apply a heat protectant spray or serum to protect your hair from heat damage during the straightening process. This creates a barrier between your hair and the heat styling tools, reducing the risk of dryness and breakage. Spray the heat protectant evenly onto your braids, focusing on the ends where you want to achieve straightness. Gently massage or comb through to ensure even distribution. Allow the heat protectant to dry before moving on to the next step. Remember, using a heat protectant is crucial for maintaining the health and integrity of your hair while achieving the desired straight ends on your braided hairstyle.
Step 3: Sectioning Your Braids:
Step 4: Heat Up Your Flat Iron
Turn on your flat iron and set it to a suitable heat level for your hair type. If you have fine or delicate hair, use a lower heat setting, while those with thicker or coarser hair may need a slightly higher setting. Avoid excessive heat, as this can cause damage to both your natural hair and the braids themselves. Allow the flat iron to fully heat up before proceeding to ensure consistent, even results. Once ready, you can begin the straightening process on your braids one section at a time.
Step 5: Straightening Each Braid
Take one braid from your pre-sectioned hair and place it between the flat iron plates, starting near the area where the curl begins. Slowly glide the flat iron down the length of the braid, maintaining gentle but firm pressure. Repeat the process as needed until the ends are sleek and straight. Move evenly and avoid lingering in one spot to prevent heat damage. Continue braid by braid, working through each section until you achieve straight ends across your entire hairstyle.
Step 6: Apply Styling Gel or Serum
Once all braids have been straightened, apply a small amount of styling gel or serum to smooth the ends further and tame any remaining flyaways. Rub the product between your palms and gently glide it over the ends of your braids. This step helps lock in the straightened look and adds extra shine for a polished finish.
Step 7: Final Touch-Up
Give your hairstyle a final inspection to ensure all braid ends are straight and uniform. If you notice any spots that need additional smoothing, quickly reapply the flat iron or styling product as required. For added durability, you can lightly mist your hair with a setting spray to help maintain your sleek and straight look throughout the day.
Step 8: Avoid Water Exposure
After straightening your braided ends, it’s crucial to avoid water exposure as much as possible. Water can cause the straightened ends to revert to their natural curly state, undoing all your hard work. Be mindful of activities like swimming, rain, or excessive sweating, and consider using a scarf or bonnet to protect your hairstyle when necessary. If you expect exposure to moisture, opt for a water-resistant styling product to help maintain the sleek look.
Step 9: Maintain and Refresh
To keep your straightened ends looking fresh, practice regular maintenance. This may include reapplying a small amount of styling gel or serum every few days to control frizz and add shine. If the ends begin to lose their sleekness, you can also use a flat iron on a low heat setting for a quick touch-up. Proper care will ensure your hairstyle remains polished and long-lasting.
Step 10: Protect While Sleeping
When sleeping, protecting your straightened braided ends from friction and potential frizz is essential. Use a silk or satin scarf, wrap, or pillowcase to minimize damage and preserve the straight look. This small step can make a big difference in extending the longevity of your hairstyle. By incorporating this habit into your nightly routine, you’ll wake up with smooth and well-kept braids.
Now that you’ve followed these ten easy steps, your braided hairstyle with straight ends is complete! With proper care and maintenance, you can enjoy a sleek, stylish, versatile, and long-lasting look.
5 Things You Should Avoid
- Using High Heat Without Protection: Applying excessive heat without proper protection can cause damage and lead to breakage. Always use a heat protectant spray or serum before using heat-styling tools.
- Skipping Moisturization: Neglecting to moisturize your hair before straightening can make it more prone to dryness and frizz. Prioritize deep conditioning treatments and use hydrating products to maintain moisture levels.
- Overlooking Sectioning: Failing to section your hair correctly can result in uneven straightening and missed areas. Divide your hair into manageable sections to ensure efficient and consistent heat distribution.
- Excessive Heat Application: Applying excessive heat to your hair can lead to heat damage and weaken the hair shaft. Opt for the lowest practical heat setting on your styling tools and minimize the number of passes over each section.
- Neglecting Heat Protection Between Styling Sessions: While you may desire a straightened look for an extended period, protecting your hair between styling sessions is essential. Wrap your hair in a silk scarf or use a satin bonnet while sleeping to preserve the straightened style.
By avoiding these common mistakes, you can achieve the desired straight look for your braided hair while minimizing the risk of damage and maintaining healthy, beautiful strands.
Conclusion
In conclusion, how to make curly ends on braids straight requires proper technique and care to achieve the desired results without damaging your hair. It is essential to use heat protectants, moisturize regularly, section properly, avoid excessive heat application, and protect your hair between styling sessions.
By following these tips, you can enjoy a sleek and smooth look while keeping your hair healthy and strong. Remember to prioritize the health of your hair above achieving a particular style for long-term benefits. You can rock any hairstyle with patience and proper care while maintaining healthy tresses!
So go ahead and experiment with straightened braids – just make sure to follow these tips for best results. Happy styling!
About the Author
Jane Hubbard is a passionate beauty expert with a wealth of experience in makeup, hair, and overall beauty techniques. After years of working as a hairdresser specialist, she followed her entrepreneurial spirit and started her own consultancy business.
Jane has always been driven by her desire to help others feel confident in their own skin, and she does this by sharing her knowledge, experiences, and practical beauty tips. Through her consultancy, she empowers individuals to embrace their unique beauty, offering tailored guidance that boosts both self-esteem and personal style.
Professional Focus
Specializes in makeup, hairstyling, and beauty consulting.
Provides personalized beauty advice, tips, and techniques to help individuals feel confident in their appearance.
Dedicated to staying up-to-date with the latest industry trends and developments.
Passionate about creating a comfortable and empowering experience for every client.
Education History
University of Craft and Design – Bachelor of Fine Arts (BFA) in Woodworking and Furniture Design
Woodworking Apprenticeships – Extensive hands-on training with skilled craftsmen to refine carpentry and furniture making techniques
Online Courses & Masterclasses – Continued education in advanced woodworking techniques, design principles, and specialized tools
Expertise:
Makeup artistry, hairstyling, and beauty consulting.
Personalized beauty techniques to enhance confidence and self-expression.
Educating clients on how to maintain their beauty routines at home.