
A lip mask is a nourishing treatment designed to hydrate, repair, and rejuvenate your lips. Unlike daily lip balms, lip masks provide intensive care, helping to restore softness and smoothness, especially during harsh weather conditions or after prolonged exposure to dryness.
Whether you’re dealing with chapped lips or simply looking to enhance your lip care routine, making your own lip mask at home can be an easy and rewarding way to achieve healthier lips using natural ingredients.
In this article on how to make lip mask, we’ll guide you through the steps to create your own nourishing lip treatment and share some tips on how to use it effectively. If you’re looking to pamper your lips, learn how to make a lip mask at home with simple ingredients that will leave your lips soft and hydrated.

Why Make Your Own Lip Mask?
While there are many lip masks available in the market, making your own allows you to control the ingredients and ensure that they are all-natural. Often, store-bought lip masks contain synthetic chemicals and preservatives that may not be suitable for everyone.
Moreover, by making your own lip mask, you can tailor it to your specific needs and preferences. You can add extra hydrating or exfoliating ingredients based on your individual lip concerns, such as dryness or discoloration.
Ingredients for a Basic Lip Mask
To make a simple yet effective lip mask, you’ll need the following ingredients:
1 Tablespoon of Honey:
Honey is known for its moisturizing and antibacterial properties, making it an excellent ingredient for repairing chapped lips.
1 Tablespoon of Coconut Oil:
Coconut oil is a natural emollient that helps to lock in moisture and soften the skin. It also contains fatty acids that nourish and protect the lips.
1 Teaspoon of Brown Sugar:
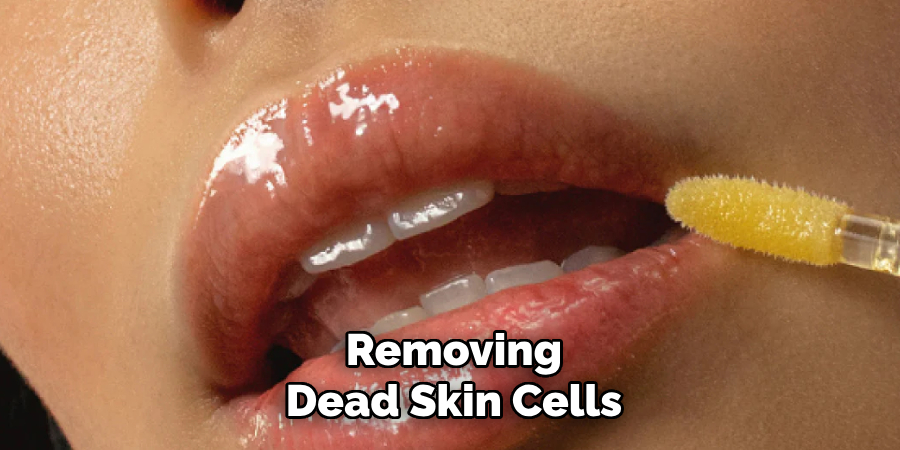
Brown sugar acts as a gentle exfoliant, removing dead skin cells and revealing softer, smoother lips.
8 Steps on How to Make Lip Mask
Step 1: Prepare
Start by gathering all the necessary ingredients and tools for making your lip mask. You will need a small mixing bowl, a spoon for stirring, and a clean container or jar to store the lip mask.
Ensure that your workspace and tools are clean to maintain hygiene, as this will prevent any contamination of the mixture. Having everything ready beforehand will make the process smooth and efficient.
Step 2: Mix the Honey and Coconut Oil
Take the tablespoon of honey and the tablespoon of coconut oil and combine them in the mixing bowl. Use the spoon to mix them thoroughly until the texture is smooth and well-blended.
This ensures that the moisturizing properties of both ingredients are evenly distributed, creating a consistent base for your lip mask. It’s also important to note that you can adjust the ratio of honey and coconut oil based on your personal preference.
Step 3: Add Brown Sugar
Next, add the teaspoon of brown sugar to the honey and coconut oil mixture. Gently stir the ingredients together until the brown sugar is evenly incorporated.
The sugar will serve as a gentle exfoliant, helping to remove dead skin cells while enhancing the overall texture of the lip mask. Ensure that the mixture remains thick and cohesive, making it easier to apply to your lips without dripping.
Step 4: Optional Ingredient
At this point, you can add an optional ingredient depending on your lip concerns and preferences. For example, if you have dry lips, adding a few drops of vitamin E oil or almond oil can provide extra hydration.
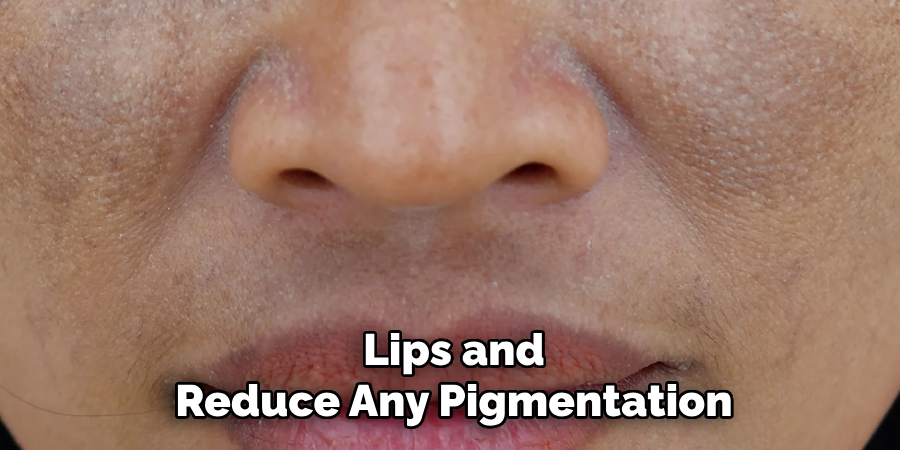
If your lips are prone to discoloration, adding a pinch of turmeric powder can help brighten the lips and reduce any pigmentation. However, be cautious with the amount of turmeric you use as it can stain your lips.
Step 5: Refrigerate
Once your lip mask mixture is ready, transfer it into a clean container or jar with a lid. Place the container in the refrigerator and allow it to chill for about 15-20 minutes. Refrigeration helps the mixture to firm up, making it easier to apply to your lips without dripping.
Additionally, the cool sensation, when applied, can feel soothing, especially if your lips are chapped or irritated. Remember to store any unused portion in the refrigerator to maintain its freshness.
Step 6: Prep Your Lips
While your lip mask is chilling in the refrigerator, take the time to prep your lips for the treatment. Use a gentle lip scrub or a soft toothbrush to exfoliate any dry and flaky skin on your lips.
This step helps to improve blood circulation and allows the lip mask to penetrate better.
Step 7: Apply the Lip Mask
Once chilled, remove the lip mask from the refrigerator and let it sit at room temperature for a few minutes. Using clean fingers or a small brush, apply a generous layer of the mixture onto your lips. Gently massage in circular motions for one to two minutes.
Avoid getting the mixture into your mouth or swallowing it, as some of the ingredients may not be safe for ingestion.
Step 8: Rinse and Moisturize
After a few minutes of massaging, rinse off the lip mask with lukewarm water and pat dry with a clean towel. You can immediately feel the difference in how soft and smooth your lips feel.
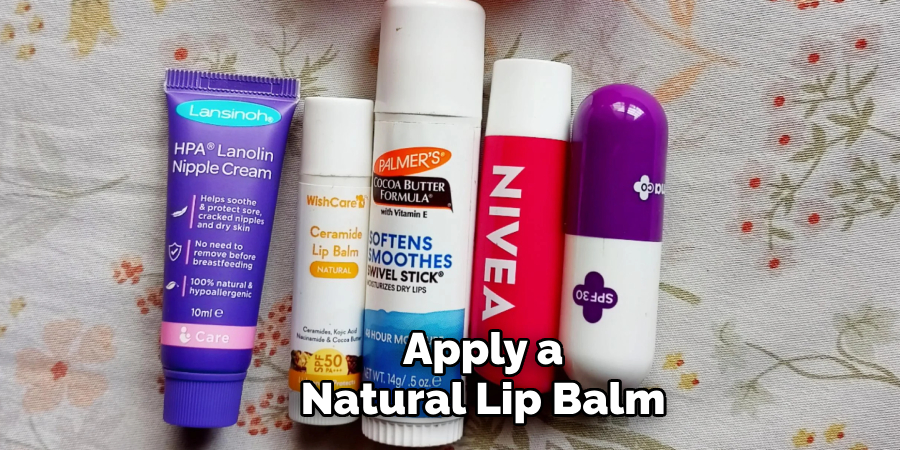
To lock in the moisture, apply a natural lip balm or coconut oil after rinsing off the lip mask. Repeat this process once to twice a week to maintain healthy, hydrated lips.
Following these eight simple steps on how to make lip mask, you can easily make your own lip mask at home that is free of harsh chemicals and tailored to your specific needs. With regular use, you can achieve softer, smoother, and healthier lips without breaking the bank on expensive store-bought products. Experiment with different ingredient combinations and find what works best for your lips. Happy pampering!
Do You Need to Use Professionals?
When it comes to lip care, the idea of seeking professional help may seem unnecessary for most. However, there are instances where consulting a dermatologist or skincare specialist can be beneficial. Persistent issues like severe dryness, chronic chapping, or discoloration that do not respond to DIY treatments or over-the-counter products might indicate an underlying condition that requires professional evaluation.
Professionals can offer tailored advice, recommend specific medical-grade products, or even perform treatments like chemical peels or laser therapy for more advanced concerns. That said, for most individuals, a routine of proper hydration, regular exfoliation, and nourishing lip masks made at home is often sufficient to maintain healthy lips. Always listen to your body, and don’t hesitate to seek expert guidance when needed.
Frequently Asked Questions
Q: How Often Should I Use a Lip Mask?
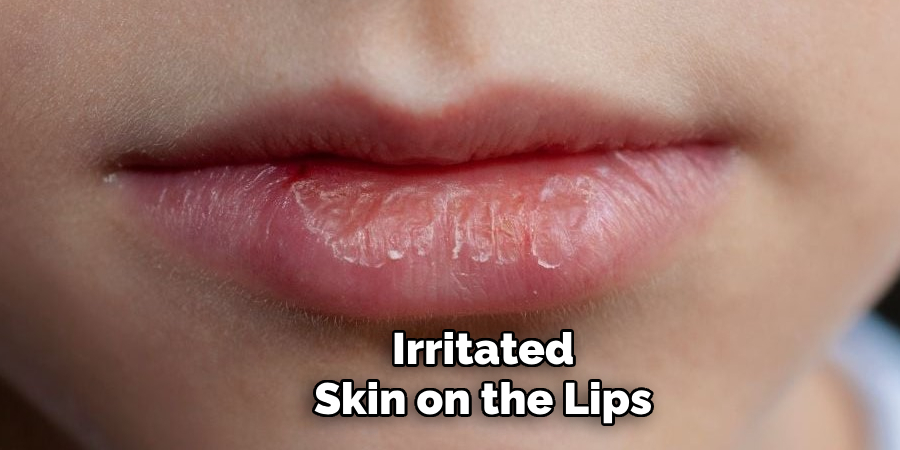
A: It is recommended to use a lip mask once or twice a week for best results. However, it’s also important to listen to your lips and adjust accordingly if they feel too sensitive or irritated. It’s better to err on the side of caution and use the lip mask less frequently if needed.
Q: Can I Use the Lip Mask on Dry or Chapped Lips?
A: Yes, a lip mask can help to repair and moisturize dry or chapped lips. However, be gentle when massaging the mixture onto your lips and avoid using it if you have any open cuts or sores.
Q: Are There Any Side Effects of Using a Lip Mask?
A: As with any skincare product, there is always a potential for allergic reactions or irritation. It’s important to patch-test the ingredients before applying them to your lips and discontinue use if you experience any adverse reactions. Additionally, some ingredients may not be safe for ingestion, so it’s essential to avoid getting the mixture into your mouth. If you have any concerns, consult with a dermatologist before using a lip mask.
Q: Can I Store the Lip Mask for Later Use?
A: Yes, you can store the lip mask in an airtight container or jar in the refrigerator for up to a week. However, it’s best to make small batches and use them fresh for maximum effectiveness.
Q: Can I Use Any Type of Honey for the Lip Mask?
A: While any type of honey can provide benefits for your lips, raw honey is usually recommended as it contains more enzymes and nutrients than processed honey. Additionally, raw honey has anti-inflammatory properties that can help soothe irritated skin on the lips. However, if you don’t have access to raw honey, regular honey will still work effectively in making a lip mask.
Conclusion
Making your own lip mask is an easy and cost-effective way to achieve nourished, soft lips using natural ingredients. With just a few simple steps on how to make lip mask, you can create a personalized lip mask that addresses your specific concerns and leaves your lips feeling hydrated and rejuvenated.
So why not give it a try and start pampering your lips today? Your pout will thank you! So, make sure to try these tips soon!!
About the Author
Jane Hubbard is a passionate beauty expert with a wealth of experience in makeup, hair, and overall beauty techniques. After years of working as a hairdresser specialist, she followed her entrepreneurial spirit and started her own consultancy business.
Jane has always been driven by her desire to help others feel confident in their own skin, and she does this by sharing her knowledge, experiences, and practical beauty tips. Through her consultancy, she empowers individuals to embrace their unique beauty, offering tailored guidance that boosts both self-esteem and personal style.
Professional Focus
Specializes in makeup, hairstyling, and beauty consulting.
Provides personalized beauty advice, tips, and techniques to help individuals feel confident in their appearance.
Dedicated to staying up-to-date with the latest industry trends and developments.
Passionate about creating a comfortable and empowering experience for every client.
Education History
University of Craft and Design – Bachelor of Fine Arts (BFA) in Woodworking and Furniture Design
Woodworking Apprenticeships – Extensive hands-on training with skilled craftsmen to refine carpentry and furniture making techniques
Online Courses & Masterclasses – Continued education in advanced woodworking techniques, design principles, and specialized tools
Expertise:
Makeup artistry, hairstyling, and beauty consulting.
Personalized beauty techniques to enhance confidence and self-expression.
Educating clients on how to maintain their beauty routines at home.