
Are you tired of your eye shadow creasing and fading after a few hours? If so, then it’s time to add an eyeshadow stick tutorial to your makeup routine.
Eye shadow primer is an essential product for achieving long-lasting and vibrant eye makeup looks. It acts as a smooth base to enhance your eye shadow’s color intensity while preventing creasing and smudging throughout the day. Whether you’re heading to a special event or simply want your eye makeup to stay flawless from morning to night, using an eye shadow primer ensures your hard work stays intact.
In this article on how to use eye shadow primer, we’ll delve into the benefits of eye shadow primer and give you step-by-step instructions on how to apply it for maximum effect.
What Are the Benefits of Eye Shadow Primer?
Eye shadow primer is crucial in any makeup routine, especially for those with oily eyelids or who live in humid climates. Here are some of the main benefits of using an eye shadow primer:
- Enhances Color Intensity: As mentioned earlier, one of the primary purposes of eye shadow primer is to intensify the color of your eye shadow. Creating a smooth and even base on your eyelids will make the colors appear more vibrant and authentic to their shade.
- Prevents Creasing and Smudging: Nothing ruins a perfectly blended eyeshadow look like creases or smudges. Eye shadow primer helps prevent this by creating a barrier between your skin and the eye shadow, keeping it in place all day.
- Increases Longevity: By creating a smooth base for your eyeshadow, the primer also helps keep it on for extended periods. This is especially beneficial for those with oily eyelids or sweat throughout the day.
- Provides a Smooth Application: Applying eye shadow onto bare skin can sometimes result in patchy or uneven color payoff. With an eye shadow primer, you’ll have a smooth canvas to work on and achieve effortless blending and application.
- Helps Conceal Imperfections: Eye shadow primers come in various shades that can help even out any discoloration or imperfections on the eyelids. This can be particularly useful for those with darker skin tones or visible veins on their eyelids.
What Will You Need?
To create a flawless eye shadow look, you’ll need:
- Eye Shadow Primer
- Eye Shadow Palette
- Various Makeup Brushes (Flat shader brush, blending brush, crease brush)
- Eyeliner (optional)
- Mascara
Once you have all your materials, you can begin creating a stunning eye look!
8 Easy Steps on How to Use Eye Shadow Primer
Step 1: Start with Clean, Moisturized Eyelids
Before applying any makeup, ensure your eyelids are clean and free from oils or residue. Use a gentle cleanser or makeup remover to clean the area thoroughly. Once your eyelids are clean, pat them dry with a soft towel. Follow up with a lightweight, non-greasy moisturizer to hydrate the skin.
This step is crucial because hydrated eyelids help the primer adhere evenly, creating a smooth base for your eye shadow. Ensure the moisturizer is fully absorbed before moving on to the next step. This foundational step ensures that your makeup will glide effortlessly and last throughout the day without creasing.
Step 2: Apply an Eye Primer
Once your moisturizer has fully absorbed, it’s time to apply an eye primer. Use a small amount and gently dab it onto your eyelids with your fingertip or a makeup brush. Focus on evenly distributing the primer across the lid, extending up to the brow bone if you plan to apply shadow there.
An eye primer is essential for enhancing the pigment of your eye shadow and prolonging its wear, ensuring your makeup stays vibrant and crease-free all day. Allow the primer to set for a few seconds before continuing to the next step.
Step 3: Apply Eyeshadow
Once the primer has set, it’s time to apply eyeshadow. Start with a neutral base shade that complements your skin tone and sweep it across your entire lid using a fluffy eyeshadow brush. This creates a smooth foundation for layering additional colors.
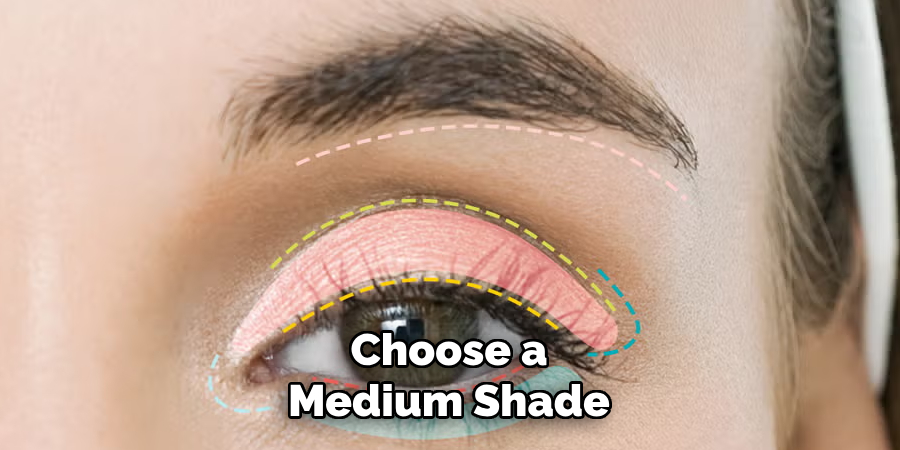
Next, choose a medium shade to add depth, blending it into the crease of your eyelid with a back-and-forth motion. For added dimension, apply a darker shade to the outer corner of your eye, blending carefully to avoid harsh lines. Finally, finish with a light, shimmery shade on the inner corners of your eyes and beneath your brow bone to highlight and brighten the look. Blend all the colors seamlessly for a polished finish.
Step 4: Apply Eyeliner
Carefully trace along your upper lash line using an eyeliner to define your eyes. You can create a winged effect for a more dramatic look by extending the line slightly upward at the outer corners. If desired, line your lower lash line as well, and smudge it gently for a softer appearance. Opt for a pencil, gel, or liquid eyeliner, depending on your preferred intensity and precision.
Step 5: Finish with Mascara
Complete your eye makeup by applying mascara to your upper and lower lashes. Start at the base of your lashes and wiggle the mascara wand upward to coat each lash evenly. For added volume, apply multiple coats, but avoid clumping by allowing each layer to dry slightly before applying the next. This step enhances the length and fullness of your lashes, tying your entire eye makeup look together.
Step 6: Set with Setting Spray
To ensure your makeup stays flawless throughout the day, finish by using a setting spray. Hold the spray bottle about 8-10 inches away from your face and mist evenly over your skin. Focus on areas where makeup is more likely to smudge, such as the T-zone, while avoiding over-saturating your face.
Setting spray helps lock in your makeup and keeps your skin refreshed and hydrated, giving it a natural and long-lasting finish. For optimal results, choose a setting spray that matches your skin type, whether mattifying for oily skin or dewy for dry skin. This final step provides the ultimate professionalism to your makeup routine, ensuring it lasts even during the busiest days.

Step 7: Touch-Up Essentials
Even with flawless makeup application, keeping a few touch-up essentials on hand throughout the day is always a good idea. Carry a compact powder or blotting sheets to control any excess shine, especially in areas prone to oiliness. Keep a travel-sized lip product to reapply your color and maintain a polished look. These essentials ensure your makeup remains fresh and balanced, regardless of your day.
Step 8: Keep Your Skin Healthy
As much as we love makeup, it’s important to remember that healthy skin is the foundation for a flawless look. Make sure to properly cleanse and moisturize your face before applying makeup, and always remove it at the end of the day. Regularly exfoliating can also help keep your skin smooth and clear.
In addition, be mindful of what you put on your skin. Opt for products with non-comedogenic ingredients (meaning they won’t clog pores) and try to avoid harsh chemicals or fragrances that may irritate your skin.
Following a healthy skincare routine and being selective with your makeup products can achieve a naturally glowing complexion.
5 Things You Should Avoid
- Skipping the Primer Altogether
One of the biggest mistakes you can make is not using an eye shadow primer. Without it, your eye shadow may crease, fade, or smudge throughout the day, making it look less polished.
- Applying Too Much Primer
Overloading your eyelids with primer can create a heavy, greasy layer that makes blending eye shadow difficult. A small, pea-sized amount is sufficient for both eyelids.
- Using the Wrong Primer for Your Skin Type
Not all primers are created equal. Using a primer that doesn’t suit your skin type (e.g., oily, dry, or sensitive skin) can irritate or interfere with your makeup’s longevity.
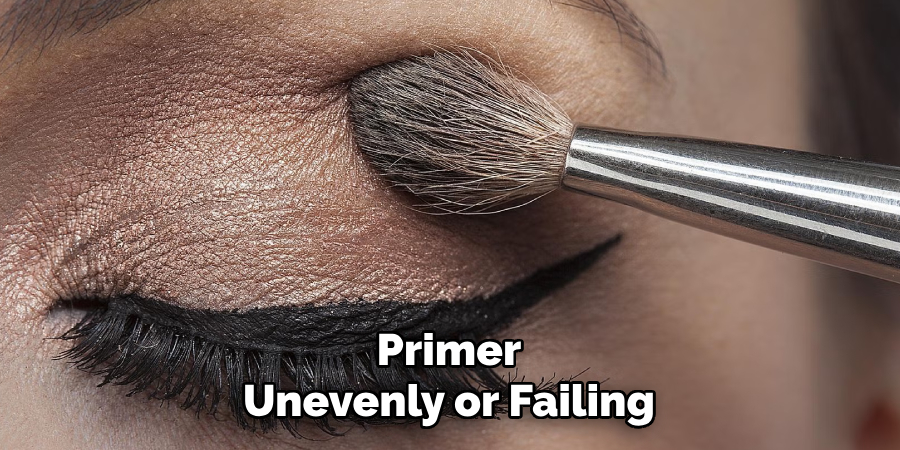
- Ignoring Proper Application Technique
Applying primer unevenly or failing to blend it properly can lead to patchy eye shadow application. Use your fingers or a clean brush to distribute the primer evenly across your eyelids.
- Skipping Time for Primer to Set
Jumping straight to eye shadow without giving the primer time to dry can result in an uneven color payoff. Wait a few seconds for the primer to set for the best results.
Following these tips and using an eye shadow primer can achieve a flawless and long-lasting eye makeup look.
Conclusion
Using an eye shadow primer is a simple yet essential step to elevate your makeup game. A primer can make a significant difference in your overall look by ensuring smooth application, enhancing the vibrancy of your eye shadow, and improving its longevity.
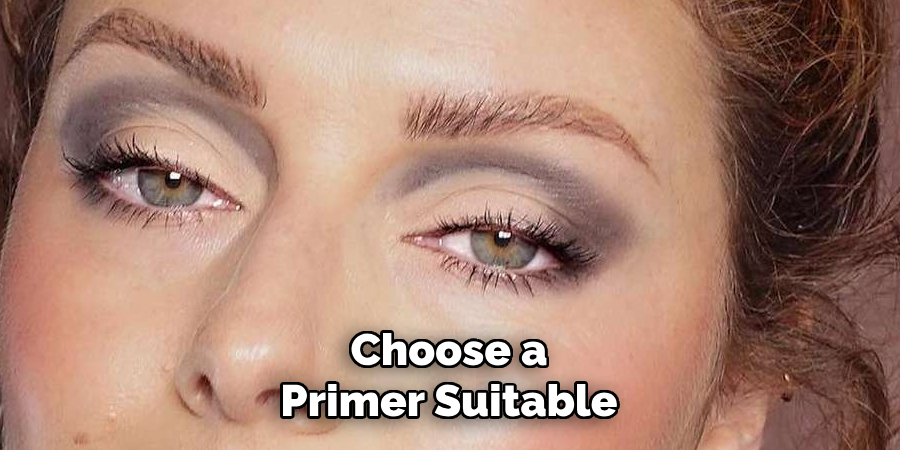
Remember to choose a primer suitable for your skin type, apply it evenly, and give it time to set before applying your eye shadow. With these steps, you can create stunning, crease-free eye makeup that lasts all day.
Hopefully, the article on how to use eye shadow primer has helped you understand the importance and benefits of this makeup product.
About the Author
Jane Hubbard is a passionate beauty expert with a wealth of experience in makeup, hair, and overall beauty techniques. After years of working as a hairdresser specialist, she followed her entrepreneurial spirit and started her own consultancy business.
Jane has always been driven by her desire to help others feel confident in their own skin, and she does this by sharing her knowledge, experiences, and practical beauty tips. Through her consultancy, she empowers individuals to embrace their unique beauty, offering tailored guidance that boosts both self-esteem and personal style.
Professional Focus
Specializes in makeup, hairstyling, and beauty consulting.
Provides personalized beauty advice, tips, and techniques to help individuals feel confident in their appearance.
Dedicated to staying up-to-date with the latest industry trends and developments.
Passionate about creating a comfortable and empowering experience for every client.
Education History
University of Craft and Design – Bachelor of Fine Arts (BFA) in Woodworking and Furniture Design
Woodworking Apprenticeships – Extensive hands-on training with skilled craftsmen to refine carpentry and furniture making techniques
Online Courses & Masterclasses – Continued education in advanced woodworking techniques, design principles, and specialized tools
Expertise:
Makeup artistry, hairstyling, and beauty consulting.
Personalized beauty techniques to enhance confidence and self-expression.
Educating clients on how to maintain their beauty routines at home.