
Are you tired of your usual eyeliner style? Looking for something more fun and unique to enhance your eyes? A Korean eyeliner tutorial may be the perfect option for you!
Achieving the perfect Korean eyeliner look is all about enhancing your natural beauty with a subtle, clean, and elegant touch. Known for its minimalist yet impactful style, Korean eyeliner application emphasizes softer lines and techniques to create a more youthful and natural appearance. Whether you’re aiming for a straight, understated line or a delicate wing, mastering Korean eyeliner can elevate your makeup game.
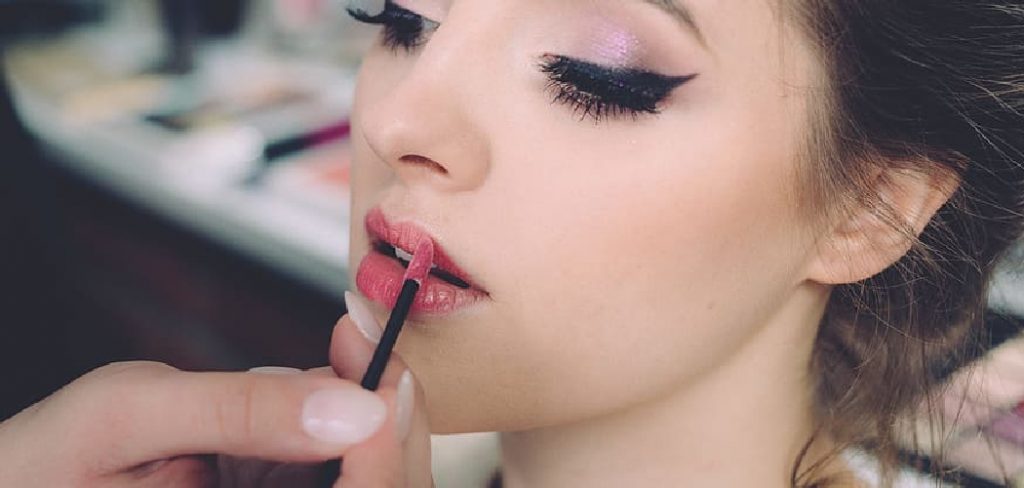
This guide on how to apply Korean eyeliner will walk you through the essential steps and tips to achieve the signature Korean eyeliner look effortlessly. Let’s dive in the process of creating stunning Korean eyeliner.
What Are the Benefits of Korean Eyeliner?
Before we start the tutorial, let’s first understand why Korean eyeliner has gained popularity in the beauty world. Here are some benefits of using Korean eyeliner:
- Creates a Natural Look: Unlike Western-style eyeliner, which often creates bold and dramatic lines, Korean eyeliner focuses on achieving a more subtle and natural effect. The goal is to enhance one’s features rather than overpower them.
- Ideal for Monolid Eyes: Monolid eyes refer to an eye shape where there is no crease between the upper eyelid and brow bone. This eye shape is common among East Asian ethnicities, including the Korean people. Traditional Western eyeliner techniques may not be suitable for monolid eyes, as the liner can easily smudge or disappear due to a lack of a defined crease. Korean eyeliner techniques have been developed explicitly for monolid eyes, making it easier to achieve a clean and long-lasting look.
- Variety of Styles: While natural looks are emphasized in Korean makeup trends, there is still room for experimentation and personal style when it comes to eyeliner. Popular styles include the classic winged liner, straight or curved lines along the upper lash line, and even multiple lines drawn at different angles for a more unique look. The key is to ensure that the eyeliner complements and enhances the overall makeup look rather than becoming the primary focus.
- Use of Brown Eyeliner: In contrast to the Western beauty standard of black eyeliner, Korean makeup often utilizes brown eyeliner for a softer and more natural look. This is especially popular in everyday or office looks, as it can create a more subtle effect while still defining the eyes.
- Emphasis on Inner Corners: Another distinguishing feature of Korean eyeliner style is the emphasis on the inner corners of the eyes. Many makeup artists use white or light-colored eyeliners to line this area, making the eyes appear brighter and more awake.
What Will You Need?
To achieve the perfect Korean eyeliner look, you will need:
- A black or brown pencil eyeliner
- A white or light-colored pencil eyeliner
- An angled eyeliner brush (optional)
- Eyeshadow in a neutral color (optional)
- Mascara
Once you have these basic items, you can start experimenting with the Korean eyeliner style and make it your own.
9 Easy Steps on How to Apply Korean Eyeliner
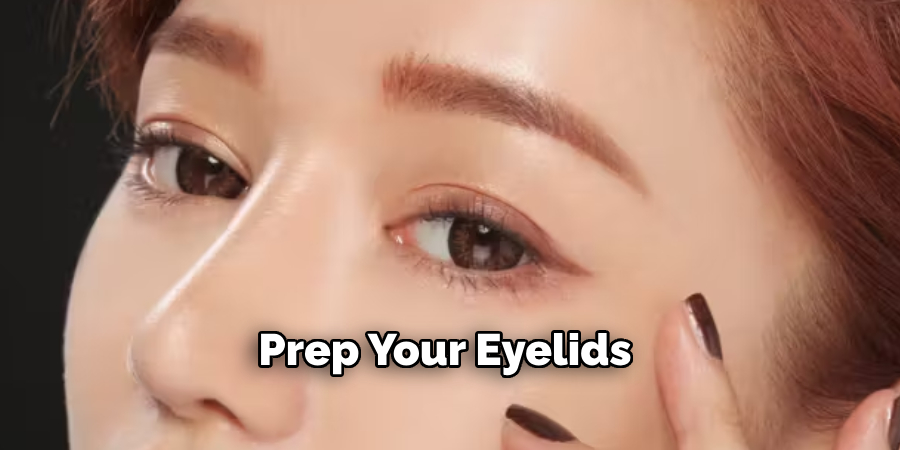
Step 1: Prep Your Eyelids
Start by prepping your eyelids to ensure a smooth and long-lasting application. Begin with a clean and dry surface, removing any excess oil or makeup residue. Apply a lightweight eye primer or a small amount of concealer to your entire eyelid, creating a neutral and even base. This step not only helps your eyeliner stay put throughout the day but also enhances the vibrancy of any additional eyeshadow you may use. If you have dry skin, consider applying a touch of moisturizer beforehand to prevent flakiness. Prepping your eyelids properly is a crucial foundation for achieving the flawless Korean eyeliner look.
Step 2: Create a Base with Eyeshadow
Start by selecting a light, neutral eyeshadow shade, such as a soft beige, pale peach, or light taupe, to act as your base color. Using a fluffy blending brush, sweep the eyeshadow evenly across your entire eyelid and gently blend it into the crease. This step helps to even out any discoloration and provides a smooth surface for your eyeliner to glide on. If desired, you can add a slightly darker shade in the crease to create subtle depth, staying true to the natural and understated approach typical of Korean makeup styles. Be sure to blend thoroughly to avoid any harsh lines, as achieving a seamless gradient is key to the look.
Step 3: Start with a Thin Line
Using a high-quality liquid or gel eyeliner, begin by drawing a thin line as close to your upper lash line as possible. Precision is crucial in this step, so make sure your eyeliner has a fine tip for better control. Start at the inner corner of your eye and gradually work your way outward, keeping the line thin and even. This subtle approach keeps the look natural and enhances your eyes without overpowering them. If you want to slightly elongate your eyes, extend the line just a little past the outer corner, creating a small upward flick. This adds a hint of sophistication while maintaining the understated elegance characteristic of Korean makeup styles.
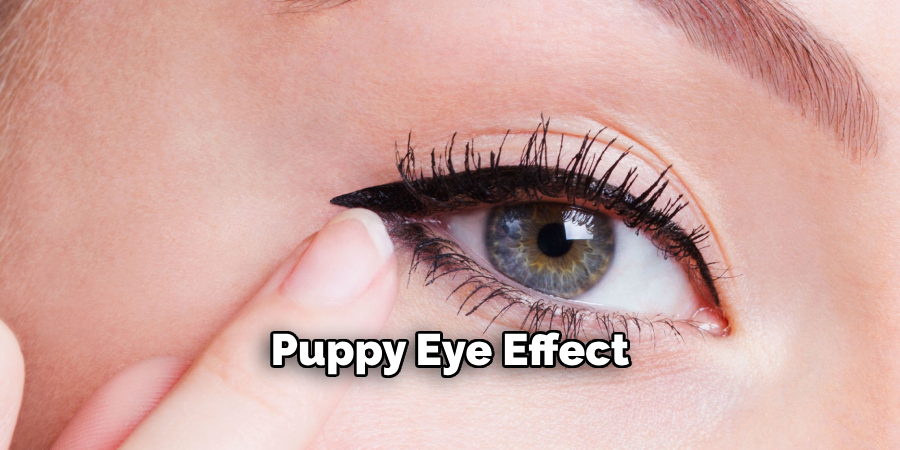
Step 4: Extend the Line for a Puppy Eye Effect
To achieve the puppy eye effect, focus on drawing the eyeliner slightly downward, rather than upward, at the outer corner of your eye. This technique gives the appearance of rounder, more innocent-looking eyes, which is a hallmark of many Korean makeup styles. Start by extending the line gently past the outer edge of your eye, following the natural curve of your lower lash line. Keep the line soft and subtle, avoiding harsh angles. Pair this effect with neutral or slightly shimmering eyeshadow in earthy tones to further complement the look. For added emphasis, apply a brown or black pencil liner lightly to your waterline, blending it outward for a softer, more natural finish.
Step 5: Tightline Your Upper Waterline
Tightlining your upper waterline is a subtle yet impactful technique that enhances the appearance of fuller lashes and a more defined eye shape. Using a waterproof gel or pencil eyeliner, gently lift your upper eyelid to expose the waterline, and carefully apply the liner along the base of your lashes. Ensure the application is smooth and even, filling in any gaps for a seamless look. This step creates the illusion of denser, darker lashes without the harshness of a traditional eyeliner line on the lid.
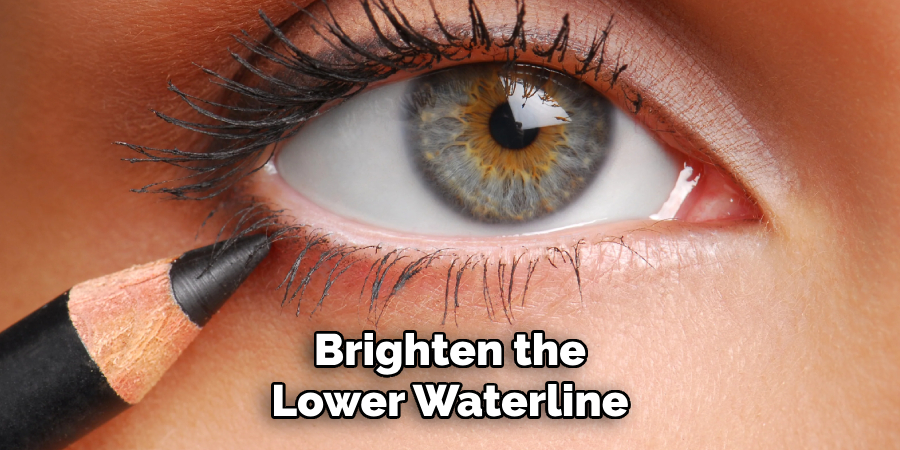
Step 6: Brighten the Lower Waterline
To achieve a refreshed and wide-eyed appearance, brightening the lower waterline is an essential step. Using a nude or white eyeliner pencil, carefully apply the product along the lower waterline. This technique works to counteract any redness or dullness in the area, making your eyes appear larger and more awake. A nude shade offers a natural, subtle enhancement suitable for everyday looks, while white eyeliner provides a more dramatic brightening effect, ideal for special occasions or bold makeup styles.
Step 7: Highlight the Aegyo-Sal Area
Using a highlighter or a light, shimmery eyeshadow, enhance the aegyo-sal area to add depth and dimension to your eyes. The aegyo-sal, or the small puff of skin just beneath the lower lash line, creates a youthful and cheerful appearance when subtly accentuated. Using a small brush or your fingertip, gently apply the product to the area, focusing on the center to highlight the natural curvature. Be careful not to confuse this step with emphasizing under-eye bags — the goal is to create a soft, flattering effect that enhances your eye’s natural contours. Pair this technique with a matching eyeliner or mascara to achieve a polished and radiant look that draws attention to your eyes.
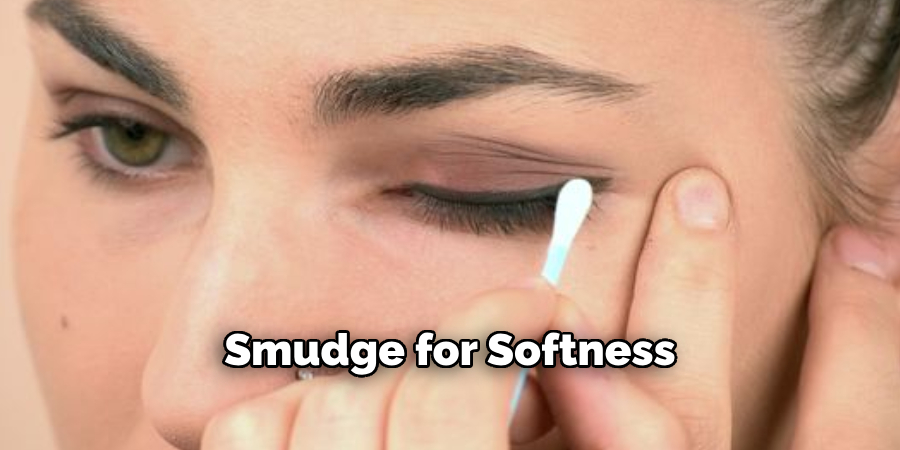
Step 8: Smudge for Softness
To achieve a softer, more natural look, smudging is an essential technique that can transform your makeup. Whether you’re working with eyeliner, eyeshadow, or both, a well-blended, smudged effect can add depth and dimension to your eyes without appearing harsh. Start by applying your eyeliner or eyeshadow along the lash line — either on the upper, lower, or both, depending on your desired look. Then, use a smudge brush, a makeup sponge, or even your finger to blend and soften the line gently. This will create a more diffused, sultry effect that enhances your eye shape.
Step 9: Curl Your Lashes and Apply Mascara
Curling your lashes is a quick yet impactful step in your makeup routine, as it instantly opens up the eyes and makes them appear larger and more awake. Use a quality eyelash curler, positioning it near the base of your lashes, and gently squeeze for a few seconds. Repeat the process slightly further along the length of your lashes for a natural, upward curl.
Keep practicing to perfect your technique and discover what works best for your eye shape and personal style.
Conclusion
How to apply korean eyeliner is all about achieving a soft, natural enhancement that complements your facial features.
Start by choosing the right eyeliner—gel or pencil formulas work best for precision and blending. Begin with a thin line close to the lash line, gradually building intensity if desired. For a signature Korean look, extend the line slightly downward at the outer corner to create a subtle puppy-eye effect. Always take your time, and remember that practice is key to mastering this delicate and versatile technique.
With patience, you’ll be able to achieve a flawless Korean eyeliner look that beautifully highlights your eyes.
About the Author
Jane Hubbard is a passionate beauty expert with a wealth of experience in makeup, hair, and overall beauty techniques. After years of working as a hairdresser specialist, she followed her entrepreneurial spirit and started her own consultancy business.
Jane has always been driven by her desire to help others feel confident in their own skin, and she does this by sharing her knowledge, experiences, and practical beauty tips. Through her consultancy, she empowers individuals to embrace their unique beauty, offering tailored guidance that boosts both self-esteem and personal style.
Professional Focus
Specializes in makeup, hairstyling, and beauty consulting.
Provides personalized beauty advice, tips, and techniques to help individuals feel confident in their appearance.
Dedicated to staying up-to-date with the latest industry trends and developments.
Passionate about creating a comfortable and empowering experience for every client.
Education History
University of Craft and Design – Bachelor of Fine Arts (BFA) in Woodworking and Furniture Design
Woodworking Apprenticeships – Extensive hands-on training with skilled craftsmen to refine carpentry and furniture making techniques
Online Courses & Masterclasses – Continued education in advanced woodworking techniques, design principles, and specialized tools
Expertise:
Makeup artistry, hairstyling, and beauty consulting.
Personalized beauty techniques to enhance confidence and self-expression.
Educating clients on how to maintain their beauty routines at home.