
Are you tired of waking up every day and spending time drawing your eyebrows? Permanent makeup eyebrow is the solution to save all that time.
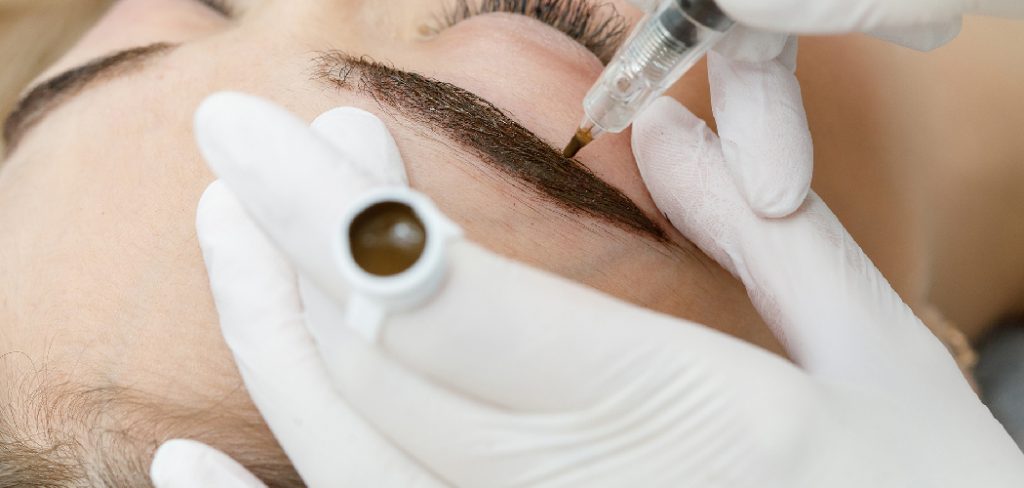
How to remove permanent makeup eyebrows can be a challenging process, but it is achievable with the right approach. Whether you are unsatisfied with the results, want to correct an uneven application, or simply desire a change, there are several methods available to fade or fully remove the pigment. It’s essential to understand the options, risks, and aftercare involved to ensure the safest and most effective outcome. Additionally, it’s vital to consult with a professional before attempting any removal process.
This introduction will guide you through the basics of removing permanent makeup eyebrows, helping you make informed decisions tailored to your needs.
What Are the Benefits of Removing Permanent Makeup Eyebrows?
There are several reasons why someone may consider removing their permanent makeup eyebrows. The most common benefits include:
- Desire for Change: People often get tired of the same eyebrow shape or color and want to try something different.
- Fading: Over time, the pigment in permanent makeup eyebrows can fade, resulting in a less defined look.
- Poor Application: If the permanent makeup was not applied correctly or by an inexperienced technician, it can result in an unsatisfactory appearance.
- Allergic Reactions: Some individuals may have adverse reactions to certain pigments used in permanent makeup, causing itching, swelling, or other discomfort.
- Change in Skin Texture: As we age, our skin’s texture may change, which can affect the appearance of permanent makeup. For example, if you originally had oily skin, but it becomes dry and flaky over time, this can impact how the pigment settles and looks.
- Trends/Personal Preferences: Just like with any other beauty trend, what is popular now may not be in a few years. Permanent makeup may also not align with your style or preferences as they evolve.
What Will You Need?
Besides doing your research and finding a reputable artist, there are some things you should prepare for before getting permanent makeup. These include:
- Consultation: It is important to have a consultation with your chosen artist before committing to the procedure. This will allow you to discuss your expectations, concerns, and any potential allergies or sensitivities.
- Patch Test: To ensure that you do not have an adverse reaction to the pigment used in the procedure, a patch test may be recommended by your artist. This involves applying a small amount of pigment behind your ear and monitoring it for 24 hours.
- Medical History Review: Your artist should also review your medical history to make sure that you are a good candidate for the procedure. Certain medical conditions or medications may affect the healing process or result in complications.
- Preparation: On the day of your appointment, make sure to properly prepare by avoiding caffeine and alcohol, as well as any blood-thinning medications. This will help reduce bleeding and bruising during the procedure.
10 Easy Steps on How to Remove Permanent Makeup Eyebrows
Step 1. Consult a Professional
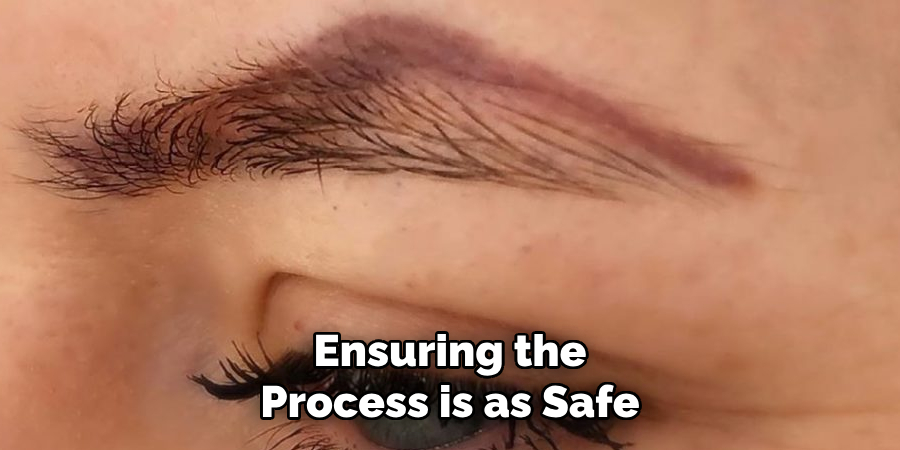
Consulting a professional is the most important first step in removing permanent makeup eyebrows. Look for a certified and experienced specialist who can assess your situation and recommend the best removal method based on your skin type and the pigments used. During the consultation, ensure to ask questions about the procedure, potential side effects, and the expected number of sessions required. A qualified professional will also review your medical history to determine if you’re a suitable candidate, ensuring the process is as safe and effective as possible.
Step 2. Understand Removal Techniques
There are several techniques available for tattoo removal, each with its unique process and effectiveness. The most common and advanced method is laser removal, which uses concentrated beams of light to break down the tattoo pigments so they can be naturally eliminated by the body.
This method is typically effective for most tattoo colors but may require multiple sessions. Another option is surgical excision, where the tattooed skin is surgically removed, and the wound is closed with sutures, making it more suitable for smaller tattoos. Dermabrasion, which involves sanding the tattooed layer of skin, is a less commonly used technique and often carries a longer recovery time.
Step 3. Schedule a Patch Test
Before proceeding with the full treatment, scheduling a patch test is essential to determine how your skin will react to the removal process. During the patch test, a small area of the tattoo is treated using your chosen method, allowing the practitioner to assess its effectiveness and monitor for any adverse reactions. This step helps ensure that the procedure is both safe and suitable for your skin type, minimizing potential risks and providing a clearer picture of the expected results.
Step 4. Prepare for the Procedure
Proper preparation before undergoing a tattoo removal procedure is crucial for ensuring the best possible outcome. Start by following any specific instructions provided by your practitioner, which may include avoiding sun exposure, tanning, or certain skin care products that can irritate the treatment area. Keep the skin clean and moisturized leading up to the appointment, but avoid applying lotions, oils, or makeup on the day of the procedure. Additionally, stay well-hydrated and get plenty of rest to help your body manage the healing process more effectively.
Step 5. Laser Removal Sessions
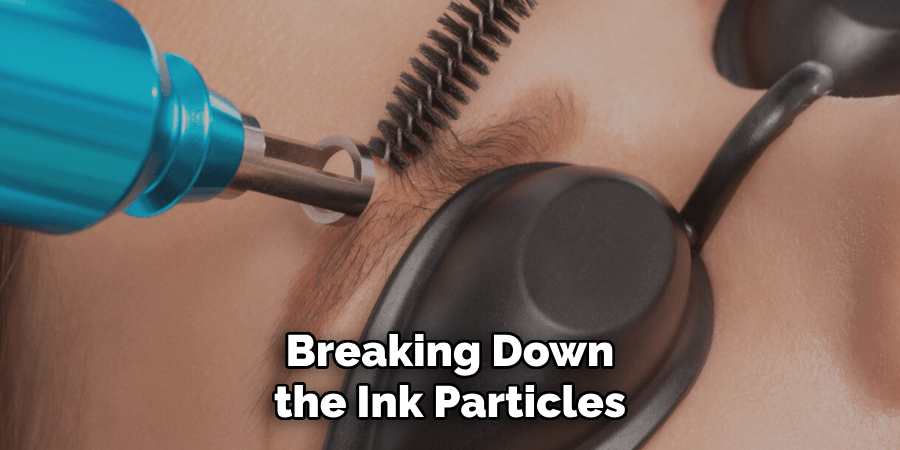
During laser removal sessions, a trained professional will use a specialized laser to target the pigment in the tattoo while leaving the surrounding skin unharmed. The laser emits highly concentrated pulses of light, breaking down the ink particles into smaller fragments that the body’s immune system can naturally eliminate over time. Each session typically lasts between 15 to 30 minutes, depending on the size and complexity of the tattoo being removed. While the procedure may cause mild discomfort, most clinics offer numbing creams or cooling devices to help minimize any pain.
Step 6. Saline Removal Process
Saline tattoo removal is a non-laser method that uses a specially formulated saline solution to lift and remove unwanted ink from the skin. During the procedure, the solution is applied to the tattooed area using a tattoo machine, similar to the process of tattooing itself.
The saline works to draw the ink particles to the surface of the skin, where they form a scab. Over time, as the scab heals and falls off, some of the ink is removed along with it. Multiple sessions are typically required for optimal results, and the process is generally considered safe for most skin types. However, proper aftercare is crucial to minimize the risk of scarring or infection, including keeping the area clean, avoiding sun exposure, and following the practitioner’s instructions carefully.
Step 7. Aftercare
To ensure proper healing and achieve the best results, it is essential to follow the aftercare instructions provided by your practitioner diligently. After each laser treatment session, keep the treated area clean and dry, gently washing it with mild soap and water if needed. Avoid picking at scabs or peeling skin, as this can increase the risk of scarring. Protect the area from direct sunlight by covering it or applying a broad-spectrum sunscreen with high SPF, as UV exposure can cause discoloration or delay healing.
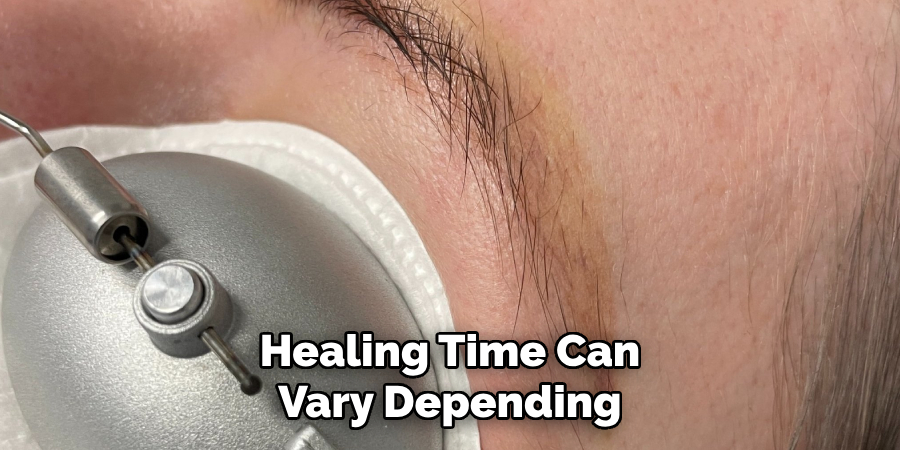
Step 8. Healing Time
Healing time can vary depending on the size, depth, and location of the treated area, as well as individual factors like age and overall health. Generally, superficial wounds may heal within a week or two, while deeper or more extensive treatments could take several weeks to fully recover. It’s important to monitor the area for any signs of infection, such as increased redness, swelling, or pus, and consult a healthcare professional if these occur. Patience is key during the healing process, as rushing it can potentially interfere with the best outcomes.
Step 9. Monitor Results
After treatment, it is essential to carefully monitor the affected area or condition to evaluate progress and ensure proper healing. Keep track of any visible changes, improvement in symptoms, or unexpected reactions. Documenting progress through photos or notes can be helpful for reference during follow-up consultations.
Additionally, pay attention to how you feel overall, as systemic symptoms like fever or fatigue might indicate a complication. Regularly communicate with your healthcare provider to share updates and adjust care plans if necessary. Monitoring results consistently can significantly contribute to achieving the best possible outcome.
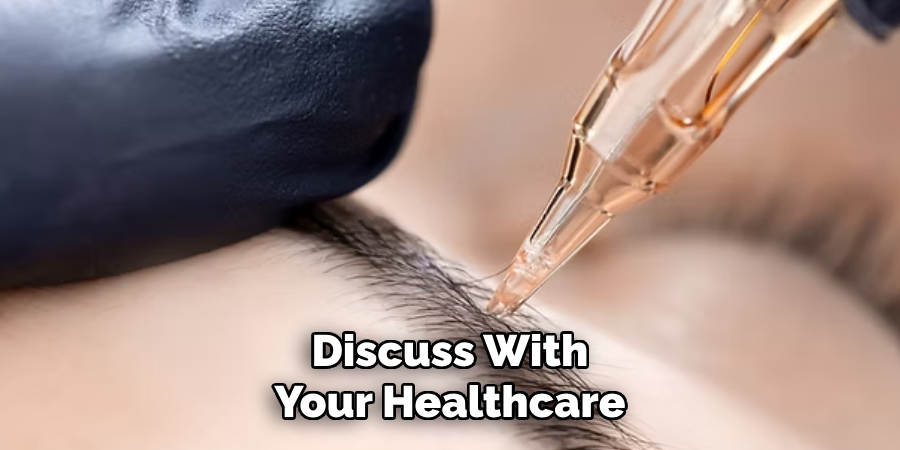
Step 10. Consider Future Options
Once the current phase of treatment or care is complete, it’s important to evaluate the next steps to maintain or enhance your progress. Discuss with your healthcare provider about long-term strategies, such as preventive measures, lifestyle adjustments, or additional therapies that may be beneficial. Consider scheduling regular check-ins to monitor your condition over time. Stay informed about emerging treatments or advancements in medical research that could be relevant to your situation.
By following these suggestions, you can take an active role in your healthcare journey and work towards achieving optimal health and well-being.
Conclusion
How to remove permanent makeup eyebrows requires careful consideration and professional guidance to ensure safety and effectiveness.
Common methods include laser tattoo removal, which uses precise light energy to break down the pigment, and saline removal, where a saline solution is applied to lift the ink from the skin. Both methods should only be performed by experienced specialists to minimize the risk of scarring or skin irritation. Non-laser options, such as glycolic acid treatments, may also be available depending on the depth and type of pigment used. It is crucial to consult with a licensed and reputable practitioner to discuss the best approach for your individual needs.
Patience is essential during this process, as multiple sessions may be required for complete removal.
About the Author
Jane Hubbard is a passionate beauty expert with a wealth of experience in makeup, hair, and overall beauty techniques. After years of working as a hairdresser specialist, she followed her entrepreneurial spirit and started her own consultancy business.
Jane has always been driven by her desire to help others feel confident in their own skin, and she does this by sharing her knowledge, experiences, and practical beauty tips. Through her consultancy, she empowers individuals to embrace their unique beauty, offering tailored guidance that boosts both self-esteem and personal style.
Professional Focus
Specializes in makeup, hairstyling, and beauty consulting.
Provides personalized beauty advice, tips, and techniques to help individuals feel confident in their appearance.
Dedicated to staying up-to-date with the latest industry trends and developments.
Passionate about creating a comfortable and empowering experience for every client.
Education History
University of Craft and Design – Bachelor of Fine Arts (BFA) in Woodworking and Furniture Design
Woodworking Apprenticeships – Extensive hands-on training with skilled craftsmen to refine carpentry and furniture making techniques
Online Courses & Masterclasses – Continued education in advanced woodworking techniques, design principles, and specialized tools
Expertise:
Makeup artistry, hairstyling, and beauty consulting.
Personalized beauty techniques to enhance confidence and self-expression.
Educating clients on how to maintain their beauty routines at home.