
Are you tired of using dirty makeup brushes and want to know how to clean your Laura Geller ones? Look no further, because we have some easy tips on how to keep your brushes in top shape!

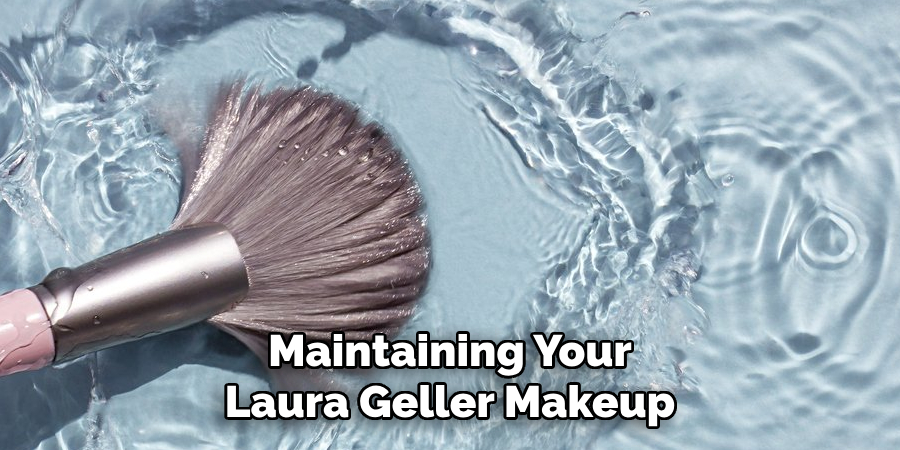
Keeping your Laura Geller makeup brushes clean is essential for maintaining their longevity and ensuring optimal performance. Regular cleaning not only helps remove accumulated makeup, dirt, and oils but also minimizes the risk of bacteria buildup that can lead to skin irritation or breakouts. By taking the time to care for your brushes, you can ensure a flawless application and protect your skin’s health.
This guide on how to clean laura geller makeup brushes will walk you through simple and effective steps to properly clean and care for your Laura Geller makeup brushes.
What Are the Benefits of Cleaning Your Makeup Brushes Regularly?
Cleaning your makeup brushes is an essential step in maintaining good hygiene and getting the best results from your makeup application. Here are some benefits that come with regular brush cleaning:
- Prevents Bacteria Buildup: Over time, bacteria, dirt, oils, and dead skin cells can accumulate on your makeup brushes. This buildup can lead to clogged pores, breakouts, and even infections.
- Promotes Better Skin Health: When you use dirty makeup brushes to apply products onto your face, you are essentially transferring all the accumulated gunk onto your skin. This can lead to clogged pores, which can result in breakouts and other skin issues.
- Extends the Lifespan of Your Brushes: Makeup brushes can be quite an investment, especially if you have high-quality ones. By regularly cleaning them, you are removing any product buildup or bacteria that can damage the bristles and affect their performance.
- Ensures Better Makeup Application: When makeup brushes are dirty or clogged with old product, they can’t perform as well as they’re supposed to. This can result in streaky or patchy makeup application, and no one wants that!
What Will You Need?
To properly clean your makeup brushes, you will need a few essential items:
- Gentle Brush Cleaner: There are many brush cleaners available on the market, but make sure to choose one that is gentle and specifically made for makeup brushes. You can also use mild shampoo or baby shampoo as an alternative.
- Warm Water: Hot water can damage the bristles of your brushes, so make sure to use lukewarm water instead.
- A Towel: You’ll need a clean towel for drying off your brushes after washing them.
- Brush Egg or Glove (Optional): These silicone tools provide extra friction when cleaning your brushes and help remove stubborn product buildup.
- Brush Tree or Brush Holder (Optional): These tools are great for drying your brushes upside down, which helps prevent water from seeping into the ferrule (the metal part) and loosening the glue that holds the bristles together.
Once you have all your supplies gathered, follow these simple steps to clean your makeup brushes effectively.
10 Easy Steps on How to Clean Laura Geller Makeup Brushes
1. Rinse the Bristles
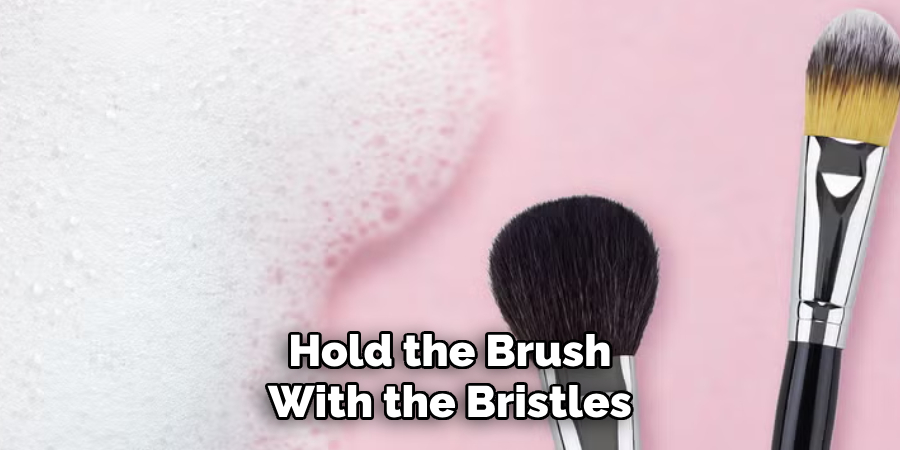
Hold the brush with the bristles facing down and place it under lukewarm running water. Ensure the water flows only onto the bristles and not the ferrule to prevent any damage to the glue holding the brush together. Gently swirl the bristles with your fingers to remove surface makeup residue. Avoid using hot water, as it can damage the bristles over time.
2. Apply a Gentle Cleanser
Choose a gentle cleanser, such as a mild soap, baby shampoo, or a cleanser specifically designed for makeup brushes. Pour a small amount of the cleanser into the palm of your hand or a cleansing mat. Swirl the bristles of the brush in the cleanser, applying gentle pressure to ensure the product reaches deep into the bristles. This step helps break down stubborn makeup residue, oils, and bacteria that accumulate on the bristles over time. Be careful not to oversaturate the bristles or immerse the entire brush in the cleanser, as this could weaken the glue and damage the handle.
3. Swirl the Brush
Gently swirl the brush in circular motions either on the palm of your hand or on the textured surface of a cleansing mat. Ensure that the cleanser works through all the bristles, reaching every part of the brush head. This motion helps dislodge trapped makeup and dirt effectively. Take your time with this step, especially for larger or denser brushes, to ensure they are thoroughly cleaned without causing damage to the bristles.
4. Rinse Thoroughly
Place the brush under gently running lukewarm water, ensuring all traces of the cleanser are removed. Hold the brush at an angle with the bristles facing downward to prevent water from seeping into the ferrule, which could weaken the glue holding the bristles in place. Gently squeeze the bristles from the base to the tip to help release any residual cleanser or dirt. Repeat this process until the water runs completely clear and no suds remain in the brush. Take care not to use hot water, as it can damage the bristles and alter their shape.
5. Reshape the Bristles
After thoroughly cleaning the brush, it is essential to reshape the bristles to maintain its original form and functionality. Using your fingers, gently coax the bristles back into their natural shape while they are still damp. This step helps ensure that the brush retains its precision and effectiveness for future use. Pay special attention to detail brushes or finely tipped brushes, as their delicate shapes are crucial for achieving accurate application. Avoid pulling or tugging too hard on the bristles, as this could loosen them or lead to shedding. Reshaping the bristles properly will prolong the lifespan of your brush and ensure it performs optimally.
6. Use a Brush Cleaning Mat
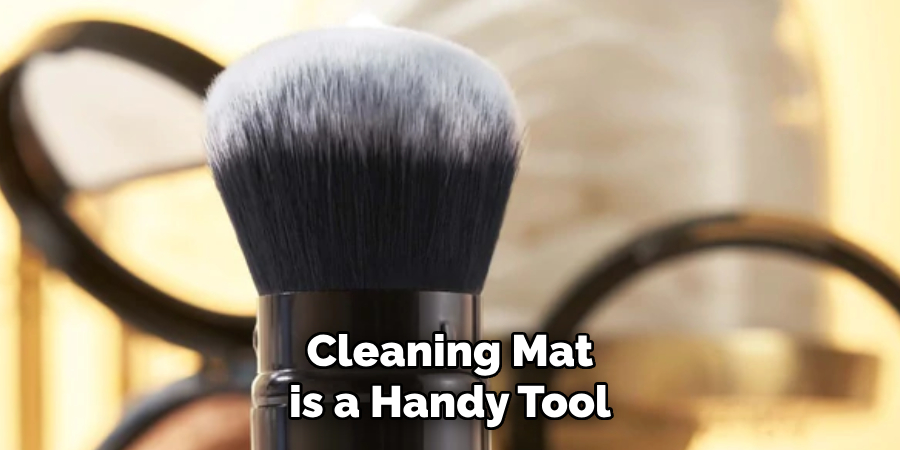
A brush cleaning mat is a handy tool designed to make the process of cleaning makeup brushes more effective and efficient. Typically made of silicone, these mats feature textured surfaces with different patterns, such as ridges or bumps, to help loosen and remove makeup residue, oils, and dirt from the bristles. To use a brush cleaning mat, place it in the sink or on a flat surface, secure it if necessary, and apply a small amount of brush cleanser or soap directly onto its surface. Gently swirl the brush bristles over the textured areas, allowing the grooves to thoroughly cleanse each strand. Rinse both the mat and the brush under lukewarm water until no soap or residue remains.
7. Repeat If Necessary
If the brushes are still not completely clean after the first wash, don’t hesitate to repeat the cleaning process. Reapply the cleanser or soap onto the mat, and continue swirling the brush bristles over the textured surfaces. Pay extra attention to heavily soiled brushes, such as foundation or concealer brushes, as they may require multiple rounds of cleaning to eliminate all buildup. Always ensure you rinse thoroughly between each wash to remove all traces of soap before proceeding to the next step.
8. Dry the Brushes
After rinsing the brushes thoroughly, gently squeeze out excess water using a clean towel. Reshape the bristles to their original form to ensure they maintain their proper structure while drying. Lay the brushes flat on a dry towel with the bristles hanging off the edge of a counter or table. This allows air to circulate the bristles and prevents water from seeping into the brush handles, which could weaken the glue holding the bristles in place. Avoid drying brushes vertically, as this can cause damage over time. Leave the brushes to dry completely before using them again, which may take several hours or overnight.
9. Dry Upside Down
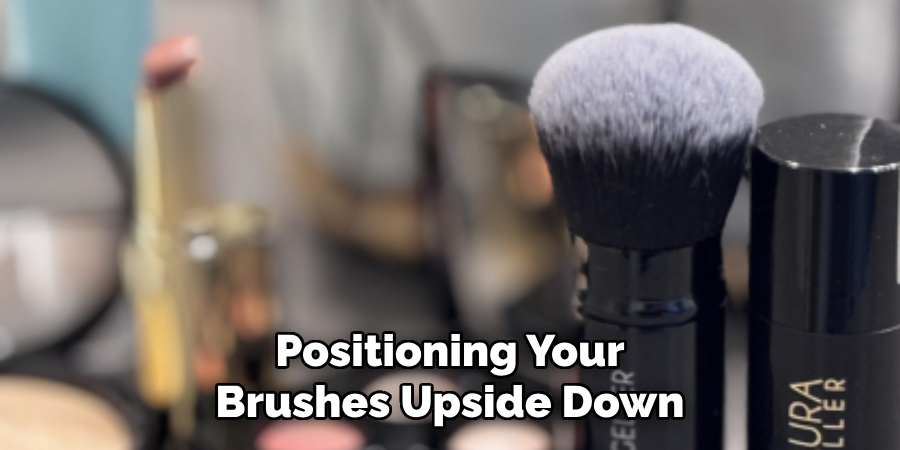
To ensure your brushes dry thoroughly and extend their lifespan, consider drying them upside down. Using a brush holder or a makeshift setup, position the brushes so that the bristles face downward. This method helps prevent water from seeping into the ferrule, which can weaken the adhesive and cause the bristles to loosen over time. By drying brushes upside down, you maintain the integrity of the brush’s structure and ensure they are ready for their next use.
10. Allow Time to Air Dry
After positioning your brushes upside down to dry, it’s crucial to allow ample time for them to air dry completely. Place them in a well-ventilated area away from direct sunlight or heat sources, as excessive heat can damage the bristles and weaken the glue in the ferrule. Depending on the size and density of the brush, drying may take several hours or even overnight. Patience is key—using a damp brush can affect its performance and lead to unwanted results during application. Ensuring your brushes are fully dry before storing them will help maintain their quality and prolong their lifespan.
By maintaining your Laura Geller makeup brushes regularly, you’ll extend their lifespan and ensure the best possible makeup application.
Conclusion
How to clean laura geller makeup brushes is an essential step in your beauty routine to maintain hygiene and ensure optimal performance.
By following the steps outlined—rinsing, washing with gentle soap, reshaping, and thoroughly drying—you can keep your brushes in excellent condition for flawless application. Proper care not only extends the life of your brushes but also helps protect your skin by minimizing the buildup of bacteria.
Make brush cleaning a regular habit, and you’ll enjoy consistent results and a smoother makeup experience every time.
:
About the Author
Jane Hubbard is a passionate beauty expert with a wealth of experience in makeup, hair, and overall beauty techniques. After years of working as a hairdresser specialist, she followed her entrepreneurial spirit and started her own consultancy business.
Jane has always been driven by her desire to help others feel confident in their own skin, and she does this by sharing her knowledge, experiences, and practical beauty tips. Through her consultancy, she empowers individuals to embrace their unique beauty, offering tailored guidance that boosts both self-esteem and personal style.
Professional Focus
Specializes in makeup, hairstyling, and beauty consulting.
Provides personalized beauty advice, tips, and techniques to help individuals feel confident in their appearance.
Dedicated to staying up-to-date with the latest industry trends and developments.
Passionate about creating a comfortable and empowering experience for every client.
Education History
University of Craft and Design – Bachelor of Fine Arts (BFA) in Woodworking and Furniture Design
Woodworking Apprenticeships – Extensive hands-on training with skilled craftsmen to refine carpentry and furniture making techniques
Online Courses & Masterclasses – Continued education in advanced woodworking techniques, design principles, and specialized tools
Expertise:
Makeup artistry, hairstyling, and beauty consulting.
Personalized beauty techniques to enhance confidence and self-expression.
Educating clients on how to maintain their beauty routines at home.