
Learning how to make blotting paper puts you in control of the materials, size, and absorbency level of your oil-control sheets. This DIY approach allows you to create eco-friendly alternatives using natural materials while saving money on skincare essentials. You can customize the thickness, cut them to your preferred dimensions, and even add subtle fragrances if desired.
The process requires minimal materials that you likely already have at home, making this an accessible project for anyone interested in sustainable beauty practices. Whether you’re looking to reduce waste, save money, or simply enjoy the satisfaction of creating your own skincare tools, homemade blotting paper delivers excellent oil-absorbing results. This comprehensive guide will walk you through multiple methods to create effective blotting sheets that rival commercial products in performance while exceeding them in customization options.
Why Making Your Own Blotting Paper Matters
Creating homemade blotting paper offers significant advantages over purchasing commercial alternatives, particularly in terms of cost-effectiveness and environmental impact. Store-bought blotting papers often contain synthetic materials and come with excessive packaging that contributes to waste. By making your own, you control every ingredient and can choose sustainable, biodegradable materials that align with eco-conscious values.
Additionally, DIY blotting paper allows for complete customization of size, thickness, and absorbency levels to match your specific skin type and oil production patterns. This personalized approach ensures optimal performance while reducing the frustration of ill-fitting commercial products.
Step-by-Step Guide: How to Make Blotting Paper
Step 1: Gather Your Essential Materials
Start by collecting the basic materials needed for creating effective absorbent paper sheets. You’ll need tissue paper, coffee filters, or thin rice paper as your base material, depending on your preferred method and desired absorbency level. Gather a clean, flat workspace, scissors for cutting custom sizes, and a ruler for precise measurements. Consider having a spray bottle with distilled water available if you choose to add any natural fragrances or treatments.
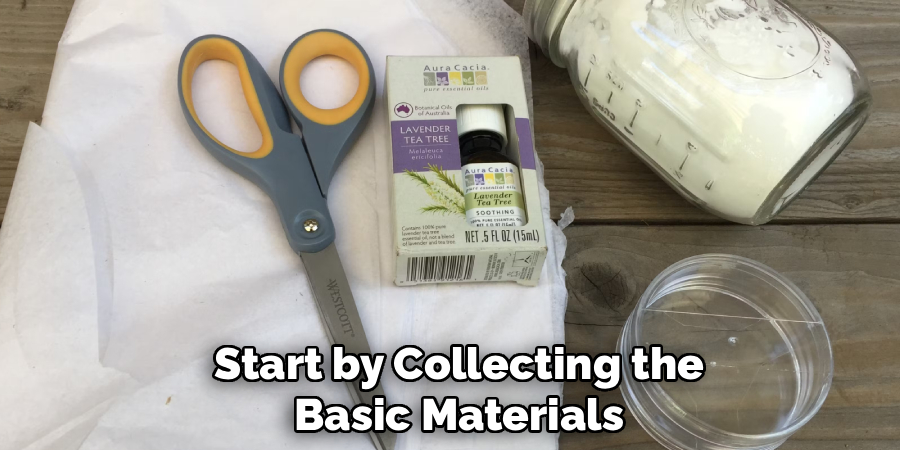
Optional materials include cornstarch powder for enhanced oil absorption, or a few drops of essential oils for subtle scenting. Ensure all materials are clean and free from contaminants that could irritate sensitive facial skin. Having everything organized before beginning streamlines the creation process and ensures consistent results across all your homemade sheets.
Step 2: Choose Your Base Paper Material
Select the most appropriate base material for your specific skin type and oil absorption needs. Tissue paper works well for light oil control and provides gentle contact with sensitive skin areas. Coffee filters offer moderate absorbency and durability, making them ideal for combination skin types that need reliable oil removal without excessive drying. Rice paper provides the highest absorbency level and works best for very oily skin that requires intensive oil control throughout the day.
Consider the thickness and texture of each material, as this affects both comfort during use and storage convenience. Test small samples of different materials on your skin to determine which feels most comfortable and provides optimal oil absorption for your individual needs. The right base material forms the foundation of effective DIY oil control sheets.
Step 3: Cut Papers to Your Desired Dimensions
Measure and cut your chosen base material into sizes that suit your specific usage preferences and storage requirements. Standard commercial blotting papers typically measure 2×3 inches, but you can customize dimensions based on your facial coverage needs and portability preferences. Use sharp scissors to create clean, straight edges that won’t fray or irritate skin during use.
Consider creating multiple sizes for different applications – smaller pieces for spot oil control and larger sheets for full-face coverage. Cut several sheets at once by stacking materials carefully and using a ruler as a guide for consistent dimensions. Store cut pieces between clean sheets of paper to prevent contamination and maintain their effectiveness. Properly sized sheets ensure convenient use and optimal oil absorption efficiency during daily skincare routines.
Step 4: Enhance Absorbency with Natural Powder Treatment
Improve the oil-absorbing capacity of your homemade sheets by lightly dusting them with cornstarch or arrowroot powder. These natural powders increase absorbency without adding harsh chemicals that could irritate sensitive skin. Apply powder sparingly using a clean, soft brush or by gently shaking it through a fine-mesh strainer over your cut paper sheets. Distribute the powder evenly across the surface, ensuring complete coverage without creating thick clumps that might feel gritty on skin.
Gently tap each sheet to remove excess powder, leaving just enough to enhance absorbency without affecting the paper’s flexibility or comfort during use. This treatment significantly improves oil control performance while maintaining the gentle, natural qualities that make homemade blotting paper superior to commercial alternatives. Allow treated sheets to settle for several minutes before handling.

Step 5: Add Optional Natural Fragrance for Enhanced Experience
Consider incorporating subtle, skin-safe fragrances to make your DIY skincare routine more enjoyable and therapeutic. Create a light misting solution using distilled water and 1-2 drops of gentle essential oils like lavender, chamomile, or tea tree oil, which offer additional skincare benefits. Spray the solution very lightly onto your prepared sheets, ensuring even distribution without oversaturating the paper material.
Allow sheets to air dry completely before use or storage to prevent mold growth and maintain structural integrity. Choose essential oils known for their skin-friendly properties and avoid strong fragrances that might cause sensitivity reactions. This optional step transforms basic oil control sheets into aromatherapeutic skincare tools that provide both practical benefits and sensory pleasure. Test fragranced sheets on a small skin area first to ensure compatibility with your skin type.
Step 6: Test Absorbency and Adjust Thickness
Verify that your homemade sheets provide adequate oil absorption by testing them on slightly oily skin areas or simulated oil spots. Press a sheet gently against the test area and observe how effectively it absorbs oil without tearing or leaving residue. If absorption seems insufficient, consider layering two thin sheets together or switching to a more absorbent base material for future batches.
Evaluate the comfort level during use, ensuring sheets don’t feel rough or irritating against facial skin. Make note of any adjustments needed for optimal performance, such as different cutting sizes or powder application amounts. Document successful combinations of materials and treatments for consistent results in future batches. This testing phase ensures your final product meets or exceeds the performance of commercial alternatives while providing the customization benefits of homemade skincare tools.
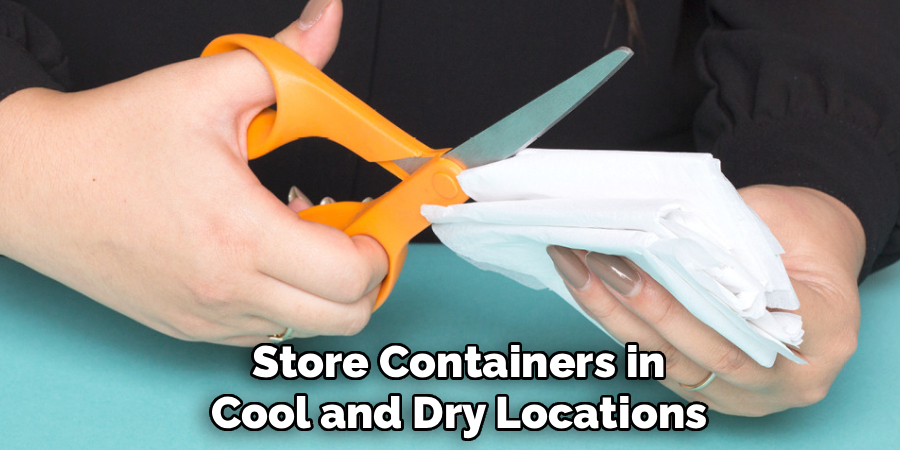
Step 7: Create Proper Storage Solutions
Develop an effective storage system that maintains the cleanliness and effectiveness of your homemade oil control sheets. Use a clean, dry container with a tight-fitting lid to prevent contamination from dust, moisture, or other environmental factors. Consider repurposing small tins, plastic containers, or even creating paper envelopes for individual sheet storage. Layer sheets between clean tissue paper or parchment paper to prevent sticking and maintain their shape during storage.
Label containers with creation dates to ensure you use older batches first and maintain freshness. Store containers in cool, dry locations away from direct sunlight and humidity that could degrade paper materials. Proper storage extends the shelf life of your homemade sheets and ensures they remain effective and hygienic for daily use. Consider creating both home and travel-sized storage solutions for convenience.
Perfect Your Technique
Refine your creation process based on initial results and user experience to achieve consistent, professional-quality results. Keep detailed notes about successful material combinations, powder application techniques, and sizing preferences that work best for your skin type. Experiment with different base materials and treatments to find the perfect balance of absorbency, comfort, and durability. Consider seasonal adjustments, such as creating more absorbent sheets for summer months when oil production typically increases.
Practice efficient cutting and treatment techniques to streamline production when making larger batches. Share your successful formulations with friends or family members who might benefit from customized oil control solutions. Continuous improvement ensures your DIY approach remains cost-effective and satisfying while delivering superior results compared to commercial alternatives. Document your process for easy replication and future reference.
Frequently Asked Questions (FAQs)
What Materials Work Best for Homemade Oil Control Sheets?
Coffee filters provide excellent absorbency and durability for most skin types, while tissue paper works well for sensitive skin requiring gentle oil control. Rice paper offers superior absorption for very oily skin but may be harder to source. Avoid materials with lotions, fragrances, or harsh chemicals that could irritate facial skin. Natural, unbleached options are generally safer and more eco-friendly than heavily processed alternatives.
How Long Do DIY Blotting Papers Last?
Properly stored homemade sheets typically remain effective for 6-12 months when kept in clean, dry containers away from moisture and contaminants. Signs that sheets need replacement include musty odors, visible mold, or significantly reduced absorbency. Creating smaller batches more frequently ensures optimal freshness and effectiveness. Always inspect sheets before use and discard any that appear damaged or contaminated.
Can I Add Skincare Ingredients to My Homemade Sheets?
Light applications of cornstarch or arrowroot powder enhance oil absorption safely, while gentle essential oils can provide aromatherapy benefits. Avoid adding heavy creams, serums, or active ingredients that could cause irritation or reduce absorbency. Test any additions on small skin areas first to ensure compatibility. Keep formulations simple to maintain effectiveness and reduce the risk of adverse reactions.
Are DIY Blotting Papers as Effective as Store-Bought Versions?
Homemade sheets can match or exceed commercial products in oil absorption when made with appropriate materials and techniques. The main advantages include customizable sizes, natural ingredients, and cost savings. Commercial products may offer convenience packaging but often contain synthetic materials and cost significantly more. Performance depends on material choice and preparation method, making experimentation worthwhile for optimal results.
How Much Money Can I Save Making My Own Blotting Paper?
Creating homemade sheets costs approximately 80-90% less than purchasing commercial alternatives, with materials for 100+ sheets costing under $5. High-quality commercial blotting papers can cost $0.10-0.25 per sheet, while homemade versions cost less than $0.02 each. The initial time investment pays off quickly through substantial savings, especially for frequent users. Additional benefits include reduced packaging waste and complete ingredient control.
Conclusion
Mastering how to make blotting paper transforms your skincare routine while delivering significant cost savings and environmental benefits. This simple DIY project puts you in complete control of materials, dimensions, and absorbency levels while eliminating unnecessary chemicals found in commercial products.
Start with simple materials and basic techniques, then experiment with enhancements like natural powders or gentle fragrances as you gain confidence. Your skin and wallet will benefit from this practical, sustainable approach to oil control that puts quality and customization in your hands.
About the Author
Jane Hubbard is a passionate beauty expert with a wealth of experience in makeup, hair, and overall beauty techniques. After years of working as a hairdresser specialist, she followed her entrepreneurial spirit and started her own consultancy business.
Jane has always been driven by her desire to help others feel confident in their own skin, and she does this by sharing her knowledge, experiences, and practical beauty tips. Through her consultancy, she empowers individuals to embrace their unique beauty, offering tailored guidance that boosts both self-esteem and personal style.
Professional Focus
Specializes in makeup, hairstyling, and beauty consulting.
Provides personalized beauty advice, tips, and techniques to help individuals feel confident in their appearance.
Dedicated to staying up-to-date with the latest industry trends and developments.
Passionate about creating a comfortable and empowering experience for every client.
Education History
University of Craft and Design – Bachelor of Fine Arts (BFA) in Woodworking and Furniture Design
Woodworking Apprenticeships – Extensive hands-on training with skilled craftsmen to refine carpentry and furniture making techniques
Online Courses & Masterclasses – Continued education in advanced woodworking techniques, design principles, and specialized tools
Expertise:
Makeup artistry, hairstyling, and beauty consulting.
Personalized beauty techniques to enhance confidence and self-expression.
Educating clients on how to maintain their beauty routines at home.