
Creating scale makeup can transform your look, whether you’re aiming for a fantastical mermaid vibe, a dragon-inspired aesthetic, or a creative costume design. This technique involves layering colors and textures to mimic the effect of shimmering, textured scales. With the right tools, products, and a bit of guidance, you can achieve a stunning and unique look suitable for cosplay, themed events, or artistic expression.
This guide on how to do scale makeup will walk you through the steps to create effective scale makeup and bring your vision to life.
Needed Supplies
To achieve this look, you will need:
- A Variety of Eyeshadow Colors in the Desired Scale Color Scheme (E.g., Shades of Green, Blue, Purple, Etc.)
- Makeup Brushes for Blending and Detailing
- A Mixing Medium (Water or a Makeup Setting Spray)
- Small Scales or Scale Stencils (Can Be Found at Craft Stores or Online)
- Eyelash Glue or Spirit Gum
10 Step-by-step Guides on How to Do Scale Makeup
Step 1: Prepare Your Skin
The first and most crucial step for any makeup application is starting with a clean, well-prepped base. Begin by washing your face with a gentle cleanser to remove any dirt, oil, or residual makeup. Pat your skin dry with a soft towel and follow up with a light, hydrating moisturizer. This not only nourishes your skin but also creates a smoother surface for makeup to glide onto, preventing patchiness. Allow the moisturizer to fully absorb for a few minutes before moving on to the next phase.
Once your skin is moisturized, applying a high-quality primer is essential. A primer acts as a barrier between your skin and the makeup, filling in pores and fine lines to create a flawless canvas. More importantly, it gives the makeup something to grip onto, significantly increasing its longevity. For a detailed look like scale makeup, a long-wear or “gripping” primer will ensure your intricate design stays put for hours without smudging or fading.

Step 2: Apply Your Base Foundation
With your skin prepped, it’s time to apply your foundation. Choose a foundation that matches your skin tone or the base color you envision for your mythical creature. For example, you might use your regular foundation for a subtle look or opt for a slightly greenish or bluish tint for a mermaid or aquatic character. Apply it evenly across your face using a makeup sponge or foundation brush, blending it down your neck to avoid any harsh lines.
This base layer serves two purposes: it evens out your complexion and provides a uniform color background for the scales to pop against. Make sure to build the coverage to your desired level, whether that’s a sheer wash of color or a full-coverage finish. Once you’re happy with the application, you can lightly set it with a translucent powder, especially if you have oily skin. This will help control shine and further prepare the surface for the detailed scale work ahead.
Step 3: Position Your Stencil
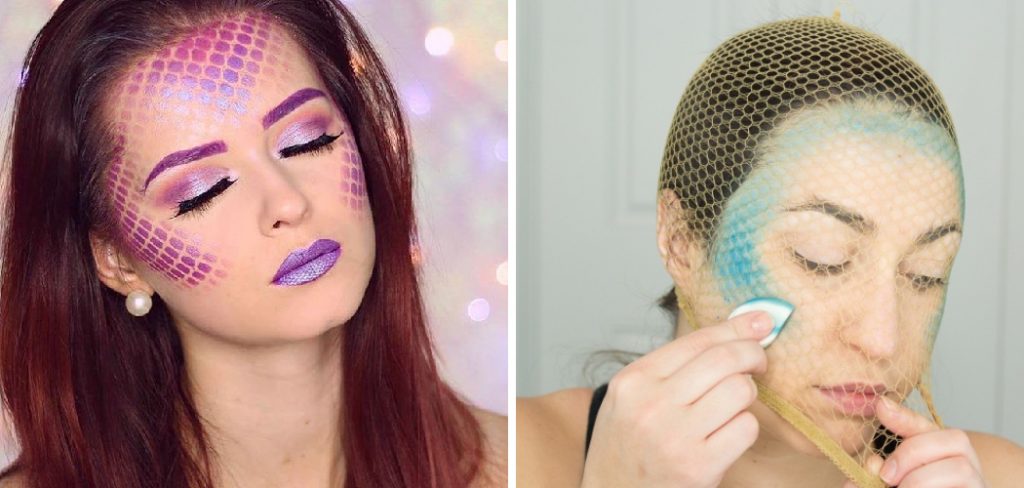
This step is where the magic begins. The key to creating a realistic scale pattern is using a stencil, and the most effective and accessible tool for this is a pair of fishnet stockings or a mesh wig cap. Cut a section of the fishnets large enough to cover the area where you want to apply the scales, such as your forehead, cheeks, or collarbones. Gently stretch the fishnet fabric over the desired section of your skin, holding it taut to ensure the diamond-shaped holes are open and uniform.
Be careful not to stretch it too much, as this can distort the scale pattern. The goal is to have a consistent grid that you can press makeup into. If you’re working alone, you may need to hold the fabric in place with one hand while applying makeup with the other. Having a friend to help hold the stencil steady can make this process much easier, ensuring the pattern remains sharp and clear throughout the application.

Step 4: Choose Your Scale Colors
Before you start dabbing on color, take a moment to plan your palette. The colors you choose will define your character. For a classic mermaid, think in shades of teal, deep blue, purple, and seafoam green. For a dragon, you might lean towards golds, bronzes, fiery reds, and black. A reptile could be a mix of forest greens, yellows, and browns. Selecting a palette with a mix of light, medium, and dark shades will help you create depth and dimension.
It’s highly recommended to use shimmery, metallic, or duo-chrome eyeshadows for this technique. These finishes catch the light beautifully and mimic the iridescent quality of real scales. Arrange your chosen eyeshadows so they are easily accessible. Using a combination of 3-4 colors will give your design a more complex and realistic appearance, allowing you to blend them together for a beautiful gradient effect.
Step 5: Begin Applying the First Color
With your fishnet stencil held firmly in place, it’s time to apply your first color. Load up a dense eyeshadow brush or a makeup sponge with your chosen base scale color—this is typically your mid-tone shade. Using a stippling or pressing motion, gently tap the makeup through the holes of the fishnet onto your skin. Avoid any sweeping or rubbing motions, as this will cause the makeup to smudge under the stencil and ruin the crisp scale shapes.
Focus on saturating the area with color to create an opaque and vibrant pattern. You can apply this first color over the entire stenciled area to establish a foundation for your other shades. Don’t worry about being perfectly neat at this stage; the main goal is to get a solid layer of color down. This stippling technique is key to achieving a clean, defined scale pattern once the fishnet is removed.

Step 6: Add Dimension with Lighter and Darker Shades
To make your scales look three-dimensional, you need to incorporate highlights and shadows. Take your darkest shade and apply it to the outer edges of the stenciled area. This will create a sense of depth and make the pattern appear to wrap around the contours of your face. Use the same stippling motion, concentrating the color where shadows would naturally fall, such as along the hairline or under the cheekbones.
Next, take your lightest, shimmery shade and apply it to the center of the scaled area or on the high points of your face, like the top of your cheekbones and the bridge of your nose. This mimics how light would hit the scales, creating a luminous focal point. Gently blend the edges where the different colors meet to create a smooth, beautiful gradient. This multi-tonal approach is what elevates the look from a simple pattern to a realistic, textured effect.
Step 7: Carefully Remove the Stencil
This is the moment of truth. Once you are satisfied with the color application and blending, it’s time to remove the stencil. Be very careful and slow during this step. If you held it in place with your hands, gently lift it straight off your skin. Try not to drag or slide it, as this will smear your hard work. The goal is to lift it cleanly, revealing the sharp, scale-like pattern underneath.
After removing the fishnet, take a moment to admire your work. You should see a well-defined grid of colorful scales on your skin. If any areas look a bit faint, you can reapply the stencil very carefully, aligning it with the existing pattern, and add more color. However, it’s often best to leave it as is to avoid potential smudging. Minor imperfections can be touched up later or will simply blend into the overall look.
Step 8: Add Highlights and Shimmer
Now that the scale pattern is complete, it’s time to make it pop. Using a fluffy brush, lightly dust a shimmery powder highlighter over the scaled areas. Focus on the high points where light would naturally catch, such as the brow bone, cheekbones, and the center of your forehead. This adds a magical, iridescent sheen that brings the entire look to life and enhances the three-dimensional effect you created with your color choices.

For an extra touch of glamour, you can use a liquid or cream highlighter on top of the powder. Use your fingertip to gently tap a small amount of liquid highlighter onto the very center of some scales. This creates a wet, glistening look perfect for aquatic creatures. You can also apply cosmetic-grade glitter gel or loose glitter over the scales for an even more dramatic and sparkling finish.
Step 9: Embellish with Details
To take your creature’s look to the next level, consider adding small embellishments. Using eyelash glue, you can apply individual rhinestones or small pearls to the center of some scales or at the corners of your eyes. These little details catch the light beautifully and add an extra layer of texture and fantasy. Place them strategically to accentuate the design rather than overwhelming it.
You can also use a fine-tipped liquid eyeliner in a metallic or black shade to add further definition. Outline a few of the scales to make them stand out, or draw tiny dots or lines to enhance the reptilian or aquatic feel. These small finishing touches are what personalize the look and transform it from a simple makeup effect into a complete character transformation.
Step 10: Set Your Makeup
After all your hard work, the final step is to lock everything in place. Closing your eyes and holding your breath, generously spritz your entire face with a quality setting spray. Hold the bottle about 8-10 inches from your face and mist it evenly. This will meld all the layers of makeup together, reduce any powdery appearance, and create a protective barrier that prevents your design from smudging, fading, or transferring.
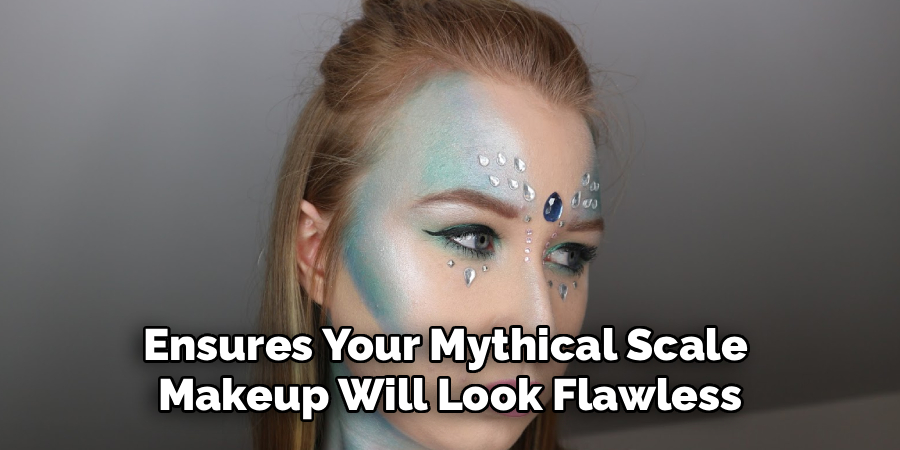
For an extra-durable, waterproof hold, especially if you’ll be at a long event or in a warm environment, you can use the “spray-and-fan” technique. After the first layer of setting spray, use a fan (or a piece of paper) to dry it completely. Then, apply a second coat of setting spray. This ensures your mythical scale makeup will look flawless and vibrant for hours on end, allowing you to enjoy your transformation without worry.
Following these steps on how to do scale makeup, you can easily create a unique and stunning look for any fantasy or cosplay event. Don’t be afraid to experiment with different colors and techniques to make your scales stand out even more. And remember, practice makes perfect – the more you do it, the better you’ll become at creating realistic scales that will leave everyone in awe.
Frequently Asked Questions
Q1: How Do I Make My Scales Look Realistic?
A1: To achieve a realistic look, focus on creating dimension with light and shadow. Instead of using a single color, blend a few complementary shades together. Use a darker color on the outer edges of the scaled area and a lighter, shimmery shade in the center. This contouring technique makes the scales appear three-dimensional. Adding a bright highlighter on the highest points, like your cheekbones, will mimic how light naturally hits and reflects off a textured surface, giving your scales a lifelike, iridescent quality.
Q2: What Can I Use If I Don’t Have Fishnet Stockings?
A2: If you don’t have fishnet stockings, you can get creative with other household items to create a scale pattern. A mesh wig cap works wonderfully and is a popular alternative. You can also try using a mesh produce bag, like the kind onions or avocados come in, as long as the holes are a good size. For smaller areas, you could even use a plastic stencil sheet from a craft store and cut out your own scale pattern. The key is to find a material with uniform holes that you can hold taut against your skin.
Q3: How Can I Prevent My Scale Makeup From Smudging?
A3: The best way to prevent smudging is to prep your skin and set your makeup properly. Start with a good quality face primer, which gives the makeup something to grip onto. After applying your scale design, the final step is absolutely crucial: use a setting spray. Generously mist your face to lock everything in place. For maximum durability, especially for a long event, allow the first layer of setting spray to dry completely and then apply a second coat. This will create a protective seal over your intricate work.
Q4: Can I Do Scale Makeup On Other Parts of My Body?
A4: Absolutely! Scale makeup looks amazing on other parts of the body and can really complete a costume. The technique is exactly the same. Popular areas include the shoulders, collarbones, neck, and arms. Just remember to stretch the fishnet stencil taut over the body part you are working on. Body makeup or cream paints are great options for larger areas as they provide excellent coverage. Don’t forget to finish with setting spray on your body as well to keep the design looking fresh and prevent it from transferring onto your clothes.
Conclusion
With the right tools, techniques, and a bit of creativity, incorporating fishnet stencils into your makeup or body art can elevate any look. Whether you’re going for bold and dramatic or subtle and artistic, this technique allows for endless customization to suit your style.
Remember to take your time, practice your application, and seal your work to ensure your design stays vibrant throughout the day. Most importantly, have fun experimenting and making it uniquely yours! Thanks for reading this guide on how to do scale makeup.
About the Author
Jane Hubbard is a passionate beauty expert with a wealth of experience in makeup, hair, and overall beauty techniques. After years of working as a hairdresser specialist, she followed her entrepreneurial spirit and started her own consultancy business.
Jane has always been driven by her desire to help others feel confident in their own skin, and she does this by sharing her knowledge, experiences, and practical beauty tips. Through her consultancy, she empowers individuals to embrace their unique beauty, offering tailored guidance that boosts both self-esteem and personal style.
Professional Focus
Specializes in makeup, hairstyling, and beauty consulting.
Provides personalized beauty advice, tips, and techniques to help individuals feel confident in their appearance.
Dedicated to staying up-to-date with the latest industry trends and developments.
Passionate about creating a comfortable and empowering experience for every client.
Education History
University of Craft and Design – Bachelor of Fine Arts (BFA) in Woodworking and Furniture Design
Woodworking Apprenticeships – Extensive hands-on training with skilled craftsmen to refine carpentry and furniture making techniques
Online Courses & Masterclasses – Continued education in advanced woodworking techniques, design principles, and specialized tools
Expertise:
Makeup artistry, hairstyling, and beauty consulting.
Personalized beauty techniques to enhance confidence and self-expression.
Educating clients on how to maintain their beauty routines at home.