
Dark spots—whether from sun exposure, hormonal changes, or post-acne marks—can sometimes make you feel self-conscious about your skin. The great news is that makeup can help you achieve a smooth, even complexion without looking mask-like or heavy. Learning how to cover dark spots with makeup involves understanding a three-step process: correct, conceal, and set. By combining the right products, careful placement, and a bit of artistry, you can create coverage that looks impressively natural and lasts all day.

If you’ve struggled with cover-ups that appear obvious in daylight or fade fast, you’re not alone. This comprehensive guide will walk you through every stage: prepping your skin for smooth application, color correcting to neutralize discoloration, layering concealer for seamless opacity, and locking your work in place for long wear. You’ll also learn how to match products to your undertone, choose the ideal tools, and avoid the most common mistakes.
Whether you’re new to makeup or a seasoned enthusiast, you’ll find actionable steps here that will help you create confident, skin-like results whenever you want to minimize dark spots. Let’s demystify the process and give you new skills for flawless, real-life coverage.
Know Your Spot: Types and Triggers
When figuring out how to cover dark spots with makeup, it helps first to understand what you’re dealing with. Not all pigmentation is the same, so tailoring your approach can make a significant difference in the results.
Hyperpigmentation vs. Post-Acne Marks
Hyperpigmentation refers to patches of skin that appear darker than your natural tone due to an increase in melanin production. These can be caused by sun damage, hormonal shifts, inflammation, or injury. Post-acne marks—sometimes called “post-inflammatory hyperpigmentation”—usually follow breakouts and often show up as brown or purplish spots that fade over time.
Sun Spots, Melasma, and Uneven Tone
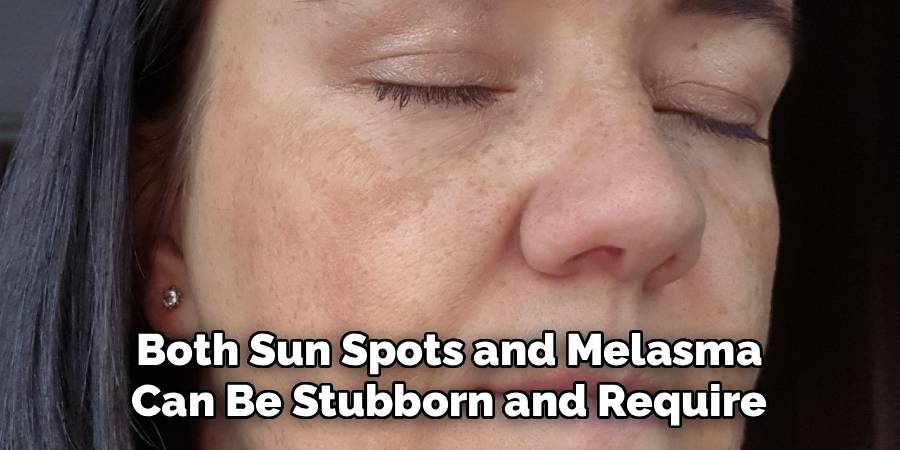
Sun spots, or solar lentigines, show up after years of UV exposure and frequently appear on the cheeks, forehead, and hands. Melasma, on the other hand, is linked to hormone changes and typically results in larger, patchy areas of discoloration, especially on the upper lip, forehead, and cheeks. Both sun spots and melasma can be stubborn and require slightly different correction strategies.
When to Treat vs. When to Cover
Consider whether your spots are candidates for gradual fading with skincare—like vitamin C serums, retinoids, or professional treatments—or whether you want to rely on makeup for fast results. If you have active breakouts, treat those gently instead of layering on heavy makeup. For most other dark spots, the right makeup will let you put your best face forward while treatment slowly works in the background.
Skin Prep That Supports Coverage
Flawless coverage of dark spots starts with an effective skincare and prep routine. If your base is smooth, hydrated, and balanced, you’ll find it much easier to blend out edges and prevent caking.
Smooth Hydration and Light-Refining Primer
Begin with a gentle cleanser and a lightweight, hydrating moisturizer that helps skin feel supple. Hydration not only plumps up dry patches (which can draw attention to spots) but also allows makeup to meld better with your skin. After moisturizing, apply a primer with a light-diffusing finish. Look for primers containing ingredients like dimethicone, which fill in texture, or those with micro-pearls, which scatter light for a subtle blur. The right primer acts as a bridge between skincare and makeup, making it easier to layer product exactly where you need it.
Targeted Mattifying on T-Zone and Spot Areas
If you’re oily through the center of your face or where your dark spots cluster, add a touch of mattifying primer directly to those areas. This step helps prevent unwanted shine and encourages concealer and color corrector to adhere more securely, especially in spots prone to breakdown during the day.
SPF Considerations Under Makeup
If you’ll be out during the day, never skip broad-spectrum SPF. Choose a sunscreen that plays nicely under makeup—one that dries down without a greasy finish and doesn’t cause pilling when foundation is layered on top. Mineral sunscreens with a sheer finish are often a safe bet. Remember, layering is crucial: give each step time to absorb fully before moving to the next.
Base Layer: Foundation That Looks Like Skin
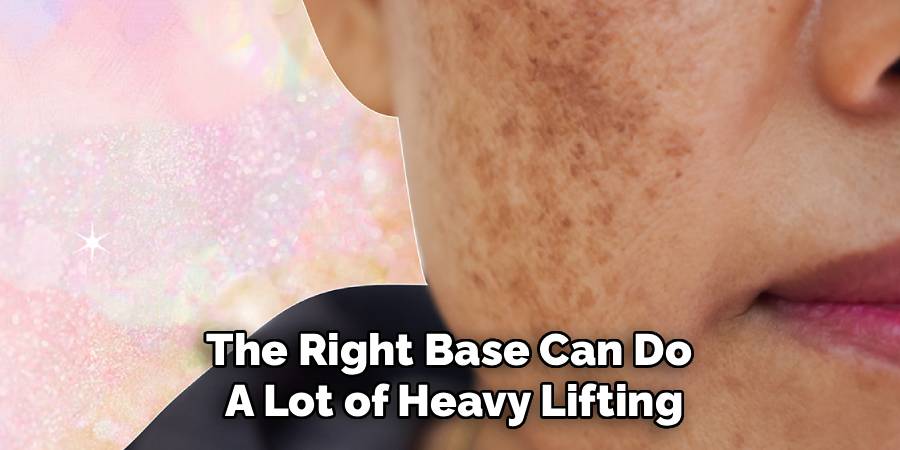
The right base can do a lot of heavy lifting, so it pays to be particular in your choices when learning how to cover dark spots with makeup. Your foundation’s job is to even out general tone—not to erase every mark—leaving less work for your concealer and corrector.
Formula and Finish: Satin-Matte, Light-to-Medium Coverage
Choose a foundation with a satin or natural matte finish, especially if you want the result to mimic real skin. Avoid overly dewy or shiny formulas, as these can highlight spots and make coverage less stable. Go for light-to-medium coverage; you can always build in targeted areas rather than coating your whole face in a full-coverage product that risks looking heavy or mask-like.
Placement Strategy to Avoid Cakiness
Start your foundation application in the center of the face, where redness and discoloration are usually most pronounced. Use a brush or sponge to blend outward, thinning out product as you move toward the hairline and jaw. Resist the urge to pile on foundation over dark spots—thin, well-blended layers always look more natural and leave space for precision concealing without buildup.
Shade Matching to Undertone and Neck
For invisible coverage, always match your foundation to both your undertone and the color of your neck. Be wary of shades that oxidize (turn orange or darker) after application; test on your jawline and check in daylight before committing. A well-matched base ensures that your spot concealer blends seamlessly into the rest of your complexion.
5 Step-by-Step Guide: How to Cover Dark Spots with Makeup
The heart of learning how to cover dark spots with makeup lies in this carefully sequenced process. With a little patience and the right steps, you’ll get a finish that’s nearly undetectable—even up close.
Step 1: Neutralize with Color Corrector
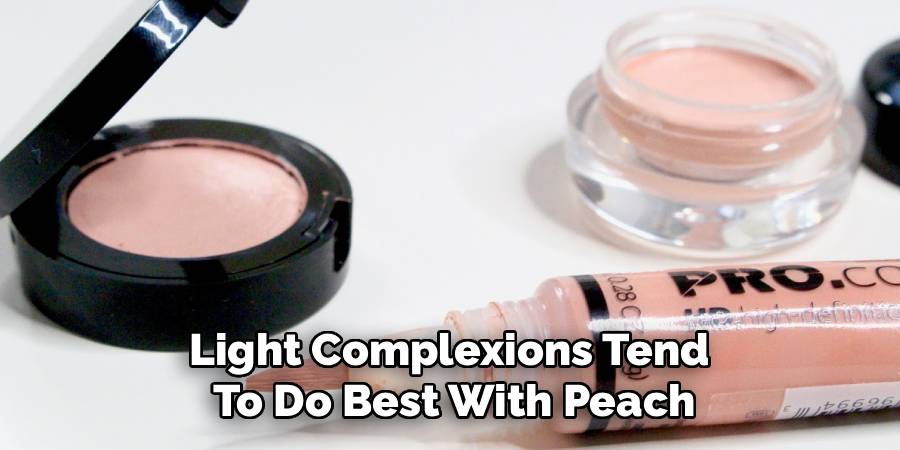
Begin by using a peach, orange, or red-toned color corrector, depending on your skin tone and the depth of your dark spots. Fair to light complexions tend to do best with peach, while medium to deep complexions may need an orange or red hue. Lightly tap the corrector directly onto the dark spot, blending just past its edges. The goal is not a thick layer, but a thin optical veil that cancels out the discoloration. Wait a few seconds for the formula to dry before layering anything on top.
Step 2: Conceal in Thin, Precise Layers
After correcting, go in with a high-coverage liquid or cream concealer that matches your foundation shade or is just a hair lighter. Use the tip of a small concealer brush—never a large one—to dab on a small amount of product directly over the corrected area. Gently blend the edges using the tip of your finger or a clean brush, feathering out to diffuse any lines of demarcation. Building up a few thin layers offers far more natural coverage than trying to mask the spot in one go.
Step 3: Set with Micro-Fine Powder
Once your concealer is in place, set the area with a micro-fine translucent powder. Use a small, soft brush or a velour puff to press powder onto the spot, rather than sweeping it across your entire face. This targeted application locks in coverage and helps absorb excess oil without dulling your complexion.
Step 4: Lock Longevity with Setting Spray
After setting powder, mist your face with a setting spray that offers long-wearing, matte, or natural finishes based on your skin’s needs. Hold the spray at least 10–12 inches from your face and allow a fine mist to settle. This step helps meld all the layers together and stretches the wear-time of your hard work, especially in heat or humidity.
Step 5: Final Lighting Check and Micro-Adjustments
Step into natural light and check your makeup’s finish. Use a fingertip, clean brush, or dry sponge to blend out any visible edges or build-up you couldn’t see indoors. If needed, add a pinch more powder or gently tap in a touch of concealer to perfect your results. The key is a soft, imperceptible blend between your skin, foundation, and spot corrections.
Tools and Textures That Make It Seamless
The right tools not only simplify the process but can also transform your results from “obvious cover-up” to undetectable.
Brushes vs. Sponges for Precision
For precision work, a small, flat concealer brush or a pointed synthetic brush allows you to place product only where you need it. Brushes are especially handy when you want to build coverage without moving your base around. Sponges, particularly micro-sponges or beauty blenders, can also work well for diffusing the outer edges or pressing powder in place without lifting what you’ve already applied.
Choosing Corrector and Concealer Textures
Opt for correctors with a creamy but not oily texture—they should have enough density to neutralize spots, but still blend easily into your foundation. For concealer, select a formula that is long-wearing, water-resistant, and non-cakey. Thin, buildable liquids or soft creams strike the best balance for most skin types.
Powder Types and Puff Technique
Translucent, micro-fine powders—either loose or pressed—lock coverage in place better than heavy, dry powders that might accentuate texture. Use a puff or a very soft, small brush to press (not sweep) powder onto just the corrected area, minimizing risk of shifting your coverage.

Shade Strategy for Complex Spots
Refining your shade strategy can mean the difference between a natural look and one that inadvertently draws attention to the very spots you want to disguise.
Undertone-Aware Corrections: Peach, Orange, Red
Matching the undertone of your corrector to your skin and the pigment of your spot is essential. Peach neutralizes blue or purple areas on lighter skin; orange cuts grayness or darkness on medium to olive skin; and deeper reds punch out stubborn spots on deep complexions. Always blend the corrector just beyond the edge of the spot for an invisible transition.
Spot-Specific Shade Tweaks
Your face isn’t the same shade everywhere. Spots on the cheeks may require a warmer or more golden concealer, while those along the jaw or forehead could need a slightly cooler hue. Take an extra moment to customize concealer where necessary, especially if you notice certain areas looking ashy or mismatched in photos or daylight.
Avoiding Grey Cast and Oxidation
Grey cast can appear when a concealer is too light or has the wrong undertone, while oxidation happens if products darken or turn orange over time. To prevent these issues, always test corrections in daylight and see how your products wear for a few hours before relying on them for big events.
Make It Last: Stop Separation and Fading
Even the most flawless application can slide or fade if you don’t secure it properly. Ensuring longevity is all about technique, not simply layering on more product.
Layering Order and Dry-Down Timing
After skincare, give each base step—primer, corrector, concealer, powder, spray—time to set before moving to the next. Rushing can create slip or patchiness as products compete for space. Patience during dry-down pays off in smoothness and lasting hold.
Sweat/Oil Management Across the Day
Carry oil-absorbing papers or a tissue with you to dab away excess shine without disturbing makeup. If you get oily or sweaty, resist the urge to add more powder directly—first absorb oil, then touch up with a micro-dusting of powder or setting spray if it’s truly needed. This method keeps touch-ups light and undetectable.
Touch-Up Protocol That Won’t Cake
For touch-ups, use the smallest brush or sponge tip you can find to add minuscule amounts of concealer or powder, just on the spot that needs refreshing. Always blend edges, never simply pile more product on top, to maintain a seamless, skin-like finish.

Common Mistakes and Quick Fixes
When figuring out how to cover dark spots with makeup, it’s easy to slip into habits that compromise your results. Knowing the pitfalls and their fixes saves you time and frustration.
Over-Correcting or Over-Layering
Applying too much corrector or concealer can end up backfiring, making spots look raised or obvious. For best results, use thin, carefully blended layers and revisit only when necessary.
Using the Wrong Undertone
If you see a grey or washed-out effect after covering a spot, your corrector is likely too cool, or your concealer is the wrong undertone for your spot or surrounding skin. Adjust by using a corrector with more warmth, or blend two concealers to achieve the right balance.
Skipping Powder or Spraying Too Close
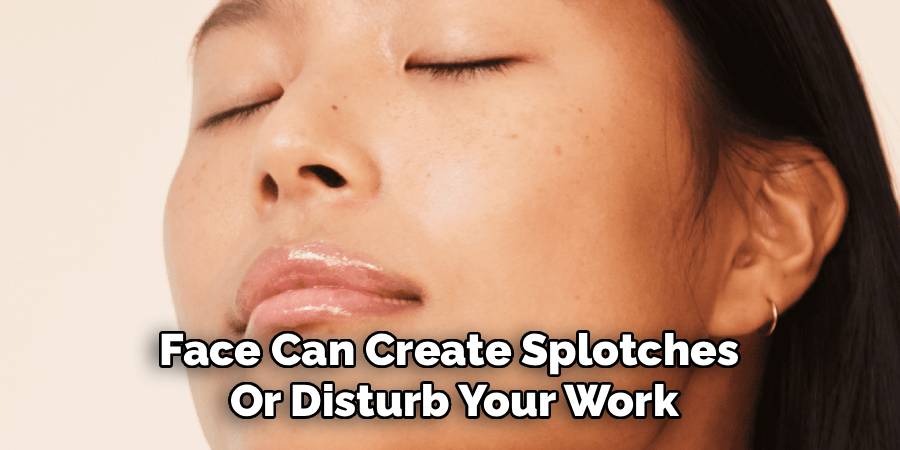
Not setting with powder leaves concealer vulnerable to slipping and fading. On the flip side, spraying setting spray too close to your face can create splotches or disturb your work. Make sure powder is gently pressed in, and always mist from a distance for a uniform setting effect.
Conclusion
Mastering how to cover dark spots with makeup comes down to understanding spot correction, selecting the right shades, and building up coverage in delicate layers. The “correct–conceal–set” method, when done thoughtfully, creates a finish so natural it’s hard to believe there was anything to cover in the first place.
As with any makeup skill, practice makes perfect. Check your work in different lighting, experiment with products and techniques, and don’t hesitate to tweak your routine for your unique skin and lifestyle. With these strategies in your toolkit, you’ll be able to step out each day knowing your skin looks healthy, radiant, and exactly like yours—only more even and confident.
About the Author
Jane Hubbard is a passionate beauty expert with a wealth of experience in makeup, hair, and overall beauty techniques. After years of working as a hairdresser specialist, she followed her entrepreneurial spirit and started her own consultancy business.
Jane has always been driven by her desire to help others feel confident in their own skin, and she does this by sharing her knowledge, experiences, and practical beauty tips. Through her consultancy, she empowers individuals to embrace their unique beauty, offering tailored guidance that boosts both self-esteem and personal style.
Professional Focus
Specializes in makeup, hairstyling, and beauty consulting.
Provides personalized beauty advice, tips, and techniques to help individuals feel confident in their appearance.
Dedicated to staying up-to-date with the latest industry trends and developments.
Passionate about creating a comfortable and empowering experience for every client.
Education History
University of Craft and Design – Bachelor of Fine Arts (BFA) in Woodworking and Furniture Design
Woodworking Apprenticeships – Extensive hands-on training with skilled craftsmen to refine carpentry and furniture making techniques
Online Courses & Masterclasses – Continued education in advanced woodworking techniques, design principles, and specialized tools
Expertise:
Makeup artistry, hairstyling, and beauty consulting.
Personalized beauty techniques to enhance confidence and self-expression.
Educating clients on how to maintain their beauty routines at home.