
There are moments when your makeup starts to fade or look less fresh, but removing and starting over simply isn’t an option. Whether you’re heading to an important meeting, transitioning from day to night, or just want to look your best after a long day, learning how to revive your makeup will help you maintain a flawless appearance.

Refreshing your makeup without taking it off is about restoring vibrancy and smoothness while keeping your skin feeling comfortable. With the right techniques and products, you can achieve that just-applied look in only a few minutes. Let’s explore how to refresh makeup without taking it off.
Why Refresh Your Makeup?
There are many reasons why you might want to refresh your makeup. Here are just a few:
- You have an important event or meeting coming up, and you want to look your best
- You’ve been wearing your makeup all day and it’s started to fade or crease
- You’re transitioning from a daytime look to an evening look and need to touch up
- You’ve been traveling for hours and want to freshen up before arriving at your destination
- You’ve been sweating or out in the heat and your makeup needs a little pick-me-up
- You’re simply in the mood for a change or want to experiment with new products and techniques.
There are endless possibilities when it comes to refreshing your makeup. Some people prefer to completely remove their existing makeup and start from scratch, while others may only need a few touch-ups and additions. Either way, taking a few minutes to refresh your makeup can make a big difference in how you look and feel.
You’ll Need
- Blotting Papers or Tissues
- Hydrating Facial Mist or Setting Spray
- Lightweight Moisturizer or Serum
- Compact Powder or Pressed Powder
- Concealer
- Makeup Sponge or Clean Brush
- Lip Balm or Gloss
- Mascara and Eyeliner (Optional, for Touch-ups)
- Small Makeup Bag for Easy Carrying
8 Step-by-step Guides on How to Refresh Makeup Without Taking It Off
Step 1: Assess the Situation

Before you begin, take a moment to examine your face in a mirror under good lighting. Identify the areas where makeup has worn off or where oil and shine are most noticeable.
Decide if you’re dealing with dryness, excess oil, or simply faded colors. Understanding your skin’s current state will help you choose the right products and steps to use.
Step 2: Remove Excess Oil and Shine
Gently press blotting papers or a clean tissue onto any oily areas, focusing on the T-zone (forehead, nose, and chin). Avoid rubbing to prevent disturbing your base makeup.
Removing oil first helps your skin look fresher and stops new makeup from caking up. This step prepares your face for additional layers without making things look heavy.
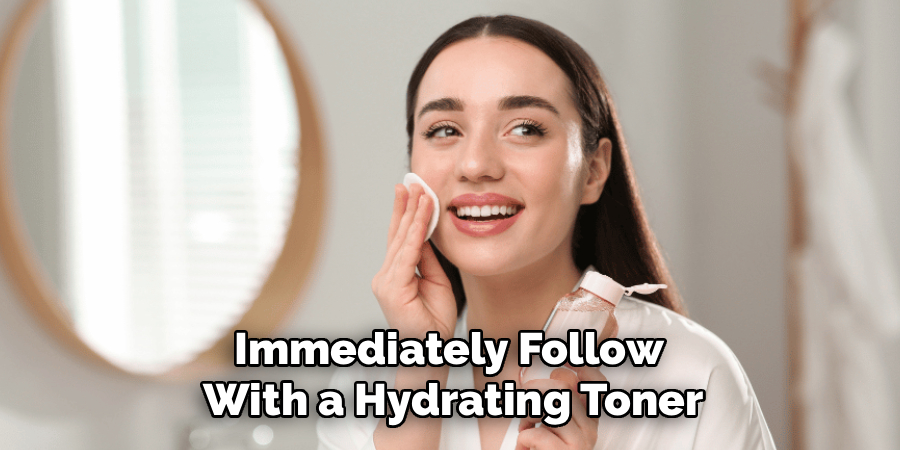
Step 3: Rehydrate Your Skin
Spritz your face with a hydrating facial mist to provide an instant boost of moisture. Wait a few seconds for it to absorb, then lightly pat your skin if needed.
Hydrating mists revitalize dull or cakey-looking foundation and make re-blending easier. This simple step can make your makeup look freshly applied without any effort.
Step 4: Smooth Out Texture With Moisturizer
For dry or flaky areas, use a tiny amount of lightweight moisturizer or serum. Dab gently onto problem spots, such as around the nose or mouth, using your fingers or a sponge.
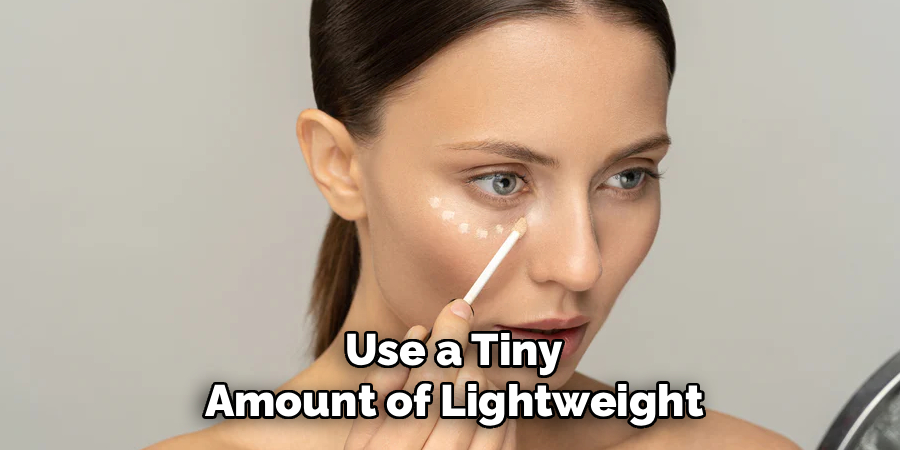
This helps blend away any patchiness and restores a dewy finish to your skin. Moisturizing mid-day can help prevent makeup from settling into fine lines.
Step 5: Touch Up Foundation and Concealer
If coverage has faded, apply a small amount of concealer or foundation only where it’s needed—under the eyes, around the nose, or on blemishes. Use a clean makeup sponge to dab and blend.
Adding just a bit of product, rather than layering all over, keeps your complexion looking natural. Take your time to ensure edges are seamless for a flawless appearance.
Step 6: Revive Color on Cheeks and Lips
Blush and lip color are often the first to fade. Use a cream blush or dab a bit of lipstick onto your cheeks and blend with your fingers for a natural flush.
Refresh your lips with balm or gloss, and reapply color as needed. This step instantly brightens your face and pulls your whole look together.
Step 7: Set and Mattify
Lightly sweep a compact or pressed powder over the center of your face, focusing on where you tend to get shiny. Use a clean brush or puff for even application.
Setting everything keeps your refreshed makeup in place and prevents new oil from breaking through. Go easy with powder to avoid a cakey finish.
Step 8: Final Touches
If needed, touch up your mascara and eyeliner to revive your eyes. Gently comb through lashes and check for smudges, cleaning up with a cotton swab if required.
Finish with a final spritz of setting spray to lock in your refreshed look and add a natural glow. These last steps help your makeup last until you’re ready to take it off.
Following these steps on how to refresh makeup without taking it off will save you time and effort, while still giving your look a beautiful boost. Remember to take care of your skin by using gentle products and techniques, and always remove your makeup at the end of the day to keep your skin healthy and happy. Enjoy your refreshed and flawless makeup look!

Additional Tips
- Try to carry a mini makeup kit with your essentials for quick fixes wherever you go.
- Choose multi-purpose products like tinted balms to save space and time.
- Avoid over-applying products—less is often more when it comes to refreshing makeup.
- Clean tools regularly to avoid transferring oil and bacteria back to your face.
- If you have sensitive skin, opt for fragrance-free or hypoallergenic formulas to prevent irritation.
- Practice these steps a few times at home so you can refresh your makeup quickly on busy days.
Common Mistakes to Avoid
- Applying new layers without first removing oil wax leads to cakey makeup.
- Rubbing powder or foundation onto dry patches instead of moisturizing.
- Using too much product when only a light touch-up is needed.
- Neglecting to blend around the edges causes an uneven texture.
- Forgetting to clean touch-up tools, which can transfer bacteria.
Do You Need To Use Professionals?
For most people, professional help isn’t required to refresh makeup during the day. The techniques and products listed above are user-friendly and easy to apply, even for beginners. However, if you have a special event or struggle to achieve your desired finish, consulting a makeup artist can provide personalized advice.
Often, makeup professionals can recommend products tailored to your skin type or demonstrate advanced blending techniques. Investing in a one-time lesson or consultation may boost your confidence and help you perfect your routine. Remember, mastering these skills gives you independence and saves time and money over the long term.
How Much Will It Cost?
Refreshing makeup doesn’t have to be expensive. Most of the required tools and products, like blotting papers, powder, and hydrating spray, are affordable and widely available. You can use travel sizes or sample products to keep costs down, and many brands offer budget-friendly options.
Investing in quality multipurpose products may save you money by cutting down on the number of items you need. If you already own your favorite foundation or blush, simply decant a small amount for touch-ups. With basic planning, you can create an effective touch-up kit at any price point.
Frequently Asked Questions
Q1: How Often Should I Refresh My Makeup During the Day?
The ideal frequency depends on your skin type, activities, and environment. For most people, a midday touch-up is enough. However, oily skin or long days may require an extra refresh. Use your judgment, and focus on areas that need help.
Q2: Can I Refresh Makeup If I Have Sensitive Skin?
Yes, but it’s important to use gentle, fragrance-free products and clean hands or tools. Avoid layering too many products, which might irritate. Look for products labeled “for sensitive skin,” and test new items in advance.
Q3: What Should I Do If My Makeup Looks Cakey After Touching Up?
Remove excess oil and mist your face with a setting spray or facial mist. Use a clean sponge to blend and remove any buildups. It’s important to apply light layers and avoid over-powdering, which often causes the cakey effect.
Q4: Is It Okay to Skip Touch-Ups and Just Reapply Everything?
You can, but it’s usually less efficient and more damaging to your skin in the long run. Layering without proper prep can highlight texture or dryness. Refreshing as described helps maintain a fresher appearance without unnecessary build-up.
Conclusion
Refreshing your makeup without starting from scratch is easy with the right steps and products. With a little practice and a simple touch-up kit, you can extend the life of your look—no matter where the day takes you.
Try these guidelines on how to refresh makeup without taking it off, stay confident, and enjoy a flawless complexion from morning to night!
About the Author
Jane Hubbard is a passionate beauty expert with a wealth of experience in makeup, hair, and overall beauty techniques. After years of working as a hairdresser specialist, she followed her entrepreneurial spirit and started her own consultancy business.
Jane has always been driven by her desire to help others feel confident in their own skin, and she does this by sharing her knowledge, experiences, and practical beauty tips. Through her consultancy, she empowers individuals to embrace their unique beauty, offering tailored guidance that boosts both self-esteem and personal style.
Professional Focus
Specializes in makeup, hairstyling, and beauty consulting.
Provides personalized beauty advice, tips, and techniques to help individuals feel confident in their appearance.
Dedicated to staying up-to-date with the latest industry trends and developments.
Passionate about creating a comfortable and empowering experience for every client.
Education History
University of Craft and Design – Bachelor of Fine Arts (BFA) in Woodworking and Furniture Design
Woodworking Apprenticeships – Extensive hands-on training with skilled craftsmen to refine carpentry and furniture making techniques
Online Courses & Masterclasses – Continued education in advanced woodworking techniques, design principles, and specialized tools
Expertise:
Makeup artistry, hairstyling, and beauty consulting.
Personalized beauty techniques to enhance confidence and self-expression.
Educating clients on how to maintain their beauty routines at home.