
Curly hair can be a beautiful crown, but it often comes with a unique set of challenges.

Over time, products, natural oils, and environmental pollutants can build up, leaving your curls looking limp, dull, and undefined. If your once-vibrant curls are feeling weighed down and unresponsive to your favorite products, it might be time for a reset.
A hair detox is a process designed to deeply cleanse your scalp and strands, removing this stubborn buildup and reviving your hair’s natural texture and health. Think of it as a fresh start for your curls. Let’s dive in how to detox curly hair.
What Will You Need?
You don’t need a professional salon to give your hair a proper detox. Most of the necessary items can be found in your kitchen or at a local beauty supply store.
- A clarifying shampoo or a DIY clarifying ingredient like apple cider vinegar or bentonite clay.
- A moisturizing deep conditioner or hair mask.
- A wide-tooth comb or your fingers for detangling.
- A scalp massager or brush (optional but recommended).
- A plastic cap or warm towel.
- Your usual styling products for after the treatment.
10 Easy Steps on How to Detox Curly Hair
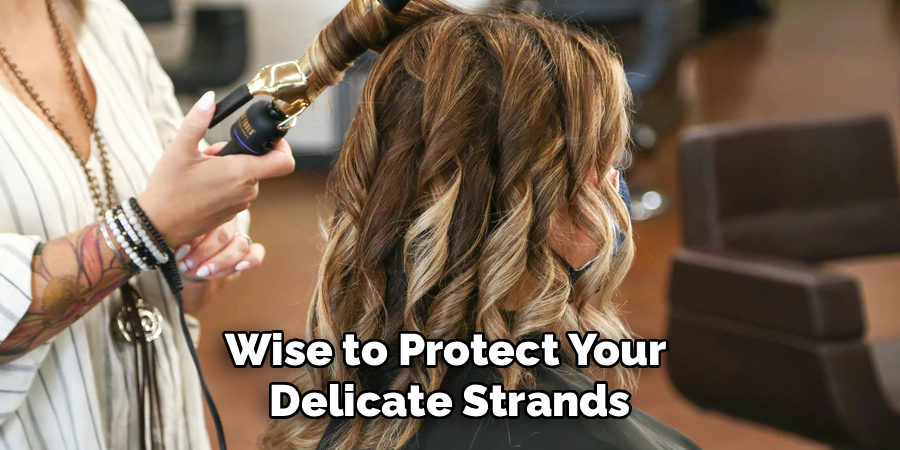
Step 1: Pre-Poo Treatment
Before you begin the deep cleansing process, it’s wise to protect your delicate strands. This step, known as a “pre-poo” (short for pre-shampoo), involves applying a protective layer of oil to your hair before washing. This helps to prevent the clarifying treatment from stripping away too much natural moisture, which is crucial for curly hair that is already prone to dryness. You can use oils like coconut, olive, or jojoba oil.
Apply the oil liberally from the mid-lengths to the ends of your hair, which are the oldest and most fragile parts. Gently work it in, making sure the ends are well-coated. Let the oil sit for at least 20-30 minutes. For an extra dose of protection, you can even apply it the night before and sleep with your hair in a protective style. This initial step ensures that your hair remains soft and manageable throughout the detox.
Step 2: Thoroughly Detangle
Curls and tangles often go hand in hand, and trying to wash tangled hair can lead to a matted mess and unnecessary breakage. Before letting any water touch your hair, take the time to detangle it thoroughly. With the pre-poo oil still in, your hair should have enough “slip” to make this process easier. Start from the ends and work your way up to the roots, using either a wide-tooth comb or simply your fingers.
Finger detangling is often gentler on curly hair, as you can feel for knots and carefully work them out without causing stress to the hair shaft. Be patient and work in small sections. Rushing this step can cause damage that you are trying to avoid. A properly detangled head of hair will allow the clarifying product to be distributed evenly and cleanse every strand effectively.
Step 3: Choose Your Clarifying Agent
This is the core of your detox. You have a few options for your clarifying agent, ranging from store-bought products to DIY concoctions. A dedicated clarifying shampoo is formulated specifically to break down and remove stubborn buildup. Look for one that is sulfate-free to avoid being overly harsh.

Alternatively, you can create your own powerful detox mask. A popular choice is a bentonite clay mask, made by mixing bentonite clay powder with apple cider vinegar (ACV) and a little water to form a yogurt-like paste. Bentonite clay has a negative charge that helps draw out positively charged toxins and impurities. Another simple DIY option is an ACV rinse, created by mixing one part ACV with three parts water. ACV helps to clarify the hair and balance the scalp’s pH.
Step 4: Apply the Detox Treatment
Once your hair is detangled, it’s time to apply your chosen clarifying treatment. It’s best to apply it to dry or slightly damp hair to ensure maximum potency. Working in sections will help you get even coverage from root to tip. If you are using a clarifying shampoo, focus on massaging it into your scalp, where most of the buildup resides.
If you’re using a bentonite clay mask or another DIY treatment, apply it generously all over your hair, ensuring every strand is coated. Pay special attention to your scalp, using your fingertips or a scalp massager to gently exfoliate and stimulate blood flow. This not only cleanses but also promotes a healthy environment for hair growth.
Step 5: Let It Sit
Don’t rinse just yet! For the clarifying agent to work its magic, it needs time to penetrate the hair shaft and scalp to break down all the accumulated gunk. If you used a clarifying shampoo, you can proceed to the next step after a thorough scalp massage. However, if you applied a clay mask or another DIY treatment, you’ll want to let it sit for about 15-25 minutes. To prevent the mask from drying out and becoming difficult to rinse, cover your hair with a plastic shower cap. This traps heat and moisture, keeping the mask active and helping it work more effectively. You’ll know the bentonite clay mask is ready when it feels slightly firm but not completely hard.
Step 6: Rinse Thoroughly with Warm Water
This step is crucial and requires patience. Rinsing out a detox treatment, especially a clay mask, can take longer than a normal shampoo. Use lukewarm water, as hot water can strip your hair of its natural oils, while cold water may not be effective at rinsing everything out. Stand directly under the showerhead and let the water run through your hair for several minutes to loosen the product. As the mask softens, use your fingers to gently massage your scalp and squeeze the product out of your hair. Continue rinsing until the water runs completely clear and your hair no longer feels gritty or coated.

Step 7: Deep Condition Immediately
After such an intense cleansing session, your hair will be crying out for moisture. The clarifying process removes buildup, but it can also strip away some of the natural oils that keep your curls soft and hydrated. It is essential to follow up with a rich, moisturizing deep conditioner or hair mask. Choose a product packed with hydrating ingredients like shea butter, avocado oil, or glycerin. Apply it generously to your hair, focusing on the mid-lengths and ends. Use your wide-tooth comb or fingers to ensure the conditioner is evenly distributed.
Step 8: Add Gentle Heat
To help the deep conditioner penetrate your hair cuticle more effectively, you can apply gentle heat. Cover your conditioned hair with a plastic cap and then wrap a warm, damp towel around it. You can also sit under a hooded dryer on a low setting for 15-20 minutes. The warmth opens up the hair cuticle, allowing the moisturizing ingredients to soak in deeply and replenish any moisture lost during the detox. This step will leave your curls feeling exceptionally soft, hydrated, and revitalized.
Step 9: Rinse with Cool Water
After your deep conditioning treatment has had time to work, it’s time for the final rinse. Switch the water temperature to cool. Rinsing with cool water helps to seal the hair cuticle, which locks in all the moisture you just added. A sealed cuticle results in smoother, shinier hair and helps reduce frizz. This final cool rinse acts like a top coat, sealing all your hard work in and preparing your curls for styling.
Step 10: Style as Usual
Now that your hair is fully detoxed, cleansed, and moisturized, you can proceed with your regular styling routine. You may notice that your products, like leave-in conditioners, curl creams, and gels, apply more smoothly and work much better than before. Your curls should feel lighter, look more defined, and have a healthy bounce. Enjoy your refreshed and reset curls!
5 Things You Should Avoid
To get the most out of your hair detox, be mindful of these common pitfalls.
- Over-Detoxing: Detoxing is an intense cleansing process. Doing it too often (more than once a month) can strip your hair of its natural oils, leading to extreme dryness and damage.
- Skipping the Deep Conditioner: Never skip the deep conditioning step. A clarifying treatment leaves your hair in a vulnerable state, and you must replenish its moisture immediately to prevent breakage.
- Using Harsh Ingredients: Avoid clarifying shampoos with sulfates or DIY recipes with ingredients like baking soda, which can be overly alkaline and damaging to the hair’s delicate structure.
- Applying to Tangled Hair: Always detangle before you detox. Trying to work a clarifying treatment through tangled hair will only lead to more knots and significant breakage.
- Not Rinsing Properly: Leaving behind any residue from your clay mask or clarifying shampoo defeats the purpose of the detox and can cause scalp irritation. Be patient and rinse thoroughly.
Conclusion
How to detox curly hair is a simple yet powerful way to restore its health, vibrancy, and definition.
By removing the buildup that accumulates over time, you create a clean canvas for your products to work effectively and for your natural curl pattern to flourish. With just a few basic ingredients and a bit of time, you can easily incorporate this refreshing ritual into your hair care routine.
Listen to your hair, and when it starts to feel dull and heavy, give it the fresh start it deserves.
About the Author
Jane Hubbard is a passionate beauty expert with a wealth of experience in makeup, hair, and overall beauty techniques. After years of working as a hairdresser specialist, she followed her entrepreneurial spirit and started her own consultancy business.
Jane has always been driven by her desire to help others feel confident in their own skin, and she does this by sharing her knowledge, experiences, and practical beauty tips. Through her consultancy, she empowers individuals to embrace their unique beauty, offering tailored guidance that boosts both self-esteem and personal style.
Professional Focus
- Specializes in makeup, hairstyling, and beauty consulting.
- Provides personalized beauty advice, tips, and techniques to help individuals feel confident in their appearance.
- Dedicated to staying up-to-date with the latest industry trends and developments.
- Passionate about creating a comfortable and empowering experience for every client.
Education History
- University of Craft and Design – Bachelor of Fine Arts (BFA) in Woodworking and Furniture Design
- Woodworking Apprenticeships – Extensive hands-on training with skilled craftsmen to refine carpentry and furniture making techniques
- Online Courses & Masterclasses – Continued education in advanced woodworking techniques, design principles, and specialized tools
Expertise:
- Makeup artistry, hairstyling, and beauty consulting.
- Personalized beauty techniques to enhance confidence and self-expression.
- Educating clients on how to maintain their beauty routines at home.