
Slime has taken the world by storm, transforming from a simple science experiment into a global phenomenon. Walk into any craft store, and you’ll likely see shelves emptied of clear glue and glitter, proof that this sticky craze isn’t going anywhere soon.
There is something oddly satisfying about squishing, stretching, and poking a ball of slime that appeals to both kids and adults. It’s the perfect rainy day activity, a hit at birthday parties, and surprisingly, a great way for adults to unwind after a long week.
While there are countless recipes floating around the internet—some using borax, others using contact solution—one of the fluffiest and most satisfying versions is made with shaving cream. This recipe creates a cloud-like texture that is soft to the touch and incredibly fun to manipulate. If you’ve been looking for the ultimate guide to making the perfect fluffy slime, you’re in the right place. Let’s dive into how to make slime with elmer’s glue and shaving cream.
What Will You Need?
Before you start mixing, make sure you have all your supplies ready. This recipe focuses on creating “fluffy slime,” which relies heavily on the shaving cream.
- Elmer’s White School Glue (PVA glue): You’ll need about 1/2 cup to 1 cup. This is the base of your slime.
- Shaving Cream: Foam shaving cream works best (not gel). The more you add, the fluffier it gets.
- Baking Soda: This helps firm up the slime. You will need about 1/2 teaspoon.
- Contact Lens Solution: This must contain boric acid and sodium borate to work as an activator.
- Food Coloring: Optional, but makes it much more fun!
- Mixing Bowl: A plastic or glass bowl dedicated to crafts is best.
- Spatula or Spoon: For stirring the mixture.
- Measuring Cups and Spoons: To get the ratios right.
- Airtight Container: For storing your creation afterward.
10 Easy Steps on How to Make Slime with Elmer’s Glue and Shaving Cream
Step 1: Prepare Your Workspace
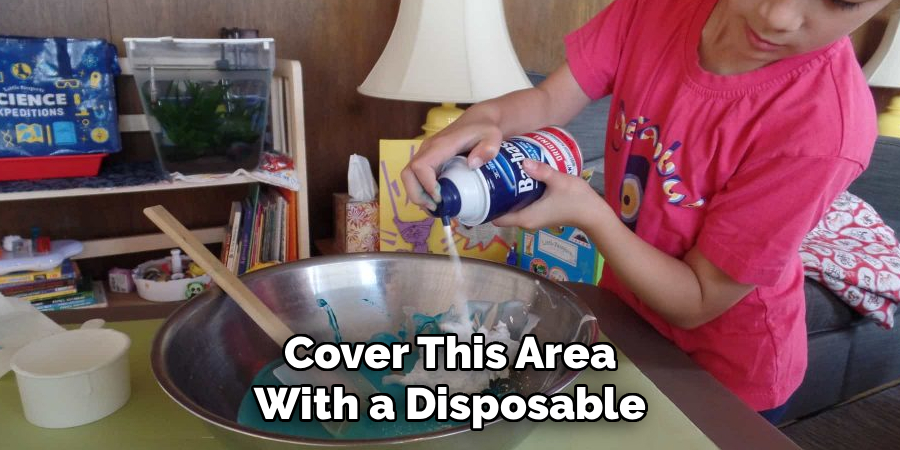
Before you even open a bottle of glue, it is crucial to set up a proper workspace. Slime making is science, but it is messy science. Find a flat surface like a kitchen table or a counter. Cover this area with a disposable plastic tablecloth, old newspapers, or a placemat that can be easily wiped down. Slime can stick to unfinished wood or fabric, so protection is key. Gather all your materials listed above and place them within easy reach. Having everything ready prevents you from scrambling for an ingredient while your hands are covered in sticky glue. Make sure you are wearing clothes you don’t mind getting a little messy, just in case.
Step 2: Pour the Glue into the Bowl
Grab your mixing bowl and your bottle of Elmer’s White School Glue. Measure out approximately 2/3 of a cup of glue. It doesn’t have to be precise to the milliliter, but this is a good starting amount for a manageable batch of slime. Pour the glue into the center of the bowl. Use your spatula to scrape out every last drop—you want as much base as possible. The white glue provides the polymers needed for the chemical reaction. If you want a larger batch, you can use a full cup, but remember you may need to slightly adjust the amount of activator later.
Step 3: Add Water (Optional but Recommended)
This step is technically optional, but for a stretchier slime, it is highly recommended. Add about 1/4 cup of water to your glue. Use your spoon or spatula to stir the water and glue together until they are completely combined. The mixture should look like thin milk. Adding water helps to loosen the polymer chains in the glue slightly before we tighten them back up with the activator. This results in a slime that has a better “drape” and stretch, rather than one that snaps or breaks easily when you pull it.
Step 4: Stir in the Baking Soda
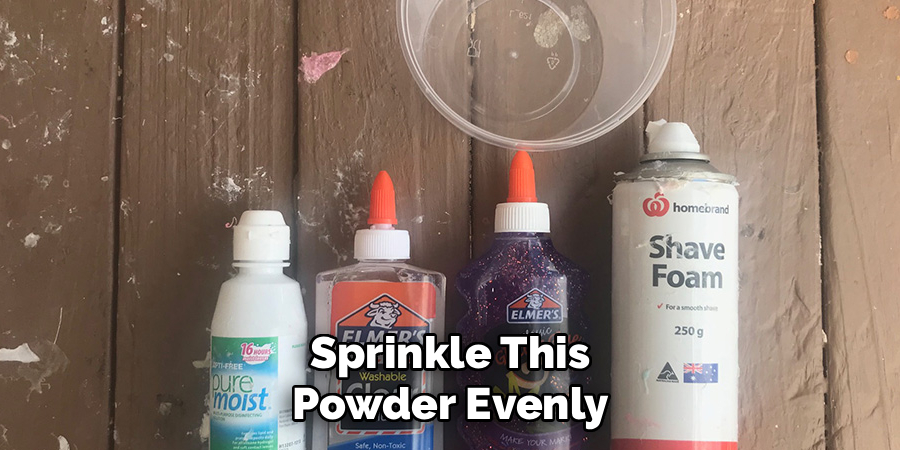
Next, measure out 1/2 teaspoon of baking soda. Sprinkle this powder evenly over your glue and water mixture. Don’t just dump it in one spot, or it might clump. Using your mixing tool, stir the mixture thoroughly. You want to ensure the baking soda is fully dissolved and distributed throughout the glue. Baking soda plays a critical role in this recipe; it works in tandem with the contact lens solution to firm up the mixture. Without it, your slime might remain too liquid or soupy regardless of how much activator you add.
Step 5: Add the Shaving Cream
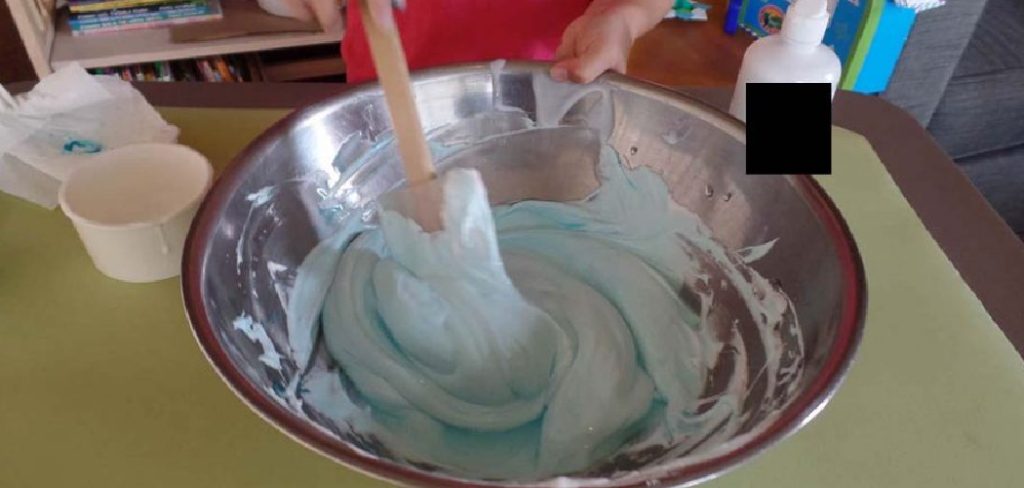
Now comes the fun part—making it fluffy! Grab your can of shaving foam (remember, do not use shave gel) and shake it well. Spray roughly 2 to 3 cups of shaving cream into the bowl. It should look like a mountain of white foam sitting on top of your glue mixture. The amount of shaving cream determines the fluffiness; more cream equals more fluff. Gently fold the shaving cream into the glue mixture. Be careful not to stir too vigorously, as you want to keep as much air in the foam as possible. Stir until the mixture looks like a thick, marshmallow cream.
Step 6: Add Color and Decorations
If you want your slime to be more than just a white cloud, this is the moment to add personality. Add a few drops of food coloring to the mixture. Start with 2-3 drops for a pastel look or 5-6 drops for vibrant color. Stir well until the color is uniform and there are no white streaks left. If you have glitter, foam beads, or sequins, toss them in now as well. This stage allows for full customization. Remember that the white base of the shaving cream will naturally lighten whatever color you choose, so you might need a bit more dye than you expect to get a deep hue.
Step 7: Slowly Add the Contact Lens Solution
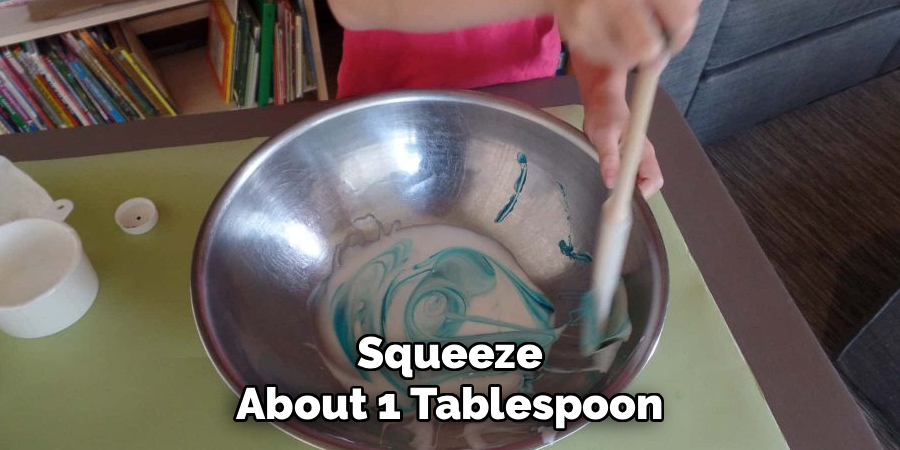
This is the magic step where chemistry happens. Read your contact lens solution label again to ensure it contains boric acid. Squeeze about 1 tablespoon of the solution into your bowl. Do not dump it all in at once. Start stirring immediately. You will notice the mixture instantly becoming harder to stir. It will begin to pull away from the sides of the bowl and clump around your spoon. This reaction is the polymer’s cross-linking to form the slime structure.
Step 8: Knead the Mixture
Once the mixture has pulled away from the bowl and isn’t completely liquid, it’s time to get your hands dirty. Put a small squirt of contact solution directly onto your hands to prevent sticking. Reach into the bowl and grab the slime. It will likely still be very sticky at first—this is normal! Begin to knead it like bread dough. Pull it, stretch it, fold it over, and squish it. The mechanical action of kneading helps the ingredients fully combine and completes the chemical reaction.
Step 9: Adjust Consistency
As you knead, assess the texture. Is it still sticking aggressively to your fingers? If so, add another squirt of contact solution (about 1 teaspoon) and keep kneading. Be very conservative with adding more activator. If you add too much, the slime will become rubbery and hard, and the fluffy texture will be ruined. It is much easier to add more activator than to fix over-activated slime. You want a consistency that is cohesive and holds together but is still soft and stretchy.
Step 10: Store Properly
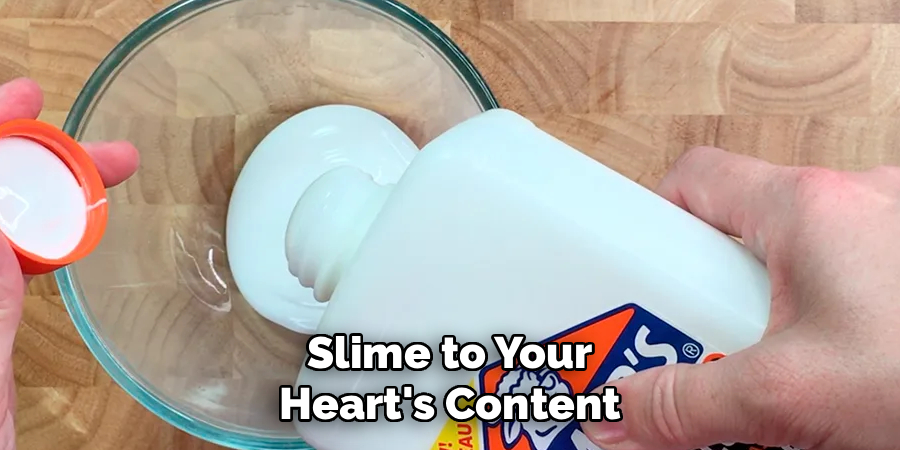
Once you have played with your slime to your heart’s content, you must store it correctly to keep it fresh. Fluffy slime, in particular, tends to lose its fluffiness over a day or two as the air bubbles from the shaving cream pop. However, it will still remain a great regular slime. Place your slime in an airtight container or a Ziploc bag with all the air squeezed out. Store it at room temperature away from direct sunlight. If stored properly, your slime can last for a few weeks. If it dries out, it’s time to make a new batch!
5 Things You Should Avoid
Even with easy recipes, slime can go wrong. Here are five common pitfalls to steer clear of:
- Using the Wrong Glue: Not all glues are created equal. Ensure you use PVA (polyvinyl acetate) glue, like standard Elmer’s school glue. “Washable” or “No-Run” formulas work best. Avoid using super glue or rubber cement, as these will not react with the activator and can be dangerous for skin contact.
- Adding Too Much Activator Too Fast: This is the number one slime killer. If you pour in too much contact solution at once, the chemical bonds become too tight, resulting in a hard, rubbery brick that snaps rather than stretches. Always add it slowly while mixing.
- Using Shaving Gel instead of Foam: The recipe for “fluffy” slime relies on the aerated texture of foam shaving cream. Shaving gel has a different chemical composition and density; it won’t provide the same volume or cloud-like texture and may mess up your ratios.
- Getting Slime on Carpet or Fabric: Slime is notoriously difficult to remove from textiles. Once it sinks into fibers and dries, it is a headache to clean. Always play over a hard surface and keep it away from hair, clothes, and furniture. If accidents happen, vinegar can often help dissolve it.
- Eating the Slime: It might look like marshmallow fluff or taffy, but it is definitely not edible. The ingredients—glue, borate, shaving cream—are toxic if ingested. Always supervise young children and wash hands thoroughly after playing.
Conclusion
Making slime with Elmer’s glue and shaving cream is a fantastic activity that combines science, art, and sensory play. It is an accessible project that requires minimal supplies but delivers maximum entertainment.
By following the steps on how to make slime with elmer’s glue and shaving cream, you can create the perfect batch of fluffy, squishy slime right in your own kitchen. Remember to experiment with colors and add-ins to make each batch unique.
So, grab your glue, shake up that shaving cream, and get ready for some satisfying, stretchy fun! Happy sliming
About the Author
Jane Hubbard is a passionate beauty expert with a wealth of experience in makeup, hair, and overall beauty techniques. After years of working as a hairdresser specialist, she followed her entrepreneurial spirit and started her own consultancy business.
Jane has always been driven by her desire to help others feel confident in their own skin, and she does this by sharing her knowledge, experiences, and practical beauty tips. Through her consultancy, she empowers individuals to embrace their unique beauty, offering tailored guidance that boosts both self-esteem and personal style.
Professional Focus
- Specializes in makeup, hairstyling, and beauty consulting.
- Provides personalized beauty advice, tips, and techniques to help individuals feel confident in their appearance.
- Dedicated to staying up-to-date with the latest industry trends and developments.
- Passionate about creating a comfortable and empowering experience for every client.
Education History
- University of Craft and Design – Bachelor of Fine Arts (BFA) in Woodworking and Furniture Design
- Woodworking Apprenticeships – Extensive hands-on training with skilled craftsmen to refine carpentry and furniture making techniques
- Online Courses & Masterclasses – Continued education in advanced woodworking techniques, design principles, and specialized tools
Expertise:
- Makeup artistry, hairstyling, and beauty consulting.
- Personalized beauty techniques to enhance confidence and self-expression.
- Educating clients on how to maintain their beauty routines at home.