
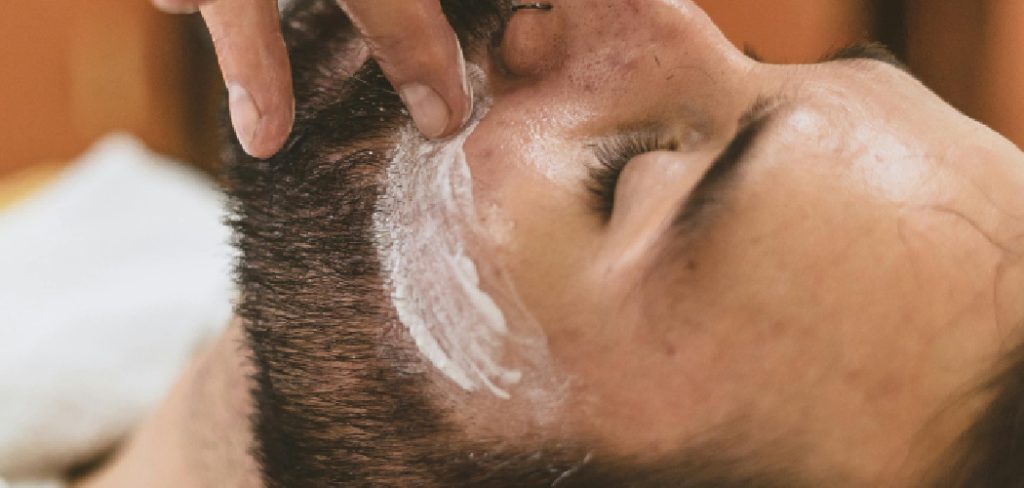
Many people accept razor burn, bumps, and dry, irritated skin as an unavoidable consequence of shaving. Commercial shaving foams and gels, often packed in aerosol cans, can feel convenient but frequently contain harsh chemicals that strip the skin of its natural moisture. The good news is that there is a luxurious, skin-saving alternative that you can create in your own kitchen. The process is simpler than you might think, and the result is a rich, moisturizing product that provides a superior shave. This guide will teach you exactly how to make a shaving cream using simple, natural ingredients. By switching to a homemade version, you can say goodbye to post-shave irritation and hello to soft, hydrated, and happy skin.
Why You Should Learn How to Make Shaving Cream?
The Problem with Commercial Aerosols
The fluffy cloud of foam that erupts from a commercial shaving cream might seem effective, but its ingredient list often tells a different story. Many of these products rely on propellants like propane and butane to create that instant lather. They also frequently contain sulfates, such as sodium lauryl sulfate (SLS), which are aggressive detergents that can strip the skin of its protective oils, leading to dryness and irritation. Artificial fragrances, while smelling pleasant, are common culprits for allergic reactions and sensitivity. Over time, using these products can leave your skin feeling tight, itchy, and more prone to the very razor burn you are trying to prevent.
Benefits of Natural Ingredients
In stark contrast, a homemade shaving cream is built upon a foundation of nourishing, natural ingredients. When you create your own, you are essentially making a high-quality skin treatment that also facilitates a close shave. Ingredients like shea butter, coconut oil, and aloe vera do double duty. They create a protective, lubricating layer that allows the razor to glide smoothly across the skin, minimizing nicks and cuts. At the same time, they deliver deep hydration, vitamins, and fatty acids that moisturize, repair, and soothe the skin. The result is a shave that leaves your skin feeling softer and more comfortable than ever before.
Essential Ingredients for a Luxurious Lather
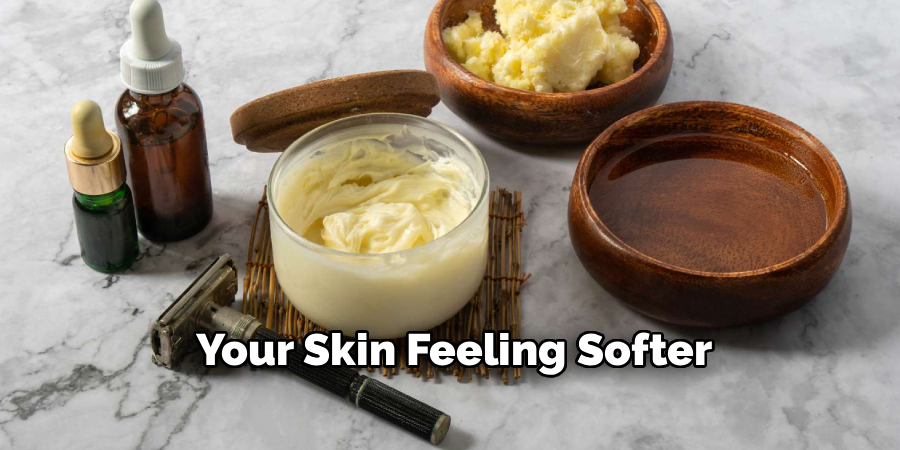
The Base Oils and Butters
The foundation of a rich, whipped shaving cream lies in its solid fats. Shea butter and cocoa butter are excellent choices for this role. They are thick at room temperature, which provides the substance and protective barrier needed for a close shave. Shea butter is particularly prized for its high concentration of vitamins and fatty acids, which are incredibly moisturizing and help to soothe inflammation. Coconut oil is another key component, celebrated for its natural antimicrobial properties and its ability to melt on contact with skin, providing a silky, lubricated surface. Together, these ingredients create a dense, nourishing base that cushions the skin against the razor blade.
Oils for Glide and Lubrication
To achieve that perfect, effortless glide, you will need to incorporate liquid carrier oils. These oils help to thin the solid butters just enough to create a spreadable consistency while adding their own unique skin benefits. Sweet almond oil is a popular choice because it is lightweight, rich in Vitamin E, and absorbs well without feeling greasy. Jojoba oil is another fantastic option as its chemical structure closely mimics the skin’s natural sebum, making it highly compatible and moisturizing. For an even richer cream, olive oil or avocado oil can be used, both of which offer deep hydration and are packed with antioxidants. These oils ensure the razor moves smoothly, preventing tugging and reducing the likelihood of razor bumps.
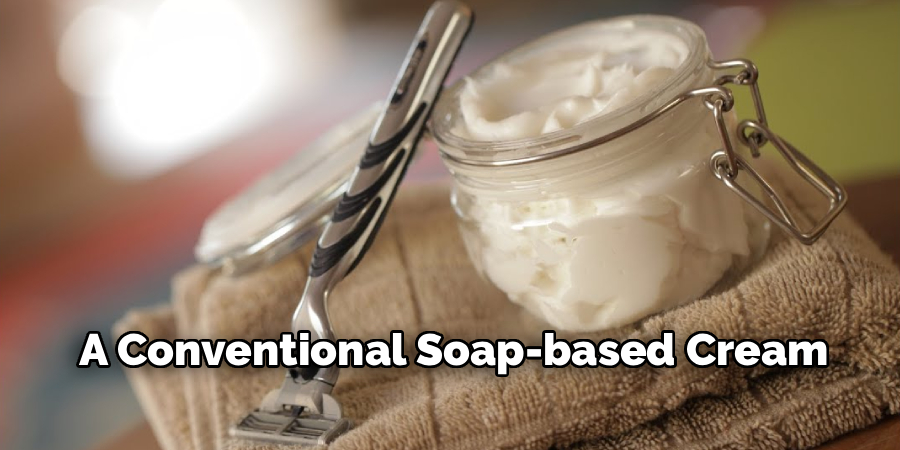
Soaps and Surfactants (Optional)
For those who prefer a more traditional lather that rinses away cleanly, incorporating a mild liquid soap is an option. Liquid Castile soap, which is made from vegetable oils, is the perfect choice for this. Adding a small amount to your recipe introduces a surfactant that helps the cream foam slightly and wash off more easily, preventing the oily residue that some people dislike. This creates a hybrid product that offers both the moisturizing benefits of a butter and the clean-rinsing feel of a conventional soap-based cream.
Tools You Will Need
Mixing Equipment
Creating a whipped shaving cream requires a few basic kitchen tools to achieve the perfect fluffy texture. The most important piece of equipment is a double boiler. If you don’t have one, you can easily create a makeshift version by placing a heat-safe glass or metal bowl over a pot of gently simmering water. This allows you to melt your butters and oils slowly and evenly without scorching them. You will also need a hand mixer or a stand mixer. This is the secret to transforming the cooled oil mixture into a light, airy cream. While you could try to whisk by hand, an electric mixer is essential for incorporating enough air to get that signature whipped texture. A flexible spatula will also be useful for scraping down the sides of the bowl and transferring the finished cream into its container.
Storage Containers
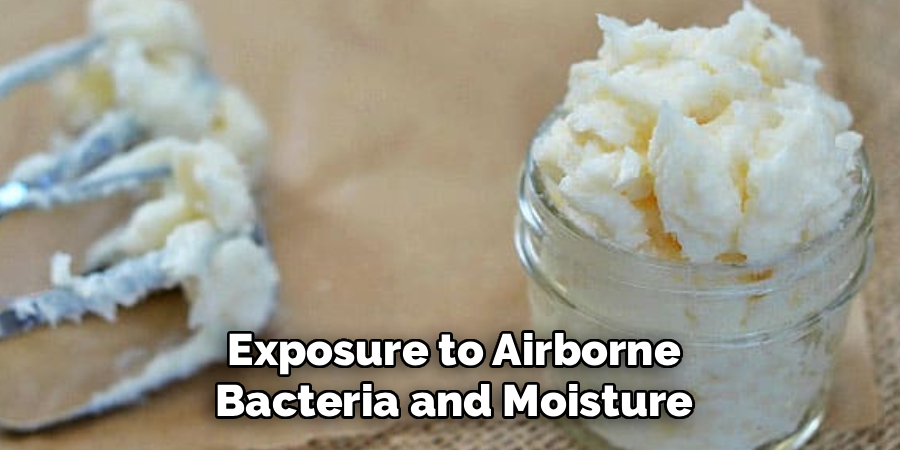
To keep your homemade shaving cream fresh and free from contaminants, proper storage is key. Airtight containers are a must. Glass jars with screw-on lids are an excellent choice as they are non-reactive, easy to clean, and allow you to see how much product you have left. Small tins or plastic tubs with secure lids also work well. Choosing a container with a wide mouth will make it easier to scoop the cream out with your fingers. Storing your cream in an airtight container prevents it from drying out and protects it from exposure to airborne bacteria and moisture, which can shorten its shelf life.
Step-by-Step Guide: How to Make a Shaving Cream (Whipped Butter Style)
Step 1: Melt the Solid Fats
Begin by setting up your double boiler or placing a heat-safe bowl over a saucepan with an inch or two of simmering water. Measure out your solid fats—typically equal parts shea butter and coconut oil—and place them in the top part of the double boiler. Keep the heat on low to ensure a gentle melting process. Using high heat can degrade the valuable nutrients in the oils. Stir the mixture occasionally with a spatula as it melts. Continue heating until the shea butter and coconut oil have transformed into a smooth, fully combined liquid with no solid pieces remaining.
Step 2: Add the Carrier Oils
Once the solid fats are completely melted, remove the bowl from the heat. Now it is time to incorporate your liquid carrier oils, such as almond oil or olive oil. Pour the measured amount of liquid oil into the melted butter mixture and stir well to combine everything. The liquid oil will integrate easily into the warm base. This step ensures that your final product will have the perfect glide and an extra layer of moisture.
Step 3: Cool the Mixture
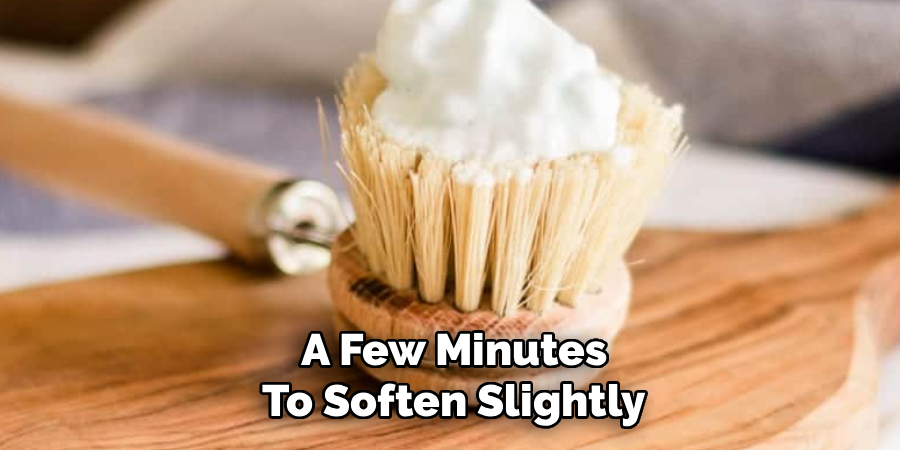
This is arguably the most crucial step for achieving a whipped texture. The warm oil mixture needs to be chilled until it becomes semi-solid. Place the entire bowl in the refrigerator. Let it chill for approximately 20 to 30 minutes. You are looking for the mixture to become opaque and firm up, but not rock-solid. The ideal consistency is when the surface is solid enough that you can press your finger into it and leave a distinct indent, similar to the texture of softened butter. If it gets too hard, let it sit at room temperature for a few minutes to soften slightly.
Step 4: Whip It to Perfection
Once your oil mixture has reached the perfect semi-solid state, it is time to whip it. Using a hand mixer or a stand mixer fitted with a whisk attachment, begin whipping the mixture on a low speed, gradually increasing to high. As you whip, you will see the mixture transform. It will lighten in color and increase in volume as air is incorporated. Continue whipping for several minutes until the texture changes from a dense solid to a light, fluffy consistency that resembles whipped cream or frosting, forming stiff peaks.
Step 5: Incorporate Scents and Extras
With the cream now whipped to perfection, you can add your final touches. This is the point to add any optional ingredients like vitamin E oil, which helps to preserve the cream and nourish the skin, or a few drops of your chosen essential oils. Peppermint oil can provide a refreshing, cooling sensation, while lavender or chamomile offers calming and soothing properties. Add these ingredients directly to the whipped cream and whip for another minute on low speed just to ensure they are fully combined.
Step 6: Transfer to Storage
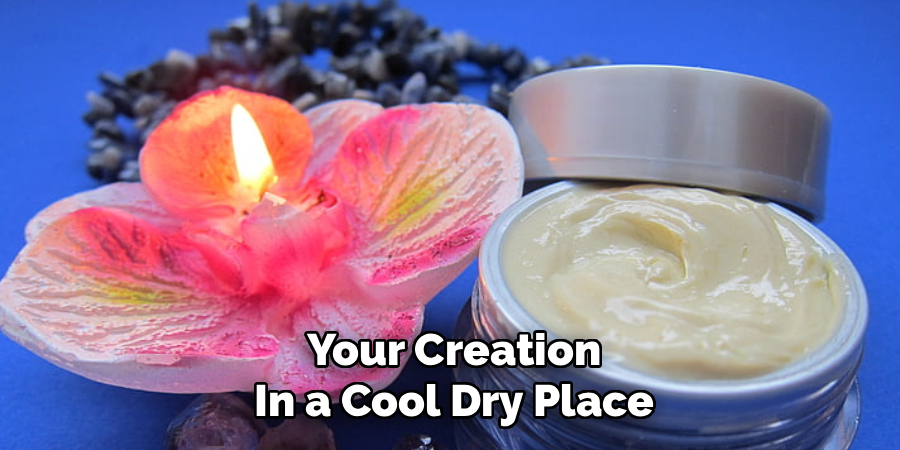
After the final whip, your luxurious homemade shaving cream is complete. Using a spatula, carefully scoop the fluffy cream from the mixing bowl and transfer it into your clean, airtight storage jars. Try to be gentle during this process to avoid pressing out the air that you just whipped into it. Fill the jars, secure the lids tightly, and store your creation in a cool, dry place.
Alternative Recipe: Making a Foaming Shaving Soap
Adding Castile Soap
If you prefer a shaving cream that lathers up and rinses away more like a traditional soap, you can easily adapt the recipe. The key is to add liquid Castile soap to your oil base. A good starting ratio is to combine the melted and cooled oil mixture with an equal part of liquid Castile soap. For example, if you have one cup of the oil base, you would mix it with one cup of liquid Castile soap. You can also add a bit of water or aloe vera juice to adjust the consistency.
Mixing Technique
This version of the recipe does not require the same chilling and whipping process. Once your solid oils have been melted and cooled slightly, you can simply whisk in the liquid Castile soap and any other liquid ingredients until the mixture is smooth and well-combined. Because this formulation will be more liquid than the whipped butter style, it is best stored in a container that allows for easy dispensing, such as a bottle with a pump top. This creates a creamy, low-lathering soap that offers both moisture and a clean finish.
Customizing Your Shaving Cream for Skin Types
For Sensitive Skin
If you have sensitive skin that is prone to redness and reactivity, it is best to keep your recipe simple and gentle. When choosing your ingredients, opt for calming additions. Incorporating aloe vera gel into your recipe can provide extra soothing benefits. For essential oils, stick to those known for their gentle properties, like chamomile or lavender. It is wise to avoid potentially irritating oils, such as strong citrus or spice oils, and to consider making an unscented version to minimize any risk of a reaction.
For Dry Skin
For those who struggle with exceptionally dry or flaky skin, you can boost the moisturizing power of your shaving cream by adjusting the ingredients. Consider increasing the proportion of shea butter, which is an excellent emollient that provides intense hydration. You can also choose a heavier carrier oil, such as avocado oil, which is rich in fatty acids and deeply nourishing. These adjustments will result in an even richer cream that leaves behind a lasting layer of moisture, helping to combat dryness long after you have finished shaving.
Using and Storing Your Homemade Creation
Proper Application
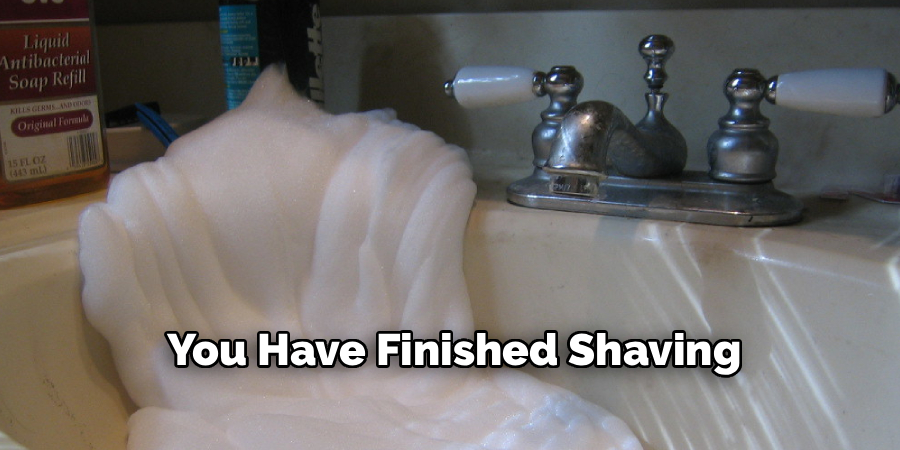
When using your oil-based shaving cream, remember that a little goes a long way. Unlike commercial foams, you only need to apply a thin layer to the skin. The concentrated oils provide all the lubrication you need. It is also important to rinse your razor blade frequently under hot water as you shave. The rich butters and oils can clog the blades more quickly than a water-based foam, so regular rinsing will ensure you maintain a clean, effective shave.
Shelf Life and Preservation
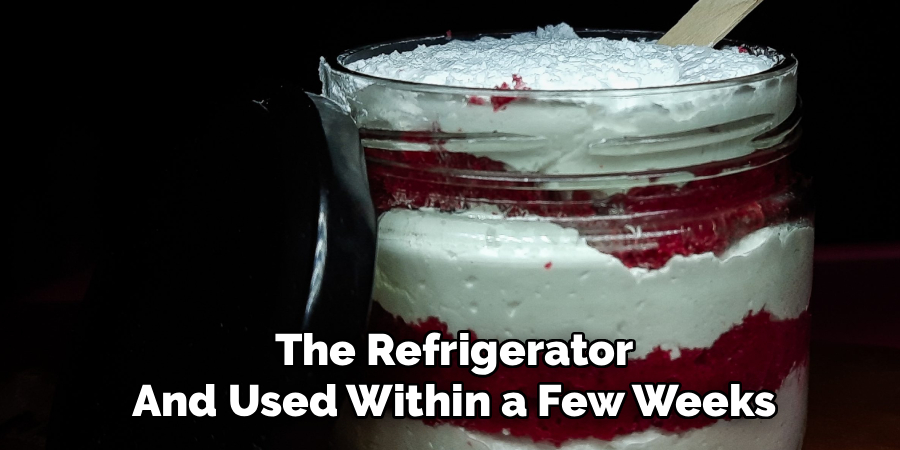
The shelf life of your homemade shaving cream depends entirely on its ingredients. The whipped butter style, which contains only oils and butters, is naturally preserved and can last for three to six months if stored in a cool, dark place. The most important rule for preserving it is to prevent water from getting into the jar. Water introduces the risk of bacterial and mold growth. Always use clean, dry hands to scoop out the cream, and be sure to tighten the lid securely after each use. If you created a version with water-based ingredients like aloe vera or Castile soap, it should be stored in the refrigerator and used within a few weeks.
Conclusion
The journey of creating your own shaving cream is a simple yet profoundly satisfying one. It transforms a routine chore into an act of self-care, yielding a final product that is far superior in quality to most commercial alternatives. The process is straightforward, and the result is a rich, moisturizing cream that protects your skin from irritation while delivering a flawlessly smooth shave. Knowing how to make a shaving cream is a skill that puts you in complete control of your skincare, allowing you to choose every ingredient and ensure a safe, natural, and chemical-free experience. We encourage you to experiment with different oils and scent combinations to craft a signature blend that you and your skin will love.
About the Author
Jane Hubbard is a passionate beauty expert with a wealth of experience in makeup, hair, and overall beauty techniques. After years of working as a hairdresser specialist, she followed her entrepreneurial spirit and started her own consultancy business.
Jane has always been driven by her desire to help others feel confident in their own skin, and she does this by sharing her knowledge, experiences, and practical beauty tips. Through her consultancy, she empowers individuals to embrace their unique beauty, offering tailored guidance that boosts both self-esteem and personal style.
Professional Focus
- Specializes in makeup, hairstyling, and beauty consulting.
- Provides personalized beauty advice, tips, and techniques to help individuals feel confident in their appearance.
- Dedicated to staying up-to-date with the latest industry trends and developments.
- Passionate about creating a comfortable and empowering experience for every client.
Education History
- University of Craft and Design – Bachelor of Fine Arts (BFA) in Woodworking and Furniture Design
- Woodworking Apprenticeships – Extensive hands-on training with skilled craftsmen to refine carpentry and furniture making techniques
- Online Courses & Masterclasses – Continued education in advanced woodworking techniques, design principles, and specialized tools
Expertise:
- Makeup artistry, hairstyling, and beauty consulting.
- Personalized beauty techniques to enhance confidence and self-expression.
- Educating clients on how to maintain their beauty routines at home.