
Mastering the art of facial sculpting can feel intimidating when you see complex tutorials online, but achieving a naturally chiseled look is actually quite simple with the right technique. Many beginners worry about looking muddy or overdone, yet the secret to a flawless finish isn’t in the expensive products you buy, but in the way you manipulate them on your skin.

When you learn how to blend contour and highlight correctly, you unlock the ability to enhance your natural bone structure, adding dimension and warmth exactly where you want it. This transformative process relies on patience and using the proper tools to ensure harsh lines disappear into a seamless gradient of shadow and light.
In this guide, we will break down the essential methods for creating a soft, professional-looking sculpt that lasts all day. Whether you prefer cream sticks or powder formulas, these beginner-friendly tips will help you elevate your makeup routine and give you the confidence to define your features beautifully every time you step out the door.
7 Step-by-Step Guide: How to Blend Contour and Highlight
Step 1: Prep Your Skin for a Smooth Base
Before you reach for any sculpting products, your canvas must be ready. Dry or flaky skin can catch pigment, leading to patchy application that is nearly impossible to fix later. Start by cleansing your face and applying a lightweight moisturizer suited to your skin type. Allow it to absorb fully for a few minutes. If you have larger pores or fine lines, a smoothing primer can be a game-changer, creating a silky barrier that helps makeup glide effortlessly. This preparation ensures that when you eventually apply your colors, they melt into the skin rather than sitting on top of texture.
Step 2: Choose the Right Tools and Textures
The debate between cream and powder is common, but for beginners, creams often blend more forgivingly into the skin. Select a contour shade that is cool-toned to mimic natural shadows and a highlighter that is two shades lighter than your skin tone. Your tools are equally important. A damp beauty sponge is excellent for a dewy, natural finish, while dense, angled brushes provide more precision and coverage. Having clean tools is non-negotiable; leftover product on a brush can muddy your application instantly. Ensure you have separate tools or clean sides of a sponge for both your dark and light shades.
Step 3: Map Out Your Face Shape
Understanding your bone structure is crucial because placement dictates the final result. Look in the mirror and suck in your cheeks to find the hollows; this is where your shadow belongs. Generally, you want to place the contour product just under your cheekbones, along your hairline, and under your jawline to create depth. For highlighting, focus on the high points where light naturally hits: the tops of your cheekbones, the bridge of your nose, the center of your forehead, and your chin. Applying these initial lines or dots serves as a roadmap before you start the actual blending process.

Step 4: Blend the Highlight First
Always start blending your lighter shades before moving to the darker ones. If you blend the dark contour first, you risk dragging that darkness into the highlighted areas, which ruins the lifting effect. Using a damp sponge or a small fluffy brush, gently tap the highlighter into your skin. Do not drag or swipe, as this can move the foundation underneath. Use a stippling motion to press the product in until it looks like a natural glow coming from within. This step brightens the center of the face and sets the stage for the contrast that follows.
Step 5: Master the Technique on Highlight Shadows
Now focus on the deeper shades. Using the clean side of your sponge or a dedicated contour brush, begin blending the contour lines. The golden rule here is to blend upwards. Dragging the product down can make the face look droopy or tired. For your cheekbones, use short, upward tapping motions to push the product towards your temple. Along the jawline, blend downwards towards the neck to avoid a harsh line of demarcation. Take your time here; the goal is a soft shadow, not a stripe. If the color looks too intense, go over it with your foundation brush to diffuse it.
Step 6: Connect the Areas seamlessly
Once the individual sections are blended, you need to ensure there are no harsh borders where the light meets the dark. This serves as the transition phase. Take a clean, fluffy brush or your damp sponge and lightly bounce it over the areas where the contour and highlight meet. This marries the two textures together. You are not adding new product here; you are simply softening the edges. This step is the difference between a striped face and a naturally sculpted one. Keep checking your reflection in natural light to ensure the transition is undetectable.
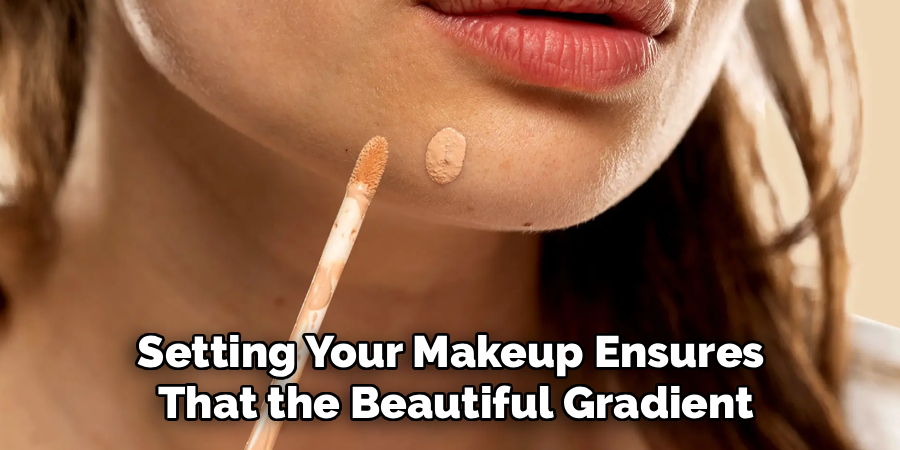
Step 7: Set with Translucent Powder
Creams and liquids have a tendency to move, especially in warm weather or on oily skin. To lock in your hard work, use a translucent setting powder. Dip a fluffy brush into the powder, tap off the excess, and lightly dust it over the areas you highlighted. For the contoured areas, you can leave them as is for a dewy finish or set them with a matching powder bronzer to intensify the look. Setting your makeup ensures that the beautiful gradient you created stays put and doesn’t melt into a muddy mess halfway through the day.
Common Contouring Mistakes
While contouring can beautifully enhance your features, a few common mistakes can detract from the desired effect. One frequent error is using the wrong shade for your contour. Shades that are too dark or too warm can look unnatural and stand out rather than blend seamlessly into your skin. Another mistake is applying too much product at once. Heavy-handed application can lead to harsh, unblended lines that are difficult to correct. Failing to blend properly is another issue—contour lines should appear as natural shadows, not streaks.
Additionally, contouring in the wrong areas, such as placing product too high or too low, can distort the proportions of your face rather than enhance them. Lastly, skipping the step of setting your makeup can cause your contour to fade or shift during the day, undermining all your hard work. Avoiding these pitfalls will help you achieve a polished and professional-looking contour.
Frequently Asked Questions
What is the difference between bronzer and contour?
Contour and bronzer serve different purposes. Contour products are typically cool-toned or grey-based to mimic natural shadows and create structural definition. Bronzers are warm-toned and often shimmer-based, designed to give the skin a sun-kissed glow where the sun would naturally hit. You use contour to sculpt and bronzer to warm up the complexion.

Can I use powder products to blend contour?
Yes, you absolutely can use powder. While creams are often recommended for beginners because they are easier to manipulate, powders are excellent for oily skin types. If using powder, apply it over a set foundation base to prevent patchiness. Use a light hand and build the color gradually rather than applying a lot at once.
Why does my contour look muddy or dirty?
A muddy look usually happens for two reasons: wrong color choice or over-blending. If your contour shade is too warm or orange, it won’t look like a shadow. Stick to cool tones. Secondly, if you blend too much or in large circles, you mix the dark and light colors into a grey mess. Keep your blending precise.
Do I need expensive brushes to blend properly?
No, you do not need luxury tools to achieve a great look. Many affordable brands offer high-quality synthetic brushes and sponges that work perfectly. The key is the density and shape of the brush, not the price tag. Look for soft bristles that aren’t too stiff, and always keep them clean to ensure the best application.
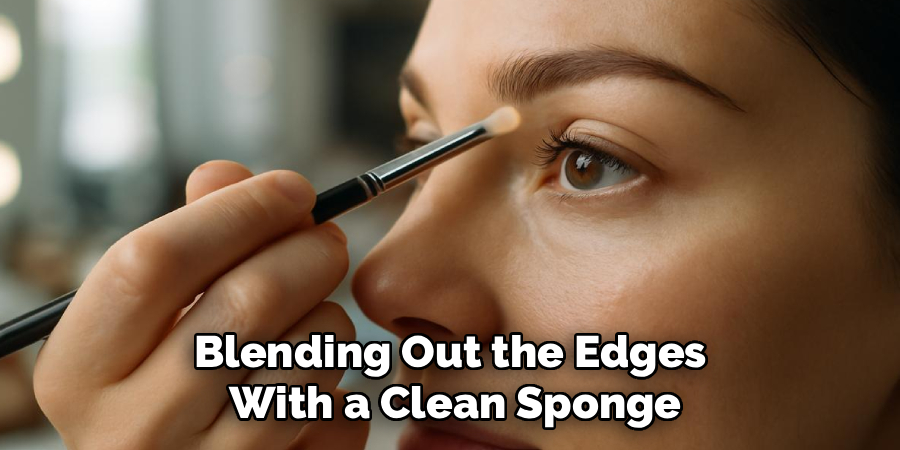
How do I fix contour that is too dark?
If you went too heavy-handed, don’t panic and wipe it all off. Take your foundation brush or sponge (which usually has a little leftover product on it) and dab it over the dark area. This acts like an eraser, diffusing the intensity without ruining the base makeup underneath. Blending out the edges with a clean sponge also helps.
Conclusion
Sculpting your face doesn’t have to be a complicated process reserved for professional makeup artists. By following these simple steps, you can achieve a defined, radiant look that enhances your natural beauty rather than masking it. Remember that practice is key; the more you work with your facial structure, the more intuitive the placement will become.
Don’t be afraid to experiment with different textures and tools until you find what works best for your skin type. Now that you know how to blend contour and highlight like a pro, you can confidently add dimension to your daily makeup routine. Grab your brushes, have fun with the process, and enjoy the beautiful, sculpted results!