
Many beginners feel intimidated by the concept of face mapping, assuming it requires the skill level of a professional makeup artist. The truth is that identifying your face shape and learning the corresponding blush technique is surprisingly simple once you know what to look for. Whether you want to soften a square jawline, add fullness to a long face, or lift round cheeks, the right placement acts as a mini facelift without any invasive procedures. It is all about working with your natural features rather than against them, using light and color to create balance and harmony.
In this comprehensive guide, we will walk you through everything you need to know to become a blush expert. You will learn how to apply blush for your face shape, choose the perfect formula for your skin type, and master the specific application techniques that will enhance your natural beauty. By the end of this article, you will have the confidence to pick up your brush and apply your makeup with intention, ensuring that your inner glow is perfectly reflected on the outside.
How to Apply Blush for Your Face Shape: A Comprehensive Guide
Step 1: Identify Your Unique Face Shape
Before you even unscrew the lid of your favorite compact, you must first determine the canvas you are working with. Standing in front of a mirror with good natural lighting is the best way to start this process. Pull your hair back completely so you can see the perimeter of your face clearly, including your hairline and jawline. Look closely at the widest part of your face and the shape of your jaw. If your face is about as wide as it is long and you have a rounded jawline, you likely have a round face shape. If your face is longer than it is wide but usually has a rounded jaw, you fall into the oval category.
Step 2: Choose the Right Blush Formula
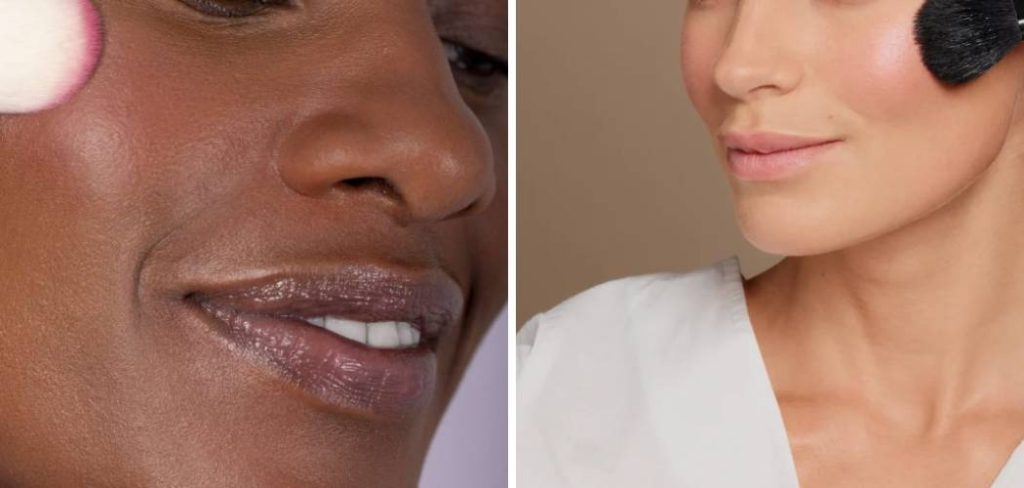
Selecting the correct formula is just as important as where you put it because the texture dictates how the product sits on your skin and how easily it blends. Powder blush is the most common and is excellent for beginners because it is easy to control and build up gradually. It works particularly well for those with oily skin or for anyone who wants a long-lasting matte finish. If you have dry or mature skin, cream blushes are a fantastic alternative because they mimic the natural texture of skin and provide a dewy, hydrated glow. They melt into the complexion rather than sitting on top of it,

Step 3: Application for Round Faces
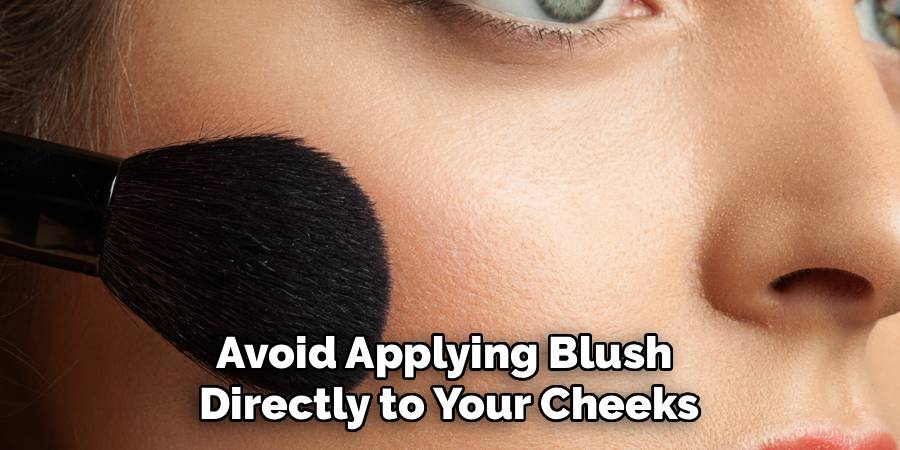
If you have a round face, your primary goal is usually to add definition and structure to soft, curved features. You want to create the illusion of more angular cheekbones and a slightly longer face shape to counter the natural fullness. To achieve this, avoid applying blush directly to the apples of your cheeks, as this accentuates roundness and can make the face look wider. Instead, look for your cheekbone and place the color slightly lower down, almost where you would place a contour product, and blend it upwards towards your temples.
Step 4: Application for Oval Faces
The oval face shape is often cited as the most balanced because the proportions are generally even, with the forehead being slightly wider than the chin. Because of this natural symmetry, you do not need to do much corrective work with your makeup. Your goal is simply to add a healthy flush that enhances your existing features without throwing off the balance. You have the freedom to follow the natural line of your cheekbone without worrying too much about widening or slimming the face.
Step 5: Application for Heart-Shaped Faces
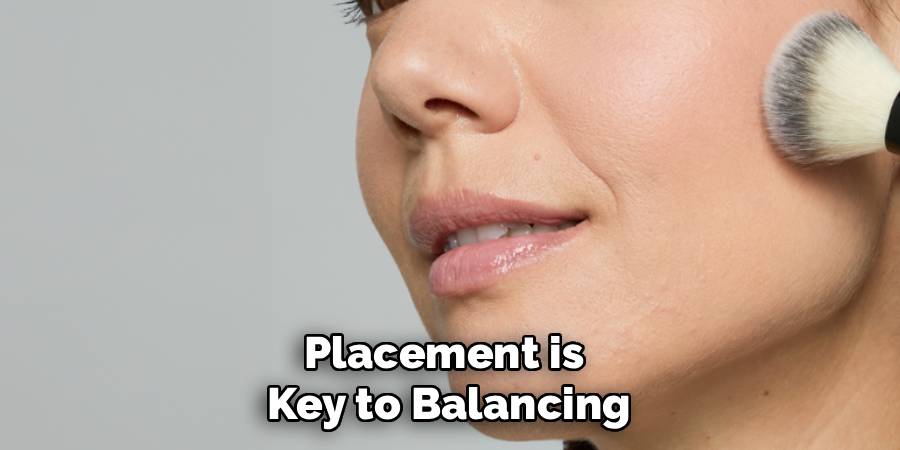
Heart-shaped faces are characterized by a wider forehead and high, prominent cheekbones that taper down to a narrow, often pointed chin. This shape can sometimes look a bit top-heavy, so the objective with blush is to soften the strong cheekbones and draw attention away from the point of the chin, creating a softer overall look. You want to avoid adding more width to the top half of the face, so placement is key to balancing the narrower lower half.
Step 6: Application for Square Faces
Square faces are defined by a strong, angular jawline and a forehead that is roughly the same width. While these features are striking and architectural, many people with square faces want to use makeup to soften the sharp angles and introduce some roundness to the center of the face. Unlike round faces where you avoid the apples, square faces benefit greatly from hitting the apples of the cheeks directly. This concentration of color in the center draws the eye inward, distracting from the width of the jaw.
Step 7: Final Blending and Setting
No matter your face shape, the final step in any blush application is blending. The most common mistake beginners make is leaving harsh stripes of color that look unnatural and jarring. Take a clean, fluffy brush—one with no product on it—and gently buff the edges of your blush. This marries the color with your foundation and bronzer, creating a seamless gradient where you cannot tell where one product ends and another begins. If you feel you have applied too much, you can go over the area with your foundation brush or sponge to mute the color slightly.
Frequently Asked Questions
How do I stop my blush from fading halfway through the day?
Blush is often the first makeup product to fade because it is placed on areas of the face that we frequently touch or that produce oil. To extend the longevity of your flush, try the sandwiching technique. Start by applying a cream or liquid blush first, then set it with a matching powder blush. The cream acts as a grip or primer for the powder, and the layering creates a multidimensional color that withstands wear much better than a single formula alone. Finishing with a robust setting spray also helps to seal the pigments onto the skin.
Can I use lipstick as blush if I don’t have a dedicated product?
Absolutely, lipstick can double as an excellent cream blush, especially when you are on the go or want a monochromatic look. Because lipsticks are generally emollient, they blend easily into the skin. Just dab a small amount onto the back of your hand to warm it up, then use your ring finger to tap it onto your cheeks. Be cautious with matte liquid lipsticks, as they dry down very quickly and can be difficult to blend once set; traditional bullet lipsticks or tinted balms are usually the safest and most user-friendly options for this hack.
What is the best blush color for my skin tone?
Choosing the right shade is about mimicking the color your cheeks naturally turn when you are flushed. Fair skin tones generally look best with soft pinks, light peaches, or cool berry shades. Medium skin tones radiate in apricots, mauves, and warm roses. Deep skin tones look stunning with rich terracottas, brick reds, and deep plums. A good rule of thumb is to look at the inside of your lip; finding a blush shade that matches that color will usually result in the most natural-looking flush for your complexion.
How high up should I apply my blush for a lifting effect?
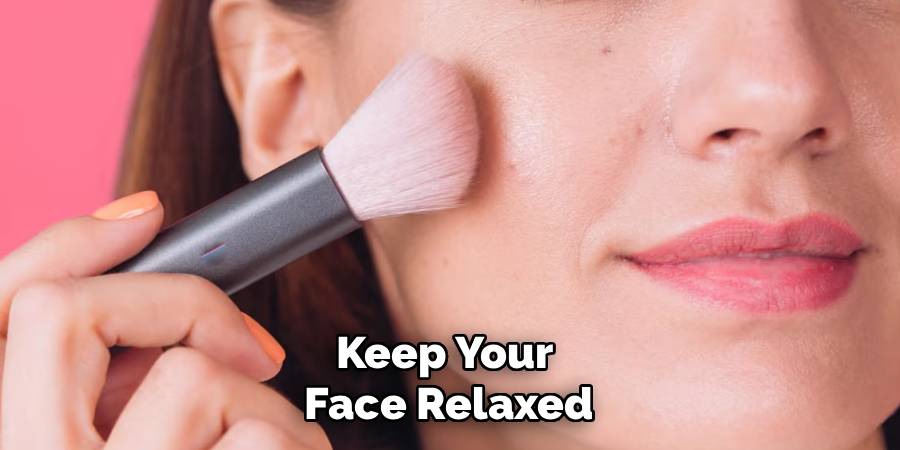
The “face lift” blush technique has become incredibly popular for its ability to defy gravity visually. Instead of smiling and applying to the apples, keep your face relaxed and place the blush on the upper part of the cheekbones, blending up towards the temples and even slightly over the outer corner of the eyebrow. This high placement draws the viewer’s eye upward, making the entire face look tighter and more lifted. It is a technique that works particularly well for mature skin or anyone feeling like their face looks tired or drawn.
Is shimmer or matte blush better for textured skin?
If you have textured skin, large pores, or acne on your cheeks, matte blush is generally the safer choice. Shimmer and glitter reflect light, which draws attention to any unevenness on the skin’s surface, effectively acting like a spotlight on bumps or pores. A matte formula will provide the color you want without emphasizing texture. If you still want a glow, you can apply a highlighter strategically on the high points of the cheekbones where the skin tends to be smoother, keeping the shimmery product away from the textured center of the cheeks.
Conclusion
Remember that makeup is ultimately a form of self-expression. While these rules are grounded in the theory of aesthetics and balance, they are not rigid laws that cannot be broken. Use this guide as a foundation to understand the “why” behind the techniques, but feel free to experiment. Maybe you have a round face but love the youthful look of blush on the apples, or perhaps you have a square jaw but prefer a sharp, contoured blush look. The best makeup technique is the one that makes you feel the most beautiful and confident when you look in the mirror. So, take these tips, grab your favorite shade, and start sculpting your way to a brighter, more defined complexion.
About the Author
Jane Hubbard is a passionate beauty expert with a wealth of experience in makeup, hair, and overall beauty techniques. After years of working as a hairdresser specialist, she followed her entrepreneurial spirit and started her own consultancy business.
Jane has always been driven by her desire to help others feel confident in their own skin, and she does this by sharing her knowledge, experiences, and practical beauty tips. Through her consultancy, she empowers individuals to embrace their unique beauty, offering tailored guidance that boosts both self-esteem and personal style.
Professional Focus
Specializes in makeup, hairstyling, and beauty consulting.
Provides personalized beauty advice, tips, and techniques to help individuals feel confident in their appearance.
Dedicated to staying up-to-date with the latest industry trends and developments.
Passionate about creating a comfortable and empowering experience for every client.
Education History
University of Craft and Design – Bachelor of Fine Arts (BFA) in Woodworking and Furniture Design
Woodworking Apprenticeships – Extensive hands-on training with skilled craftsmen to refine carpentry and furniture making techniques
Online Courses & Masterclasses – Continued education in advanced woodworking techniques, design principles, and specialized tools
Expertise:
Makeup artistry, hairstyling, and beauty consulting.
Personalized beauty techniques to enhance confidence and self-expression.
Educating clients on how to maintain their beauty routines at home.