
We have all been there. You come home after a long day, ready to unwin and start your nightly beauty routine, only to realize you are completely out of your trusty lash cleanser. Panic sets in. You know that sleeping with dirty lashes is a recipe for disaster, leading to potential infections, poor retention, and the dreaded premature shedding of those expensive extensions. Keeping your lash extensions clean is the single most important rule of lash care, yet it is the step that many beginners struggle with the most. While professional products are always the gold standard, life happens, and sometimes you need a safe, effective alternative to get you through until your next restock.

Understanding how to wash lash extensions without lash shampoo is a vital skill for any lash enthusiast. It saves you from skipping a wash and allows you to maintain that fluffy, fresh-set look even when you are between products. This guide is designed to help you navigate this process safely using items you likely already have at home.
We will walk you through a gentle, effective method that removes oil, makeup residue, and pollutants without compromising the adhesive bond that keeps your extensions in place. Whether you are a total beginner or a seasoned pro looking for a backup plan, this guide ensures your lashes stay healthy, clean, and beautiful.
Step-by-Step Guide to DIY Lash Cleansing
Step 1: Prepare Your Materials and Workspace
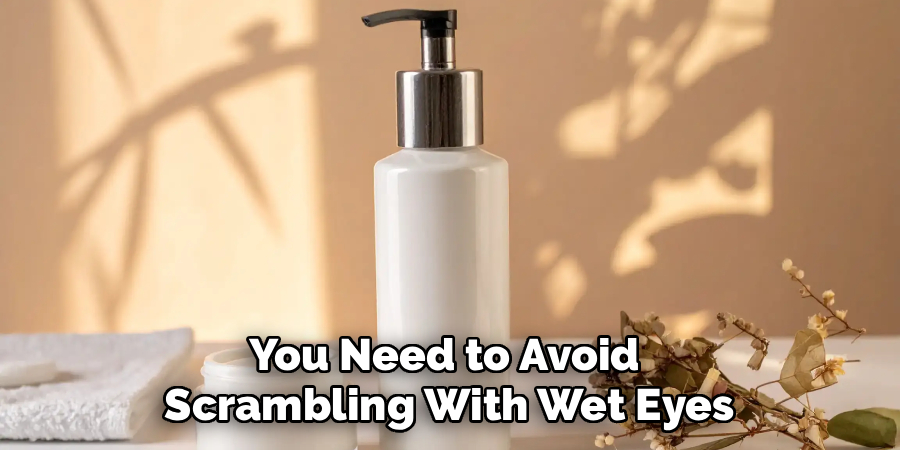
Before you begin the cleansing process, it is essential to gather everything you need to avoid scrambling with wet eyes. You want to create a calm, well-lit environment, preferably in front of a bathroom mirror where you can see the details of your lash line clearly. You will need a source of lukewarm water, a clean, small mixing container, and a designated soft bristle brush or a clean spoolie. If you do not have a cleansing brush, your clean fingertips can work in a pinch, but a brush gets deeper between the lashes.
Ensure you also have a lint-free towel or paper towel nearby for drying. Regular cotton rounds or fluffy towels should be avoided at all costs because the tiny fibers can snag on your extensions, ripping them out or leaving white fuzz behind. Finally, ensure your hands are thoroughly washed with antibacterial soap before touching your face. Introducing new bacteria to your eye area defeats the purpose of washing your lashes, so hygiene is the priority here.
Step 2: Create a Safe Cleaning Solution
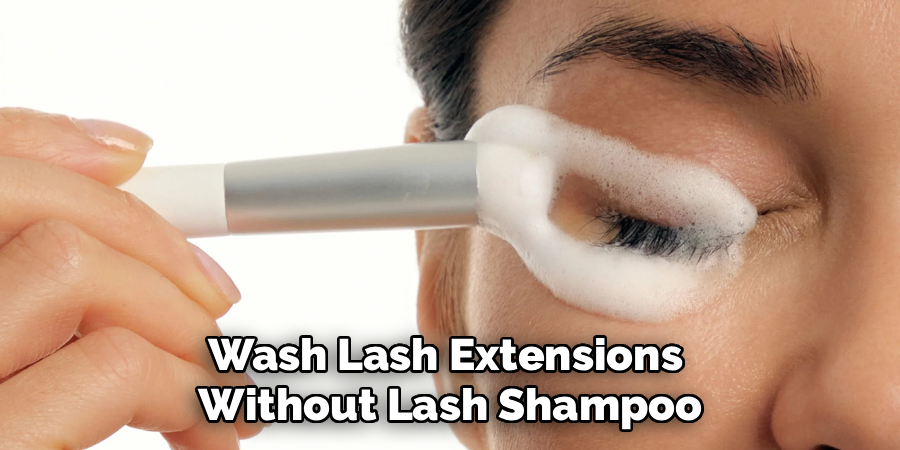
The most critical aspect of learning how to wash lash extensions without lash shampoo is mixing the right DIY solution. You cannot simply grab any soap from your counter; many face washes contain oils, glycols, or emollients that will break down the cyanoacrylate adhesive used to bond the extensions to your natural lashes. The safest homemade alternative is a mixture of distilled water and oil-free baby shampoo.
In your small container, mix about one tablespoon of lukewarm distilled water with a dime-sized drop of oil-free baby shampoo. Stir this mixture gently until it is fully combined. You want a diluted solution that is strong enough to cut through facial oils and makeup residue but gentle enough not to irritate your eyes. Alternatively, some people use diluted micellar water, provided it is explicitly labeled as oil-free. Whatever you choose, double-check the ingredients list for oils, as even trace amounts can cause your extensions to slide off prematurely.
Step 3: Gentle Application of the Cleanser
Once your solution is ready, it is time to apply it to your eyes. Dip your cleansing brush or your clean ring finger into the mixture. Close one eye and gently pat the solution onto the eyelid and the lashes. The key word here is “gentle.” You never want to rub, tug, or pull at the extensions.
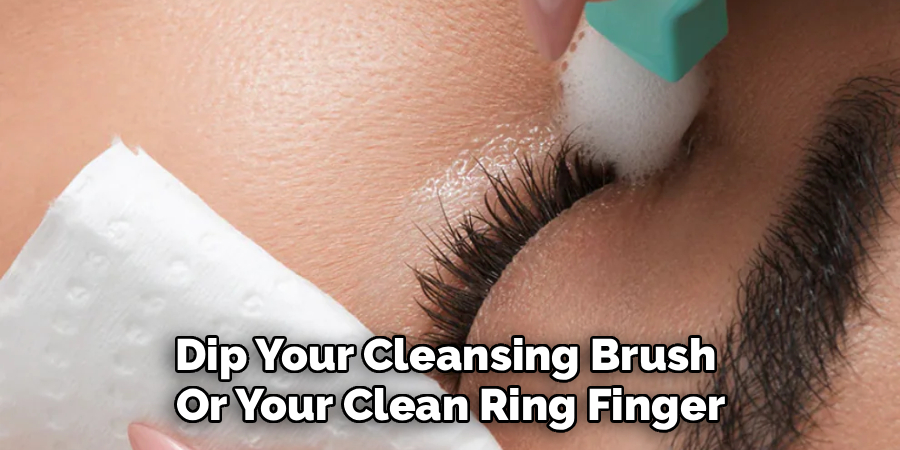
Apply the mixture starting from the brow bone and working your way down to the tips of the lashes. Allow the soapy water to saturate the lashes for a few seconds to help break down any stubborn mascara, eyeliner, or natural oils that have accumulated throughout the day. If you are using your fingers, use a light tapping motion rather than a wiping motion. This ensures that you are depositing the cleanser exactly where it needs to be without applying unnecessary friction that could twist or damage the extensions. Treat your lashes like fine silk; they require a delicate touch to maintain their shape and longevity.
Step 4: Cleansing the Lash Line Thoroughly
The lash line is where the majority of debris, dead skin cells, and bacteria accumulate. This area requires focused attention during the wash. Using your soft brush or finger, make small, circular motions right at the root of the lashes where the extensions adhere to your natural hair. This is the area most prone to blepharitis—an inflammation of the eyelids caused by bacterial overgrowth—so thorough cleansing here is non-negotiable.
Be meticulous but cautious. You want to dislodge any buildup sitting between the lashes without scrubbing the adhesive bond too aggressively. If you wear heavy eye makeup, you may need to repeat this step twice to ensure every trace of pigment is gone. Make sure you are cleaning the skin of the eyelid as well, as oils from the lid travel down to the lashes. A clean eyelid promotes a clean lash line. Take your time with this step, as it is the most crucial part of maintaining healthy natural lashes underneath your extensions.
Step 5: Rinsing with Lukewarm Water
After you have thoroughly cleansed the lashes and the eyelid, it is time to rinse. The water temperature is very important; hot water can warp the curl of synthetic lashes and soften the glue, while ice-cold water might not effectively wash away the soap residue. Lukewarm water is the perfect middle ground.

Cup your hands with fresh water and gently splash it over your closed eye. Repeat this several times until you are certain that all the soapy solution has been removed. Leaving soap residue on the lashes can cause itching, irritation, and a white, chalky appearance once they dry. If you have a handheld fan or a detachable shower head with a gentle mist setting, you can use that as well, but avoid high-pressure water streams directly on the face. The goal is to let the water flow over the lashes naturally to carry away the impurities and the cleanser without applying pressure that could twist the extensions.
Step 6: Proper Drying Technique
Once your lashes are rinsed, they will look clumped together and heavy with water. Do not panic; this is normal. The drying phase requires patience. Take your lint-free towel or paper towel and gently pat the area around your eyes to soak up excess water from your face. Do not rub the towel over your eyes.
To dry the actual lashes, you can gently press the lint-free cloth against the closed lid to absorb moisture, but do not swipe. The best method for drying extensions is to let them air dry or use a small handheld fan. If you use a fan, hold it about a foot away from your face and direct the cool air toward your lashes for about 30 to 60 seconds. This helps fluff them back up and ensures that moisture doesn’t get trapped between the dense lashes, which can encourage bacterial growth. Never use a hair dryer on a hot setting, as the heat can singe the tips of synthetic lashes and straighten out their beautiful curl.
Step 7: Brushing and Grooming
The final step in mastering how to wash lash extensions without lash shampoo is grooming. You should never brush your lashes while they are soaking wet, as wet hair is more elastic and prone to snapping, and the weight of the water puts extra stress on the hair follicle. Wait until they are at least damp or mostly dry.
Take your clean spoolie wand and support your lashes with your finger underneath them. Gently twirl the spoolie through the lashes, starting from the middle and working toward the tips. Avoid digging the brush into the very base of the lashes where the glue bond is, as this can snag. Brushing helps to separate the extensions, fanning them back out into their perfect, fluffy shape. It also ensures that they are aligned correctly and not crisscrossed. This final grooming step is what gives you that “fresh from the salon” look and prevents your lashes from looking messy or unkempt throughout the day.
Frequently Asked Questions
Can I use regular face wash if I avoid the eye area?
It is generally risky to use regular face wash near your extensions, even if you try to avoid the eyes. When you rinse your face, water travels, and it inevitably carries some of the cleanser into your lash line. Most standard facial cleansers contain ingredients like glycol, oils, and moisturizing agents that are notoriously bad for lash adhesive. These ingredients can weaken the bond, causing your extensions to fall out much faster than they should. If you must use a regular face wash, use a washcloth to wipe the lower part of your face and forehead, avoiding the eye socket entirely, and then use your safe DIY solution for the eyes specifically.
How often should I be washing my lash extensions?
You should wash your lash extensions every single day. Many beginners make the mistake of thinking that washing them less often will help them last longer, but the opposite is true. Your skin naturally produces sebum (oil), and your eyes collect dust and allergens daily. If you do not wash this away, the oil builds up and eats away at the glue. Furthermore, not washing daily can lead to lash mites and infections. If you wear eye makeup or have particularly oily skin, you might even benefit from washing them twice a day—once in the morning and once at night—to ensure optimal retention and hygiene.
Is baking soda a safe alternative to lash shampoo?
While some online forums suggest using a baking soda and water paste, it is generally not recommended by lash professionals. Baking soda is abrasive and has a high pH level, which can be very drying and irritating to the delicate skin on your eyelids. Over time, it can cause the extensions to become brittle and lose their sheen. Additionally, if the gritty particles are not rinsed out perfectly, they can cause significant friction and scratching on the eye itself. It is much safer to stick to the diluted, oil-free baby shampoo method or distilled water if you are in a bind, as these are far gentler on both the eyes and the adhesive.
What happens if I just use water to clean them?
Using water alone is better than nothing, but it is not sufficient for proper hygiene. Water cannot break down the oils produced by your skin or the polymers found in makeup and skincare products. Think of it like washing greasy dishes without dish soap; the water just slides right over the grease without removing it. To effectively clean lash extensions, you need a surfactant (a cleansing agent) that can lift the oil and debris away from the lash surface. Relying solely on water will eventually lead to buildup, which looks unsightly and significantly shortens the lifespan of your lash set.
Can I use makeup remover wipes on my extensions?
No, you should avoid using makeup remover wipes on your lash extensions. Most wipes are saturated with oils, glycols, and emollients to help break down waterproof makeup, all of which are enemies of lash glue. furthermore, the physical material of the wipe—usually cotton or a fibrous blend—can snag on the base of the extensions and rip them out. The wiping motion itself is also too aggressive for extensions. If you need to remove eye makeup, use an oil-free liquid makeup remover on a lint-free applicator or Q-tip, working carefully around the lashes rather than wiping over them.
Conclusion
maintaining the health and longevity of your beauty investment does not have to be complicated, even when you run out of your professional supplies. Knowing how to wash lash extensions without lash shampoo is a valuable trick to have up your sleeve, ensuring that you never have to compromise on hygiene. By following the steps outlined above—preparing a safe oil-free solution, cleaning gently, and drying properly—you can keep your lashes looking fluffy and full for weeks.
Remember, while this DIY method is a fantastic temporary fix, investing in a high-quality, designated lash cleanser is always the best long-term choice for the health of your natural lashes. However, until that new bottle arrives, you can rest easy knowing that your at-home routine is safe, effective, and keeping your lashes in pristine condition. Consistency is key, so keep scrubbing (gently!) and enjoy the confidence that comes with a perfectly clean, fluttery set of lashes.
About the Author
Jane Hubbard is a passionate beauty expert with a wealth of experience in makeup, hair, and overall beauty techniques. After years of working as a hairdresser specialist, she followed her entrepreneurial spirit and started her own consultancy business.
Jane has always been driven by her desire to help others feel confident in their own skin, and she does this by sharing her knowledge, experiences, and practical beauty tips. Through her consultancy, she empowers individuals to embrace their unique beauty, offering tailored guidance that boosts both self-esteem and personal style.
Professional Focus
Specializes in makeup, hairstyling, and beauty consulting.
Provides personalized beauty advice, tips, and techniques to help individuals feel confident in their appearance.
Dedicated to staying up-to-date with the latest industry trends and developments.
Passionate about creating a comfortable and empowering experience for every client.
Education History
University of Craft and Design – Bachelor of Fine Arts (BFA) in Woodworking and Furniture Design
Woodworking Apprenticeships – Extensive hands-on training with skilled craftsmen to refine carpentry and furniture making techniques
Online Courses & Masterclasses – Continued education in advanced woodworking techniques, design principles, and specialized tools
Expertise:
Makeup artistry, hairstyling, and beauty consulting.
Personalized beauty techniques to enhance confidence and self-expression.
Educating clients on how to maintain their beauty routines at home.