

For decades, the secret to the flawless, poreless skin you see on movie screens and magazine covers was locked away in professional makeup trailers. That secret was airbrushing. Once reserved exclusively for Hollywood celebrities and runway models, airbrush makeup has now made its way into the daily routines of beauty enthusiasts everywhere.
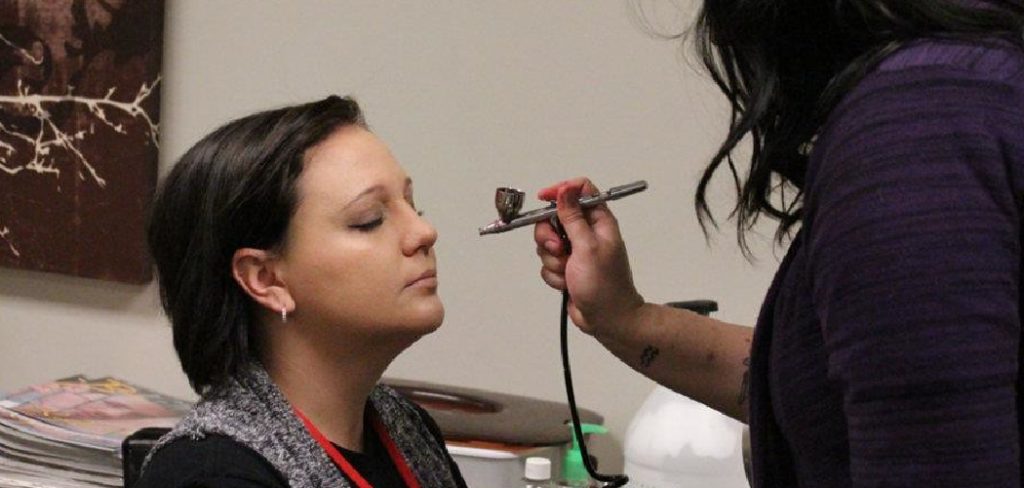
The rise of airbrush makeup stems from its ability to deliver a pristine, natural-looking complexion that traditional brushes and sponges simply cannot match. By spraying a fine mist of foundation onto the skin, the airbrush technique creates a lightweight, even layer that blurs imperfections and lasts through heat, humidity, and long hours.
This comprehensive guide on how to use airbrush makeup will walk you through the entire process.
What Will You Need?
To get started with airbrush makeup, you need a few essential pieces of equipment. Most brands sell these items together in a starter kit, which is the most cost-effective way to build your collection.
- Airbrush Compressor: This is the machine that generates the air pressure. Most cosmetic compressors are small, quiet, and feature an adjustable dial to control the airflow (measured in PSI).
- Airbrush Stylus (Gun): This is the pen-like tool you hold in your hand. It features a small cup on top to hold the makeup and a trigger to control the release of the fluid.
- Airbrush Makeup: You cannot use regular foundation in an airbrush machine because it is too thick and will clog the nozzle. You must purchase specially formulated airbrush foundation, which is much thinner.
- Airbrush Cleaner: Proper maintenance is non-negotiable. You need a liquid cleaner specifically designed to break down your airbrush makeup so you can flush out the stylus after every use.
10 Easy Steps on How to Use Airbrush Makeup
Mastering your equipment takes a little practice, but the process is highly straightforward once you understand the mechanics. Follow these ten detailed steps to achieve a perfectly airbrushed complexion.
Step 1: Prep Your Skin Thoroughly
Great makeup always starts with great skincare. Because airbrush makeup creates a thin, microscopic film over your face, any dry patches, dead skin cells, or excess oil will interfere with the final result. Start by cleansing your face with a gentle face wash to remove impurities.
Follow up with a mild chemical exfoliant to smooth away any rough texture. Next, apply a lightweight, oil-free moisturizer. Wait at least five to ten minutes to allow your skin to fully absorb the moisturizer. If your skin is still damp or greasy when you spray the foundation, the makeup will slide right off or separate upon contact. Taking the time to properly hydrate and balance your skin ensures the smoothest possible canvas for the micro-mist.

Step 2: Prime for Perfection
Applying a primer acts as a binding agent between your skin and the airbrush foundation. However, you must choose your primer carefully. The golden rule of airbrushing is that your primer must match the base of your foundation. If you use a water-based airbrush foundation, you must use a water-based primer. If your foundation is silicone-based, opt for a silicone-based primer. Mixing incompatible bases will cause the makeup to pill, separate, or streak on your face. Apply a thin layer of primer using your fingertips, focusing on your T-zone or any areas where you have visible pores. Give the primer a full two minutes to set and become slightly tacky before moving on to the next step.
Step 3: Assemble and Test Your Equipment
Before you pour any makeup into your stylus, you need to ensure your machine is running correctly. Connect the air hose to both the compressor and the stylus. Plug in the compressor and turn it on. You should feel a steady stream of air flowing from the nozzle. To test the fluid dynamics, add a few drops of water (or airbrush cleaner) into the makeup cup. Pull the trigger back gently and spray the water onto a tissue or paper towel. This quick test serves two purposes: it guarantees there are no leftover clogs from your last application, and it allows you to get a feel for the trigger tension before you start applying expensive makeup to your face.

Step 4: Load the Foundation
Airbrush foundation formulas separate when they sit in their bottles because the pigment particles settle at the bottom. Shake the bottle of foundation vigorously for at least twenty seconds to ensure the formula is completely blended. Open the bottle and dispense four to six drops of foundation directly into the cup of your stylus. If you want to mix two shades to perfectly match your skin tone, you can add drops of both colors into the cup. To mix them, place a tissue over the nozzle, gently pull the trigger, and let the air bubble back up into the cup. This technique, known as back-bubbling, flawlessly blends custom shades right inside the stylus.
Step 5: Find the Right Distance and Angle
Positioning the stylus correctly is critical for achieving an even application. Hold the airbrush gun approximately four to six inches away from your face. If you hold the stylus too close, the makeup will pool on your skin, resulting in wet, heavy, and uneven patches. If you hold it too far away, the mist will dry before it reaches your face, causing the makeup to look powdery and cakey. Keep your elbow relaxed and maintain a perpendicular angle to your skin. The air stream should hit your face directly, not at a sharp slant. Take a deep breath, keep your eyes closed, and prepare to start the airflow.
Step 6: Master the Trigger Control
Most airbrush guns use a dual-action trigger mechanism. Pushing down on the trigger releases the air, and pulling the trigger back releases the makeup. The key to a natural finish is pulling the trigger back only slightly. You want to release a very fine, nearly invisible mist of makeup. If you pull the trigger all the way back, you will blast your face with a heavy stream of liquid, completely ruining the application. Practice pulling the trigger back just a millimeter or two. You should feel a cool breeze on your face and see a gradual change in your skin tone, but your face should never feel wet or saturated.

Step 7: Apply in Continuous Circular Motions
Once you have found the sweet spot on your trigger, it is time to cover your face. Keep the stylus moving at all times. If you hold the gun still in one place while releasing makeup, you will create a harsh, concentrated spot of color. Move the stylus in small, continuous, overlapping circles. Start at the top of your forehead and slowly work your way down the perimeter of your face, moving toward your cheeks, jawline, and chin. Keep your hand relaxed and let the air stream do the blending for you. The continuous circular motion ensures that the microscopic dots of foundation overlap evenly, eliminating any streaks or lines of demarcation.
Step 8: Build Coverage Gradually
One of the biggest mistakes beginners make is trying to achieve full coverage in a single pass. Airbrush makeup is designed to be built up in thin, sheer layers. Complete one light pass over your entire face. Let the makeup dry for about ten to fifteen seconds. Assess your skin in the mirror. If you have areas that require more coverage, such as acne scars, redness, or dark circles, go back and apply a second light layer exclusively to those target zones. Working in ultra-thin layers guarantees that the makeup remains breathable and natural. You can easily achieve full, opaque coverage without ever compromising the lightweight feel of the application.
Step 9: Highlight and Contour
You can use your airbrush machine for much more than just foundation. Once your base is complete, you can flush out the cup and add airbrush blush, bronzer, or highlighter. To apply bronzer or contour, drop two drops of a darker shade into the cup. Hold the stylus slightly closer to your face—about three inches away—and pull the trigger back very lightly. Sweep the airbrush along the hollows of your cheeks, the sides of your nose, and your jawline. For blush, aim the stylus at the apples of your cheeks and use tiny circular motions. Because you are applying liquid over liquid, the blush and contour will melt seamlessly into your foundation.
Step 10: Clean Your Equipment Thoroughly
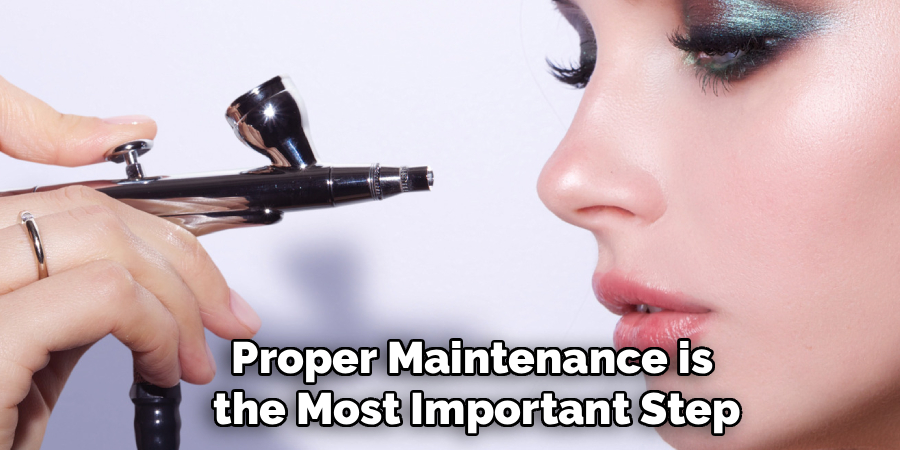
Proper maintenance is the most important step of the entire process. If you allow makeup to dry inside the stylus, it will clog the delicate nozzle and ruin the machine. Immediately after you finish your makeup, pour a few drops of airbrush cleaner into the cup. Use an old makeup brush or a cotton swab to loosen any pigment clinging to the sides of the cup. Spray the cleaner through the nozzle into a tissue or a designated cleaning pot until the spray runs completely clear. Perform the back-bubbling technique once or twice with the cleaner to dislodge any stubborn makeup trapped in the needle. Store your stylus safely in its holder until your next use.
5 Things You Should Avoid
To guarantee a flawless application every time, make sure you avoid these common pitfalls.
1. Do Not Hold the Stylus Too Close
Spraying from a distance of one or two inches will cause the liquid to blast onto the skin and run in streaks. Always maintain a minimum distance of four inches.
2. Do Not Pull the Trigger All the Way Back
Pulling the trigger back entirely releases too much product at once. Keep the trigger pulled back only a fraction of an inch to maintain a sheer, controlled mist.
3. Do Not Mix Incompatible Formulas
Never pour traditional liquid foundation into an airbrush machine. Furthermore, never mix water-based primers with silicone-based airbrush foundations, as the products will separate on your face.
4. Do Not Stop Moving Your Hand
Hesitating or stopping the stylus while the makeup is spraying will create heavy, concentrated dots of color. Keep your hand moving in constant, fluid circles.
5. Do Not Skip the Cleaning Process
Leaving leftover makeup in the cup overnight will lead to severe clogs. Always flush your system with a dedicated airbrush cleaner immediately after you finish your routine.
Conclusion
Transitioning to airbrush makeup opens up a whole new world of flawless, long-lasting beauty. While the equipment might seem daunting at first, breaking the process down into manageable steps makes it accessible for anyone.
By thoroughly prepping your skin, mastering your trigger control, and remembering to apply the makeup in sheer, continuous layers, you will easily achieve a professional-level complexion right at home.
Hopefully, this guide on how to use airbrush makeup has demystified the airbrush makeup process and given you the confidence to try it for yourself. With a little practice, you’ll be able to create a flawless, photo-ready complexion with ease.

About the Author
Jane Hubbard is a passionate beauty expert with a wealth of experience in makeup, hair, and overall beauty techniques. After years of working as a hairdresser specialist, she followed her entrepreneurial spirit and started her own consultancy business.
Jane has always been driven by her desire to help others feel confident in their own skin, and she does this by sharing her knowledge, experiences, and practical beauty tips. Through her consultancy, she empowers individuals to embrace their unique beauty, offering tailored guidance that boosts both self-esteem and personal style.
Professional Focus
Specializes in makeup, hairstyling, and beauty consulting.
Provides personalized beauty advice, tips, and techniques to help individuals feel confident in their appearance.
Dedicated to staying up-to-date with the latest industry trends and developments.
Passionate about creating a comfortable and empowering experience for every client.
Education History
University of Craft and Design – Bachelor of Fine Arts (BFA) in Woodworking and Furniture Design
Woodworking Apprenticeships – Extensive hands-on training with skilled craftsmen to refine carpentry and furniture making techniques
Online Courses & Masterclasses – Continued education in advanced woodworking techniques, design principles, and specialized tools
Expertise:
Makeup artistry, hairstyling, and beauty consulting.
Personalized beauty techniques to enhance confidence and self-expression.
Educating clients on how to maintain their beauty routines at home.