
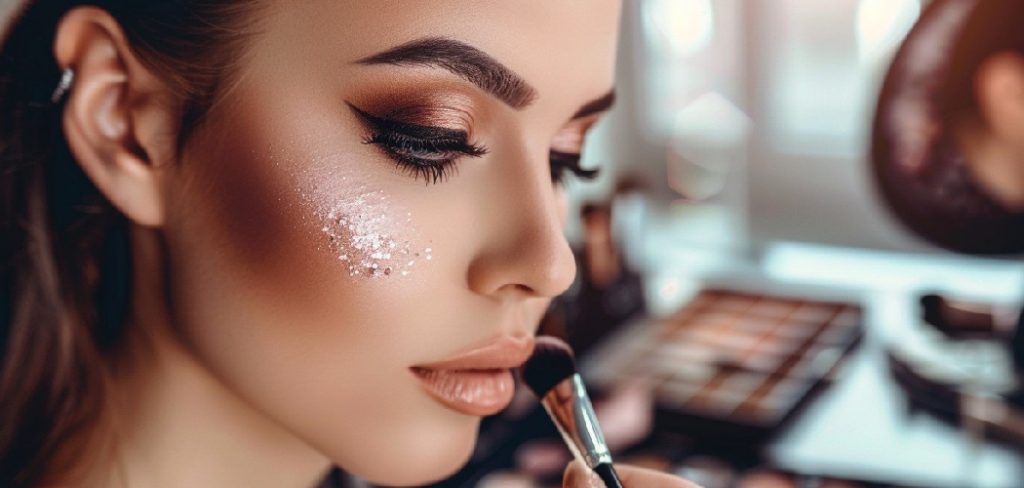
Blending makeup is an art that can completely transform your look, whether you’re aiming for a subtle, everyday style or preparing for a glamorous event. Mastering the skill of blending ensures that harsh lines disappear and colors merge smoothly, giving your skin a flawless finish. Beginners may find it overwhelming at first, but with patience and the right technique, anyone can achieve professional-looking results.
Making time to practice and experiment with different textures and tools will boost your confidence and help you understand what works best for your skin type. This guide on how do you blend makeup walks you through everything you need to know, from essential tools to detailed steps, practical tips, and answers to common questions.
Tools and Materials You’ll Need
- Foundation (Liquid, Cream, or Powder)
- Concealer
- Primer
- Beauty Blender Sponge
- Foundation and Blending Brushes
- Setting Powder or Spray
- Blush, Bronzer, and Highlighter
- Clean Towel or Blotting Papers
- Makeup Remover for Correction
- Mirror With Good Lighting
10 Step-by-step Guidelines on How Do You Blend Makeup
Step 1: Start With a Clean Canvas
Before diving into makeup, always cleanse your face thoroughly to remove dirt, oil, or leftover products. This step ensures your pores are clean and helps makeup adhere better to your skin. Follow with a gentle toner to balance your skin, prepping it for moisturization.
Finish your skincare prep by applying a suitable moisturizer and allowing it to absorb for a few minutes. Well-hydrated skin provides a smooth surface for blending makeup, preventing patchiness or a cakey appearance later on.
Step 2: Apply Primer For Even Texture
Primer is an essential step that smooths your skin’s surface and helps makeup last longer. Focus on areas that tend to get oily or have larger pores, like your T-zone and cheeks. Use your fingers or a brush to gently work the primer into your skin.
Allow the primer to set for one to two minutes. This creates a barrier that prevents foundation and other products from settling into fine lines or uneven texture, making blending easier and the finished look more natural.

Step 3: Use The Right Foundation Shade
Choosing the correct foundation shade is crucial for seamless blending. Test a few shades along your jawline to find your perfect match, considering your undertone as well. Dot foundation on your cheeks, forehead, nose, and chin.
Use a damp beauty sponge or brush to blend the foundation outward in gentle, tapping motions. Avoid harsh rubbing, and take your time to ensure the product sinks into the skin and doesn’t sit on top, which could create streaks.
Step 4: Blend With A Sponge For a Natural Finish
A damp beauty blender or sponge is ideal for creating a natural, airbrushed effect. After applying foundation, use the sponge to bounce—never drag—on your skin. This action blends the product without disturbing the base you’ve created.
Focusing especially on the hairline, jawline, and neck, feather out the foundation so there are no visible edges. This ensures your makeup appears seamless and integrated with your natural skin color.
Step 5: Conceal Imperfections Gently
Apply concealer to any problem areas, such as dark circles, redness, or blemishes. Use a small brush or the tip of your finger to tap concealer gently into the skin, rather than rubbing it in, to maintain coverage.
Once the concealer is placed, take a clean side of your sponge and lightly blend the edges so the product merges with your foundation. Blending here prevents obvious “concealer patches” and improves the overall harmony of your makeup look.
Step 6: Add Layered Color—Blush, Bronzer, Highlighter
Blending isn’t just for foundation and concealer—it’s key for blush, bronzer, and highlighter as well. Apply these products in thin layers, building up to the color intensity you prefer. Use fluffy brushes aimed at soft, sweeping strokes.
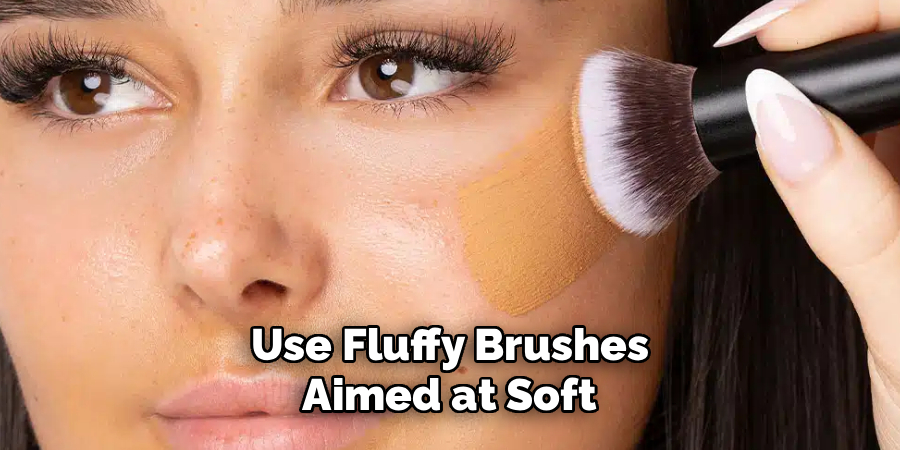
After applying each product, blend the edges where blush meets bronzer or highlighter so that the colors transition smoothly. Avoid harsh lines by using a clean brush to go over the borders of each section for a naturally radiant look.
Step 7: Set Your Base To Lock In Blending
Setting your makeup with a light layer of translucent powder helps maintain the smooth blended finish. Use a fluffy brush to apply powder only where needed, such as the T-zone or areas prone to shine.
For a more dewy look, opt for a setting spray instead. Hold the bottle at arm’s length and mist it gently over your face. This locks in your seamless blend, making it last longer while preventing caking or creasing throughout the day.
Step 8: Blend Eye Makeup For A Polished Look
Eyeshadows require extra attention to blending, especially when using multiple shades. Start with transition colors and blend each layer with a clean blending brush, using windshield wiper or circular motions for soft edges.
Take a clean brush between every new shade to prevent muddiness. Be patient—layer slowly, blending between each application to achieve a gradient rather than stark lines, resulting in a sophisticated eye look.
Step 9: Don’t Forget The Neck And Jawline
For the most natural result, always blend foundation and other face products slightly into the jawline and neck. This step prevents the dreaded “mask” effect, where the face is a different color than your neck.
Use light downward strokes with your brush or sponge to feather the makeup out past the jaw. This ensures a uniform, natural look even in different lighting or when your hair is pulled back.

Step 10: Check And Refine Your Blend
Before finishing, inspect your makeup in both natural and artificial lighting. Use a handheld mirror to check for any unblended lines or product buildup, especially around the nose, hairline, and under the eyes.
Correct any uneven spots with your sponge or a clean brush, ensuring everything looks smooth. Take your time here—a little extra effort ensures your makeup remains flawless and perfectly blended throughout the day.
Following these steps on how do you blend makeup well, you should now have a flawless, natural-looking finish.
Additional Tips
Always clean your brushes and sponges regularly to prevent product build-up and skin irritation. Work in natural daylight whenever possible to see the true effect of your blending. Less is more—it’s easier to add product than it is to remove it, so start light and build gradually. Don’t rush the process; blending may take a little time, but it delivers superior results. Lastly, choose products that suit your skin type to enhance both blending and longevity of your makeup.
It’s also important to keep your makeup tools clean in order to avoid bacteria build-up. A great tip is to wash your brushes weekly with a mild soap and warm water, then lay them flat to air dry. This will not only keep your skin healthy, but it will also help prolong the life of your brushes.
Frequently Asked Questions
Q1: How Do I Prevent My Makeup From Looking Cakey?
A1: The best way to prevent a cakey appearance is to apply products in thin layers and blend each layer thoroughly. Always prep your skin with moisturizer and primer to create a smooth surface. Use a damp sponge for foundation and concealer application. Avoid over-powdering, and use setting spray to melt products together for a natural finish.
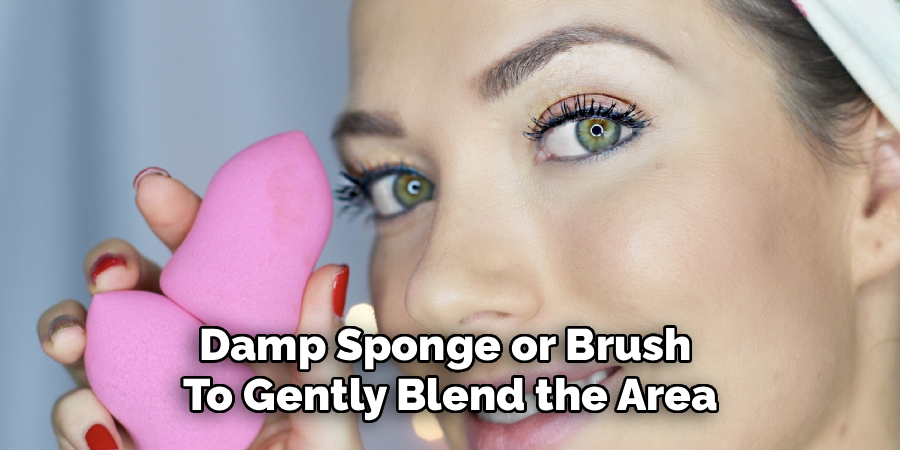
Q2: What If I Make A Mistake While Blending?
A2: If you notice streaks or harsh lines, use a clean, damp sponge or brush to gently blend the area. Sometimes removing excess product with a blotting paper or tissue can help. Don’t be afraid to blend over mistakes with a touch of foundation or powder. With practice, fixing blending errors will become easier and less noticeable.
Q3: Do Different Skin Types Require Different Blending Techniques?
A3: Yes, skin type can influence blending technique and product choice. For dry skin, use creamy, hydrating formulas that blend easily. Oily skin types may benefit from oil-free or matte products, setting with powder for longer wear. Always use brushes and sponges suited to your product’s texture for the best result.
Q4: How Can I Make My Blended Makeup Last Longer?
A4: To prolong the wear of your makeup, always start with a primer and end with a setting spray or powder. Choose long-wearing, high-quality products and build thin layers for durability. Touch up with blotting papers or a light dusting of powder if you notice shine or fading throughout the day.
Conclusion
Blending makeup is a skill every makeup lover should master, as it forms the foundation of any flawless look. By using the right tools, following systematic steps on how do you blend makeup, and applying expert tips, you can achieve natural, seamless-looking makeup.
Don’t get discouraged by early mistakes—every successful look adds to your confidence and technique. Remember, practice is key, and with time, blending will feel effortless. Enjoy the process and experiment with new styles to find what works best for you!
About the Author
Jane Hubbard is a passionate beauty expert with a wealth of experience in makeup, hair, and overall beauty techniques. After years of working as a hairdresser specialist, she followed her entrepreneurial spirit and started her own consultancy business.
Jane has always been driven by her desire to help others feel confident in their own skin, and she does this by sharing her knowledge, experiences, and practical beauty tips. Through her consultancy, she empowers individuals to embrace their unique beauty, offering tailored guidance that boosts both self-esteem and personal style.
Professional Focus
- Specializes in makeup, hairstyling, and beauty consulting.
- Provides personalized beauty advice, tips, and techniques to help individuals feel confident in their appearance.
- Dedicated to staying up-to-date with the latest industry trends and developments.
- Passionate about creating a comfortable and empowering experience for every client.
Education History
- University of Craft and Design – Bachelor of Fine Arts (BFA) in Woodworking and Furniture Design
- Woodworking Apprenticeships – Extensive hands-on training with skilled craftsmen to refine carpentry and furniture making techniques
- Online Courses & Masterclasses – Continued education in advanced woodworking techniques, design principles, and specialized tools
Expertise:
- Makeup artistry, hairstyling, and beauty consulting.
- Personalized beauty techniques to enhance confidence and self-expression.
- Educating clients on how to maintain their beauty routines at home.