
BB cream, or “beauty balm,” has revolutionized the daily makeup routine for millions. It offers a magical combination of skincare and coverage, providing hydration, sun protection, and color correction all in one tube. While there are countless tools available on the market—from expensive stippling brushes to high-tech blending sponges—sometimes the best tools are the ones you were born with.
Using your hands allows for a level of control and warmth that synthetic tools simply cannot replicate, resulting in a finish that looks less like makeup and more like healthy, radiant skin. It is the ultimate method for busy mornings or travel when you want to pack light. However, simply smearing it on can lead to streaks or uneven patches if you aren’t careful. Mastering the technique requires a little bit of know-how. This guide is designed to walk you through how to apply BB cream with fingers to achieve a flawless, natural complexion that glows from within.
How to Apply BB Cream with Fingers: A Step-by-Step Guide
Step 1: Start with Thoroughly Clean Hands
Before you even touch your face or open your makeup tube, hygiene must be your top priority. Your hands come into contact with countless surfaces throughout the day, picking up bacteria, oils, and dirt that you definitely do not want to transfer onto your delicate facial skin. Wash your hands vigorously with warm water and antibacterial soap for at least twenty seconds. Dry them completely with a clean towel. Applying makeup with dirty fingers is the fastest way to clog pores and cause unnecessary breakouts. Starting with a sterile canvas ensures that your beauty routine remains healthy and effective. This simple preparatory step sets the stage for a clean, professional application process.
Step 2: Prepare Your Skin with Moisturizer
Even though BB cream is famous for its moisturizing properties, it should not replace your standard skincare routine entirely, especially if you have dry or combination skin. Apply your regular lightweight daily moisturizer and let it sink in for a few minutes. This creates a smooth, hydrated base that prevents the pigment in the BB cream from clinging to dry patches or settling into fine lines. Think of this as priming a wall before painting; the better the surface condition, the smoother the final result will be. A well-prepped face ensures the product glides on effortlessly rather than dragging against the skin, which is essential when learning how to apply BB cream with fingers correctly.
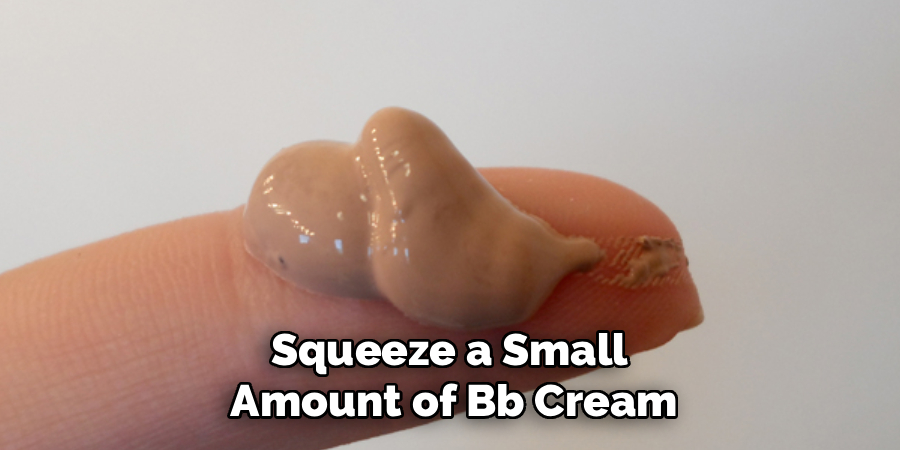
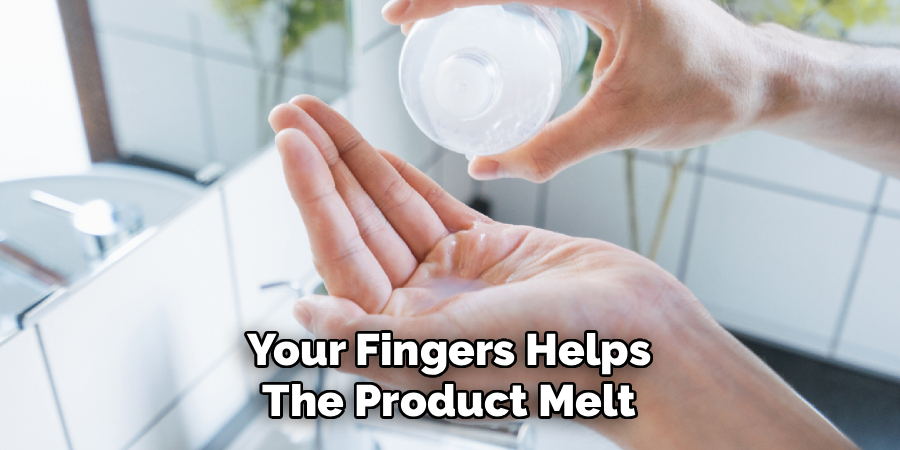
Step 3: Warm the Product Between Your Fingertips
The unique advantage of using your hands lies in the natural heat your body generates. Squeeze a small amount of BB cream—roughly the size of a pearl or a pea—onto the back of your non-dominant hand. Take a little bit of product onto your ring and middle fingers and rub them gently against your thumb. This friction warms up the waxes and oils in the formula, making the texture more emollient and pliable. Cold product can sit on top of the skin and look cakey, but warmed product melts into the pores seamlessly. This technique transforms the consistency, allowing it to fuse with your skin for that coveted “no-makeup” makeup look.
Step 4: Dot the Cream Strategically Across Your Face
Instead of swiping a large glob of product onto one area and trying to spread it out, use the dotting method for even distribution. Take the warmed product on your fingertips and gently tap small dots across your forehead, cheeks, nose, and chin. Do not forget to place a little on your neck to ensure a seamless color transition. This strategic placement ensures that you have an equal amount of product available in every zone of your face before you start blending. It prevents the common mistake of having too much coverage on the cheeks and not enough on the forehead, giving you a balanced starting point for the blending process.
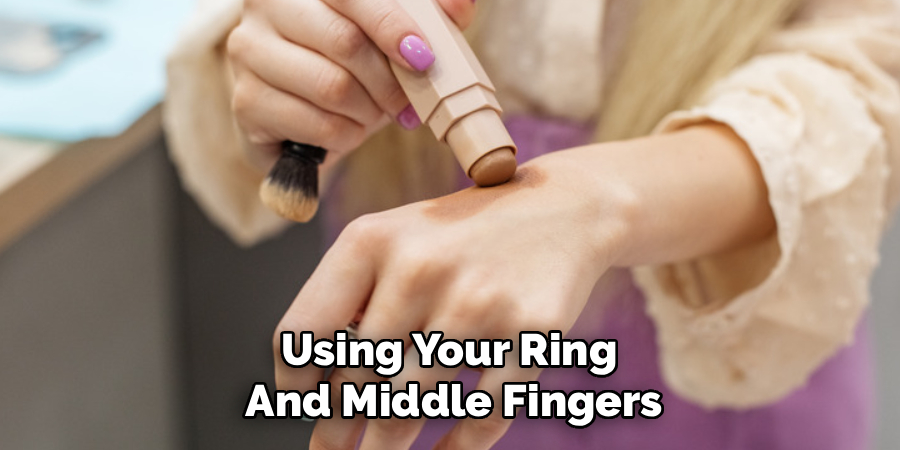
Step 5: Blend Outwards
Now begins the actual application. Using your ring and middle fingers—which naturally apply less pressure than your pointer finger—begin to blend the dots. Start from the center of your face, typically the nose, and work your way outwards toward the hairline and jawline. Use gentle, sweeping strokes initially to spread the product, and then switch to a light tapping or patting motion to press the cream into the skin. This patting technique mimics the action of a beauty sponge, helping to build coverage without leaving streak marks. By working from the center out, you ensure the most coverage is where redness usually occurs, while the edges near your hairline remain sheer and natural.
Step 6: Address Problem Areas
Once you have achieved a sheer, all-over wash of color, you may notice that certain areas need a little extra help. If you have dark circles, blemishes, or redness around the nose, do not rub more product on. Instead, squeeze a tiny additional drop of BB cream onto your finger and use a stippling or tapping motion to layer it specifically over those spots. Tapping deposits pigment exactly where you need it without disturbing the base layer you just applied. This builds coverage incrementally and avoids the heavy, cakey look that comes from applying too much product at once. This precision is a major benefit of using your fingers.
Step 7: Set the T-Zone for Longevity
The heat from your fingers helps the product melt in, but it can also transfer a bit of oil, which might make the finish too dewy for some skin types. To ensure your look lasts all day, assess your T-zone (forehead, nose, and chin). If these areas look overly shiny, lightly dust them with a translucent setting powder using a fluffy brush. Alternatively, you can use blotting papers to remove excess oil without adding more texture. This final step locks the BB cream in place and prevents it from sliding around or fading prematurely. You now have a radiant, perfected complexion that looks effortless and feels weightless.
Frequently Asked Questions
Is It Unsanitary to Apply Makeup with Your Fingers?
It is only unsanitary if you skip the most important step: washing your hands.
- Hygiene First: If you scrub your hands thoroughly with soap and water before touching your face, it is a perfectly hygienic method.
- Tool Comparison: In fact, fingers can sometimes be cleaner than brushes or sponges, which harbor bacteria if they are not washed deep-cleaned regularly.
- Avoid Touching: Just be sure not to touch other dirty surfaces (like your phone) midway through the application process.
Does Using Fingers Use More Product Than a Brush?
Actually, using your fingers typically wastes less product than using synthetic tools.
- Absorption: Sponges and brush bristles are absorbent and tend to soak up a significant amount of the liquid cream.
- Direct Application: Your skin does not absorb the makeup in the same way. The product stays on the surface of your fingertip until it is transferred to your face.
- Economy: This means you get more coverage with less product, saving you money in the long run.
Can I Use This Method for Full-Coverage Foundation?
While you technically can apply foundation with your fingers, it is often more difficult to get a flawless finish with heavier formulas.
- Texture: BB creams are sheer and emollient, making them forgiving and easy to blend by hand.
- Foundation: Full-coverage foundations are thicker and can streak easily.
- Recommendation: If you do use fingers for heavy foundation, you will need to spend extra time patting and blending to ensure there are no visible fingerprints or uneven patches.
Will Applying with Fingers Cause Wrinkles?
Applying makeup gently with your fingers will not cause wrinkles, but being rough can damage the skin over time.
- Technique Matters: Aggressive pulling, tugging, or rubbing the delicate skin around the eyes can contribute to premature aging.
- The Ring Finger: This is why beauty experts recommend using your ring finger. It is the weakest finger and naturally applies the lightest pressure.
- Gentle Touch: Always use a soft touch and rely on patting motions rather than dragging the skin.
What If the Finish Looks Streaky?
If you notice streaks after applying with your fingers, do not panic.
- Warmth: Rub your clean palms together to generate heat and gently press them over your face to melt the streaks.
- Damp Sponge: You can lightly bounce a damp beauty sponge over the finished look to smooth out any lines.
- Moisturizer: Ensure you used enough moisturizer beforehand; streaks often happen when the product catches on dry skin.
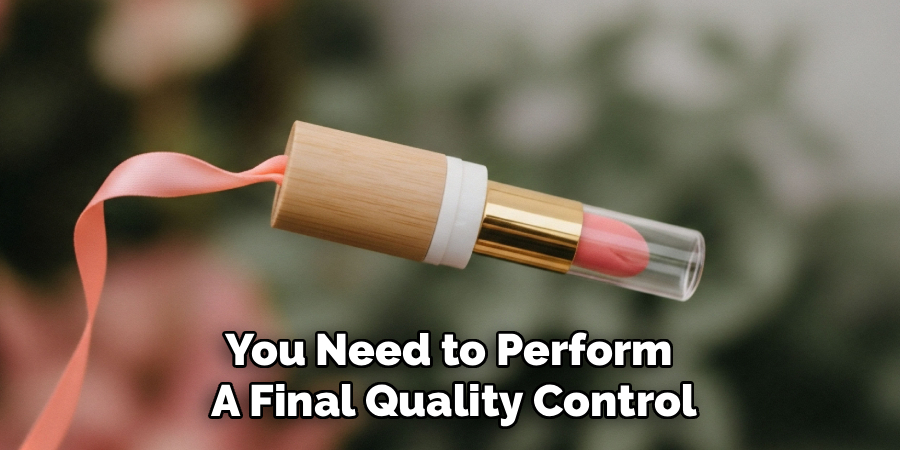
Conclusion
Embracing the fingertip application method is about more than just convenience; it is about achieving a finish that mimics the texture of real skin. By utilizing the natural warmth of your hands, you can melt the product into your complexion in a way that brushes and sponges often struggle to achieve. It is an economical, hygienic, and highly effective technique that simplifies your beauty routine.
Whether you are a makeup novice or a seasoned pro looking to lighten your load, following these steps ensures a radiant, streak-free glow every time. Now that you have mastered how to apply BB cream with fingers, you can confidently step out with a fresh face that looks naturally perfected, proving that the best beauty tools are indeed right at your fingertips.
About the Author
Jane Hubbard is a passionate beauty expert with a wealth of experience in makeup, hair, and overall beauty techniques. After years of working as a hairdresser specialist, she followed her entrepreneurial spirit and started her own consultancy business.
Jane has always been driven by her desire to help others feel confident in their own skin, and she does this by sharing her knowledge, experiences, and practical beauty tips. Through her consultancy, she empowers individuals to embrace their unique beauty, offering tailored guidance that boosts both self-esteem and personal style.
Professional Focus
- Specializes in makeup, hairstyling, and beauty consulting.
- Provides personalized beauty advice, tips, and techniques to help individuals feel confident in their appearance.
- Dedicated to staying up-to-date with the latest industry trends and developments.
- Passionate about creating a comfortable and empowering experience for every client.
Education History
- University of Craft and Design – Bachelor of Fine Arts (BFA) in Woodworking and Furniture Design
- Woodworking Apprenticeships – Extensive hands-on training with skilled craftsmen to refine carpentry and furniture making techniques
- Online Courses & Masterclasses – Continued education in advanced woodworking techniques, design principles, and specialized tools
Expertise:
- Makeup artistry, hairstyling, and beauty consulting.
- Personalized beauty techniques to enhance confidence and self-expression.
- Educating clients on how to maintain their beauty routines at home.