
Are you looking to switch up your makeup routine? Or maybe you have a special event coming up and want to try something new?
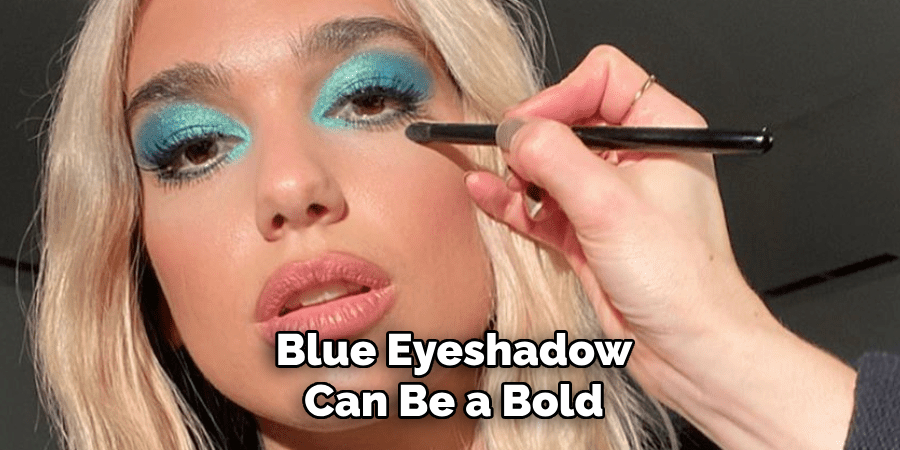
How to apply blue eyeshadow can feel intimidating, but with the right technique, it can create a stunning and bold look that makes your eyes stand out. Whether you’re aiming for a subtle daytime style or a dramatic evening effect, blue eyeshadow offers versatility and charm. This guide will walk you through simple steps to achieve a flawless, professional-looking finish while enhancing your natural beauty.
By mastering blending techniques and selecting the right shades of blue for your skin tone, you can confidently incorporate this vibrant color into your makeup routine. Let’s dive into the world of powder blue eyeshadow and explore the endless possibilities it offers.
What Will You Need?
- Blue eyeshadow palette
- Eyeshadow primer or base
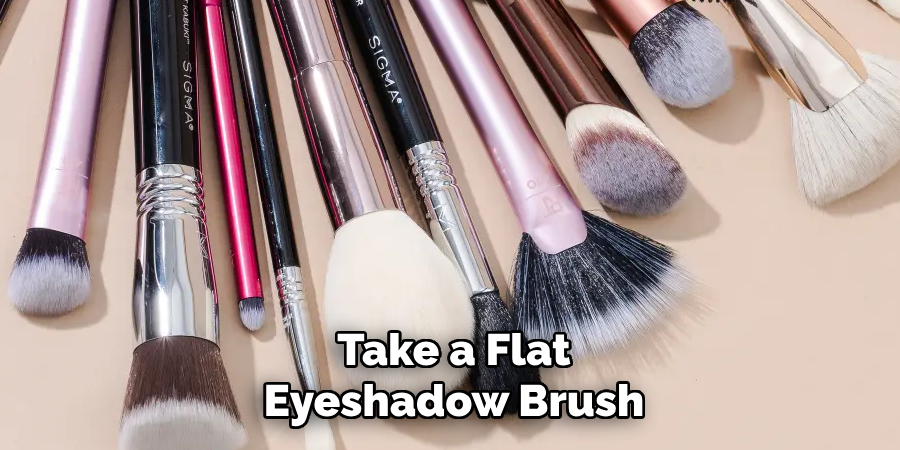
- Small and medium-sized eyeshadow brushes
- Blending brush
- Eyeliner (optional)
- Mascara
Once you have gathered all the necessary materials, it’s time to get started on creating your perfect blue eyeshadow look!
9 Easy Steps on How to Apply Blue Eyeshadow
Step 1. Prepare Your Eyelids
Start by prepping your eyelids to ensure a smooth and long-lasting application. Gently clean your eyelids to remove any oil or dirt that could interfere with the eyeshadow’s adhesion. Once clean, apply a thin layer of eyeshadow primer or base to your eyelids, covering the entire area from the lash line to the brow bone.
This step not only helps the eyeshadow colors pop but also prevents creasing, ensuring the makeup stays in place throughout the day. If you don’t have an eyeshadow primer, a concealer can be used as a substitute. Pat it in with your finger or a small makeup sponge for an even application. Now your eyelids are perfectly prepped and ready for the vibrant blue hues to stand out beautifully!
Step 2. Choose Your Base Shade
Start by selecting a light blue or pastel blue shade as your base color. This will act as the foundation for your entire eyeshadow look, creating a soft and even canvas. Using a fluffy eyeshadow brush, gently sweep the base shade across your eyelid, starting from the inner corner and blending outward toward the crease.
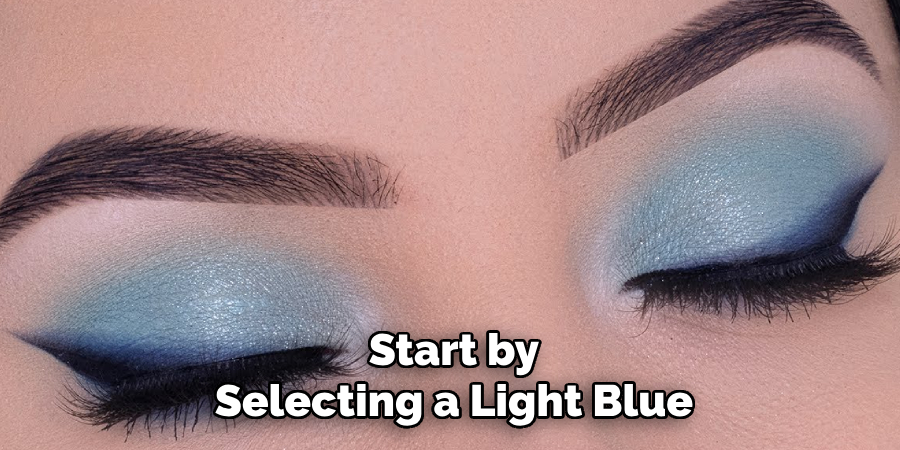
Be sure to mix well to avoid any harsh lines, as this will help the final look appear smooth and seamless. If you’re aiming for a more vibrant finish, you can layer the shade until you reach your desired intensity. Remember, building the color gradually allows for better control and ensures a polished, professional appearance.
Step 3. Add Depth to the Crease
To add depth to your crease, choose a slightly darker shade that complements the base color you’ve already applied. Using a smaller, tapered brush, focus on placing the color directly into the crease of your eyelid for a defined yet natural effect. Start at the outer corner of your eye and use a windshield wiper motion to evenly blend the shade across the crease, moving toward the center of your eyelid.
This technique enhances the natural contours of your eyes, adding dimension and definition. Be careful not to apply too much product at once—begin with a small amount and gradually build up the intensity to achieve the desired depth. Ensure you blend the edges well to maintain a smooth gradient between the base shade and the crease color, avoiding any harsh edges that could disrupt the overall look.
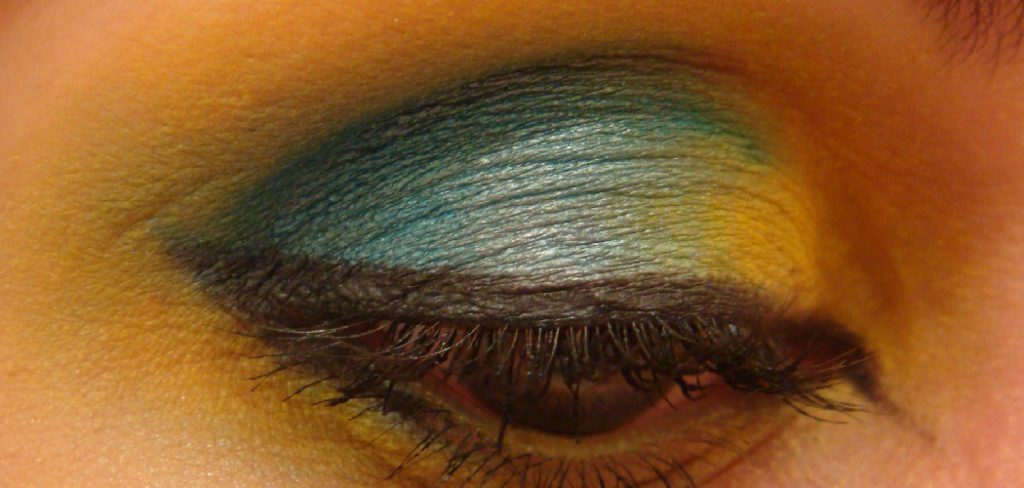
Step 4. Apply the Main Blue Shade
Take a flat eyeshadow brush and pick up the main blue shade, tapping off any excess product to avoid fallout. Gently pat the color onto the center of your eyelid, focusing on building an even, vibrant layer of pigment. Avoid dragging the brush, as this can disrupt the even application.
For a more intense look, consider layering the blue shade gradually, blending between each layer to ensure a seamless, bold finish. To enhance the vibrancy further, you could use a damp brush or start with a light base, such as a white or cream eyeshadow primer, which will help the blue shade pop even more.
When applying the color, take care to maintain the soft gradient you’ve already created in the crease, blending softly where the blue meets the other shades for a cohesive and polished appearance.
Step 5. Define the Outer Corner
To define the outer corner effectively, opt for a deeper shade within the same color family as the crease or lid color to add depth and dimension. Using a small, dense brush, apply the shadow to the outer “V” of your eye, focusing on creating a slightly lifted shape to enhance the natural curves of your eyelid.
Begin with a small amount of product and build it up gradually to achieve the desired intensity, avoiding harsh lines. Blend the edges carefully to maintain a seamless look and ensure the darker shade transitions smoothly into the other colors. If desired, you can also use a tiny pencil brush to connect the outer corner color along the lower lash line, creating a balanced and harmonious appearance.
Step 6. Highlight the Inner Corner
To highlight the inner corner, select a light, shimmery shade that complements the rest of your eye makeup. Using a small, precise brush or even your fingertip, gently apply the highlight to the inner corner of your eyes, focusing on the area where your upper and lower eyelids meet. This step brightens your eyes, making them appear larger and more awake.
You can also extend the highlight slightly into the inner portion of the lower lash line for an extra pop of illumination. Be sure to blend the shimmer softly to avoid any harsh edges, ensuring it seamlessly integrates with the other shades on your eyelid.
Step 7. Blend for a Seamless Finish
Blending is the key to achieving a professional and polished makeup look. Using a clean, fluffy blending brush, gently buff the edges of your eyeshadow to eliminate any visible lines where colors meet. Use small, circular motions to ensure the shades transition smoothly into one another for a naturally diffused effect.
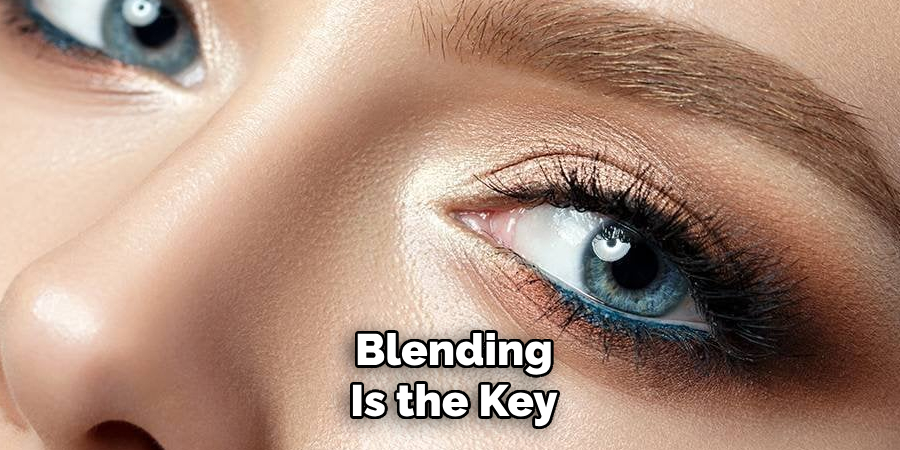
Pay particular attention to the crease area, as this is where harsh lines are most likely to form. If needed, add a neutral matte shade close to your skin tone to help soften any areas that need extra blending.
Step 8. Line Your Eyes
Using an eyeliner can define your eyes and enhance their shape, creating a polished and cohesive makeup look. Start by selecting an eyeliner that matches your desired style—gel, pencil, or liquid liners each offer different levels of precision and intensity. For a natural look, use a pencil eyeliner to gently trace along your upper lash line, keeping the strokes close to the lashes for subtle definition.
If you prefer a more dramatic effect, a liquid or gel liner is ideal for creating bold and sharp lines, such as a classic winged look. Begin at the inner corner of your eye and gradually build the line outward, ensuring even thickness and symmetry between both eyes.
Step 9. Apply Mascara
After completing your eyeliner, the next step is to enhance the lashes with mascara. Mascara helps to lengthen, volumize, and define your lashes, creating a more open and dramatic eye look. Begin by gently curling your lashes with an eyelash curler to add lift and create a fanned-out effect.
When applying mascara, start at the base of your lashes and wiggle the wand upward in a zigzag motion to ensure even coverage and minimize clumping. Focus on building up the product on the outer lashes for a more elongated and wide-eyed appearance. For a natural look, one coat may suffice, but for greater intensity, you can apply multiple coats.
By following these tips, you can achieve the perfect lash look for any occasion.
5 Things You Should Avoid
- Skipping Eye Primer: A common mistake is skipping the use of an eye primer before applying blue eyeshadow. Primer helps create a smooth base, enhances color payoff, and ensures the eyeshadow stays in place without creasing throughout the day.
- Overloading the Brush: Avoid picking up too much product on your brush. Blue eyeshadow can be bold, and applying too much at once may result in an unblended, patchy look. Always start with a small amount and build up gradually.
- Ignoring Blending: Blending is key when using vibrant colors like blue. Neglecting to blend properly can lead to harsh lines and an unnatural appearance. Use a clean blending brush to soften edges for a seamless finish.
- Using the Wrong Shade for Your Skin Tone: Not all shades of blue complement every skin tone. Selecting a hue that clashes with your complexion can diminish the impact of your look. Experiment with different tones, like navy or teal, to find what works best for you.
- Pairing with the Wrong Lip Color: Bold blue eyeshadow paired with an equally striking lip color can overwhelm your look. Instead, balance the vibrant eyeshadow with a neutral or subtle lip shade to maintain harmony and sophistication.
Conclusion
How to apply blue eyeshadow can be a bold and stylish choice when done thoughtfully.
The key lies in finding a shade that complements your skin tone and eye color while balancing the rest of your makeup for a cohesive and polished look. Avoid common mistakes such as over-application, neglecting blending, or clashing with other elements of your makeup.
With the proper techniques and combinations, blue eyeshadow can make a striking statement and elevate your overall appearance with elegance and confidence.
About the Author
Jane Hubbard is a passionate beauty expert with a wealth of experience in makeup, hair, and overall beauty techniques. After years of working as a hairdresser specialist, she followed her entrepreneurial spirit and started her own consultancy business.
Jane has always been driven by her desire to help others feel confident in their own skin, and she does this by sharing her knowledge, experiences, and practical beauty tips. Through her consultancy, she empowers individuals to embrace their unique beauty, offering tailored guidance that boosts both self-esteem and personal style.
Professional Focus
- Specializes in makeup, hairstyling, and beauty consulting.
- Provides personalized beauty advice, tips, and techniques to help individuals feel confident in their appearance.
- Dedicated to staying up-to-date with the latest industry trends and developments.
- Passionate about creating a comfortable and empowering experience for every client.
Education History
- University of Craft and Design – Bachelor of Fine Arts (BFA) in Woodworking and Furniture Design
- Woodworking Apprenticeships – Extensive hands-on training with skilled craftsmen to refine carpentry and furniture making techniques
- Online Courses & Masterclasses – Continued education in advanced woodworking techniques, design principles, and specialized tools
Expertise:
- Makeup artistry, hairstyling, and beauty consulting.
- Personalized beauty techniques to enhance confidence and self-expression.
- Educating clients on how to maintain their beauty routines at home.