
Are you tired of using powder blush and looking for a new way to add color to your cheeks? Look no further than cream blush!
Applying cream blush can bring a fresh, natural glow to your face, enhancing your complexion with a dewy, healthy finish. Unlike powder blush, cream formulas are versatile, easy to blend, and ideal for a more youthful, radiant look. Whether you’re new to makeup or looking to refine your technique, learning how to apply cream blush properly is key to getting that perfect flush of color.
In this guide on applying cream blush, we’ll cover everything from choosing the right shade and tools to achieving a flawless application. So get ready to elevate your makeup game with this simple yet effective technique!
What Are the Benefits of Using Cream Blush?
Cream blush is a versatile product with numerous benefits, making it a must-have in your makeup routine. Some of the top benefits of using cream blush include:
- Natural Finish: Cream blush blends seamlessly into the skin, giving a natural flush of color that looks like you’re glowing from within.
- Long-Lasting Color: The creamy formula adheres to the skin for extended periods, ensuring your cheeks stay rosy and vibrant throughout the day.
- Buildable Coverage: You can easily control the intensity of the color by layering or blending more product onto your skin.
- Suitable for All Skin Types: Whether you have dry, oily, or combination skin, cream blush is ideal for all skin types and provides a hydrating boost to your complexion.
- Multi-Purpose: Cream blush can also double as a lip color or even eyeshadow, making it a versatile product that you can use for multiple purposes.
These benefits make cream blush popular among makeup enthusiasts and professionals.
What Will You Need?
Before we dive into the steps of applying cream blush, here’s a list of items you’ll need:
- Cream Blush: Choose a shade that complements your skin tone. For fair or light skin tones, opt for soft pink or peach shades, while medium to dark skin tones can go for deeper rose or berry hues.
- Makeup Sponge/Brush: A sponge or brush designed explicitly for cream products will help blend and achieve a smooth finish.
- Foundation/Concealer: Depending on your preference, you may need a base product to create an even canvas for the blush.
- Setting Powder: If you have oily skin, setting powder can help prevent the cream blush from shifting or fading throughout the day.
- Highlighter: Adding a touch of highlighter on your cheekbones can enhance the overall glow and add dimension to your look.
It’s time to get started once you have all your tools and products ready!
8 Easy Steps on How to Apply Cream Blush
Step 1: Prepare Your Skin
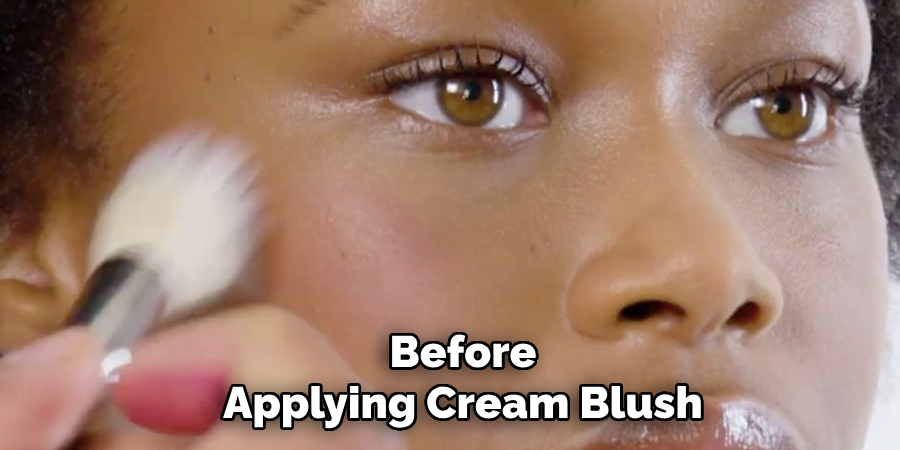
Before applying cream blush, it is essential to ensure your skin is properly prepped for a smooth and long-lasting application. Start by cleansing your face to remove any dirt, oil, or remnants of previous makeup. Follow this with a lightweight moisturizer to hydrate your skin and create a supple base.
If you’re planning to wear makeup throughout the day, consider applying a primer suitable for your skin type—this will help to even out your skin texture and increase the longevity of your makeup. Taking the time to prepare your skin ensures a flawless application and minimizes the risk of the cream blush settling into fine lines or appearing patchy later on.
Step 2: Choose the Right Shade
Selecting the right shade of cream blush is crucial for achieving a natural and flattering look. Consider your skin tone and undertones when making your choice. Soft pinks or peaches work beautifully for fair skin, while medium skin tones suit rosy or warm coral shades.
Deeper skin tones look stunning with rich berry or vibrant tangerine hues. Testing the blush on your wrist or jawline can help determine if the color complements your complexion. Choosing the right shade ensures your blush enhances natural beauty rather than overpowering your overall look.
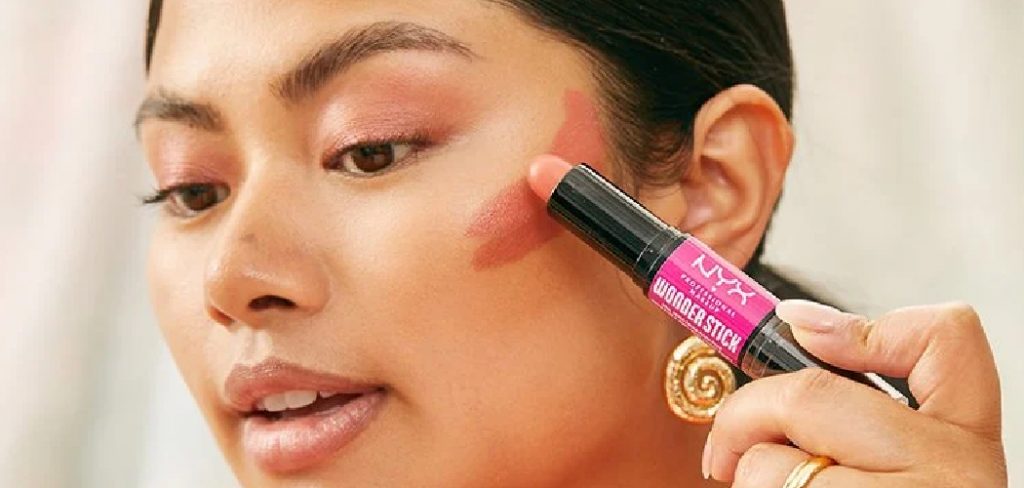
Step 3: Apply with Precision
Applying cream blush requires a gentle and precise technique to achieve a seamless finish. Start using clean fingers, a stippling brush, or a sponge to pick up a small amount of product. Dab the blush onto the apples of your cheeks, blending it upwards and outwards toward your temples for a lifted and natural appearance. Build the color gradually, adding more product to achieve your desired intensity.
Blending is key to ensure the blush melts into your skin for a flawless, glowing effect. Avoid heavy-handed application to maintain a soft, radiant look that complements the rest of your makeup.
Step 4: Set Your Blush for Longevity
To ensure your blush stays vibrant and in place throughout the day, it’s essential to set it properly. For cream blush, lightly dust a translucent setting powder over your cheeks to lock in the product without dulling its glow.
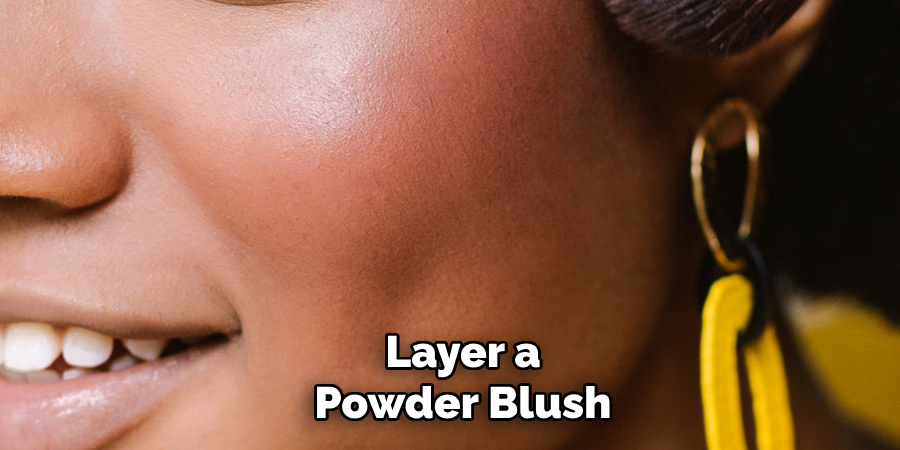
Alternatively, layer a powder blush in a matching shade over the cream blush for added intensity and staying power. This dual-layer technique enhances the color and ensures your look lasts from morning to evening. Remember to use a light hand to avoid a cakey finish, maintaining a fresh and natural appearance.
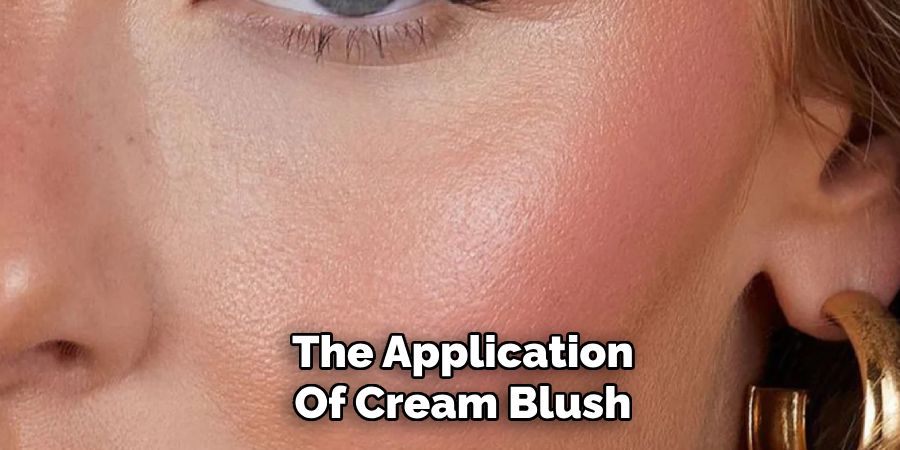
Step 5: Final Touches for a Polished Look
Once your blush is perfectly applied and set, take a moment to assess your overall makeup. Use a clean, fluffy brush to blend any harsh edges, ensuring a seamless transition between your blush and the rest of your makeup.
Consider adding a subtle highlighter to the tops of your cheekbones for an extra touch of radiance. This will enhance your glow and draw attention to the natural high points of your face. The key is balance—your blush should complement your entire look while standing out as a focal point of your makeup.
Step 6: Setting Your Makeup for Longevity
To ensure your blush and overall makeup stay flawless throughout the day, finish with a setting spray. Hold the spray about 8-10 inches away from your face and mist lightly in an “X” and “T” motion for even coverage.
Setting spray locks in your makeup, reducing the chances of fading or smudging, and adds a subtle glow or matte finish depending on the spray you choose. Give it a few moments to dry, and you’ll be ready to face the day with a polished and long-lasting look.
Step 7: Touch-Ups Throughout the Day
Even with the best setting techniques, occasional touch-ups can help maintain your flawless look. Carry a compact mirror, a small travel blush brush, and your blush product for quick fixes. Blot away excess oil with blotting papers or a mattifying powder before reapplying blush to avoid a cakey appearance.
A light reapplication on the apples of your cheeks will refresh your look and keep you glowing all day long. Remember, a little goes a long way to maintain a natural and balanced finish.
Step 8: Removing Your Makeup
At the end of the day, removing your makeup to maintain healthy skin properly is essential. Start by using a gentle makeup remover or micellar water on a cotton pad to dissolve and lift away your makeup, especially around the eyes and lips.

Follow up with a cleanser suited for your skin type to clean your face and remove any remaining residue thoroughly. Consider incorporating a hydrating toner and moisturizer into your nighttime routine to replenish your skin’s moisture and keep it feeling soft and refreshed. These steps ensure your skin stays healthy and radiant, ready for another day of makeup application.
You can achieve a flawless and long-lasting cream blush application by following these eight easy steps.
5 Things You Should Avoid
- Using Too Much Product: Applying excessive cream blush can make it difficult to blend and may result in an unnatural, patchy look. Start with a small amount and build gradually.
- Skipping Proper Skin Preparation: Failing to moisturize or prep your skin can lead to uneven application. Always ensure your skin is well-hydrated before applying cream blush.
- Applying Directly to Powdered Skin: Cream blush does not blend well over powdered skin and can create a cakey texture. Apply it on top of liquid or cream foundation for a seamless finish.
- Blending with the Wrong Tools: Using the wrong tools, such as a dense brush or a dry sponge, may leave streaks or patches. Fingers or a damp beauty sponge typically work best for blending cream blush.
- Ignoring Your Face Shape: Placing cream blush in the wrong area can reduce your natural proportions. Pay attention to your face shape and apply the blush to areas that enhance your features, such as the apples of your cheeks or upward along the cheekbones.
Conclusion
Mastering the application of cream blush is all about practice and understanding what works best for your skin type and facial structure.
By avoiding common mistakes and following these tips, you can achieve a natural, radiant look that enhances your overall appearance. Remember to start with a small amount of product, blend seamlessly using the right tools, and always prepare your skin beforehand. With the right technique, cream blush can become a versatile and essential part of your makeup routine.
Hopefully, the article on how to apply cream blush has given you some valuable insights and tips to achieve a flawless look. Keep glowing!
About the Author
Jane Hubbard is a passionate beauty expert with a wealth of experience in makeup, hair, and overall beauty techniques. After years of working as a hairdresser specialist, she followed her entrepreneurial spirit and started her own consultancy business.
Jane has always been driven by her desire to help others feel confident in their own skin, and she does this by sharing her knowledge, experiences, and practical beauty tips. Through her consultancy, she empowers individuals to embrace their unique beauty, offering tailored guidance that boosts both self-esteem and personal style.
Professional Focus
- Specializes in makeup, hairstyling, and beauty consulting.
- Provides personalized beauty advice, tips, and techniques to help individuals feel confident in their appearance.
- Dedicated to staying up-to-date with the latest industry trends and developments.
- Passionate about creating a comfortable and empowering experience for every client.
Education History
- University of Craft and Design – Bachelor of Fine Arts (BFA) in Woodworking and Furniture Design
- Woodworking Apprenticeships – Extensive hands-on training with skilled craftsmen to refine carpentry and furniture making techniques
- Online Courses & Masterclasses – Continued education in advanced woodworking techniques, design principles, and specialized tools
Expertise:
- Makeup artistry, hairstyling, and beauty consulting.
- Personalized beauty techniques to enhance confidence and self-expression.
- Educating clients on how to maintain their beauty routines at home.