
Are you tired of smudging and fading eyeliner during your busy day? Do you want a more precise and long-lasting look? Then it’s time to switch to gel eyeliner!
How to apply gel eyeliner can seem intimidating at first, but with the right tools and techniques, it’s a simple way to elevate any makeup look. Known for its versatility and long-lasting finish, gel eyeliner is perfect for creating everything from bold, dramatic lines to soft, subtle accents. Whether you’re aiming for a classic wing or experimenting with a trendy look, mastering gel eyeliner application adds a sleek and professional touch to your makeup.
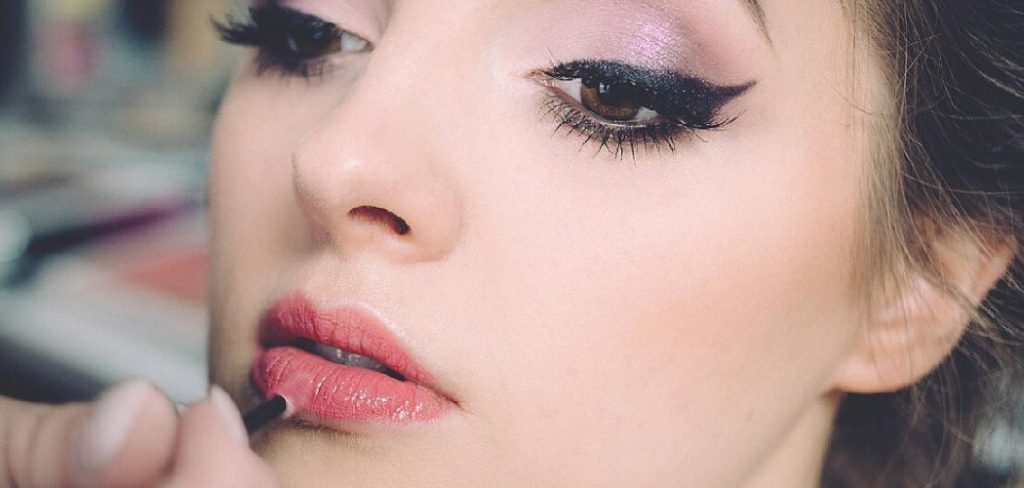
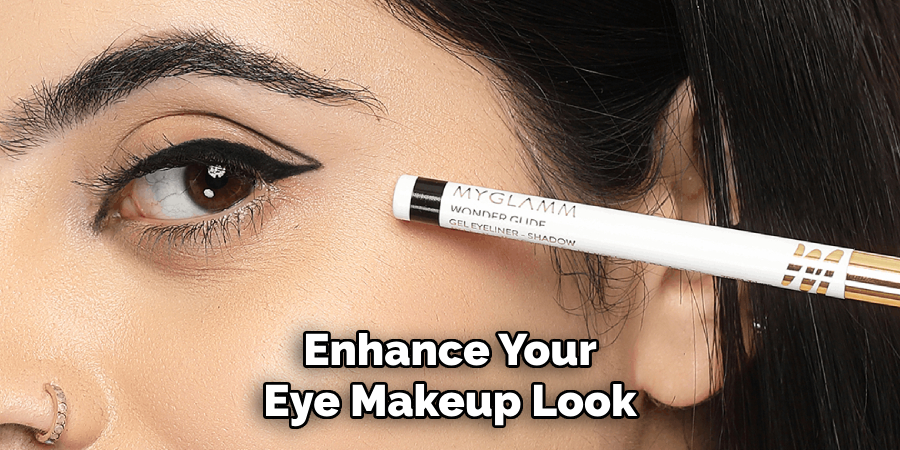
This guide on gel eyeliner tutorial will walk you through the essential steps for achieving flawless results, ensuring your liner looks smooth, sharp, and effortless every time.
What Are the Benefits of Using Gel Eyeliner?
Gel eyeliner has become increasingly popular due to its many benefits. Here are a few reasons why you should incorporate gel eyeliner into your makeup routine:
- Long-lasting: One of the biggest advantages of using gel eyeliner is its long-lasting formula. Unlike pencil or liquid eyeliner, gel liners are designed to stay put all day without smudging or fading.
- Intense Pigmentation: Gel eyeliners offer a fierce and bold color payoff, making them perfect for creating dramatic eye looks. They also come in shades, from classic black and brown to vibrant colors like blue and purple.
- Versatile Application: A gel eyeliner gives you more control over the application. You can use an angled brush for a precise and sharp line or a smudge brush to create a smokey effect.
- Waterproof: Many gel eyeliner products are also waterproof, making them ideal for hot and humid climates or those with watery eyes.
- Suitable for All Skill Levels: Whether you’re a beginner or an experienced makeup artist, gel eyeliners are easy to work with. They offer enough playtime to perfect your look before they set, but they won’t budge once they do.
What Will You Need?
To apply gel eyeliner, you will need the following tools:
- Gel eyeliner pot
- Angled brush or smudge brush
- Eyeliner brush (optional)
Once you have these essentials, you’re ready to apply gel eyeliner like a pro!
8 Easy Steps on How to Apply Gel Eyeliner
Step 1: Prepare Your Eyes
Start by ensuring your eyelids are clean and free of excess oil or makeup residue. Use a gentle cleanser or makeup remover to wipe away any impurities. This step is crucial as it helps the gel eyeliner adhere better and ensures a smooth application. For longer-lasting results, apply an eyeshadow primer or a light dusting of translucent powder to your eyelids.
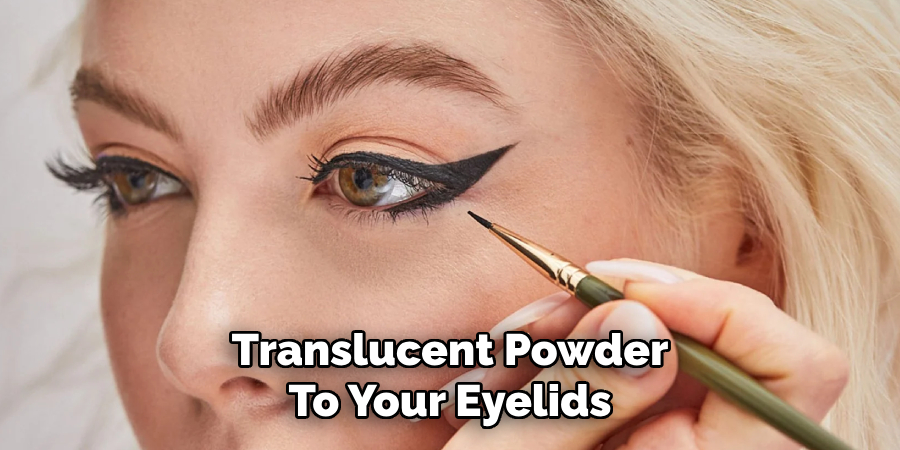
This will create a matte surface and prevent smudging or creasing throughout the day. Taking the time to prepare your eyes properly sets the foundation for achieving a flawless gel eyeliner look.
Step 2: Choose the Right Brush
Selecting the right brush is just as crucial as the eyeliner itself. Opt for an angled or fine-point brush explicitly designed for gel eyeliner to achieve precision. These brushes allow for better control and enable you to create sharp, clean lines easily. Ensure the brush is clean and free of any dried product for smooth application.
A well-chosen brush can make all the difference in creating your desired look, whether a subtle thin line or a dramatic winged effect.
Step 3: Choose the Right Eyeliner
Selecting the right eyeliner is crucial to achieving your desired look. Consider the type of eyeliner—pencil, gel, or liquid—that best suits your application skills and the effect you want to create.
For a subtle, everyday look, opt for a pencil eyeliner, which is easy to control and blend. For a bold or precise line, liquid eyeliner is ideal, while gel eyeliner offers a balance of precision and softness. Ensure the color complements your eye color and overall makeup style for a cohesive finish.
Step 5: Start with Small Strokes
When applying eyeliner, working in small, controlled strokes rather than attempting to draw one continuous line is essential. Begin at the inner corner of your eye and gradually move outward, connecting the strokes. This technique allows for better precision and reduces the risk of uneven lines. If you’re using a pencil, keep it sharpened for more accurate application, or use short, feathery strokes to create a soft, blended effect.
Use a steady hand with a liquid or gel liner and gradually build the line to avoid smudging or creating a too-thick line. Starting small also gives you the flexibility to adjust the intensity and shape of your eyeliner as you go, ensuring a polished and symmetrical result tailored to your desired look.
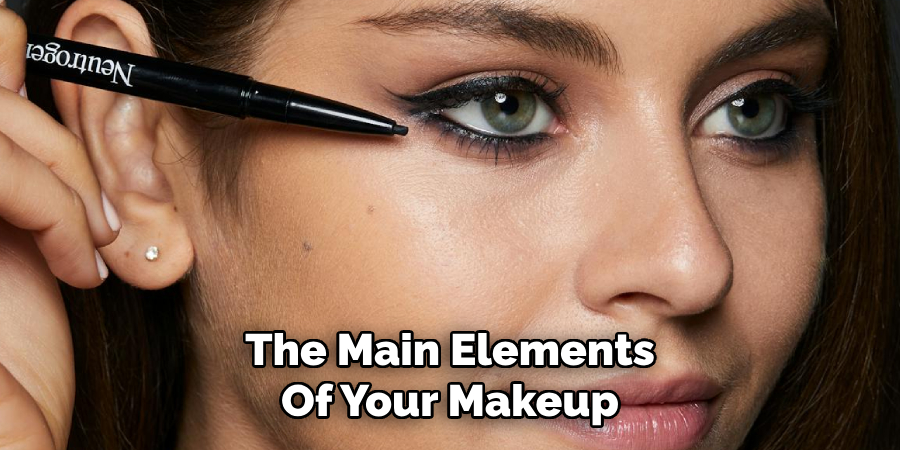
Step 6: Finishing Touches
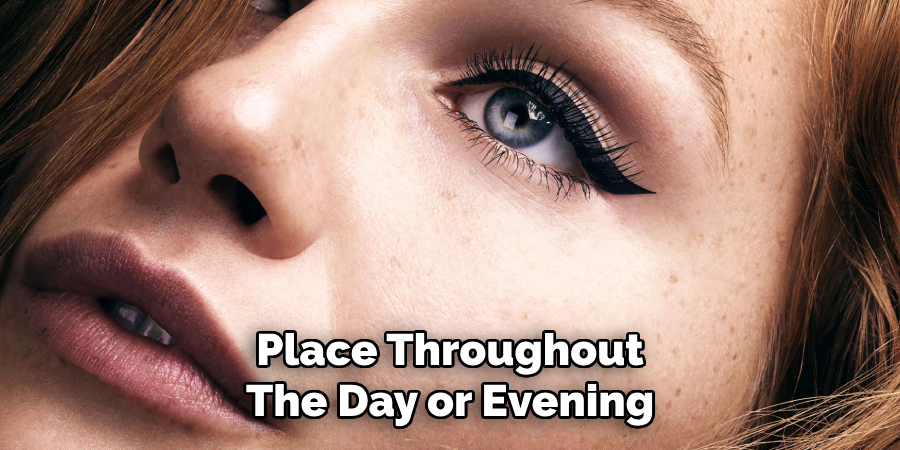
Once you have completed the main elements of your makeup, it’s time to add the final touches that will bring your entire look together. Start by setting your makeup with a setting spray or a translucent powder to ensure it stays in place throughout the day or evening.
For a radiant glow, consider applying a highlighter to the high points of your face, such as the tops of your cheekbones, the bridge of your nose, and your cupid’s bow. If you’d like to enhance your lashes further, add an extra coat of mascara or apply false lashes for a more dramatic effect.
Finally, finish your lips with a complementary lip color. Whether you prefer a bold lipstick, a glossy shine, or a natural nude lip, ensure your lips are hydrated and well-prepped for a smooth application. Blot your lips with a tissue to remove any excess product and lock in the color. These finishing touches refine your look, adding dimension, longevity, and a flawless finish that makes a lasting impression.
Step 7: Perfecting Your Look
Take a moment to evaluate your overall makeup. Ensure that your eyeliner complements your eye shape and blends seamlessly with the rest of your makeup. Adjust other elements of your look, such as blending eyeshadow edges or touching up your eyebrows. This step is about refining your appearance to achieve a polished result, ensuring your final look feels cohesive and stunning.
Step 8: Setting Your Makeup
To ensure your makeup lasts throughout the day, finish by applying a setting spray or setting powder. A setting spray helps lock in your look, prevent smudging, and maintain a fresh appearance, while a setting powder minimizes shine and keeps oily areas under control. Hold the spray at a distance and mist evenly over your face, or gently dust the powder onto areas prone to oil, like your T-zone. This final step is crucial for a long-lasting, flawless finish.
By following these tips and techniques, you can achieve a flawless and long-lasting makeup look that will make you feel confident and beautiful all day.
5 Things You Should Avoid
- Skipping Primer or Base: Never use an eye primer or a neutral base on your eyelids before applying gel eyeliner. This helps create a smooth surface and ensures the eyeliner stays in place without smudging or fading throughout the day.
- Using Too Much Product on the Brush: Avoid overloading your brush with gel eyeliner. This can lead to uneven application and clumps. Dip the brush lightly into the product and remove any excess before lining your eyes.
- Pulling or Tugging on Your Eyelids: Tugging on the delicate skin around your eyes can lead to uneven lines and even premature wrinkles. Instead, keep a gentle, steady hand as you apply the gel liner for a more natural finish.
- Skipping Cleanup: If you make a mistake or your eyeliner doesn’t look precise, don’t skip the cleanup step. Use a cotton swab dipped in makeup remover to clean up edges, ensuring clean and sharp lines.
- Neglecting Brush Maintenance: Not cleaning your eyeliner brush regularly can result in hardened bristles and uneven application. Clean your brush frequently to maintain its shape and performance, ensuring smooth and precise application every time.
What Color Should I Choose?
When choosing the color of your eyeliner, there are a few factors to consider. Here are some tips to help you decide on the perfect color for your look:
- Eye Color: Your eye color can play a role in determining which eyeliner shade will work best for you. For example, if you have blue eyes, brown or black liner can make them pop. If you have green eyes, purple or navy liner can enhance their natural hue.
- Skin Tone: Your skin tone also plays a part in selecting the right eyeliner color. Darker skin tones look great with bold and vibrant colors like gold or bronze, while lighter skin tones may look better with softer shades like taupe or grey.
- Personal Style: Your style and the overall look you are going for can also influence your choice of eyeliner color. If you have a more edgy and dramatic style, black or dark brown liner can help create a bold statement. Earthy tones like olive green or deep plum can add just the right definition for a more natural and subtle look.
- Occasion: The occasion you are getting ready for can be another factor in choosing an eyeliner color. For a casual daytime look, neutral shades like champagne or light brown may be appropriate. At the same time, a glamorous evening event may call for metallic or glittery liners to add some sparkle.
Conclusion
How to apply gel eyeliner can be a simple yet effective way to enhance your eye makeup look.
Start by choosing a high-quality gel eyeliner and the right angled or fine-tipped brush for precise application. Always ensure your eyelids are clean and primed to help the eyeliner glide on smoothly and last longer. Begin by drawing small, controlled strokes along your lash line, gradually building up your desired thickness or style. Remember to take your time, and don’t hesitate to clean up any mistakes with a cotton swab dipped in makeup remover.
With practice and patience, gel eyeliner can elevate your makeup routine, offering versatility and definition for any occasion.
About the Author
Jane Hubbard is a passionate beauty expert with a wealth of experience in makeup, hair, and overall beauty techniques. After years of working as a hairdresser specialist, she followed her entrepreneurial spirit and started her own consultancy business.
Jane has always been driven by her desire to help others feel confident in their own skin, and she does this by sharing her knowledge, experiences, and practical beauty tips. Through her consultancy, she empowers individuals to embrace their unique beauty, offering tailored guidance that boosts both self-esteem and personal style.
Professional Focus
- Specializes in makeup, hairstyling, and beauty consulting.
- Provides personalized beauty advice, tips, and techniques to help individuals feel confident in their appearance.
- Dedicated to staying up-to-date with the latest industry trends and developments.
- Passionate about creating a comfortable and empowering experience for every client.
Education History
- University of Craft and Design – Bachelor of Fine Arts (BFA) in Woodworking and Furniture Design
- Woodworking Apprenticeships – Extensive hands-on training with skilled craftsmen to refine carpentry and furniture making techniques
- Online Courses & Masterclasses – Continued education in advanced woodworking techniques, design principles, and specialized tools
Expertise:
- Makeup artistry, hairstyling, and beauty consulting.
- Personalized beauty techniques to enhance confidence and self-expression.
- Educating clients on how to maintain their beauty routines at home.