
Are you tired of your basic eyeliner? Do you want to elevate your eye makeup game? Look no further because a liquid eyeliner tutorial is the perfect solution!
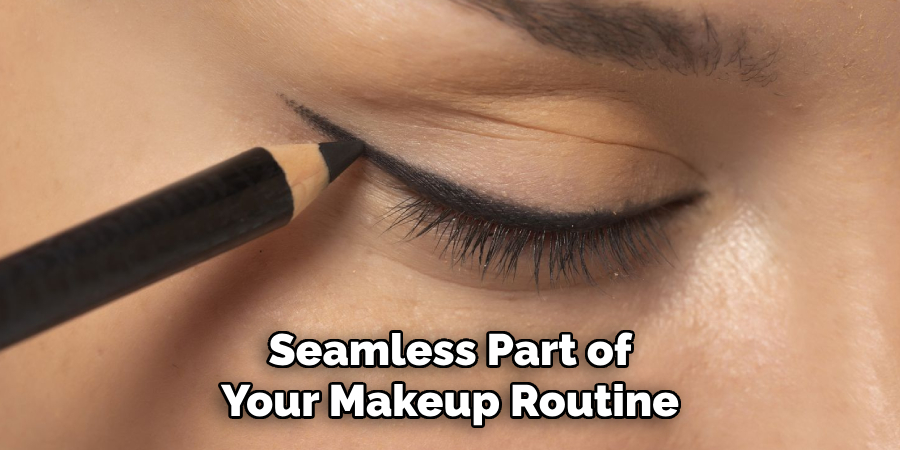
Applying liquid eyeliner can seem intimidating initially, but with a bit of practice and the proper technique, it can become an effortless part of your makeup routine. Liquid eyeliner is known for its precision and ability to create sharp, defined lines, making it perfect for bold makeup looks or subtle accents. Whether aiming for a classic winged liner or experimenting with creative designs, mastering the application process is key.

This guide on how to apply liquid eyeliner will walk you through the essential steps to achieve a flawless liquid eyeliner look, even if you’re a beginner. Let’s get started!
What Are the Benefits of Using Liquid Eyeliner?
Liquid eyeliner offers several benefits, making it a popular choice among makeup enthusiasts. Some advantages of using liquid eyeliner include the following:
- Precision: The thin, pointed applicator and fluid formula make it easier to control the placement and thickness of your lines.
- Pigmentation: Liquid eyeliners tend to have more intense color payoff than other liner types, making it perfect for dramatic looks.
- Longevity: Once dried, liquid eyeliner is known for its long-lasting wear, making it ideal for all-day events or special occasions.
- Versatility: You can create a wide range of looks with liquid liner, from precise wings to bold graphic designs.
What Will You Need?
To achieve a flawless liquid eyeliner look, you will need the following items:
- Liquid Eyeliner: Choose one that has a brush tip for more control and precision.
- Eye Primer: This will help your eyeliner stay in place and prevent it from smudging or fading.
- Angled Brush: An angled brush can help create crisp lines and wings if you prefer using gel or cream eyeliner.
- Q-tips or Makeup Remover: These will be useful if you make any mistakes during application.
Once you have all the necessary items, follow these steps to achieve a perfect liquid eyeliner look.
8 Easy Steps on How to Apply Liquid Eyeliner
Step 1: Prep Your Eyes
Before applying liquid eyeliner, creating a smooth base for the product is essential. Start by cleansing your eyelids to remove any excess oil or residue that could interfere with the eyeliner’s longevity. Then, apply a small amount of eye primer to your eyelids, blending it evenly from the lash line to the crease.
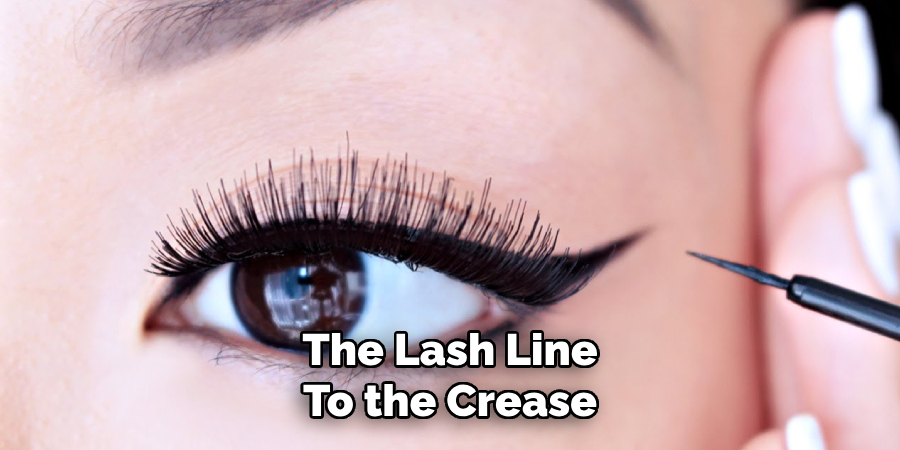
The primer helps keep the eyeliner in place, prevents smudging, and ensures a smooth application. If you plan to wear eyeshadow, this is the time to apply it, as it will serve as the backdrop for the eyeliner and enhance the overall look. Properly prepping your eyes makes all the difference in achieving a flawless and durable eyeliner application.
Step 2: Choose the Right Eyeliner
Selecting the correct type of eyeliner is crucial for achieving your desired look. Eyeliners come in various forms, including pencil, gel, liquid, and felt-tip pens, each offering distinct benefits. For beginners or those seeking a softer look, pencil eyeliner is easy to control and ideal for creating subtle lines.
Gel liners are precise and perfect for bold and defined looks, while liquid and felt-tip eyeliners offer sharp, dramatic lines suitable for more intricate designs. Choose a formula and color that complements your look, ensuring it aligns with your makeup style and the occasion.
Step 3: Apply in a Thin Line:
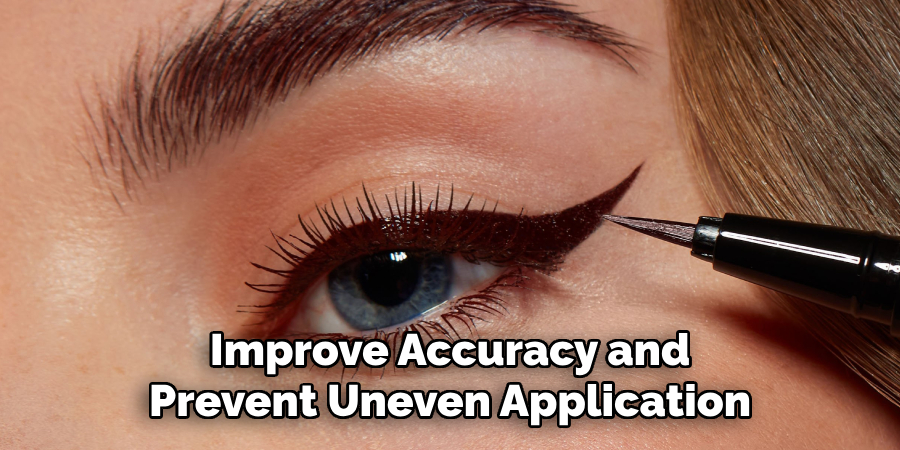
Start by applying the eyeliner as close to the lash line as possible to create a natural and seamless effect. Use short, light strokes to build the line gradually, rather than trying to draw it in one long sweep. This technique helps maintain control and ensures an even application. Keep the line thin and close to the lashes for a more subtle daytime look.
If you aim for a more dramatic evening look, you can thicken the line slightly or extend it into a winged flick for added flair. Remember to take your time, steady your hand, and work in small sections to perfect the line. A mirror at eye level can also help improve accuracy and prevent uneven application.
Step 4: Adapting to Different Eye Shapes
Different eye shapes may require different techniques for the most flattering results when applying eyeliner. Here are some tips for adapting your eyeliner application based on your unique eye shape:
- Hooded Eyes: For those with hooded eyes, where a fold of skin partially covers the eyelid, it’s essential to create a smooth and even line that is visible when the eyes are open. To achieve this, try using a gel or liquid liner and keeping the line as close to the lash line as possible.
- Almond-Shaped Eyes: Those with almond-shaped eyes have a slightly elongated shape and can pull off various eyeliner styles. Experiment with winged liner or a thicker line to accentuate the shape of your eyes.
- Round Eyes: If you have round eyes, creating a cat-eye effect can help elongate and lift the shape of your eyes. Try using a thin liquid liner and extending the line slightly past the outer corner of your eye.
- Monolid Eyes: Monolid eyes do not have a visible fold, making it essential to create dimension with eyeliner. Start by tightlining – lining as close as possible to the upper lash line – and then use a pencil or gel liner to trace along the upper lid, gradually thickening towards the outer corner for added definition.
Step 5: Apply Mascara
Mascara is a crucial step in completing your eye makeup look by enhancing the lashes and making the eyes appear more open and defined. Start by curling your lashes with an eyelash curler to add lift and shape. Then, choose a mascara that suits your desired effect—volume, length, or curl. Hold the mascara wand at the base of your lashes and wiggle it upward in a zigzag motion to distribute the product and avoid clumps.
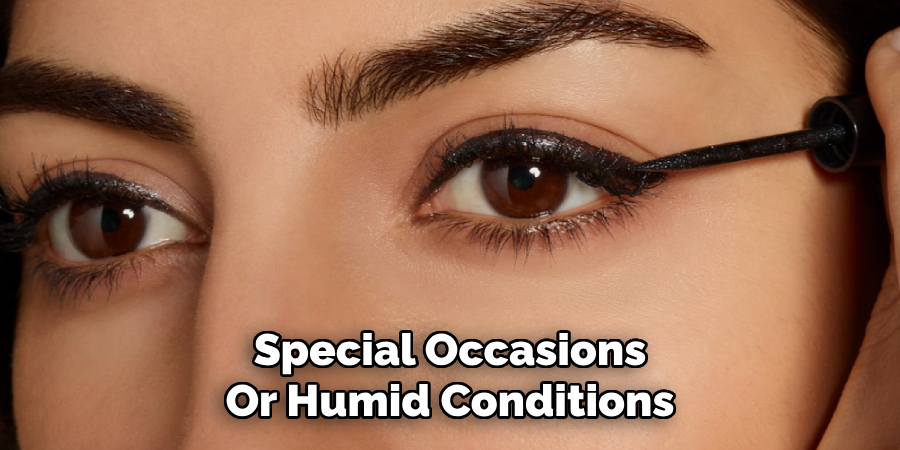
For added impact, apply a second coat, focusing on the outer lashes to create a more dramatic look. Don’t forget to coat your bottom lashes, but use a steady hand to avoid smudging. If you want a more striking effect, consider waterproof mascara for longer wear, particularly for special occasions or humid conditions.
Step 6: Perfect Your Eyebrows
Your eyebrows frame your face, so giving them some attention can transform your entire look. Start by brushing your brows upward with a spoolie to reveal their natural shape. Use an eyebrow pencil, pomade, or powder to fill in sparse areas with light, hair-like strokes, staying within the natural shape of your brows. For a polished finish, apply a clear or tinted brow gel to set them in place and keep them defined throughout the day.
Step 7: Add Mascara for Depth
Mascara can instantly open up your eyes and make your lashes appear longer and fuller. Begin by curling your lashes with an eyelash curler for added lift. Then, apply a coat of mascara to your upper lashes, starting at the roots and wiggling the wand upward to ensure even coverage.
For extra drama, you can add a second coat or lightly apply mascara to your bottom lashes. Choose a waterproof formula if you expect a long day or humid conditions.
Step 8: Define Your Lips
Add the finishing touch to your look by defining your lips. Start by applying a lip balm to keep your lips hydrated and smooth. Then, outline your lips with a lip liner that matches your lipstick shade for a precise and longer-lasting application. Fill in your lips with your chosen lipstick, using a brush for an even distribution if needed. You can top it off with a touch of lip gloss for a glossy finish. Choose a color that complements your overall makeup look and enhances your natural features.
By following these steps, you can achieve a flawless and long-lasting makeup look that will make you feel confident and beautiful. Remember, always choose high-quality products suitable for your skin type and tone.
5 Things You Should Avoid
- Skipping Primer or Preparation Avoid applying liquid eyeliner directly to your eyelids without proper preparation. Oily or uneven skin can cause smudging or fading, so always start with a primer or a light dusting of translucent powder for a smooth surface.
- Pulling or Tugging on Your Eyelids: Tugging your eyelids while applying eyeliner can create uneven lines and lead to premature wrinkles. Instead, look downward into a mirror and gently stabilize your hand for better control and precision.
- Starting with a Thick Line: Beginning with a thick line can make it harder to correct mistakes and may result in an overly dramatic or uneven look. Start with a thin line along the lash line and build up thickness gradually as desired.
- Not Allowing the Liner to Dry: If you open your eyes wide after applying liquid eyeliner, it can smudge and transfer onto your eyelid. Always allow a few seconds for the liner to dry completely before continuing with the rest of your makeup.
- Using Old or Dried-Out Eyeliner: Expired or dried-out liquid eyeliner tends to flake and create an uneven application. Regularly check the consistency of your liner and replace it when necessary to ensure smooth, precise lines every time.
Conclusion
How to apply liquid eyeliner can seem intimidating at first, but with practice and attention to detail, it can become a seamless part of your makeup routine.
You can achieve precise, flawless lines by using the right tools, maintaining steady hands, and avoiding common mistakes such as overloading the brush or rushing the drying process. Remember to choose a high-quality eyeliner and start with a clean, prepared canvas for the best results.
With these tips in mind, you’ll master the art of liquid eyeliner in no time!
About the Author
Jane Hubbard is a passionate beauty expert with a wealth of experience in makeup, hair, and overall beauty techniques. After years of working as a hairdresser specialist, she followed her entrepreneurial spirit and started her own consultancy business.
Jane has always been driven by her desire to help others feel confident in their own skin, and she does this by sharing her knowledge, experiences, and practical beauty tips. Through her consultancy, she empowers individuals to embrace their unique beauty, offering tailored guidance that boosts both self-esteem and personal style.
Professional Focus
- Specializes in makeup, hairstyling, and beauty consulting.
- Provides personalized beauty advice, tips, and techniques to help individuals feel confident in their appearance.
- Dedicated to staying up-to-date with the latest industry trends and developments.
- Passionate about creating a comfortable and empowering experience for every client.
Education History
- University of Craft and Design – Bachelor of Fine Arts (BFA) in Woodworking and Furniture Design
- Woodworking Apprenticeships – Extensive hands-on training with skilled craftsmen to refine carpentry and furniture making techniques
- Online Courses & Masterclasses – Continued education in advanced woodworking techniques, design principles, and specialized tools
Expertise:
- Makeup artistry, hairstyling, and beauty consulting.
- Personalized beauty techniques to enhance confidence and self-expression.
- Educating clients on how to maintain their beauty routines at home.