
Are you tired of your dry, matte makeup look? Want to try something new that will give you a dewy, radiant glow? Look no further than liquid highlighter!
Applying liquid highlighter can elevate your makeup game by adding a radiant, glowing finish. Whether you’re aiming for a subtle shimmer or a bold, dewy effect, liquid highlighter is a versatile product that suits various skin types and tones.

To achieve the perfect glow, knowing the right techniques and tools for application is essential. Understanding the different types of liquid highlighters available can help you choose the perfect one for your desired look.
This guide on how to apply liquid highlighter will walk you through the steps to apply liquid highlighter effortlessly, ensuring a flawless and luminous finish every time.
What Are the Benefits of Liquid Highlighter?
Before we dive into the application process, let’s discuss the benefits of using liquid highlighter.
- Versatile: Liquid highlighters come in various shades and formulations, making them suitable for different skin tones and types. They can also be used on multiple areas of the face, such as cheekbones, brow bone, cupid’s bow, and inner corners of the eyes.
- Natural-looking: When applied correctly, liquid highlighter gives a natural-looking glow to the skin without looking too shimmery or glittery.
- Long-lasting: Liquid highlighters typically have a more extended staying power than powder or cream highlighters. They also blend seamlessly into the skin and don’t require frequent daily touch-ups.
- Buildable Coverage: Liquid highlighters can be easily layered to achieve your desired level of intensity. This makes it great for both subtle and dramatic looks.
- Hydrating: Many liquid highlighters contain hydrating ingredients, making them suitable for dry skin types. They can also give a luminous and dewy finish to the skin.
Now that we know the benefits, let’s get into the step-by-step process of applying liquid highlighter.
What Will You Need?
Before starting the application process, gather the following tools and products:
- Liquid highlighter of your choice
- Makeup sponge or brush (depending on preference)
- Foundation or BB cream
- Setting powder
- Blush (optional)
Once your tools and products are ready, follow the steps below for a flawless application.
8 Easy Steps on How to Apply Liquid Highlighter
Step 1. Prepare Your Base:
Begin by prepping your skin with a clean and moisturized surface. Apply your favorite foundation or BB cream to even out your skin tone and create a smooth base for the highlighter. Blend the product thoroughly using a makeup sponge or brush, ensuring no streaks or uneven patches.
This step is crucial, as a well-prepared base enhances the seamless application of the liquid highlighter and prevents it from clinging to dry spots or settling into fine lines. If desired, lightly set your foundation with a translucent setting powder to avoid excess shine while maintaining a natural finish.
Step 2. Choose Your Highlighting Areas:
Identify the areas of your face you want to highlight. Typically, these include the high points of your face such as the cheekbones, the bridge of your nose, the brow bones, the cupid’s bow, and the inner corners of your eyes.
These areas naturally catch the light, and applying the highlighter here will create a radiant, lifted appearance. Always remember your face shape and personal preferences when deciding where to apply the product for the most flattering results.
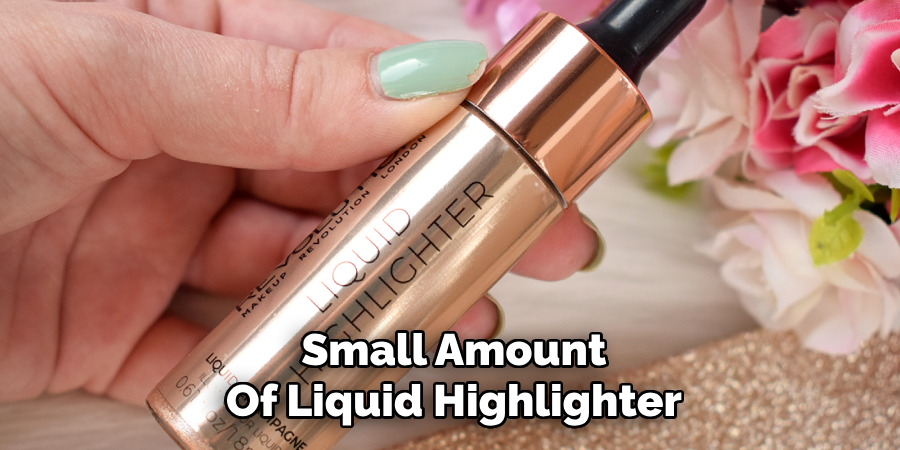
Step 3. Apply the Liquid Highlighter:
Using a small amount of liquid highlighter, start by dotting the product onto the chosen areas of your face. It’s essential to begin with a light hand, as you can always add more product if needed.
Use your fingers, a makeup sponge, or a brush to blend the highlighter gently into your skin, ensuring a seamless and natural look. Focus on mixing the edges well to avoid harsh lines and create a soft, glowing effect. Remember to layer gradually to achieve your desired level of luminosity without overdoing it.
Step 4. Set Your Highlight:
To ensure your highlight lasts throughout the day, set it with a powder highlighter or a translucent setting powder. Use a light, fluffy brush to gently dust the product over the areas where you applied the liquid highlighter.
This enhances the glow and locks it in place, preventing it from fading or smudging. For a more intense shine, choose a powder highlighter that complements the shade of your liquid highlighter. This step adds a finishing touch to your look, keeping your radiance intact all day or night.
Step 5. Final Touches and Tips:
Once your highlight is set, assess your look in natural light to ensure balance and symmetry. Blend out any areas that appear too intense or uneven with a clean brush or sponge. To amplify the glow for special occasions, add a small shimmer or glitter highlighter to the highest points of your face.
Remember, less is more—focus on enhancing your natural beauty rather than overpowering it. Lastly, carry a compact or small highlighter product for touch-ups throughout the day, especially if you have oily or combination skin. With these final steps, your highlight will leave you shining confidently in any setting!
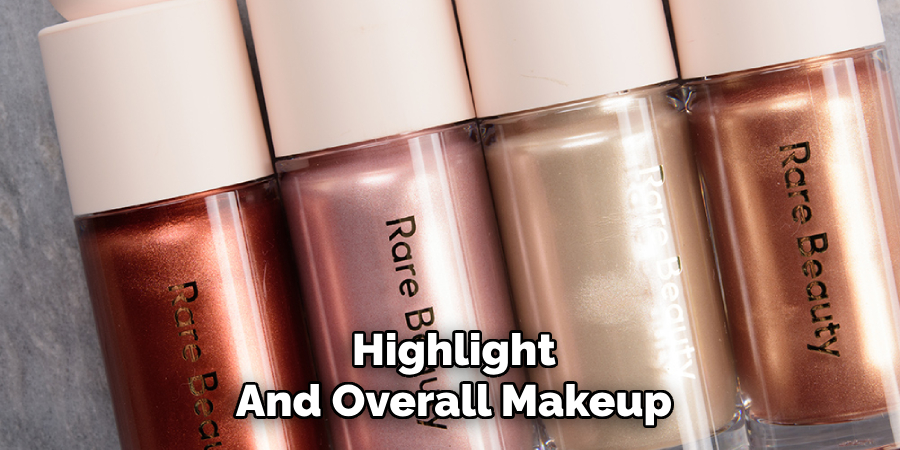
Step 6. Setting Your Makeup:
To ensure your highlight and overall makeup stay flawless throughout the day, finish with a setting spray. Hold the spray about 8–10 inches away from your face and mist lightly in an “X” or “T” motion.
This step locks in your makeup while adding a natural, dewy finish that enhances your highlighter’s glow. For those with oily skin, consider using a matte setting spray to control shine while maintaining the highlighted effect. By sealing your look, you’ll be ready to take on the day with confidence and radiance!
Step 7. Maintaining Your Glow Throughout the Day:
Keeping your highlight fresh requires a little maintenance, especially during long days or special events. Use blotting papers to gently remove excess oil without disturbing your makeup. After blotting, lightly reapply your highlighter to the areas where it has faded, using a brush or your fingertips for precision.
This quick touch-up will restore your glow and keep your makeup looking vibrant and polished. With these minor adjustments, your illuminated look will remain stunning from day to night.
Step 8. Removing Your Makeup Properly:
Removing your makeup thoroughly is essential to keep your skin healthy and prevent clogged pores. Begin by using a gentle makeup remover or micellar water to dissolve your highlighter and other makeup products. Follow this with a cleanser suited to your skin type to ensure all residue is removed.
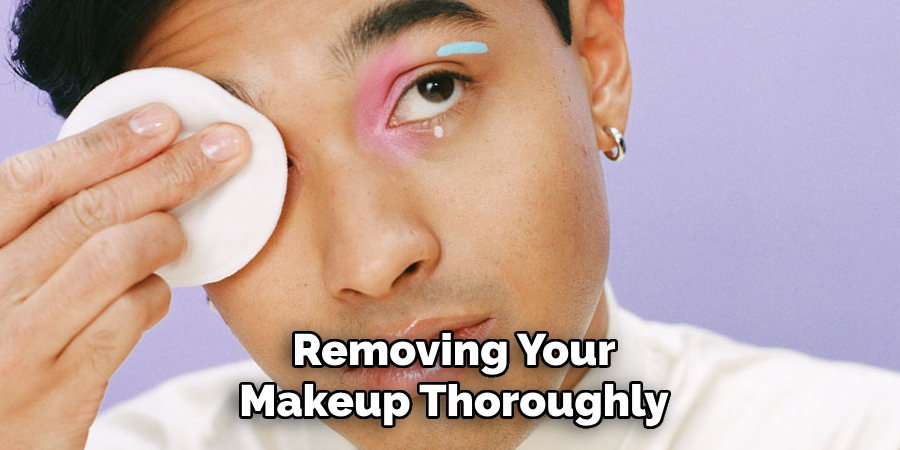
Gently pat your face dry with a clean towel, and finish with a hydrating moisturizer to replenish your skin. Proper removal maintains your skin’s glow and prepares it for future makeup applications.
By following these easy steps, you can achieve a gorgeous, glowing highlighter look that enhances your natural features and elevates any makeup style.
5 Things You Should Avoid
- Applying Too Much Product: Using excessive liquid highlighter can produce an overly shiny or greasy look. Start with a small amount and build it up gradually to achieve a natural glow.
- Skipping Proper Blending: Not blending your highlighter properly can leave visible streaks or harsh lines. Use a makeup sponge, brush, or fingers to blend it into your skin seamlessly.
- Ignoring Your Skin Type: Applying liquid highlighter on oily or uneven skin without prepping it can emphasize pores and texture. Always prepare your skin with a good primer and consider a formula suited to your skin type.
- Placing Highlighter in the Wrong Areas: Highlighting areas like your laugh lines or forehead creases can draw attention to imperfections. Focus on high points of your face, like cheekbones, the tip of your nose, and brow bones.
- Using the Wrong Shade: Choosing a shade that doesn’t complement your skin tone can make your makeup look unnatural. Opt for golden tones for warm undertones and champagne or pearl tones for cooler undertones.
How to Mix Liquid Highlighter With Foundation?
Mix a few drops of liquid highlighter with your foundation before applying it to your face to achieve an all-over luminous look. This technique will give you a subtle and natural glow without looking too shiny or greasy.
Here’s how to mix liquid highlighter with foundation:
- Start by choosing the right highlighter shade that complements your skin tone. You can also mix different shades to create a custom color.
- Squeeze out a pea-sized amount of your favorite liquid highlighter on the back of your hand.
- Next, mix a small amount of foundation on top of the highlighter and use a makeup brush or sponge.
- If you want a more intense glow, add another drop of highlighter and blend it in with the foundation.
- Once you have achieved your desired shade, apply the mixture to your face using a brush or beauty blender.
- Remember to start with a small amount and build up gradually until you reach your desired level of luminosity.
- Finish off by setting your makeup with a light dusting of translucent powder for long-lasting wear.
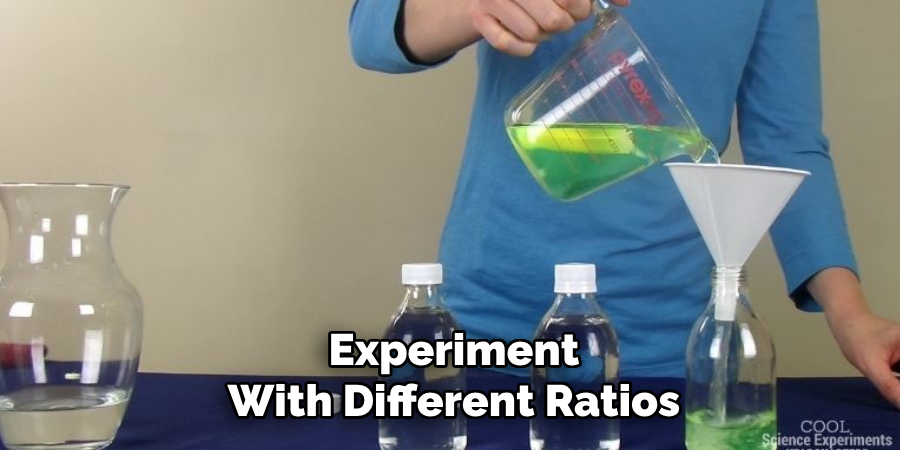
Experiment with different ratios and shades to find the perfect combination that works for you. This technique is also great for customizing your foundation shade if you have trouble finding an exact match for your skin tone.
Conclusion
How to apply liquid highlighter is a simple yet effective way to achieve a radiant, glowing complexion.
By mixing it with your foundation, you can create a subtle, all-over luminosity tailored to your skin tone and preference. It’s important to start small and build up gradually, ensuring a natural finish that enhances your features without appearing heavy. With the right tools and a bit of experimentation, you can effortlessly customize your routine to achieve a flawless, lit-from-within glow.
Remember, practice makes perfect, so take your time to find the best balance for your unique skin type.
About the Author
Jane Hubbard is a passionate beauty expert with a wealth of experience in makeup, hair, and overall beauty techniques. After years of working as a hairdresser specialist, she followed her entrepreneurial spirit and started her own consultancy business.
Jane has always been driven by her desire to help others feel confident in their own skin, and she does this by sharing her knowledge, experiences, and practical beauty tips. Through her consultancy, she empowers individuals to embrace their unique beauty, offering tailored guidance that boosts both self-esteem and personal style.
Professional Focus
- Specializes in makeup, hairstyling, and beauty consulting.
- Provides personalized beauty advice, tips, and techniques to help individuals feel confident in their appearance.
- Dedicated to staying up-to-date with the latest industry trends and developments.
- Passionate about creating a comfortable and empowering experience for every client.
Education History
- University of Craft and Design – Bachelor of Fine Arts (BFA) in Woodworking and Furniture Design
- Woodworking Apprenticeships – Extensive hands-on training with skilled craftsmen to refine carpentry and furniture making techniques
- Online Courses & Masterclasses – Continued education in advanced woodworking techniques, design principles, and specialized tools
Expertise:
- Makeup artistry, hairstyling, and beauty consulting.
- Personalized beauty techniques to enhance confidence and self-expression.
- Educating clients on how to maintain their beauty routines at home.