
Are you tired of struggling with traditional fake eyelashes that require glue and often look unnatural? Magnetic lashes might be the perfect solution for you!
Magnetic lashes are a game-changer in the world of beauty, offering a quick and easy way to achieve stunning, voluminous lashes without the mess of glue. Whether you’re prepping for a special occasion or simply enhancing your everyday look, magnetic lashes provide a hassle-free alternative to traditional false lashes. With a secure fit and reusable design, they’re perfect for makeup beginners and beauty enthusiasts alike.

This guide on how to apply magnetic lashes will walk you through the simple steps to apply magnetic lashes effortlessly, helping you achieve a flawless and natural finish every time. Let’s get started!
What Are the Benefits of Magnetic Lashes?
Before we dive into the application process, it’s essential to understand why magnetic lashes are gaining popularity in the beauty world. Here are some of the key benefits of using magnetic lashes:
- No Adhesive Needed: Unlike traditional false lashes that require lash glue, magnetic lashes use tiny magnets to stay in place. This eliminates any messiness or potential irritation from lash adhesive.
- Reusable: With proper care, magnetic lashes can be used multiple times, making them a cost-effective alternative to disposable false lashes.
- Easy Application: Applying magnetic lashes is a quick and easy process, making them perfect for those who struggle with traditional false lash application.
- Natural Look: Magnetic lashes come in a variety of styles and lengths, allowing you to achieve a natural-looking lash look that suits your preference.
- No Damage: Unlike traditional false lashes that can damage your natural lashes if not applied or appropriately removed, magnetic lashes do not cause any harm to your real lashes.
- Versatile: Magnetic lashes can be easily removed and reapplied without any hassle, making them perfect for special occasions or daily wear.
What Will You Need?
To achieve the perfect magnetic lash look, you will need a few essential tools:
- Magnetic lashes of your choice
- Eyelash glue (optional)
- Tweezers or lash applicator tool
- Mascara (optional)
- Makeup remover (if using eyelash glue)
Once you have these tools, you are ready to start applying your magnetic lashes.
9 Easy Steps on How to Apply Magnetic Lashes
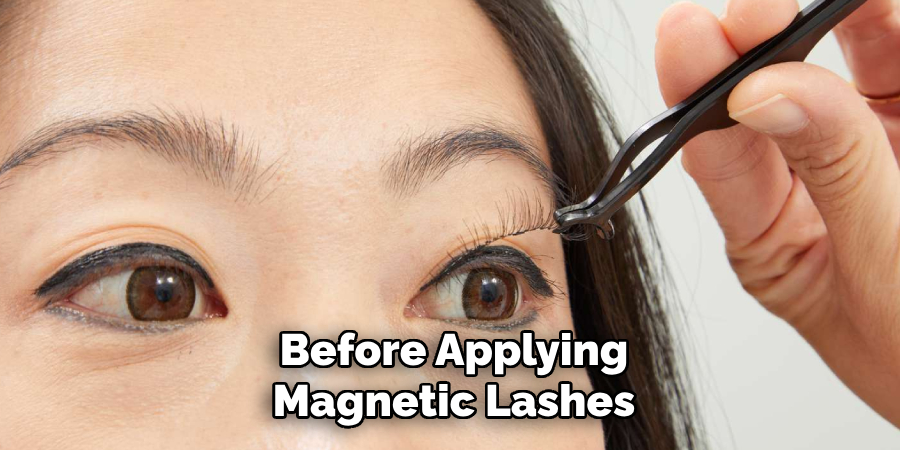
Step 1: Prepare Your Lashes
Before applying magnetic lashes, ensure your natural lashes are clean and free from makeup, oil, and residue. Use a gentle makeup remover or cleanser to thoroughly clean your lash line. This helps the magnetic lashes adhere better and stay in place throughout the day.
If you prefer, you can curl your natural lashes with an eyelash curler for extra lift and shape. Applying a light coat of mascara is optional, but some people find it helps blend the magnetic lashes with their natural ones for a more seamless look. Make sure everything is dry and ready before moving to the next step.
Step 2: Clean and Prep Your Eyelids
Before applying magnetic lashes, it’s essential to ensure your eyelids are clean and free of oils or makeup residue. Use a gentle, oil-free makeup remover or micellar water on a cotton pad to gently wipe your eyelids.
This step ensures that the magnetic eyeliner adheres properly and prevents it from slipping throughout the day. Dry your eyelids completely to create a smooth, clean surface. Taking the time to prep your eyelids properly will help achieve a more secure and long-lasting application.
Step 3: Apply the Magnetic Eyeliner
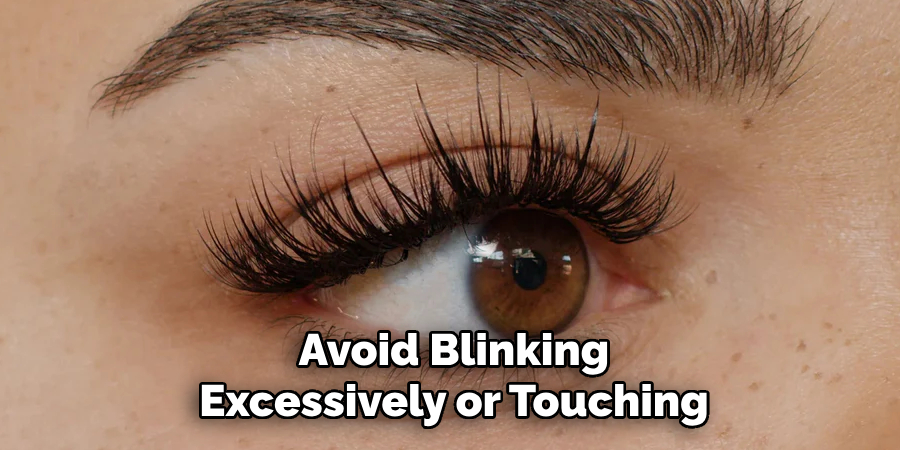
Once your eyelids are clean and prepped, it’s time to apply the magnetic eyeliner. Start by shaking the eyeliner bottle well to ensure the formula is thoroughly mixed. Using the applicator, carefully draw a thin, even line along your upper lash line, as close to your natural lashes as possible. If you want added security, you can apply a thicker line or even a second coat once the first one dries.
Be sure to give the eyeliner ample time to dry completely, as this step is crucial for the magnetic lashes to adhere correctly. Avoid blinking excessively or touching the eyeliner while it sets to prevent smudging or uneven application. For best results, follow the instructions provided with your magnetic liner to ensure proper use.
Step 4: Measure and Trim (If Necessary)
Before applying the magnetic lashes, it’s essential to measure them against your natural lash line to ensure a comfortable and secure fit. Hold the magnetic lash strip up to your upper lash line, starting from the inner corner and gently laying it across to the outer corner. If the lash strip extends beyond your natural lash line or feels too long, you’ll need to trim it to avoid discomfort and to create a more natural look.
Use a pair of small, sharp scissors to carefully trim the excess from the outer edge of the lash strip—never trim from the inner corner, as this can alter the design and compromise the natural taper of the lashes. Take your time with this step; precision is key to achieving a polished and seamless result.
Step 5: Use Tweezers or an Applicator for Precision
When applying false lashes, using tweezers or a specialized lash applicator can make all the difference in achieving a professional finish. These tools provide greater control and help you place the lash strip as close to your natural lash line as possible. Begin by gripping the lash strip gently in the center with your tweezers or applicator. Hold the lash up to your eye to ensure proper alignment before applying any adhesive.
Once the adhesive has been applied and allowed to become tacky, use the tweezers to position the center of the lash strip onto your lash line. Then, carefully press down the inner and outer corners, adjusting the placement as needed for a natural look. Tweezers also allow you to press your false lashes and natural lashes together, creating a seamless blend. Always exercise caution when working near your eyes to avoid accidental pinching or poking, and sanitize your tools before use to maintain hygiene.
Step 6: Attach the Top Lash
Once you have positioned and secured the center of the lash strip, focus on perfecting the placement. Begin by gently pressing the rest of the lash strip along your natural lash line, starting from the center and working your way outward. Use your tweezers or fingertips to ensure the strip adheres evenly to your eyelid.
Pay close attention to the inner and outer corners, as they are prone to lifting if not adequately secured. If you notice any gaps between your natural lashes and the false lashes, lightly press them together using your tweezers for a seamless finish. Additionally, you can use the handle of a makeup brush or a similar tool to gently press the lash strip into place, ensuring maximum adhesion without damaging the delicate lash band.
Step 7: Secure with the Bottom Lash
To ensure that your false lashes remain securely in place and provide a natural look, consider using the bottom lash technique for added stability. Take a second strip of false lashes, ideally a thinner or lighter version, and carefully position it underneath your natural lashes. Align it with the upper lash strip so that the two strips meet, effectively sandwiching your natural lashes in between.
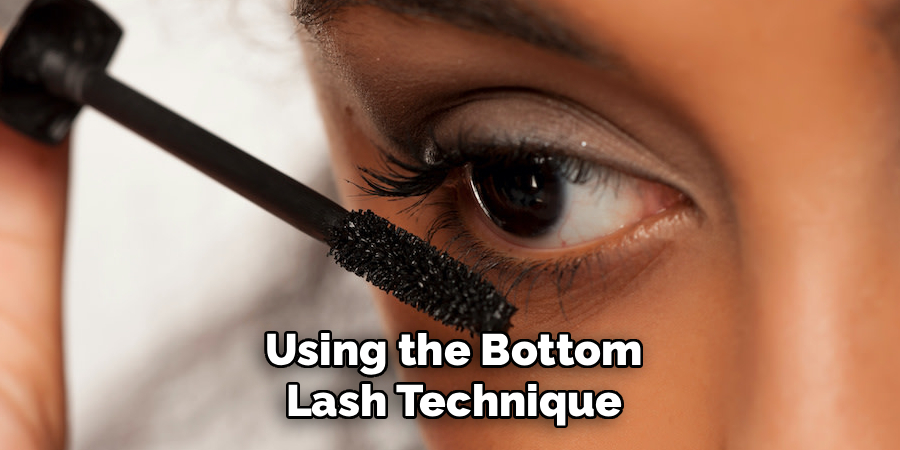
This method not only enhances adhesion but also creates a fuller, more cohesive lash appearance. Be sure to use tweezers for precise placement and press gently to avoid discomfort. If needed, a clear lash adhesive can be applied sparingly to the bottom lash to ensure a seamless finish. Take your time and adjust as necessary to achieve a professional result.
Step 8: Adjust for Comfort
Once your lashes are in place, it’s essential to ensure they feel comfortable and secure. Gently blink a few times to test the placement and identify any areas where the lashes may be irritating or feel loose. If you notice any discomfort, use your tweezers to make minor adjustments by carefully repositioning the lash strip.
Pay extra attention to the inner and outer corners, as these areas are often prone to lifting or poking the skin. If needed, reapply a tiny amount of adhesive to these sections for added stability. You can also use a lash applicator or your fingers to gently press the natural and false lashes together, ensuring a seamless blend.
Step 9: Apply Mascara
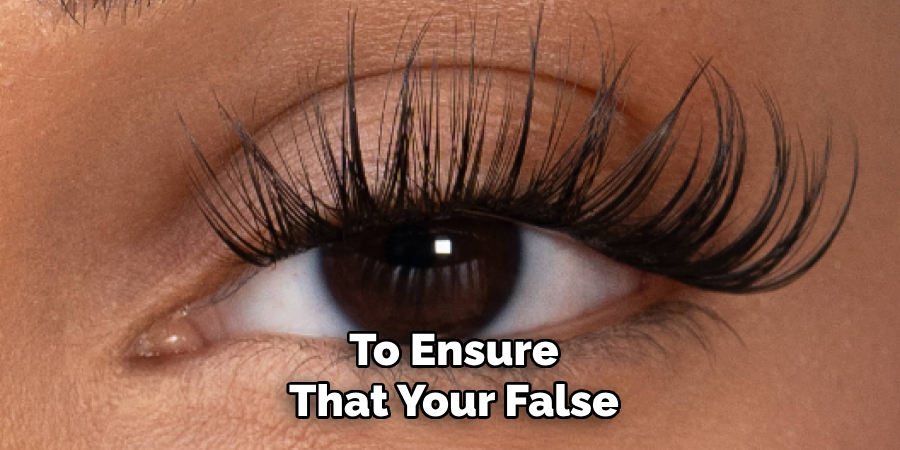
Once you have ensured the false lashes are securely in place, it’s time to apply mascara to blend your natural and false lashes seamlessly. Choose a mascara that complements the style of lashes you’re wearing—opt for lengthening or volumizing formulas depending on your desired look.
Start at the base of your lashes and gently wiggle the mascara wand upward through the lashes, coating both your natural and false lashes. This technique not only adds an extra layer of cohesion but also enhances the overall intensity of your lash line.
By following these steps, your false lashes will blend in seamlessly with your natural lashes, creating a more natural and flawless appearance.
Conclusion
How to apply magnetic lashes may seem intimidating at first, but with a bit of practice and patience, it can become a seamless part of your beauty routine.
By adequately preparing your natural lashes, carefully aligning the magnetic strips, and ensuring a secure fit, you can achieve a stunning, natural look with minimal effort. Magnetic lashes are a game-changer for those seeking convenience and versatility, allowing you to enhance your eyes without the hassle of traditional lash glue.
Confidence and precision are key, and with time, you’ll master the technique for flawless results every time.
About the Author
Jane Hubbard is a passionate beauty expert with a wealth of experience in makeup, hair, and overall beauty techniques. After years of working as a hairdresser specialist, she followed her entrepreneurial spirit and started her own consultancy business.
Jane has always been driven by her desire to help others feel confident in their own skin, and she does this by sharing her knowledge, experiences, and practical beauty tips. Through her consultancy, she empowers individuals to embrace their unique beauty, offering tailored guidance that boosts both self-esteem and personal style.
Professional Focus
- Specializes in makeup, hairstyling, and beauty consulting.
- Provides personalized beauty advice, tips, and techniques to help individuals feel confident in their appearance.
- Dedicated to staying up-to-date with the latest industry trends and developments.
- Passionate about creating a comfortable and empowering experience for every client.
Education History
- University of Craft and Design – Bachelor of Fine Arts (BFA) in Woodworking and Furniture Design
- Woodworking Apprenticeships – Extensive hands-on training with skilled craftsmen to refine carpentry and furniture making techniques
- Online Courses & Masterclasses – Continued education in advanced woodworking techniques, design principles, and specialized tools
Expertise:
- Makeup artistry, hairstyling, and beauty consulting.
- Personalized beauty techniques to enhance confidence and self-expression.
- Educating clients on how to maintain their beauty routines at home.