
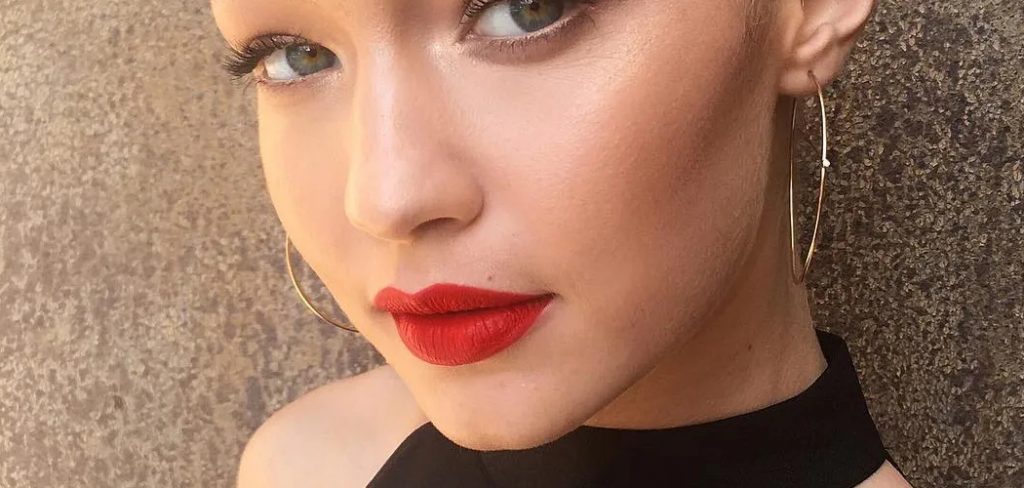
Are you tired of applying red lipstick perfectly without looking like a clown? Don’t worry, you’re not alone. Red lipstick is a classic and timeless look that can elevate any makeup look. However, applying it can be tricky and requires some practice and the proper techniques.
How to apply red lipstick is a timeless beauty statement that can elevate any look from casual to glamorous. Perfecting the application ensures a bold and flawless finish that highlights your lips and boosts confidence.
Whether you’re preparing for a night out or adding a touch of elegance to your everyday style, learning the proper techniques to apply red lipstick will ensure long-lasting, smudge-free results. Let’s dive into the steps and tips for achieving the perfect red lip.
What Are the Benefits of Wearing Red Lipstick?
Before we dive into the application process of makeup look with red lipstick, it’s essential to understand why red lipstick is such a popular and coveted makeup item. Here are some benefits of wearing red lipstick:
- Adds a Pop of Color: Red lipstick instantly brightens up your face and adds a bold touch to any outfit.
- Enhances Your Natural Features: The right shade of red can bring out the natural undertones in your lips, making them appear fuller and more defined.
- Versatile: From classic matte formulas to glossy finishes, there are endless options when it comes to shades and textures of red lipstick, making it suitable for any occasion.
- Boosts Confidence: Something is empowering about wearing red lipstick. It can make you feel confident, bold, and ready to take on the world.
What Will You Need?
Before we begin the application process, make sure you have these essential items on hand:
- Red Lipstick: The most essential item is your red lipstick. Choose a shade that complements your skin tone and personal style.
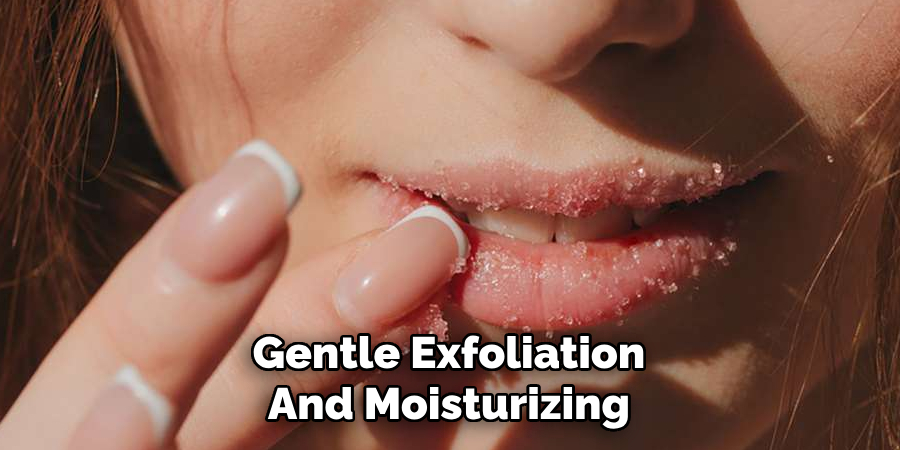
- Lip Scrub or Exfoliator: To ensure a smooth and even application, it’s crucial to prep your lips beforehand. Use a gentle lip scrub or exfoliator to remove dry or flaky skin.
- Lip Balm: After exfoliating, apply a nourishing lip balm to hydrate and moisturize your lips before applying lipstick.
- Lip Liner: This step is optional but highly recommended. A lip liner will help define and shape your lips, prevent bleeding, and make the lipstick last longer.
- Concealer or Foundation: To achieve a clean and sharp edge, you’ll need a concealer or foundation to tidy up any mistakes around the edges of your lips.
Once these items are ready, let’s move on to the application process.
8 Easy Steps on How to Apply Red Lipstick
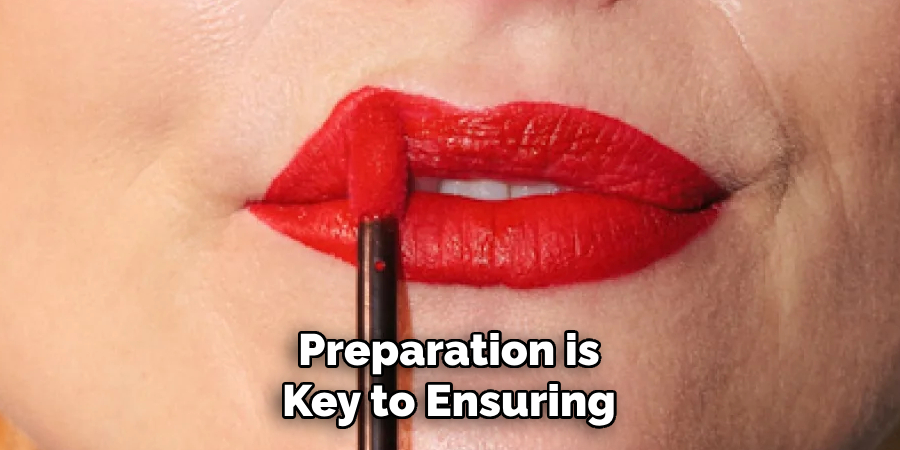
Step 1: Prep Your Lips
Preparation is key to ensuring a flawless red lipstick application. Start by exfoliating your lips with a gentle lip scrub or a DIY mixture made of sugar and honey. This step removes any dead or flaky skin, creating a smooth canvas for the lipstick. After exfoliating, rinse your lips with water and gently pat them dry with a soft towel.
Next, apply a hydrating lip balm to deeply moisturize your lips and prevent them from drying under the lipstick. Allow the balm a few minutes to fully absorb before moving to the next step. Prepping your lips improves the lipstick’s appearance and ensures it lasts longer without cracking or feathering.
Step 2: Apply a Lip Primer
Applying a lip primer is essential for a long-lasting and smooth red lipstick look. A lip primer helps to create an even base, improve the lipstick’s vibrancy, and prevent it from bleeding or smudging throughout the day.
Gently dab a small amount of primer across your lips, blending it evenly. If you don’t have a dedicated lip primer, a tiny dab of foundation or concealer can work as an alternative. This step ensures your red lipstick stays in place while enhancing its bold color.
Step 3: Line Your Lips
Lining your lips is a crucial step to achieving a precise and defined red lipstick look. Use a lip liner that closely matches your lipstick shade to outline the natural edges of your lips. Start from the center of your upper lip and carefully trace along the Cupid’s bow, moving outward toward the corners.
Repeat the same technique for the lower lip. To add longevity and prevent color fading, fill in your lips with the liner before applying the lipstick. This step not only enhances the shape of your lips but also prevents the lipstick from feathering or smudging.
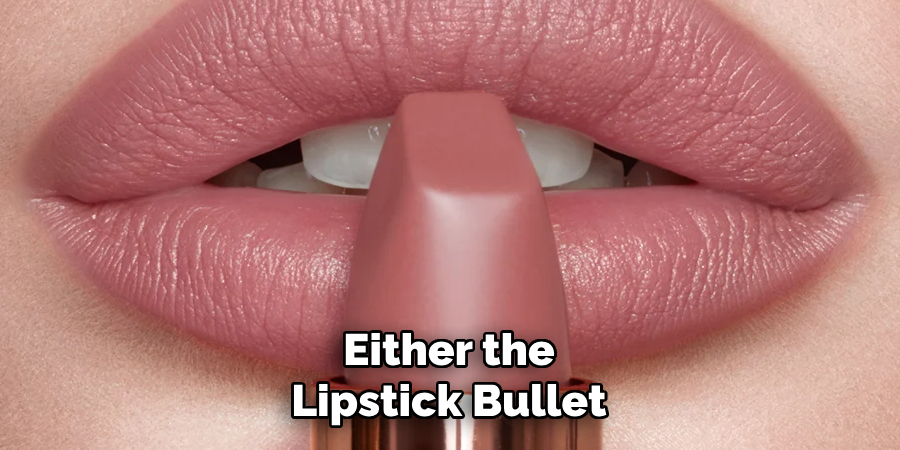
Step 4: Apply the Red Lipstick
Now it’s time to apply your red lipstick. Using either the lipstick bullet or a lip brush, start from the center of your lips and work outward, ensuring even coverage. A lip brush allows for more precision, especially around the edges. Press your lips together gently to evenly distribute the color, but avoid overdoing it to prevent a messy application. For a more intense and polished finish, apply a second layer of lipstick. This step combines the entire look, highlighting the bold and beautiful red color.
Step 5: Clean Up the Edges
To achieve a flawless red lip, take the time to clean up any smudges around the edges. Use a small, flat brush dipped in concealer to carefully outline your lips, creating a sharp and precise shape.
This enhances the definition and prevents the lipstick from bleeding onto the surrounding skin. Blend the concealer outward for a seamless finish. You can also use a cotton swab dipped in makeup remover to tidy up any mistakes for extra precision. This final step ensures a professional and polished look that will last throughout the day.
Step 6: Set the Look
To ensure your red lipstick stays in place all day, setting the look is essential. Take a single ply of tissue and gently press it over your lips. Then, using a fluffy brush, lightly dust a translucent setting powder over the tissue.
This method locks in the color without dulling its vibrancy. For added longevity, finish with a quick spritz of setting spray to keep your makeup looking fresh and flawless. This step will help your bold red lip withstand smudging, fading, or transfer, ensuring you look stunning from morning to night.
Step 7: Reapply as Needed
Even with the best setting techniques, it’s natural for lipstick to wear off slightly throughout the day, especially after eating or drinking. To maintain your bold red lip, carry your lipstick and a small mirror for quick touch-ups. Gently reapply a thin layer of lipstick to refresh the color, and use a lip brush if needed for precision.
Blot lightly with tissue after each application to prevent buildup and to keep the look smooth and even. This final step will ensure your lips remain vibrant and flawless no matter the occasion.
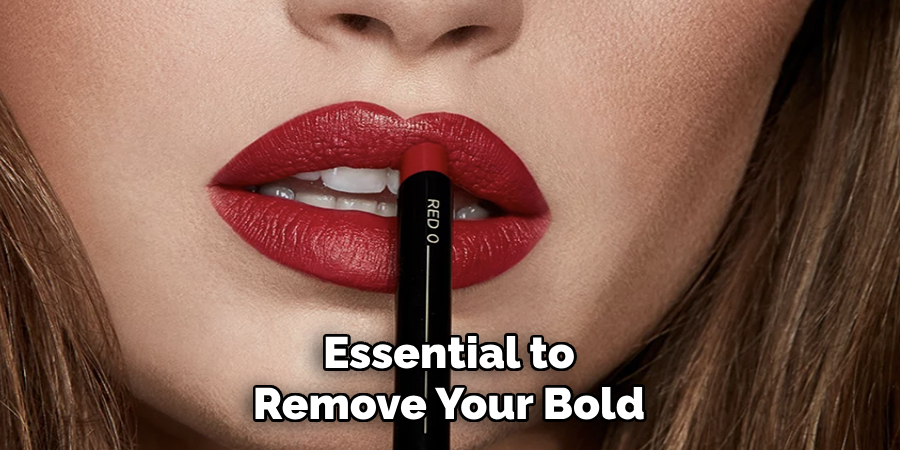
Step 8: Remove Your Lipstick Properly
At the end of the day, it’s essential to remove your bold red lipstick thoroughly to maintain the health of your lips. Use a gentle makeup remover or an oil-based cleanser to break down the lipstick. Apply the remover to a cotton pad or soft cloth, and gently wipe away the product without harsh scrubbing.
Afterward, exfoliate your lips lightly with a lip scrub to remove any residual color and dead skin, then follow up with a nourishing lip balm to restore moisture. This routine will leave your lips clean, soft, and ready for another stunning application.
Following these eight easy steps, you can confidently rock a bold and beautiful red lip for any occasion.
5 Things You Should Avoid
- Skipping Lip Liner: Avoid applying red lipstick without using a matching lip liner. Lip liner helps define the lips, prevents the color from bleeding, and ensures a clean, polished look.
- Neglecting Lip Prep: Never apply red lipstick onto dry or chapped lips. Skipping exfoliation and moisturizing can make the color look uneven and unflattering.
- Overapplying Product: Too much red lipstick can lead to smudging and a cakey appearance. Stick to layering lightly and building the intensity gradually.
- Choosing the Wrong Shade: Not all red lipsticks complement every skin tone. Avoid picking a shade that clashes with your complexion—experiment to find the perfect hue.
- Ignoring Application Tools: Avoid smearing lipstick directly from the tube without precision. Use a lip brush for more control, especially around the edges, to achieve a flawless finish.
How Can You Combine Color
There are endless possibilities when it comes to combining red lipstick with other makeup looks. Red pairs beautifully with neutral eyeshadows for a classic and elegant look.
Try a winged eyeliner or smokey eye in deep shades like black or navy for a bold statement. You can also experiment with blush tones to complement your red lips, from soft pinks to warm corals. Don’t be afraid to play around and find the perfect combination that suits you best! Remember, confidence is key when wearing a statement red lip.
Additionally, consider incorporating complementary colors into your overall makeup look. For example, if you’re wearing cool-toned red lipstick, opt for warmer-toned eyeshadows, and vice versa. This balance creates a harmonious and cohesive look. You can also play with different textures, such as pairing a matte red lip with shimmery eyeshadow for an eye-catching contrast.
Conclusion
How to apply red lipstick can seem intimidating, but with the right techniques, it’s easy to achieve a polished and stunning look.
Start by prepping your lips with a gentle exfoliation and moisturizing balm to ensure a smooth application. Use a lip liner to outline and fill in your lips, which helps prevent smudging and extends the wear of your lipstick.
Choose a high-quality red lipstick that complements your skin tone, and apply it directly from the bullet or with a lip brush for greater precision. Blot your lips gently with a tissue and reapply for a longer-lasting finish. Finally, check for any smudges or uneven edges and clean them up with a small brush or concealer.
With practice, you’ll master the art of applying red lipstick and feel confident rocking this timeless and bold look!
About the Author
Jane Hubbard is a passionate beauty expert with a wealth of experience in makeup, hair, and overall beauty techniques. After years of working as a hairdresser specialist, she followed her entrepreneurial spirit and started her own consultancy business.
Jane has always been driven by her desire to help others feel confident in their own skin, and she does this by sharing her knowledge, experiences, and practical beauty tips. Through her consultancy, she empowers individuals to embrace their unique beauty, offering tailored guidance that boosts both self-esteem and personal style.
Professional Focus
- Specializes in makeup, hairstyling, and beauty consulting.
- Provides personalized beauty advice, tips, and techniques to help individuals feel confident in their appearance.
- Dedicated to staying up-to-date with the latest industry trends and developments.
- Passionate about creating a comfortable and empowering experience for every client.
Education History
- University of Craft and Design – Bachelor of Fine Arts (BFA) in Woodworking and Furniture Design
- Woodworking Apprenticeships – Extensive hands-on training with skilled craftsmen to refine carpentry and furniture making techniques
- Online Courses & Masterclasses – Continued education in advanced woodworking techniques, design principles, and specialized tools
Expertise:
- Makeup artistry, hairstyling, and beauty consulting.
- Personalized beauty techniques to enhance confidence and self-expression.
- Educating clients on how to maintain their beauty routines at home.