
Achieving a flawless, long-lasting makeup look is a common goal, but few things are more frustrating than seeing your carefully applied products settle into fine lines and creases. This common issue can make your skin appear older and your makeup look less polished. Understanding why this happens and how to prevent it is key to maintaining a smooth finish throughout the day.
Fortunately, with the right techniques and products, you can easily combat makeup creasing. It all comes down to proper skin preparation, application methods, and setting your look for success. This guide on how to avoid creases in makeup will walk you through everything you need to know to keep your makeup looking fresh and crease-free from morning to night.
Tools and Materials You’ll Need
- Hydrating Moisturizer
- Eye Cream
- Makeup Primer (silicone-based or hydrating)
- Liquid or Cream Concealer and Foundation
- Makeup Sponge or Blending Brush
- Translucent Setting Powder
- Fluffy Powder Brush or Powder Puff
- Setting Spray
10 Step-by-step Guidelines on How to Avoid Creases in Makeup
Step 1: Start with Proper Skin Preparation
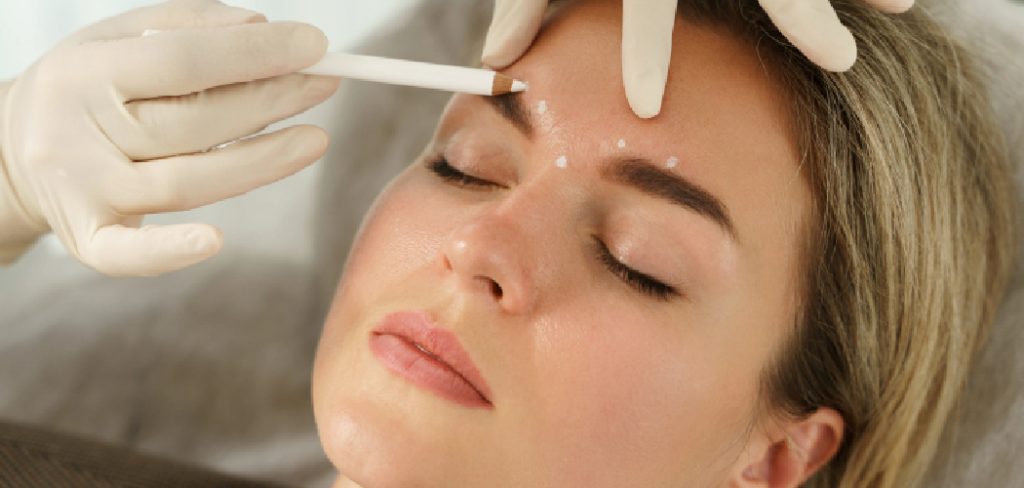
The foundation of a crease-free makeup application begins long before you pick up a brush. Properly preparing your skin is the most critical step to ensure a smooth canvas. Start by cleansing your face to remove any dirt, oil, or leftover makeup. Follow up with a hydrating moisturizer suited for your skin type. Well-hydrated skin is plumper and smoother, which helps to fill in fine lines and prevent makeup from sinking into them. This creates an even surface for your products to glide over.
Don’t forget the delicate under-eye area, which is particularly prone to creasing. Apply a dedicated eye cream to provide targeted hydration. Gently tap the cream into the skin using your ring finger until it’s fully absorbed. Allowing your moisturizer and eye cream to sink in for a few minutes before moving on to the next step is crucial. This ensures that your skin is supple and ready for makeup, rather than being wet, which could cause products to slide around and settle improperly.
Step 2: Apply a Quality Makeup Primer
Once your skin is hydrated, the next essential step is applying a makeup primer. A primer acts as a barrier between your skin and your makeup, creating an ultra-smooth surface that helps products adhere better and last longer. It fills in pores, fine lines, and any uneven texture, which significantly reduces the chances of your foundation and concealer creasing later on. There are various types of primers, so choose one that addresses your specific skin concerns, such as a silicone-based primer for smoothing or a hydrating one for dry skin.
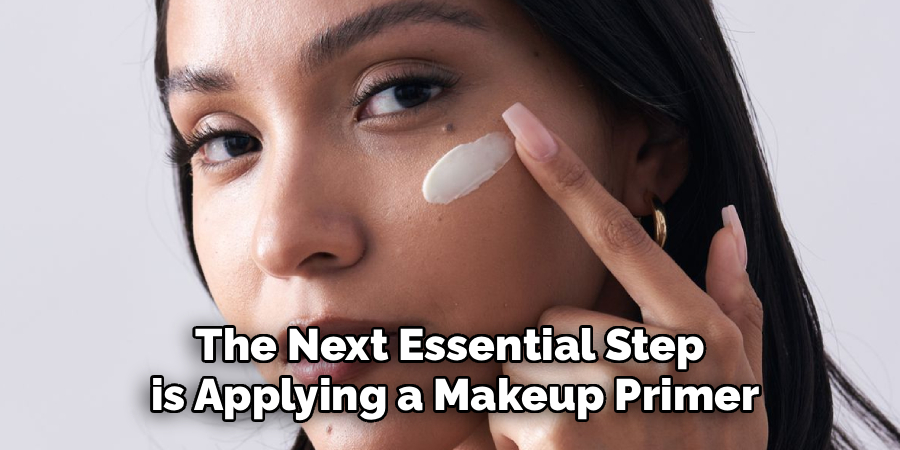
When applying primer, use a small, pea-sized amount and focus on the areas where you tend to crease the most, like around the eyes, mouth, and forehead. Gently pat or press the product into your skin rather than rubbing it. This technique ensures that you are filling in the lines without disturbing the skincare products you’ve already applied. Give the primer a minute or two to set before you move on to applying your foundation. This creates the perfect base for a seamless application.
Step 3: Use Less Product
One of the biggest culprits behind creasing is simply using too much product. While it might seem like more foundation or concealer will provide better coverage, it actually increases the likelihood of the makeup caking and settling into lines. The more product you have on your skin, the more there is to move around and crease as you make facial expressions throughout the day. The key is to build coverage strategically and only where you need it most.
Start with a very thin layer of foundation and blend it out thoroughly. If you need more coverage in certain spots, go back and add a small amount, building it up gradually. The same principle applies to concealer. Apply it sparingly, focusing only on the areas that need brightening or concealing, such as the inner corners of your eyes and any blemishes. Using a light hand is fundamental to achieving a natural, skin-like finish that is less prone to creasing.
Step 4: Choose the Right Foundation and Concealer Formulas
The type of foundation and concealer you use can make a significant difference in preventing creases. Heavy, thick, or overly matte formulas are more likely to look cakey and settle into fine lines. Instead, opt for lightweight, hydrating liquid or cream products. These formulas tend to be more flexible and move with your skin, rather than sitting on top of it and cracking. They blend more seamlessly and provide a more natural finish.
When selecting a concealer, especially for the under-eye area, look for one that is specifically designed for that purpose. These are often more emollient and have self-setting properties. Avoid thick, “stage makeup” style concealers unless absolutely necessary. A good rule of thumb is to test the product on the back of your hand; if it feels heavy or dry, it will likely crease on your face. A lightweight, buildable formula will give you the coverage you need without the unwanted texture.
Step 5: Blend, Blend, Blend
Proper blending is a non-negotiable step for a crease-free makeup look. Whether you use a damp makeup sponge, a brush, or your fingers, the goal is to melt the product into your skin so there are no harsh lines or visible layers. When applying foundation and concealer, use stippling or bouncing motions with a damp sponge. This technique presses the product into the skin for a flawless, airbrushed effect, rather than just moving it around on the surface.

Pay special attention to areas prone to creasing. After applying your concealer under your eyes, look up and use the tip of your sponge or a small brush to blend out any product that has already started to settle into lines. Make sure the product is evenly distributed and there are no areas of heavy concentration. Taking an extra minute to blend thoroughly can make a world of difference in how your makeup wears throughout the day.
Step 6: Set Your Makeup Immediately with Powder
After you have blended your liquid and cream products to perfection, it is crucial to set them in place with powder. This step locks your makeup down, absorbs excess oil, and prevents it from moving or creasing. The key is to apply the powder while your foundation and concealer are still slightly damp, but after you’ve ensured there are no existing creases. If you see any product settling, blend it out one last time before applying powder.
For the best results, use a finely milled translucent setting powder. You can apply it using a technique called “baking,” where you press a generous amount of powder onto the areas that crease most (like under the eyes and around the nose) with a damp sponge and let it sit for a few minutes before dusting off the excess. Alternatively, for a lighter touch, you can use a fluffy brush to lightly dust a thin layer of powder all over your face to set everything.
Step 7: Apply Powder Products Strategically
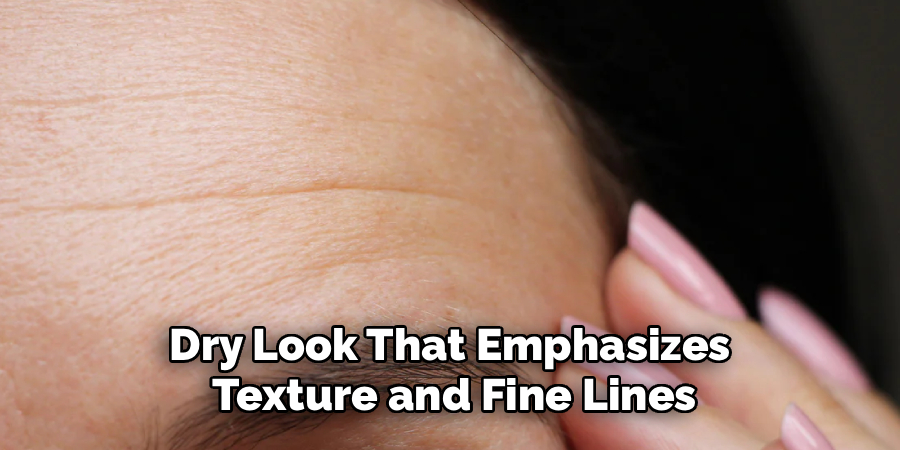
Once your base is set with translucent powder, you can move on to other powder products like bronzer, blush, and highlighter. However, be mindful of where and how you apply them. Adding too much powder on top of your already set base can create a heavy, dry look that emphasizes texture and fine lines. This is especially true for areas that move a lot, like around the eyes and mouth. Try to keep powder products away from the immediate under-eye area.
When applying bronzer or blush, use a light hand and a fluffy brush. Build the color up gradually rather than applying a lot at once. This gives you more control and prevents a cakey appearance. For highlighter, choose a finely milled formula that gives a sheen rather than a glittery finish, as large glitter particles can draw attention to skin texture. Applying these products with precision will enhance your features without contributing to creasing.
Step 8: Blot Excess Oil Throughout the Day
Even with the best preparation and application, natural oils can start to break down your makeup as the day goes on, leading to creasing. To combat this, keep blotting papers or a powder puff on hand for quick touch-ups. Instead of layering on more powder, which can lead to a cakey buildup, first use a blotting paper to gently lift away excess oil from your skin. This will refresh your makeup without adding more product.
Press the blotting sheet onto shiny areas like your T-zone (forehead, nose, and chin). You will see the oil being absorbed by the paper. After blotting, if you feel you need to, you can apply a very light dusting of powder to mattify the area again. This two-step process of blotting first and then powdering (if needed) is much more effective at maintaining a smooth finish than simply piling on more makeup.
Step 9: Use a Setting Spray to Lock Everything In
The final step to ensure your makeup remains crease-free is to use a setting spray. A good setting spray works by melting all the layers of makeup together—from primer to powder—creating a unified, seamless finish that looks more like natural skin. It also forms a protective film over your makeup, helping it to resist smudging, fading, and settling into fine lines for hours.
Hold the setting spray about 8-10 inches away from your face and mist it evenly in an “X” and “T” motion. Be careful not to drench your face; a light, even mist is all you need. Allow the spray to air dry completely without touching your face. Some setting sprays offer a matte finish, while others provide a dewy glow, so you can choose one that suits your desired look. This final step is like hairspray for your face, locking everything in place.

Step 10: Check and Correct Throughout the Day
Despite your best efforts, a small amount of creasing can sometimes be inevitable, especially on long days or in humid weather. The trick is to know how to quickly and easily correct it without ruining the rest of your makeup. Periodically check your makeup in a mirror, paying close attention to the areas where you typically crease, such as under your eyes or in your smile lines.
If you spot any creasing, you can gently pat the area with your ring finger. The warmth of your finger will help to re-blend the product and smooth out the line. You can also use a dry, clean makeup sponge to lightly press over the creased area to pick up any excess product and smooth it out. This quick fix is much better than trying to cover the crease with more concealer, which will only make the problem worse.
Following these steps on how to avoid creases in makeup can help you achieve a flawless and long-lasting look. With the right techniques, products, and tools, you can ensure that your makeup stays put all day without any unsightly creasing.

Conclusion
Preventing makeup from creasing is entirely achievable with the right approach. It’s a process that emphasizes preparation, moderation, and technique over simply applying more product.
By focusing on hydrating your skin, using lightweight formulas, blending meticulously, and setting your makeup properly, you create a look that is not only flawless but also durable. These steps on how to avoid creases in makeup will help you enjoy a smooth, fresh-faced appearance all day long, allowing you to wear your makeup with confidence.
About the Author
Jane Hubbard is a passionate beauty expert with a wealth of experience in makeup, hair, and overall beauty techniques. After years of working as a hairdresser specialist, she followed her entrepreneurial spirit and started her own consultancy business.
Jane has always been driven by her desire to help others feel confident in their own skin, and she does this by sharing her knowledge, experiences, and practical beauty tips. Through her consultancy, she empowers individuals to embrace their unique beauty, offering tailored guidance that boosts both self-esteem and personal style.
Professional Focus
- Specializes in makeup, hairstyling, and beauty consulting.
- Provides personalized beauty advice, tips, and techniques to help individuals feel confident in their appearance.
- Dedicated to staying up-to-date with the latest industry trends and developments.
- Passionate about creating a comfortable and empowering experience for every client.
Education History
- University of Craft and Design – Bachelor of Fine Arts (BFA) in Woodworking and Furniture Design
- Woodworking Apprenticeships – Extensive hands-on training with skilled craftsmen to refine carpentry and furniture making techniques
- Online Courses & Masterclasses – Continued education in advanced woodworking techniques, design principles, and specialized tools
Expertise:
- Makeup artistry, hairstyling, and beauty consulting.
- Personalized beauty techniques to enhance confidence and self-expression.
- Educating clients on how to maintain their beauty routines at home.