
Dealing with tangled hair can be a frustrating and painful experience. It often feels like a battle you can’t win, especially after a relaxing hair wash.
Those stubborn knots not only make combing a chore but can also lead to significant hair breakage and damage. The good news is that with a few adjustments to your routine, you can keep your hair smooth, manageable, and free of tangles.
This guide on how to avoid tangles when washing hair will walk you through everything you need to know to transform your hair washing process and protect your strands.
What Will You Need?
To set yourself up for success, it helps to have the right tools and products on hand. Here’s a list of essentials for a tangle-free wash day:
- Wide-tooth Comb: This is your best friend for detangling wet hair without causing damage.
- Detangling Brush: A flexible-bristle brush designed specifically for working through knots gently.
- Sulfate-free Shampoo: Gentler on the hair, it cleanses without stripping natural oils, which helps reduce dryness and tangling.
- Moisturizing Conditioner: A good conditioner provides slip, making it easier to detangle your hair in the shower.
- Leave-in Conditioner: This adds an extra layer of moisture and slip after washing to keep hair smooth.
- Microfiber Towel: These are much gentler on the hair cuticle than traditional terrycloth towels and reduce frizz and tangles.
- Hair Clips: Useful for sectioning your hair during the washing and detangling process.
10 Easy Steps on How to Avoid Tangles When Washing Hair
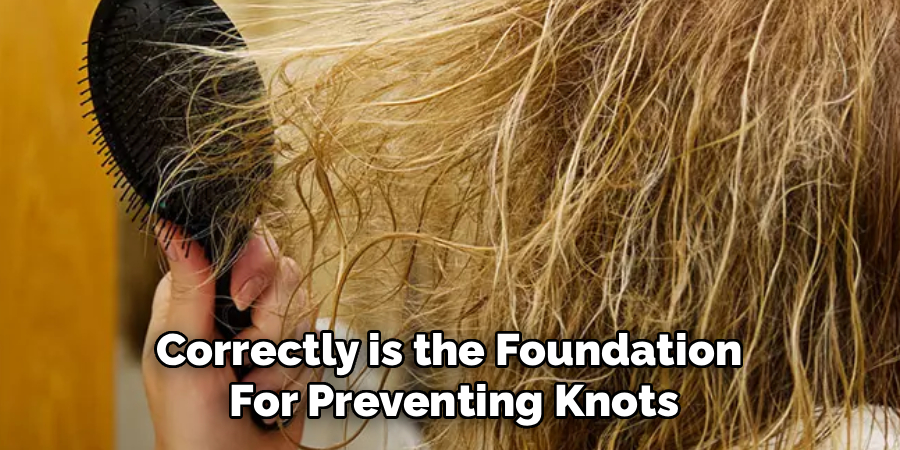
Washing your hair correctly is the foundation for preventing knots. Piling your hair on top of your head and scrubbing vigorously is a recipe for a tangled mess. Instead, follow these detailed steps to keep your strands smooth from start to finish.
Step 1: Pre-Wash Detangling
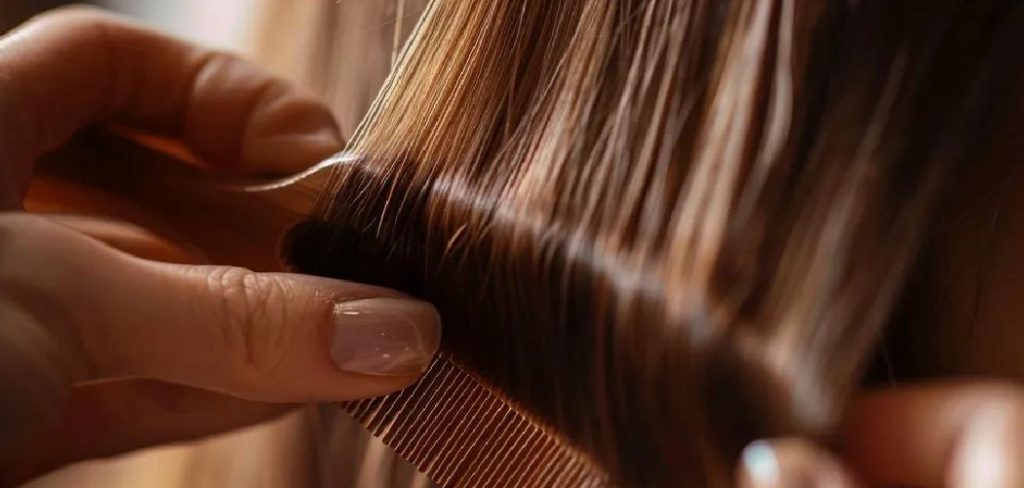
Before you even step into the shower, take a few minutes to detangle your dry hair. Starting with a smooth canvas is crucial. If you try to wash hair that is already tangled, the water and shampoo will only make the knots tighter and more difficult to remove later. Use your fingers first to gently separate any large knots. Then, take a wide-tooth comb or a detangling brush specifically designed for dry hair.
Begin combing from the ends of your hair and slowly work your way up to the roots. This method prevents you from pulling a knot from the top all the way down, which can cause breakage. By patiently working from the bottom up, you gently release tangles without putting stress on the hair shaft. This single step can dramatically reduce the number of tangles you have to deal with during and after your shower. It ensures that the shampoo and water can flow freely through your strands.
Step 2: Section Your Hair
If you have long, thick, or curly hair, washing it all in one go can be a major cause of tangles. The strands inevitably get mixed up, creating a web of knots. The solution is to section your hair. Before wetting it, divide your hair into four or more manageable sections. You can create two sections on each side of your head. Use hair clips to secure each section.
This technique allows you to focus on cleansing one part of your hair at a time, preventing the strands from swirling together and tangling. Washing in sections ensures that every part of your scalp gets cleaned thoroughly without creating a bird’s nest on top of your head. It might seem like an extra step, but the time you save on post-wash detangling is well worth the effort. It keeps your hair organized and under control throughout the entire washing process.
Step 3: Thoroughly Wet Your Hair
Once your hair is sectioned, it’s time to get it wet. Stand under the shower and let the water run down the length of your hair. Instead of letting the water pressure blast your hair in all directions, guide it to flow downwards, in the same direction your hair grows. Use your fingers to ensure the water penetrates every strand from root to tip within one section before moving to the next.

This ensures your hair is completely saturated, which allows the shampoo to lather and distribute evenly without needing to rough up the hair cuticles. Completely wet hair also helps the conditioner penetrate more deeply later on. Rushing this step can leave dry patches, leading to an uneven wash and more potential for tangles.
Step 4: Apply Shampoo to the Scalp Only
One of the most common hair washing mistakes is applying shampoo all over your hair and scrubbing the ends. Your scalp is where most of the oil and product buildup resides, so that’s where you should focus your cleansing efforts. Take a small amount of sulfate-free shampoo, rub it between your palms, and apply it directly to your scalp within one section. Use the pads of your fingers (not your nails) to gently massage your scalp in circular motions.
This will lift away dirt and oil without creating friction and tangles in the lengths of your hair. There is no need to scrub the ends of your hair with shampoo. As you rinse, the suds will run down the hair shaft and gently cleanse the lengths and ends. This method is much gentler and keeps your hair from becoming a tangled mess.
Step 5: Rinse in a Downward Motion
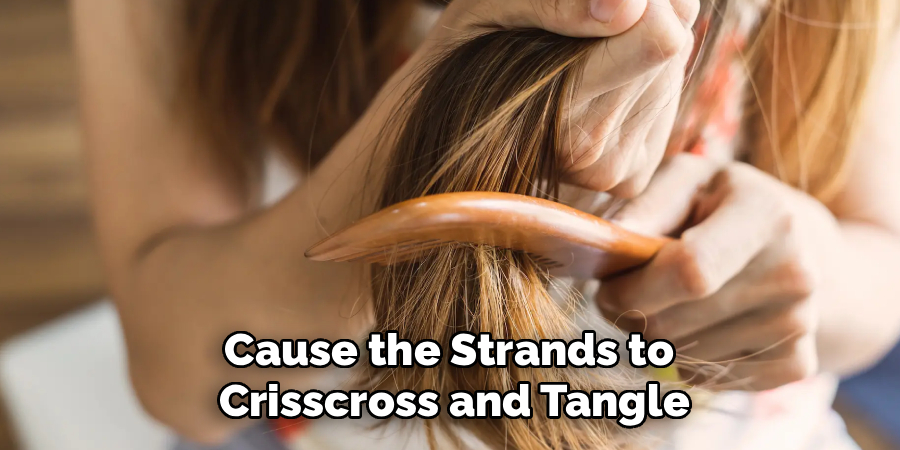
How you rinse your hair is just as important as how you wash it. After shampooing your scalp, tilt your head back and let the water flow down the length of your hair. Use your fingers to guide the water and shampoo downwards, from root to tip. Avoid flipping your hair over or gathering it on top of your head while rinsing.
This will cause the strands to crisscross and tangle. By keeping the hair flowing in one direction, you maintain the alignment of the hair cuticles, which helps keep it smooth. Ensure all the shampoo is completely rinsed out, as any residue can leave your hair feeling heavy and prone to tangling. Repeat the shampoo and rinse process for each section.
Step 6: Squeeze Out Excess Water
Before applying conditioner, it’s important to remove as much excess water as possible from your hair. If your hair is sopping wet, the conditioner will be diluted and won’t be able to coat the hair shaft effectively. After rinsing out the shampoo, gently squeeze the water out of each section of your hair. Work your way from the roots to the ends.
Do not wring or twist your hair, as this can cause breakage and create tangles. A gentle, downward squeeze is all you need. This simple action prepares your hair to absorb the full benefits of the conditioner, allowing it to provide the necessary slip for detangling.
Step 7: Apply Conditioner Generously
Conditioner is the key to unlocking knots in the shower. Unlike shampoo, conditioner should be applied from the mid-lengths to the ends of your hair, where it tends to be the driest and most prone to tangling. Avoid applying a large amount of conditioner directly to your scalp, as this can weigh your hair down and make it greasy. Work the conditioner through your hair with your fingers, making sure every strand is coated. Be generous with the product, especially if you have thick or coarse hair. This creates a slippery surface that allows knots to slide out easily.
Step 8: Detangle with Conditioner In
This is the perfect moment to detangle. With your hair coated in slippery conditioner, the knots will be much easier to work through. Start by using your fingers to gently separate any large tangles. This is known as finger detangling. Once you’ve worked through the bigger knots, you can use a wide-tooth comb.
Just like with pre-wash detangling, start from the ends and work your way up to the roots. The slip from the conditioner will help the comb glide through your hair with minimal resistance. This in-shower detangling method is far gentler on your hair than trying to comb it when it’s dry or just wet with water.
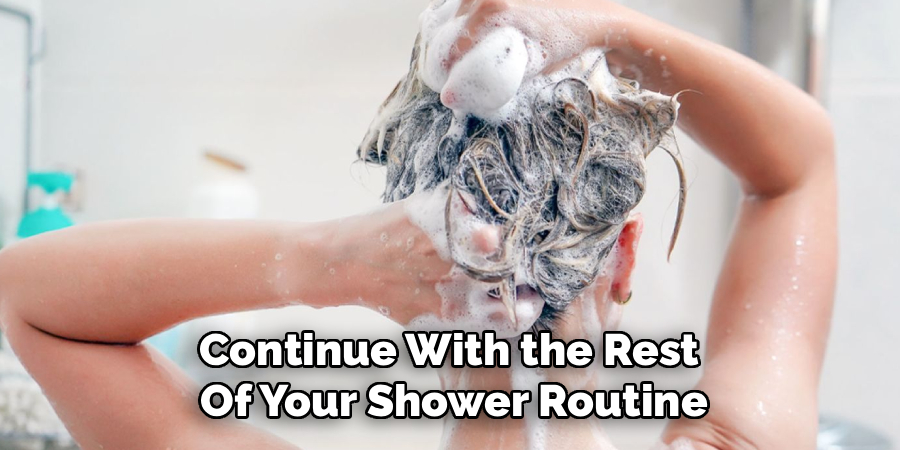
Step 9: Let the Conditioner Sit
Don’t rinse out the conditioner immediately. Let it sit on your hair for at least three to five minutes. This gives the ingredients time to penetrate the hair shaft, providing deep hydration and nourishment. The extra time allows the conditioner to soften the hair even more, making it smoother and less likely to tangle after you rinse. You can clip your hair up while you wait or continue with the rest of your shower routine. For an extra dose of moisture, you can occasionally use a deep conditioner or hair mask and leave it on for 10-15 minutes.
Step 10: Final Rinse with Cool Water
For your final rinse, switch the water to a cooler temperature. Rinsing with cool water helps to seal the hair cuticles. A sealed cuticle lies flat, resulting in smoother, shinier hair that is less prone to frizz and tangling. Just like with the shampoo rinse, let the water run down your hair in a downward direction. Make sure all the conditioner is rinsed out, as any leftover product can make your hair feel heavy. Once you step out of the shower, your hair will be clean, detangled, and prepped for a smooth styling experience.
Conclusion
Saying goodbye to tangled hair is within your reach. It doesn’t require expensive treatments, but rather a mindful and gentle approach to your hair washing routine.
By detangling before you wash, working in sections, and using the right products and techniques, you can keep your hair smooth and manageable. These small changes will not only save you time and frustration but will also lead to healthier, stronger, and more beautiful hair in the long run.
Hopefully, the article on how to avoid tangles when washing hair has been helpful and informative. Remember, taking care of your hair doesn’t have to be complicated or expensive.
About the Author
Jane Hubbard is a passionate beauty expert with a wealth of experience in makeup, hair, and overall beauty techniques. After years of working as a hairdresser specialist, she followed her entrepreneurial spirit and started her own consultancy business.
Jane has always been driven by her desire to help others feel confident in their own skin, and she does this by sharing her knowledge, experiences, and practical beauty tips. Through her consultancy, she empowers individuals to embrace their unique beauty, offering tailored guidance that boosts both self-esteem and personal style.
Professional Focus
- Specializes in makeup, hairstyling, and beauty consulting.
- Provides personalized beauty advice, tips, and techniques to help individuals feel confident in their appearance.
- Dedicated to staying up-to-date with the latest industry trends and developments.
- Passionate about creating a comfortable and empowering experience for every client.
Education History
- University of Craft and Design – Bachelor of Fine Arts (BFA) in Woodworking and Furniture Design
- Woodworking Apprenticeships – Extensive hands-on training with skilled craftsmen to refine carpentry and furniture making techniques
- Online Courses & Masterclasses – Continued education in advanced woodworking techniques, design principles, and specialized tools
Expertise:
- Makeup artistry, hairstyling, and beauty consulting.
- Personalized beauty techniques to enhance confidence and self-expression.
- Educating clients on how to maintain their beauty routines at home.