
Are you tired of your dirty and stained beauty blender sponge? Are you looking for an easy and cost-effective way to clean it?
How to clean beauty blender sponge is essential for maintaining healthy skin and ensuring flawless makeup application. Over time, these sponges can accumulate makeup residue, oils, and bacteria, which may lead to breakouts or uneven application. Regularly cleaning your beauty blender extends its lifespan and ensures it remains hygienic and effective. Additionally, cleaning your beauty blender can help to prevent product buildup, which may affect the performance of your sponge.
Whether you use it daily or occasionally, learning how to clean your beauty blender properly is a vital part of your skincare and makeup routine. Let’s dive into the step-by-step process of cleaning your beauty blender.
What Are the Benefits of Cleaning Your Beauty Blender?
Cleaning your beauty blender has several benefits, including:
- Preventing Bacteria Buildup: Regular cleaning of your beauty blender helps prevent bacteria and germs from accumulating on the surface. This reduces the risk of transferring these harmful microorganisms onto your skin, causing breakouts or infections.
- Extending Lifespan: By keeping your beauty blender clean, you can significantly extend its lifespan. A dirty and neglected sponge is more prone to tears and wear and tear, which means it may need to be replaced more frequently. Properly cleaned sponges can last for months, even with daily use.
- Maintaining Effectiveness: A clean beauty blender performs better than a dirty one. When makeup residue builds up on the sponge, it can affect its ability to blend and distribute product evenly. A clean beauty blender ensures that your makeup application remains smooth and flawless.
- Saving Money: Regularly cleaning your beauty blender can save you money in the long run. Instead of constantly buying new sponges, proper maintenance can help prolong the life of your current ones.
What Will You Need?
To properly clean your beauty blender, you will need:
- A gentle soap or cleanser (preferably one made specifically for cleaning makeup tools)
- Warm water
- A clean towel or cloth
Once you have these materials, you can start cleaning your beauty blender!
10 Easy Steps on How to Clean Beauty Blender Sponge
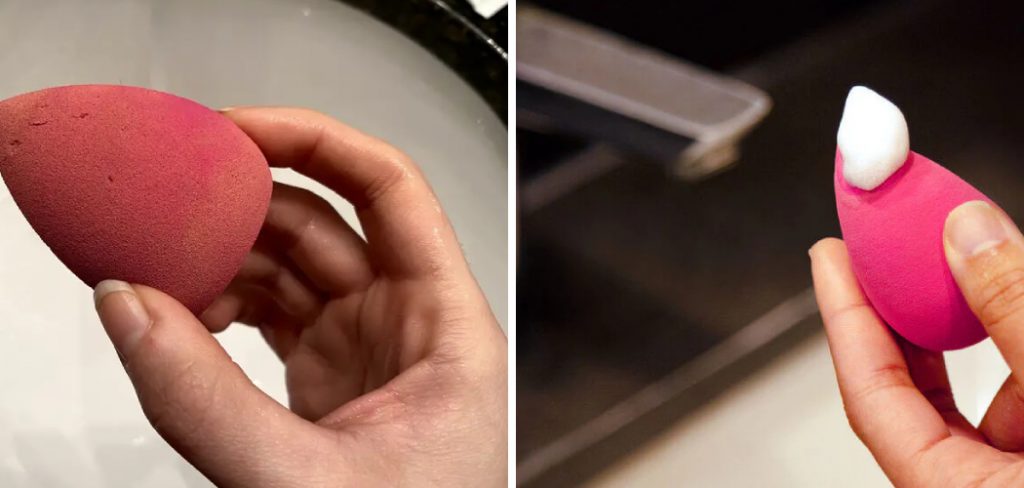
Step 1. Wet the Sponge:
Begin by holding your beauty blender under warm running water. Make sure the entire sponge is thoroughly soaked, and you’ll notice it expanding in size as it absorbs the water. Squeeze the sponge gently to ensure it is evenly saturated but not dripping excessively. This step prepares the sponge for an effective cleaning process.

Step 2. Apply Cleanser:
After the sponge is thoroughly wet, apply a small amount of cleanser. You can use a specialized beauty sponge cleanser, gentle liquid soap, or mild shampoo. Target areas with visible makeup residue, as these tend to be the dirtiest parts. For an even distribution of the cleanser, gently massage it into the sponge using your fingers. This allows the cleanser to penetrate deeply into the sponge, breaking down makeup, oils, and other impurities that may have accumulated over time.
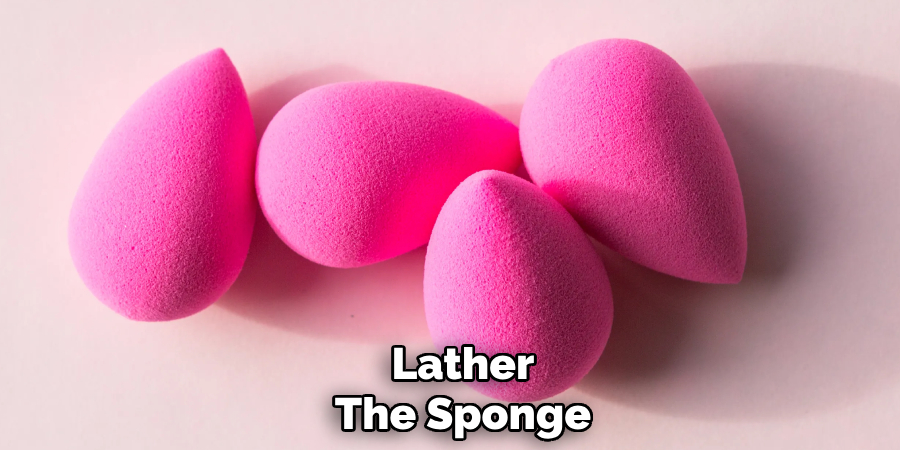
Step 3. Lather the Sponge:
Once the cleanser has been applied, it’s time to create a rich lather to ensure a thorough cleaning. Hold the sponge under warm running water and gently squeeze it several times to activate the cleanser and build up a foamy lather. Be careful not to be too rough, as excessive force could damage the sponge or alter its shape.
Squeezing the sponge will help work the cleanser through all the layers, dislodging any makeup or impurities deeply ingrained in the material. Pay extra attention to areas that appear stained or have residual makeup, ensuring these spots are appropriately cleaned. Continue lathering until the sponge feels softer and cleaner, with minimal residue being released.
Step 4. Rinse Thoroughly:
Rinse the sponge under lukewarm running water, completely removing all soap and residue. Gently squeeze the sponge while rinsing, but avoid twisting or pulling too hard to maintain its integrity. Continue rinsing until the water runs clear and no suds or cleanser remain inside the sponge. It’s essential to be thorough in this step, as leftover soap can cause the sponge to feel sticky or lead to skin irritation during future use. Repeat this process to ensure the sponge is entirely clean and free from any lingering product.
Step 5. Repeat if Necessary:
Repeat the washing process if the sponge still appears dirty or retains any stains after the initial cleaning. Apply a small amount of cleanser again, work it into a lather, and rinse thoroughly. Ensuring the sponge is completely clean before drying will help maintain its effectiveness and prevent the buildup of residue or bacteria over time. Be patient and gentle throughout this additional cleaning to preserve the sponge’s quality.
Step 6. Disinfect (Optional):
To further ensure your sponge is clean and bacteria-free, you may choose to disinfect it. Prepare a solution of one part water to one part white vinegar or rubbing alcohol. Submerge the sponge completely in this solution and allow it to soak for 5–10 minutes. Alternatively, you can microwave the wet sponge for 1–2 minutes to kill germs, ensuring it contains no metallic parts. Exercise caution when handling the sponge after microwaving, as it will be hot. Disinfection is a valuable step, primarily if the sponge is used regularly for heavy cleaning tasks or comes into contact with food preparation areas.
Step 7. Squeeze Out Excess Water:
After disinfecting the sponge, remove it from the cleaning solution or microwave. Using clean hands or gloves, firmly squeeze the sponge to remove as much excess water as possible. Avoid twisting the sponge too aggressively, as this could damage its structure. Once the sponge is free of excess water, it will dry more quickly and remain in good condition for future use.
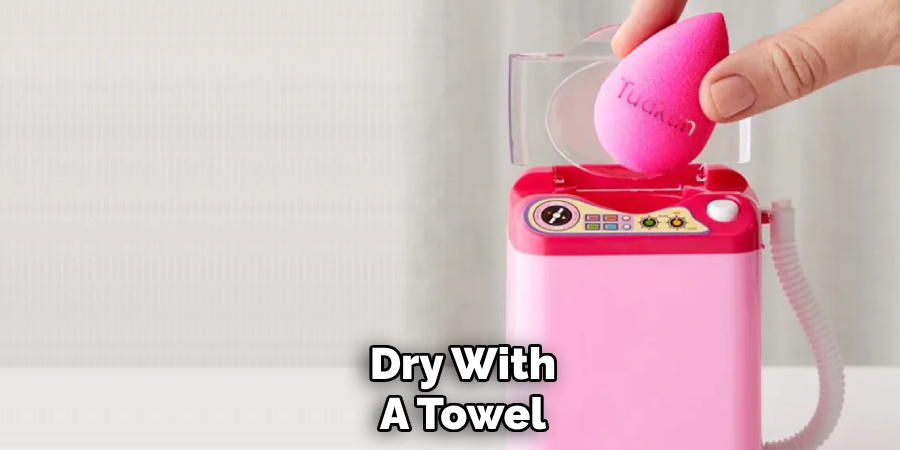
Step 8. Dry with a Towel:
Place the squeezed sponge on a clean, dry towel. Gently press the towel over the sponge to absorb any remaining moisture. Ensure the towel is clean to prevent bacteria from transferring to the sponge. For best results, leave the sponge in a well-ventilated area to air dry completely before its subsequent use.
Step 9. Air Dry:
After pressing the sponge with a towel to remove as much moisture as possible, place the sponge in a location with good airflow to facilitate the air-drying process. Choose a spot near a window or under a fan where the sponge can dry more rapidly. Avoid placing it in enclosed spaces, such as cabinets or drawers, as the lack of ventilation may encourage the growth of bacteria and mold. Use a sponge holder or rack that allows air circulation on all sides if possible. Proper air drying is crucial for maintaining hygiene and extending the lifespan of your sponge. Ensure the sponge is entirely dry before using it again, as a damp sponge can harbor bacteria more easily.
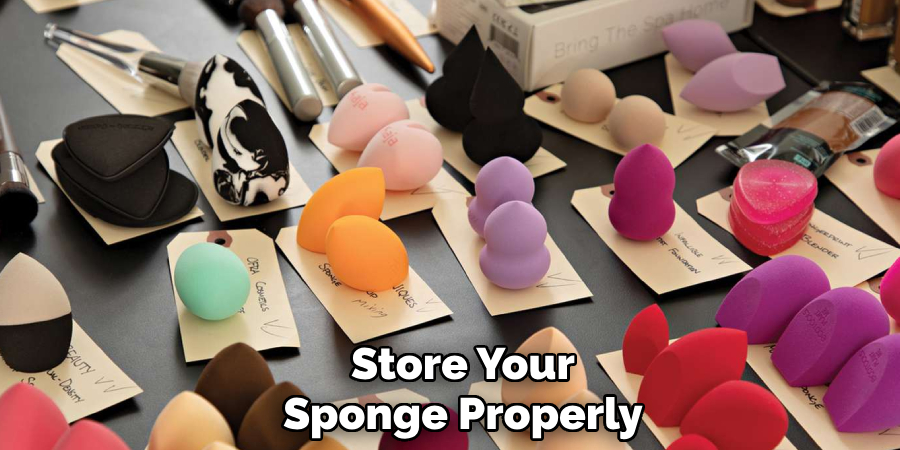
Step 10. Store Properly:
To store your sponge properly, select a clean and dry location that promotes good airflow. Storing your sponge in a well-ventilated area helps prevent the buildup of moisture, which can lead to the development of bacteria and unpleasant odors. Consider using a dedicated sponge holder with drainage holes to allow any residual water to escape. Avoid stacking multiple sponges together, which can trap moisture and limit ventilation. For long-term storage or when not in regular use, sterilize the sponge thoroughly and ensure it is dry before placing it in an airtight container to keep it free from contaminants. Proper storage is essential for maintaining the sponge’s cleanliness and durability, ensuring it remains effective for future use.
By following these simple steps, you can extend the lifespan of your sponge and keep it hygienic for longer periods.
5 Things You Should Avoid
- Using Hot Water
Avoid using excessively hot water when washing your beauty blender sponge. This can damage the material and cause it to lose its elasticity over time. Stick to lukewarm water for the best results.
- Scrubbing Aggressively
Harsh scrubbing can tear the delicate surface of the sponge, making it less effective and shortening its lifespan. Always handle the sponge gently while cleaning.
- Ignoring Built-Up Residue
Leaving old makeup and product residue on the sponge for too long can lead to bacterial growth and unpleasant odors. Clean your sponge regularly to prevent such build-up.
- Using Harsh Chemicals
Avoid using strong detergents or cleaners not designed for beauty sponges. These may contain ingredients that can irritate your skin or degrade the sponge material.
- Skipping Proper Drying
Never store your beauty blender while it is still damp. A moist environment is a breeding ground for bacteria, so always ensure it is dry before storing it.
Conclusion
How to clean beauty blender sponge is essential for both hygiene and prolonging its lifespan.
Regularly washing it with a gentle cleanser, thoroughly rinsing out all product residue, and allowing it to dry completely can significantly improve its functionality. By avoiding harsh chemicals, properly drying the sponge, and replacing it when necessary, you can ensure that your beauty blender remains reliable in your makeup routine.
A clean beauty blender protects your skin and helps you achieve flawless makeup application every time.
About the Author
Jane Hubbard is a passionate beauty expert with a wealth of experience in makeup, hair, and overall beauty techniques. After years of working as a hairdresser specialist, she followed her entrepreneurial spirit and started her own consultancy business.
Jane has always been driven by her desire to help others feel confident in their own skin, and she does this by sharing her knowledge, experiences, and practical beauty tips. Through her consultancy, she empowers individuals to embrace their unique beauty, offering tailored guidance that boosts both self-esteem and personal style.
Professional Focus
- Specializes in makeup, hairstyling, and beauty consulting.
- Provides personalized beauty advice, tips, and techniques to help individuals feel confident in their appearance.
- Dedicated to staying up-to-date with the latest industry trends and developments.
- Passionate about creating a comfortable and empowering experience for every client.
Education History
- University of Craft and Design – Bachelor of Fine Arts (BFA) in Woodworking and Furniture Design
- Woodworking Apprenticeships – Extensive hands-on training with skilled craftsmen to refine carpentry and furniture making techniques
- Online Courses & Masterclasses – Continued education in advanced woodworking techniques, design principles, and specialized tools
Expertise:
- Makeup artistry, hairstyling, and beauty consulting.
- Personalized beauty techniques to enhance confidence and self-expression.
- Educating clients on how to maintain their beauty routines at home.