
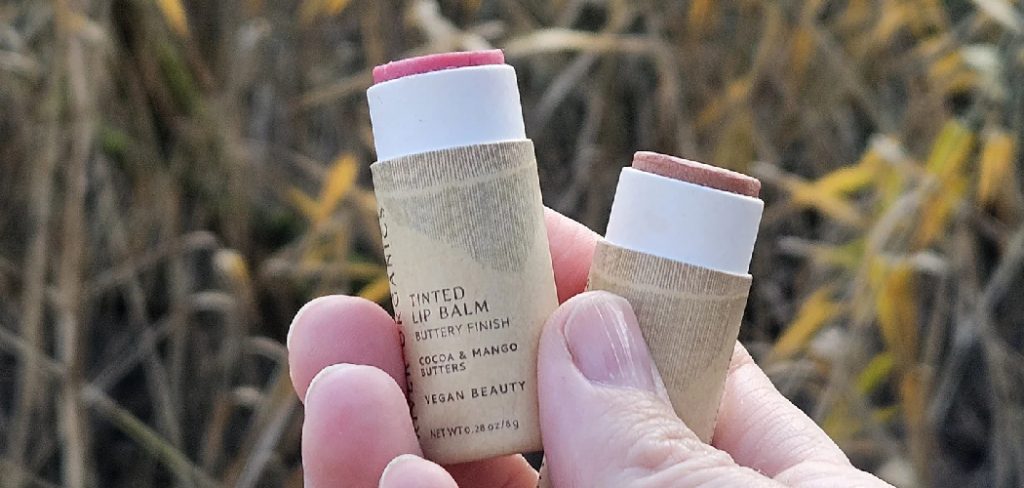
Are you tired of looking for ways to clean your lip gloss? Look no further!
Keeping your lip gloss clean is essential for maintaining hygiene and ensuring the product stays safe to use. Over time, DIY lip gloss tubes and applicators can accumulate dirt, bacteria, and even residue from previous applications, which can impact the quality and safety of the product. Regularly cleaning your lip gloss prolongs its lifespan and helps prevent potential skin irritations or infections. Additionally, cleaning your lip gloss can also improve the overall application and appearance of your lips.
In this guide on how to clean lip gloss, we will walk you through simple and effective steps to keep your lip gloss fresh and clean. Let’s get started with the materials you will need.
What Will You Need?
- Mild soap or makeup remover
- Cotton swabs or pads
- Rubbing alcohol (optional)
- Small container for mixing solution
- Clean cloth or towel
Once you have gathered all the necessary materials, follow these steps to clean your lip gloss effectively.
10 Easy Steps on How to Clean Lip Gloss
1. Wash Your Hands
Before you start cleaning your lip gloss, it’s important to ensure your hands are clean to avoid transferring dirt, bacteria, or oils to the product. Use mild soap and warm water to wash your hands thoroughly for at least 20 seconds. Dry them with a clean towel or air dry them to maintain hygiene. Clean hands are crucial to ensuring that your lip gloss remains uncontaminated during the cleaning process.
2. Remove Excess Product
Check your lip gloss applicator or tube for any excess product buildup. If the applicator wand has accumulated product, gently wipe it with a clean tissue or a disposable makeup wipe. Be careful not to press too hard, as this could damage the applicator. For lip gloss tubes, inspect the opening where the wand is inserted, as this area tends to gather residue over time.
Use a cotton swab dipped in a small amount of isopropyl alcohol to carefully clean the rim of the tube. Allow the cleaned areas to air dry completely before proceeding to ensure no moisture is trapped, as this could affect the quality of the product. Taking these steps will help maintain your lip gloss and keep it looking and feeling fresh.
3. Prepare a Cleaning Solution
To prepare a cleaning solution, you’ll need a few simple ingredients that are both effective and gentle on your products. Mix equal parts of distilled water and isopropyl alcohol in a small bowl or container. This combination is ideal for disinfecting without causing damage. For a more thorough cleaning, you can add a drop of mild dish soap to the mixture, but be sure to rinse thoroughly afterward to avoid leaving any residue. Stir the solution gently to combine, and you’re ready to use it for cleaning makeup tools, containers, or other cosmetic items. Always test the solution on a small area first to ensure compatibility.
4. Clean the Applicator
To clean the applicator, first remove any excess makeup or residue by wiping it with a dry, lint-free cloth. Next, dip the applicator into the prepared cleaning solution, ensuring it is fully submerged. Gently swirl it around to dislodge any remaining particles. For stubborn buildup, use a soft-bristled brush to scrub the surface carefully. After cleaning, rinse the applicator thoroughly under warm running water to remove all traces of the cleaning solution. Pat it dry with a clean towel and allow it to air-dry completely before using it again.
5. Store the Applicator
Once the applicator is completely dry, store it in a clean, dry, and dust-free environment to maintain its quality and ensure hygiene. Use a protective case or a designated storage area to prevent contamination or damage. Proper storage will prolong the lifespan of the applicator and keep it ready for future use.
6. Sanitize
Sanitizing the applicator is important to ensure it remains free from harmful bacteria and germs. Use a reliable sanitizing spray or solution designed explicitly for beauty tools or applicators. Lightly mist or carefully apply the sanitizer over the surface of the applicator, ensuring full coverage without oversoaking. Allow the sanitizer to air-dry completely before handling or storing the tool. Regular sanitization not only maintains the applicator’s cleanliness but also helps reduce the risk of skin irritations or infections caused by impurities.
7. Wipe the Tube
Keeping the exterior of your beauty product tubes clean is an essential step in maintaining hygiene. Use a soft, damp cloth or an alcohol wipe to gently clean around the opening and neck of the tube, where residue can often build up. This step prevents the transfer of bacteria into the product and ensures that your makeup stays fresh and safe to use. Make it a habit to wipe the tube regularly, especially if it’s used frequently or shared with others.
8. Dry Thoroughly
After cleaning the exterior of your beauty product tubes, it is crucial to ensure they are completely dry before storing them. Moisture left on the surface can encourage the growth of bacteria or mold, which may compromise the product’s quality and safety.
Use a clean, dry cloth or a tissue to gently pat the tube dry, paying close attention to the neck and cap, as these areas are prone to trapping moisture. Avoid air-drying, which could allow dust or contaminants to settle on the wet surface. Properly drying your tubes helps extend your makeup’s life and ensures that your beauty routines remain safe and effective.
9. Inspect for Cleanliness
Regularly inspecting your makeup products for cleanliness is essential to maintaining both hygiene and the product’s effectiveness. Examine the tube or container for any visible signs of residue, discoloration, or buildup around the neck, cap, or applicator. Such residues can harbor bacteria or mold over time, potentially causing irritation or infections when applied to the skin.
Pay close attention to any changes in texture, smell, or color of the product, as these can indicate contamination or that the product has expired. It’s also a good idea to wipe down the exterior of containers with a clean, damp cloth to remove fingerprints, dust, or debris that can accumulate during daily handling.
10. Reassemble and Store
Once you’ve completed cleaning your beauty tools and products, it’s essential to reassemble them carefully to ensure they function correctly and remain hygienic. For instance, ensure that brushes are completely dry before reattaching brush heads to handles or storing them. Storing brushes while damp can lead to the growth of mildew or bacteria. Similarly, double-check that beauty sponges are thoroughly dried to prevent moisture buildup, which can be a breeding ground for harmful microbes.
By following these simple steps, you can keep your beauty tools and products clean and safe to use for a long time.
5 Things You Should Avoid
- Using Harsh Chemicals
Avoid using strong cleaning agents or chemicals when cleaning your lip gloss applicators or containers. These substances can harm your skin and alter the product’s formula, making it unsafe for use.
- Submerging the Entire Applicator
Do not completely submerge the applicator wand in water or cleaning solutions, as this can damage its structure and compromise the integrity of the materials.
- Skipping Regular Cleaning
Neglecting to clean your lip gloss components regularly promotes bacterial buildup. Always ensure proper maintenance and sanitation of your lip gloss to prevent contamination.
- Using Dirty Tools
Never use unclean brushes or implements to clean your lip gloss. Dirty tools can transfer germs and bacteria, making the cleaning process counterproductive.
- Not Allowing Proper Drying Time
Avoid reassembling or storing your lip gloss applicators while they’re still damp. Trapped moisture can lead to mold growth, jeopardizing the safety and longevity of your product.
How Can You Combine Sanitation with Convenience?
- Invest in Disposable Applicators: One way to keep your lip gloss application process sanitary is by using disposable applicators. These are at most beauty supply stores and are perfect for on-the-go touch-ups or travel.
- Keep Alcohol Wipes Handy: If you prefer reusable applicators, regularly clean them with alcohol wipes after each use. This will help kill any bacteria that may have accumulated on the surface.
- Consider a Pump Dispenser: Another convenient option is investing in a pump dispenser for your lip gloss. This eliminates the need for direct contact with the product, thus reducing the risk of contamination. Plus, it makes the application much easier and mess-free.
- Do Not Share Your Lip Gloss: As tempting as it may be to let a friend try out your new lip gloss, sharing products can spread bacteria or viruses. To prevent potential infections, it’s best to avoid sharing lip glosses or any other makeup items.
- Pay Attention to Expiration Dates: Lip gloss has a shelf life like all beauty products. Be sure to check the expiration date on your lip gloss and replace it when necessary. Using expired products can lead to skin irritation or infection.
Conclusion
How to clean lip gloss applicator and tube is essential for maintaining hygiene and prolonging the product’s usability.
Start by regularly wiping the applicator with a clean, damp cloth to remove any buildup. If the applicator is detachable, gently wash it with warm water and a mild soap, ensuring it is thoroughly dried before reinserting it into the tube. Store your lip gloss in a clean and dry place to prevent contamination.
By following these steps, you can keep your lip gloss clean and safe, ensuring a smooth and worry-free application every time.
About the Author
Jane Hubbard is a passionate beauty expert with a wealth of experience in makeup, hair, and overall beauty techniques. After years of working as a hairdresser specialist, she followed her entrepreneurial spirit and started her own consultancy business.
Jane has always been driven by her desire to help others feel confident in their own skin, and she does this by sharing her knowledge, experiences, and practical beauty tips. Through her consultancy, she empowers individuals to embrace their unique beauty, offering tailored guidance that boosts both self-esteem and personal style.
Professional Focus
- Specializes in makeup, hairstyling, and beauty consulting.
- Provides personalized beauty advice, tips, and techniques to help individuals feel confident in their appearance.
- Dedicated to staying up-to-date with the latest industry trends and developments.
- Passionate about creating a comfortable and empowering experience for every client.
Education History
- University of Craft and Design – Bachelor of Fine Arts (BFA) in Woodworking and Furniture Design
- Woodworking Apprenticeships – Extensive hands-on training with skilled craftsmen to refine carpentry and furniture making techniques
- Online Courses & Masterclasses – Continued education in advanced woodworking techniques, design principles, and specialized tools
Expertise:
- Makeup artistry, hairstyling, and beauty consulting.
- Personalized beauty techniques to enhance confidence and self-expression.
- Educating clients on how to maintain their beauty routines at home.