
Are you looking to achieve shiny, healthy-looking hair? Whether you have curly, straight, or wavy hair, closing the hair cuticle is key to maintaining a smooth and glossy appearance.
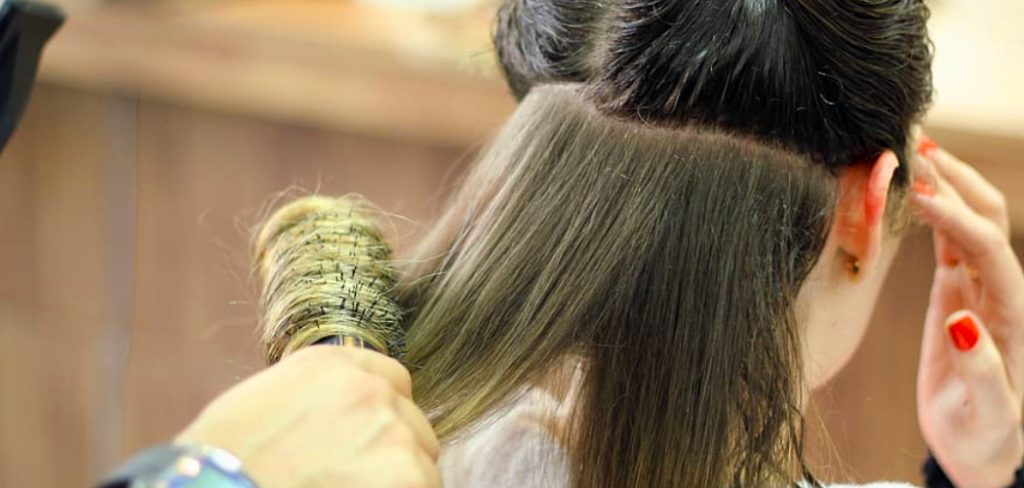
Properly closing the hair cuticle is essential in maintaining healthy, shiny, and smooth hair. The cuticle, the outermost layer of the hair strand, plays a vital role in protecting the hair’s inner structure from damage and moisture loss. When the cuticle remains open, hair can appear frizzy, dull, and more prone to breakage.
Learning how to close hair cuticle effectively can help lock in moisture, reduce damage, and enhance your hair’s overall appearance and manageability. Below, we will explore various techniques and tips to ensure your hair cuticles stay sealed and healthy.
What Are the Benefits of Closing Hair Cuticle?
Before we delve into the different methods for closing hair cuticles, let’s first understand why it is crucial. Here are some benefits of closing hair cuticles:
- Locks in Moisture: Closed hair cuticles prevent moisture from escaping, leading to better hydration and increased softness and shine.
- Reduces Frizz: When the cuticle is closed, the hair appears smoother and sleeker, reducing frizz and flyaways.
- Enhances Color: Closed hair cuticles help reflect light off the hair’s surface, making your color appear more vibrant and long-lasting.
- Prevents Damage: Sealed cuticles protect the inner structure of the hair from external factors, such as heat and chemicals, reducing the risk of damage and breakage.
- Improves Manageability: Closed cuticles make detangling, styling, and maintaining your hair much easier due to its smooth texture.
These are just a few of the many benefits of closing hair cuticles. Now, let’s explore how to do it effectively.
What Will You Need?
Before we begin, gathering the necessary tools and products for closing hair cuticles is essential. Some of these include:
- Clarifying shampoo: This will help remove any buildup or residue on your hair, allowing the cuticle to close correctly.
- Deep conditioning treatment: A deep conditioner can help nourish and strengthen the hair, making it more damage-resistant.
- Apple cider vinegar (ACV) rinse: ACV helps balance the scalp’s and hair’s pH levels, promoting a healthier scalp and closed cuticles.
- Coldwater: Rinsing your hair with cold water after washing can help seal the cuticle as cold water constricts the hair shaft.
These are just a few examples, but you can also use products specifically designed to close hair cuticles, such as serums and leave-in conditioners.
10 Easy Steps on How to Close Hair Cuticle
Step 1. Start with a Clarifying Shampoo:
A clarifying shampoo is the first vital step to closing your hair cuticles effectively. Over time, your hair can accumulate product buildup, oils, and environmental impurities that make the cuticle harder to seal.
A clarifying shampoo is formulated to deeply cleanse your hair and remove this residue, leaving it fresh and ready for the next steps. Be sure to gently massage the shampoo into your scalp and hair to ensure thorough cleansing. However, avoiding overusing clarifying shampoos is essential, as they can strip the hair of natural oils. Limiting their use to once every two weeks or as necessary is ideal for maintaining a healthy balance. After thoroughly rinsing out the shampoo, you’ll notice your hair feels lighter, paving the way for the next step.
Step 2. Rinse with Cold Water:
After cleansing your hair with a clarifying shampoo, rinse it thoroughly with cold water. Cold water helps to seal the hair cuticles, creating a smoother and shinier appearance. This contrasts with warm or hot water, which can open the cuticle and lead to frizz or dryness. Gently tilt your head and allow the cool water to rinse through every strand, locking in moisture and preparing your hair for the following treatments. This simple yet effective step contributes significantly to healthier, glossier hair.
Step 3. Apply a Deep Conditioning Treatment:
Once your hair has been properly cleansed and rinsed with cold water, it’s time to nourish it with a deep conditioning treatment. Select a conditioner or hair mask that suits your hair type and needs, whether it’s for hydration, repair, or strengthening. Apply the product generously from the mid-lengths to the ends, avoiding the roots to prevent excess buildup. Use a wide-tooth comb to distribute the product evenly and ensure each strand is coated. For best results, leave the treatment on for the recommended time, typically 5-20 minutes. This step helps restore essential moisture, repair damage, and leave your hair feeling soft, smooth and rejuvenated.
Step 4. Rinse and Seal with Cool Water:
After allowing the deep conditioning treatment to work magic, gently rinse your hair with cool water. This step is vital as it helps to seal the hair cuticles, locking in the nutrients and moisture from the conditioner. The cool water also adds a natural shine to your hair, making it appear healthier and more vibrant. Be thorough during the rinse to ensure no product residue is left behind, which could weigh your hair down. This simple yet effective step prepares your hair for styling and boosts its overall manageability.
Step 5. Dry Gently and Style Carefully:
Once you’ve rinsed your hair thoroughly, gently pat it dry with a soft towel to remove excess water. Avoid rubbing your hair vigorously, as this can cause breakage and frizz. Instead, use a blotting motion to preserve your hair’s integrity. If you prefer a blow dryer, ensure it is set to a low-heat or cool setting to minimize heat damage. For added protection, apply a heat-protectant product before styling. Style your hair as desired, and enjoy the results of your revitalized, nourished locks!
Step 6. Maintain Your Hair’s Health Between Washes:
To keep your hair looking its best between washes, adopt a consistent maintenance routine. Use a lightweight, leave-in conditioner or hair oil to keep your strands hydrated and tame any frizz. Avoid over-styling or excessive heat tools, as they can weaken the hair over time. Regularly brushing your hair with a wide-tooth comb or boar bristle brush can help distribute natural oils evenly, promoting a healthy shine. Additionally, protect your hair from environmental stressors like the sun or pollution by wearing hats or using products with UV protection. Consistent care will ensure your hair remains strong, shiny, and nourished.
Step 7. Trim Your Hair Regularly:
Regular trims are essential for maintaining healthy hair and preventing split ends from traveling up the hair shaft. Even if you’re trying to grow out your hair, a trim every 6-8 weeks can ensure your strands remain strong and free from damage. If visiting a salon frequently is not an option, consider learning basic trimming techniques or investing in quality hair-cutting shears. Maintaining a trimming schedule will help retain your hair’s shape, promote healthier growth, and keep your locks looking their best.
Step 8. Use Nourishing Hair Masks:
Hair masks are an excellent way to deeply hydrate and nourish your hair, addressing issues like dryness, frizz, or damage. Choose a mask with ingredients like argan oil for moisture, keratin for strengthening, or coconut oil for repair depending on your hair type and needs. Apply the mask once or twice a week, leaving it on for the recommended time to allow the nutrients to penetrate your hair strands. Regular use of hair masks can rejuvenate your locks, leaving them soft, smooth, and more manageable.
Step 9. Protect Your Hair from Heat:
Using heated styling tools, such as curling irons or straighteners, can cause significant damage to your hair over time. To minimize this, always apply a heat-protectant spray or cream before styling. These products create a protective barrier that reduces the impact of high temperatures on your strands. Additionally, limit heat styling to special occasions and opt for heatless methods whenever possible. This step will help preserve your hair’s health, prevent split ends, and maintain its natural shine.
Step 10. Trim Your Hair Regularly:
Regular trims are essential to maintain the health and appearance of your hair. Trimming helps remove split ends, which can travel up the hair shaft and cause further damage if left untreated. Aim to get a trim every 6-8 weeks or as needed, depending on your hair growth and the level of damage. Consistent trimming keeps your hair fresh and promotes healthier, more vigorous growth. This simple step ensures that your locks remain vibrant and full of life.
You can achieve and maintain healthy, nourished hair by following these simple yet effective steps. Remember to choose products specifically designed for your hair type and needs, protect your locks from heat styling, and regularly trim or get trims to keep split ends at bay.
Conclusion
How to close hair cuticle is an essential step to achieving smooth, shiny, and healthy hair. To seal the cuticle effectively, start by rinsing your hair with cool water after shampooing and conditioning. Cool water helps to close the cuticle layers, locking in moisture and nutrients from your conditioner.
Additionally, products with a slightly acidic pH, such as apple cider vinegar rinses, can help tighten the cuticle for a sleeker finish. Avoid overusing heat styling tools, as excessive heat can cause the cuticle to lift and lead to damage. Lastly, opt for leave-in conditioners or serums specially formulated to smooth and seal the cuticle, ensuring your hair remains manageable and radiant.
Following these practices will keep your hair looking its best while protecting it from daily wear and tear.
About the Author
Jane Hubbard is a passionate beauty expert with a wealth of experience in makeup, hair, and overall beauty techniques. After years of working as a hairdresser specialist, she followed her entrepreneurial spirit and started her own consultancy business.
Jane has always been driven by her desire to help others feel confident in their own skin, and she does this by sharing her knowledge, experiences, and practical beauty tips. Through her consultancy, she empowers individuals to embrace their unique beauty, offering tailored guidance that boosts both self-esteem and personal style.
Professional Focus
- Specializes in makeup, hairstyling, and beauty consulting.
- Provides personalized beauty advice, tips, and techniques to help individuals feel confident in their appearance.
- Dedicated to staying up-to-date with the latest industry trends and developments.
- Passionate about creating a comfortable and empowering experience for every client.
Education History
- University of Craft and Design – Bachelor of Fine Arts (BFA) in Woodworking and Furniture Design
- Woodworking Apprenticeships – Extensive hands-on training with skilled craftsmen to refine carpentry and furniture making techniques
- Online Courses & Masterclasses – Continued education in advanced woodworking techniques, design principles, and specialized tools
Expertise:
- Makeup artistry, hairstyling, and beauty consulting.
- Personalized beauty techniques to enhance confidence and self-expression.
- Educating clients on how to maintain their beauty routines at home.