
Are you tired of dealing with dry, damaged hair? Are you looking for a gentler way to wash your natural hair? Cold washing may be the solution for you!
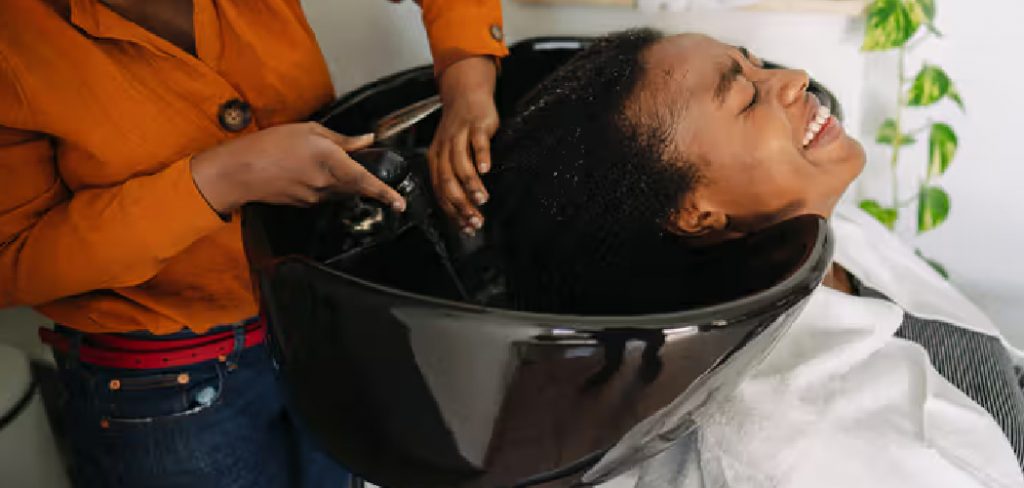
Cold washing, also known as co-washing, is a popular and gentle method for cleansing natural hair without harsh chemicals or hot water. This technique, embraced by many with diverse hair types, retains the hair’s natural moisture and promotes overall hair health.
Unlike traditional shampooing, which can strip the hair of its natural oils, cold washing offers a milder alternative that helps maintain the hair’s natural balance.
In this guide, we’ll explore the benefits of cold washing and provide step-by-step instructions on how to cold wash natural hair. Get ready to discover a refreshing and nourishing approach to washing your beautiful natural locks.
What Are the Benefits of Cold Washing Natural Hair?
There are several benefits to incorporating cold washing into your hair care routine:
- Retains Moisture: Traditional shampoos often contain harsh detergents that can strip the hair of its natural oils, leaving it dry and brittle. On the other hand, cold washing uses a gentle cleansing conditioner that cleanses the scalp and strands without stripping away moisture.
- Reduces Frizz: Frizzy hair is a common problem for those with curly or wavy hair types. This method’s cold water helps seal the cuticles, keeping them smooth and reducing frizz.
- Promotes Healthy Hair Growth: Cold washing helps maintain the hair’s natural pH balance, which is essential for healthy hair growth. It also stimulates blood flow to the scalp, promoting hair growth.
- Gentler on Hair: Cold washing is a milder alternative to traditional shampooing, making it suitable for those with sensitive scalps or damaged hair.
Now that we’ve explored the benefits of cold washing let’s dive into how to incorporate this method into your hair care routine.

What Will You Need?
To cold wash your natural hair, you’ll need the following:
- Cleansing Conditioner: As mentioned earlier, this will be used instead of traditional shampoo. Look for a conditioner that is sulfate-free and suitable for your hair type.
- Wide-Tooth Comb: This will help detangle the hair while applying the cleansing conditioner.
- Spray Bottle with Cold Water: You can also use filtered or distilled water.
- Hair Towel/ T-shirt: Use a soft towel or t-shirt to wrap your hair after washing it.
Once you have gathered all the necessary items, follow these step-by-step instructions to cold-wash your natural hair.
10 Easy Steps on How to Cold Wash Natural Hair
Step 1: Wet Your Hair
Before starting the cold washing process, thoroughly wet your hair from root to tip. Use lukewarm water to open the hair cuticles and allow for better absorption of the cleansing conditioner. Gently massage your scalp as you wet your hair, ensuring that all strands are saturated.
Wetting the hair helps to remove any surface dirt or product buildup and prepares the hair for the next steps of the cold-washing routine. Remember, wet hair is more elastic and less prone to breakage, so handle your hair with care during this step.
Step 2: Apply Cleansing Conditioner
Once your hair is thoroughly wet, take a generous amount of cleansing conditioner and apply it evenly throughout. Start at the roots and work down to the tips, ensuring every strand is coated.
Use your fingers to gently massage the conditioner into your scalp, focusing on areas where product buildup and dirt accumulate. This step helps cleanse your scalp and nourish your hair without stripping it of natural oils. Take your time to ensure the conditioner is evenly distributed and your hair feels moisturized and smooth.
Step 3: Detangle with a Wide-Tooth Comb
Use a wide-tooth comb to gently detangle your hair while the cleansing conditioner is still in. Start detangling from the ends of your hair and gradually work your way up to the roots. This method helps prevent unnecessary breakage and makes the detangling process smoother.
Be patient and take your time, especially if you encounter knots or tangles. The conditioner will provide slip, making it easier to glide through your strands without tugging or pulling.

Step 4: Rinse with Cold Water
After thoroughly detangling, it’s time to rinse out the cleansing conditioner. Use cold water for this step, as it helps to seal the hair cuticles, locking in moisture and enhancing shine.
Gently tilt your head back and allow the water to rinse out the conditioner thoroughly, ensuring no residue is left on your scalp or strands. The cold water will smooth the hair shaft, reducing frizz and promoting a sleek appearance. Be gentle with your hair as you rinse to avoid friction or tangling.
Step 5: Repeat If Necessary
If your hair still feels unclean or heavy, repeat the process by applying another round of cleansing conditioner and rinsing again with cold water. This is particularly beneficial if you have a lot of product buildup or if it’s been a while since your last wash. However, avoid overdoing it to prevent over-conditioning your hair, which can weigh it down.
Step 6: Gently Squeeze Out Excess Water
Once you’ve finished rinsing, gently squeeze the excess water from your hair using your hands. Avoid twisting or wringing your hair, which can cause unnecessary stress and breakage. Instead, press your hair between your palms to remove the water without disrupting your natural curl pattern or causing damage.
Step 7: Use a Soft Towel or T-Shirt to Dry
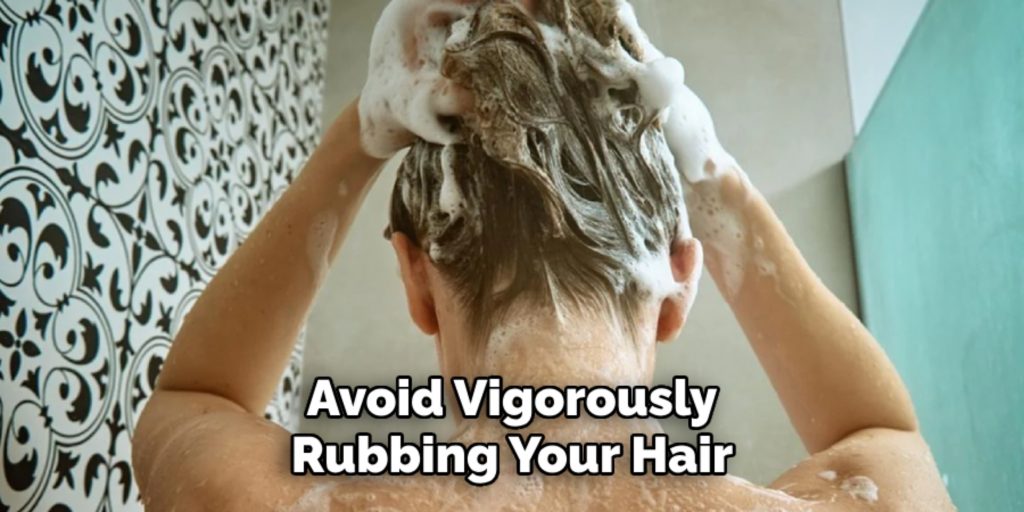
Wrap your hair in a soft towel or an old t-shirt to absorb the remaining water. Microfiber towels or t-shirts are preferable to regular towels, as they reduce friction and minimize frizz. Simply wrap your hair and gently pat it dry instead of rubbing it, which can roughen the cuticles and lead to breakage.
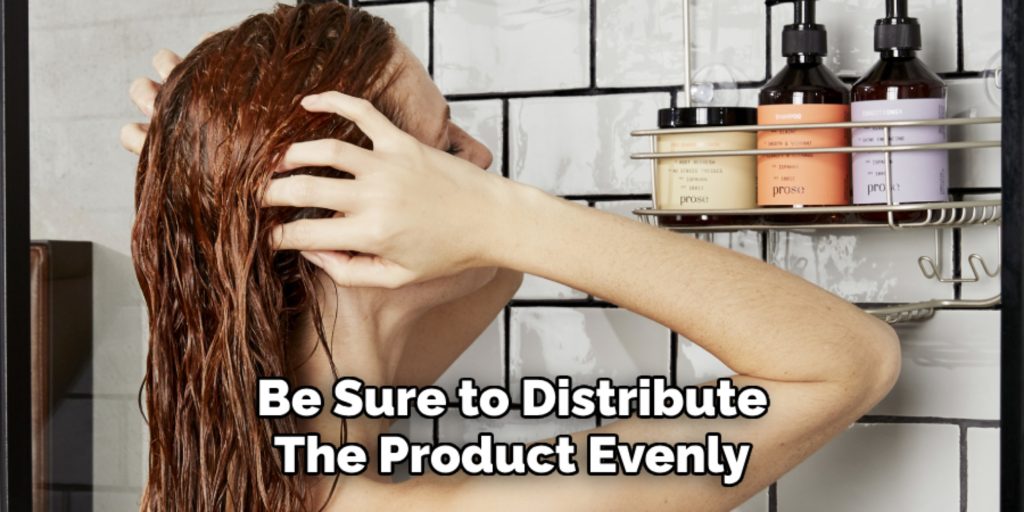
Step 8: Apply Leave-In Conditioner or Styling Products
Apply a leave-in conditioner or favorite styling products while your hair is still damp. This step locks in moisture and helps define your natural curl pattern or style. Be sure to distribute the product evenly throughout your hair, starting at the ends and working your way upward to ensure all strands are adequately nourished.
Step 9: Air Dry or Style as Desired
Allow your hair to air dry naturally, or style it according to your preference. Air drying is a gentle option that helps preserve your hair’s natural texture while minimizing heat damage. If you prefer styling tools, apply a heat protectant to reduce the risk of breakage and dryness. For defined curls, you can scrunch your hair lightly or use a diffuser attachment with your blow dryer. This step allows you to showcase your natural hair while maintaining its health and vibrancy.
Step 10: Maintain Regular Cold Washing
Finally, incorporate cold washing into your regular hair care routine to maintain healthy, vibrant hair. Depending on your hair type and styling preferences, you can cold wash every few days or as needed. Over time, this method can help improve the overall condition of your hair, making it stronger, more manageable, and full of life. By being consistent and patient, you’ll notice a positive transformation in the health and appearance of your hair.
With these ten easy steps, you can cold wash your natural hair with confidence and care.
5 Things You Should Avoid
Here are five things you should avoid when cold washing natural hair:
- Using Hot Water: Cold washing is done explicitly with cold or cool water to retain the hair’s natural moisture. Avoid using hot water, as it can strip away essential oils and leave the hair dry and brittle.
- Skipping Pre-Wash Detangling: Before cold washing, thoroughly detangle your hair. Skipping this step can lead to tangles and breakage while washing.
- Overusing Shampoo: When cold washing, be mindful of the amount of shampoo you use. Using too much can cause product buildup and dryness. Opt for a gentle, sulfate-free shampoo to maintain the hair’s natural oils.
- Rough Towel Drying: Avoid vigorously rubbing your hair with a towel to dry it after cold washing. Instead, gently squeeze out excess water and let your hair air dry, or use a microfiber towel to minimize frizz and breakage.
- Skipping Moisturizing and Sealing: Cold washing can leave the hair feeling dry, so following up with a moisturizer and sealant is essential. Apply a leave-in conditioner or moisturizing cream to hydrate the hair, then seal in the moisture with an oil or butter.
By avoiding these common mistakes, you can maximize the benefits of cold washing and keep your natural hair healthy, moisturized, and vibrant.
Conclusion
Cold washing is a gentle and effective way to cleanse your natural hair without stripping it of its essential oils.
By following these ten easy steps and avoiding common mistakes, you can maintain healthy, vibrant hair while showcasing your unique natural texture.
Remember to be patient and consistent with cold washing, and over time, you’ll see a positive transformation in your hair’s overall health and appearance. Embrace the beauty of your natural hair by incorporating cold washing into your regular hair care routine.
Hopefully, the article on how to cold wash natural hair has been informative and helpful. Happy washing!
About the Author
Jane Hubbard is a passionate beauty expert with a wealth of experience in makeup, hair, and overall beauty techniques. After years of working as a hairdresser specialist, she followed her entrepreneurial spirit and started her own consultancy business.
Jane has always been driven by her desire to help others feel confident in their own skin, and she does this by sharing her knowledge, experiences, and practical beauty tips. Through her consultancy, she empowers individuals to embrace their unique beauty, offering tailored guidance that boosts both self-esteem and personal style.
Professional Focus
- Specializes in makeup, hairstyling, and beauty consulting.
- Provides personalized beauty advice, tips, and techniques to help individuals feel confident in their appearance.
- Dedicated to staying up-to-date with the latest industry trends and developments.
- Passionate about creating a comfortable and empowering experience for every client.
Education History
- University of Craft and Design – Bachelor of Fine Arts (BFA) in Woodworking and Furniture Design
- Woodworking Apprenticeships – Extensive hands-on training with skilled craftsmen to refine carpentry and furniture making techniques
- Online Courses & Masterclasses – Continued education in advanced woodworking techniques, design principles, and specialized tools
Expertise:
- Makeup artistry, hairstyling, and beauty consulting.
- Personalized beauty techniques to enhance confidence and self-expression.
- Educating clients on how to maintain their beauty routines at home.