
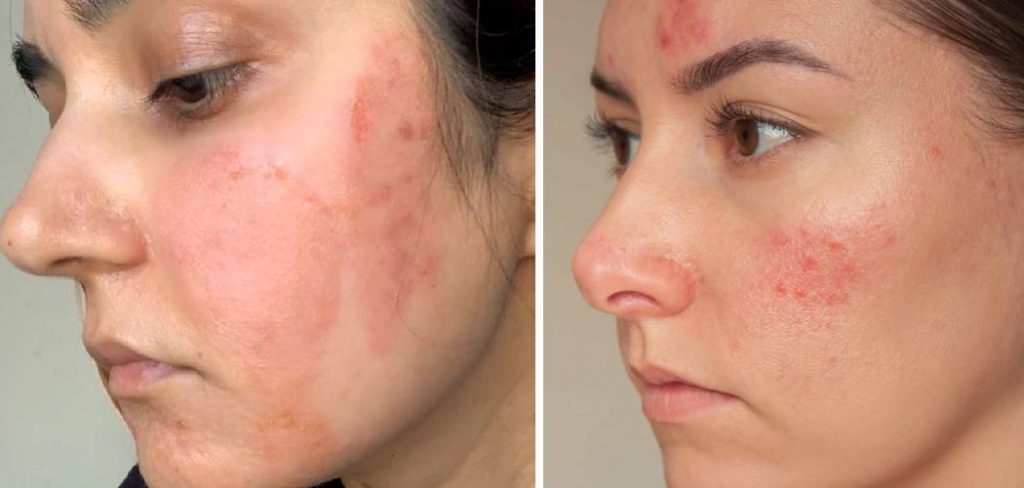
Chemical burns on the face can be not only physically painful but also emotionally distressing due to their visibility. Proper care and coverage are essential to promote healing while helping individuals feel more confident during the recovery process. In this blog post we will show you how to cover chemical burn on face so that it functions properly. Read on to learn more about which components and tools are needed for the job as well as detailed instructions on completing the task!
Importance of Prioritizing Healing and Safety
When dealing with a chemical burn on the face, prioritizing healing and safety should always come first before focusing on coverage or appearance. Proper medical care ensures that the burn heals effectively and minimizes the risk of infection, scarring, or further damage to the skin. It’s essential to follow the guidance of healthcare professionals and use recommended treatments, such as prescribed ointments or dressings, to encourage proper recovery. Additionally, any cosmetic application or covering must be non-irritating and designed to work gently with sensitive, healing skin. Maintaining a balance between safety and temporary appearance solutions is crucial to achieving the best outcome for both skin health and emotional well-being.
Types of Chemical Burns
Chemical burns can be categorized based on the substance that caused the injury. The most common types include:
- Acid Burns: These are caused by exposure to acidic substances such as sulfuric acid, hydrochloric acid, or nitric acid. Acid burns often result in coagulation necrosis, which can create a protective barrier of dead tissue but still requires immediate care.
- Alkali Burns: Burns caused by alkaline substances, such as sodium hydroxide or ammonia, tend to penetrate deeper than acid burns due to the process of liquefaction necrosis. Alkali burns can cause significant tissue damage and require prompt intervention.
- Oxidizing Agent Burns: These occur when strong oxidizers like hydrogen peroxide or potassium permanganate come into contact with the skin. Such agents can cause both burns and systemic toxicity.
- Solvent Burns: Solvents like gasoline or industrial cleaners can irritate the skin and lead to chemical burns, frequently accompanied by a lingering, uncomfortable sensation.
- Hydrofluoric Acid Burns: These are a specific and potentially highly dangerous type of chemical burn. Hydrofluoric acid can penetrate deeply and may result in tissue destruction or systemic complications, such as calcium imbalance.
It is critical to identify the type of chemical involved with any burn to provide appropriate first aid and medical treatment.
10 Methods How to Cover Chemical Burn on Face
1. Start with a Gentle Cleansing Routine
Before attempting to cover a chemical burn with makeup, it’s essential to start with clean skin that has been properly cared for. Use a gentle, fragrance-free cleanser that is suitable for sensitive or compromised skin. Avoid any products that contain alcohol, exfoliating beads, or strong acids, as these can aggravate the burn and cause more irritation. Gently pat the skin dry with a clean towel without rubbing, and make sure to keep your hands clean throughout the process. The goal here is to provide a clean canvas while minimizing the risk of infection or further inflammation. Clean skin ensures better makeup adherence and longer wear without worsening the skin condition.
2. Apply a Healing Moisturizer or Barrier Cream
Hydration is key when dealing with damaged skin, and a chemical burn is no exception. Use a healing moisturizer rich in ceramides, hyaluronic acid, or soothing ingredients like aloe vera and calendula. Products such as CeraVe Healing Ointment or Aquaphor can also form a protective layer that locks in moisture and shields the skin. Allow the product to absorb fully into your skin before applying any makeup. This step not only calms and comforts the damaged area but also creates a smoother surface for makeup application. Using a barrier cream can prevent makeup from settling into dry or peeling patches caused by the burn.

3. Use a Color Corrector to Neutralize Redness
Chemical burns often leave behind redness or discoloration. To neutralize this redness before applying foundation, use a green color corrector. Green cancels out red tones on the color wheel, allowing you to achieve a more even-toned appearance. Dab the corrector gently onto the affected areas using a clean finger or a beauty sponge, being careful not to press too hard. Blend it just enough to cover the red but not so much that the product gets removed. This step provides a neutral base and ensures the redness does not show through your foundation later.
4. Choose a Full-Coverage, Non-Comedogenic Foundation
When covering a chemical burn, opt for a foundation that offers full coverage but is also non-comedogenic, meaning it won’t clog pores or aggravate sensitive skin. Look for formulations labeled as suitable for sensitive or healing skin. Liquid or cream-based foundations are typically easier to work with than powders, as they are more hydrating and less likely to highlight flakiness. Apply the foundation using a damp beauty sponge to prevent further irritation. Gently tap the foundation over the skin rather than dragging it, and gradually build coverage where needed instead of applying a heavy layer all at once.
5. Apply a Lightweight Concealer Strategically
After your foundation layer is complete, use a lightweight, full-coverage concealer to target any areas that still show signs of discoloration or textural difference. Choose a concealer that is creamy and hydrating, avoiding anything that may be drying or cakey. Apply it in small amounts and tap it into the skin with your ring finger or a small concealer brush. Focus on blending the edges so the concealed area blends seamlessly into the rest of the skin. This step is particularly helpful for more prominent scars or lingering patches that need extra attention beyond foundation.

6. Set Lightly with a Translucent Powder
To help your makeup stay in place and prevent any unwanted shine, use a finely milled translucent powder. Avoid heavy powders or those with added shimmer, as they may draw attention to texture or dryness. Using a soft, fluffy brush, dust a minimal amount over the face, focusing only on areas that tend to become oily or where makeup might slide off. For the affected area, it’s best to use a light touch or even skip powder entirely if the skin is overly dry or peeling. This method locks in your base while preserving a natural finish.
7. Avoid Harsh Contouring or Heavy Blush
While contouring and blush can enhance your features, they should be applied carefully if you’re covering a chemical burn. Harsh lines or bright pigments can accentuate uneven texture or discoloration. If you choose to use blush or bronzer, stick to cream formulas that blend effortlessly into the skin and create a soft, natural look. Apply gently and blend thoroughly to avoid disturbing your base makeup. It’s often better to keep the focus away from the affected area by using minimal and well-blended face color elsewhere.
8. Use a Setting Spray for Long-Lasting Wear
A setting spray helps seal in your makeup and adds a layer of hydration, which is especially beneficial for dry or healing skin. Choose a setting spray with soothing ingredients like aloe or chamomile and avoid anything labeled as “matte” or “long-wear” that may contain alcohol. Mist it evenly over the face from a comfortable distance, and allow it to dry naturally. This step not only helps your makeup last throughout the day but also prevents it from cracking or becoming cakey around the damaged area.
9. Opt for Distraction Techniques with Eye or Lip Makeup
Another smart way to draw attention away from the chemical burn is by enhancing your eyes or lips. Choose a bold lipstick, a well-blended eyeshadow, or a dramatic eyeliner to create a focal point elsewhere on your face. However, make sure your color choices are harmonious with your overall look and don’t appear overly distracting. By creating a standout feature elsewhere, you can subtly reduce the visibility of the affected area without overloading it with product. This technique works especially well if the chemical burn is limited to one part of your face, such as the cheek or forehead.

10. Remove Makeup Gently and Rehydrate
At the end of the day, it’s vital to remove your makeup gently to avoid damaging the healing skin. Use a fragrance-free, non-alcoholic micellar water or a mild cleansing balm that won’t require harsh rubbing. Follow this with your usual gentle cleanser and a rich moisturizer or healing ointment. Rehydrating and nourishing your skin overnight helps speed up the recovery process and ensures it’s ready for makeup the next day, if needed. Consistent, gentle care is key to healing while still maintaining your confidence and appearance during recovery.
Conclusion
Taking care of your skin after any treatment or irritation is essential for maintaining its health and appearance. By following a consistent, gentle routine and using products suited for sensitive skin, you can promote healing while preserving your skin’s natural barrier. Remember, patience and proper care are vital in achieving lasting results and keeping your skin glowing and resilient over time. Thanks for reading our blog post on how to cover chemical burn on face! We hope you found it helpful and informative.
About the Author
Jane Hubbard is a passionate beauty expert with a wealth of experience in makeup, hair, and overall beauty techniques. After years of working as a hairdresser specialist, she followed her entrepreneurial spirit and started her own consultancy business.
Jane has always been driven by her desire to help others feel confident in their own skin, and she does this by sharing her knowledge, experiences, and practical beauty tips. Through her consultancy, she empowers individuals to embrace their unique beauty, offering tailored guidance that boosts both self-esteem and personal style.
Professional Focus
- Specializes in makeup, hairstyling, and beauty consulting.
- Provides personalized beauty advice, tips, and techniques to help individuals feel confident in their appearance.
- Dedicated to staying up-to-date with the latest industry trends and developments.
- Passionate about creating a comfortable and empowering experience for every client.
Education History
- University of Craft and Design – Bachelor of Fine Arts (BFA) in Woodworking and Furniture Design
- Woodworking Apprenticeships – Extensive hands-on training with skilled craftsmen to refine carpentry and furniture making techniques
- Online Courses & Masterclasses – Continued education in advanced woodworking techniques, design principles, and specialized tools
Expertise:
- Makeup artistry, hairstyling, and beauty consulting.
- Personalized beauty techniques to enhance confidence and self-expression.
- Educating clients on how to maintain their beauty routines at home.