
Are you tired of wearing the same makeup look for every holiday party? Do you want to stand out and impress with your makeup this season? Look no further, because we have all the tips and tricks you need to achieve a stunning holiday makeup look!
Achieving the perfect holiday party makeup is all about blending festive charm with your style. Whether you’re attending a cozy family gathering or a glamorous party, holiday makeup allows you to experiment with bold colors, glittery accents, and radiant finishes. From classic red lips to shimmering eyeshadow, you can create a look that captures the magic of the season.
This guide on How to do holiday makeup will walk you through essential tips and techniques to help you shine at every holiday event, ensuring your makeup not only complements your outfit but also makes you feel confident and beautiful.
What Are the Benefits of Holiday Makeup?
There are several benefits to doing holiday makeup, both from a physical and mental standpoint.
- Enhances Your Features: The right holiday makeup can enhance your best features, such as your eyes or lips, making them stand out more and giving you a glamorous look.
- Adds a Festive Touch: Holiday makeup is all about incorporating festive elements into your look, whether it’s through glitter, bold colors, or shimmery finishes. It adds an extra touch of fun and celebration to your overall appearance.
- Boosts Confidence: Adding some sparkle and color to your makeup routine can help boost your self-confidence. When you feel good on the outside, it reflects in how you carry yourself and interact with others.
- Allows for Creative Expression: Makeup is an art form, and holiday makeup is the perfect opportunity to get creative and experiment with different looks. You can play around with bold colors, glitter, and different techniques to create a unique look that reflects your style.
- Complements Festive Attire: Whether you’re headed to a holiday party or family gathering, your makeup can help tie together your festive outfit and complete the overall look. For example, a bold red lip can add an extra pop of color to a little black dress or a shimmery eye look can complement a sparkly holiday sweater.
What Will You Need?
To achieve a stunning holiday makeup look, here are some essential items you may want to have:
- A good foundation that matches your skin tone
- Concealer for covering any blemishes or dark circles
- Setting powder to keep your makeup in place all night
- Eyeshadow palette with a variety of colors to create different looks
- Mascara for voluminous and defined lashes
- Eyeliner for adding definition and drama to your eyes
- Blush to add a natural flush of color to your cheeks
- Highlighter for a radiant glow on the high points of your face
- Lipstick or lip gloss in festive shades like red, berry, or metallics
- Makeup brushes for precise and blended application
9 Easy Steps on How to Do Holiday Makeup
Step 1. Start with a Clean Base

To ensure your holiday makeup looks flawless and lasts all night, it’s crucial to begin with a fresh, clean base. Start by washing your face with a gentle cleanser suited to your skin type to remove any dirt, oil, or impurities. Follow this step with a toner to balance your skin’s pH and a lightweight moisturizer to hydrate and prep your skin for makeup application. If you have dry skin, opt for a richer moisturizer to create a smooth canvas. Don’t forget to apply a primer that suits your skin’s needs—whether it’s mattifying for oily skin, pore-filling for smoother texture, or illuminating for a radiant finish.
Step 2. Apply Foundation and Concealer
Choose a foundation that matches your skin tone and preferred finish—whether it’s matte, dewy, or natural. Use a brush, sponge, or your fingertips to blend it evenly across your face, starting from the center and working outward. For areas that need extra coverage, such as dark circles, redness, or blemishes, apply a concealer that is one shade lighter than your foundation. Gently tap the concealer into the skin with your ring finger or a brush for a seamless blend. Remember to set these base products with a light dusting of translucent powder to lock them in place and prevent creasing.
Step 3. Set Your Base
To ensure your makeup stays in place all day, setting your base is a crucial step. Start by using a setting powder that matches your skin tone, or opt for a translucent powder if you prefer a natural, lightweight finish. Focus on areas that tend to get oily, such as the T-zone, using a fluffy brush or a makeup sponge to lightly press the powder into the skin. If you have dry skin, apply sparingly to avoid emphasizing texture. For an extra long-lasting hold, finish with a setting spray. Hold the spray about 8-10 inches from your face and mist evenly to lock everything in place.
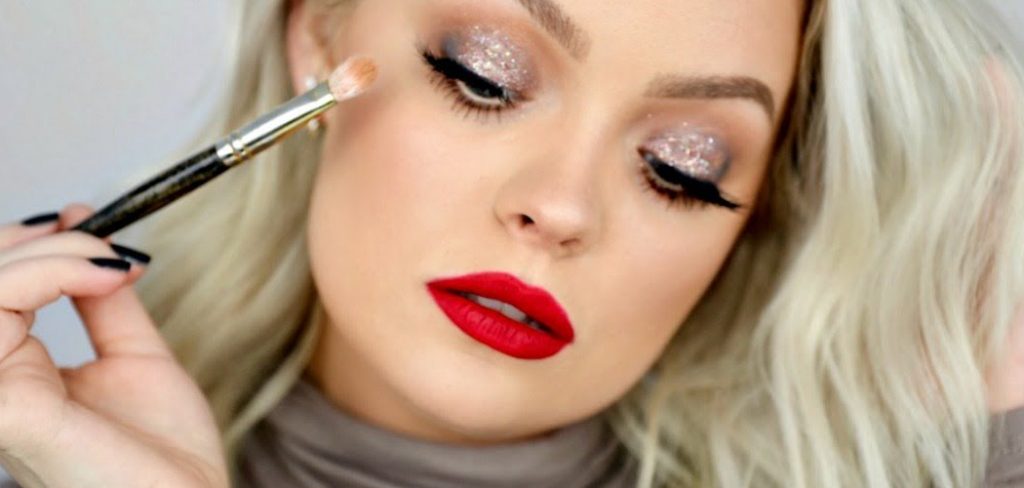
Step 4. Enhance Your Eyes
Start by shaping and filling in your eyebrows to frame your eyes. Use an eyebrow pencil or powder to define their shape, following their natural arch. Next, choose an eyeshadow palette that complements your look—neutral tones for a subtle appearance or bold hues for a dramatic effect. Blend the shades seamlessly to create depth, starting with a light color on the lid and gradually building intensity with darker shades in the crease and outer corner.

For added definition, apply eyeliner along the upper lash line, and consider a winged style for a more striking look. Finish by curling your lashes and applying mascara, ensuring even coverage from root to tip to open up your eyes and enhance their appearance.
Step 5. Define with Eyeliner
To perfect your look, choose an eyeliner that complements your style and skill level. For a classic appearance, use a pencil eyeliner to draw a fine line along your upper lash line, starting from the inner corner and gradually thickening toward the outer corner. For a bold, dramatic effect, opt for gel or liquid eyeliner to create a precise cat-eye or winged design.
If you prefer a softer look, gently smudge the liner using a brush or your fingertip for a smoky finish. Remember to keep the application even, and don’t forget the lower lash line for added depth, using a lighter hand to avoid overpowering the overall look.
Step 6. Boost Your Lashes
To elevate your lash game, start by curling your lashes with a high-quality eyelash curler for added lift and volume. Next, apply a volumizing and lengthening mascara, wiggling the wand from the roots to the tips to ensure even coverage. For a more dramatic look, consider applying multiple coats, allowing each layer to dry slightly before adding the next.
If you want extra fullness, you can use false lashes or individual lash extensions for a custom finish. Finally, brush through your lashes with a clean spoolie to eliminate any clumps and achieve a polished, fluttery effect.
Step 7. Shape Your Brows
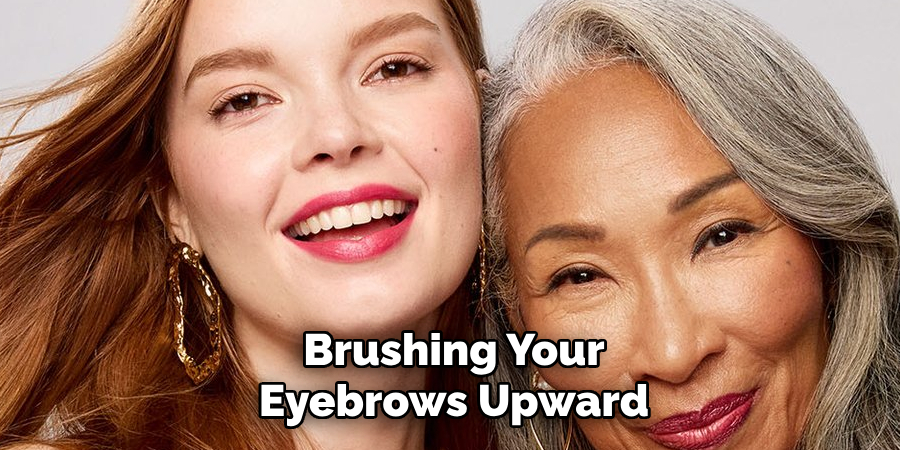
Start by brushing your eyebrows upward using a spoolie to reveal their natural shape. Using a brow pencil or powder, lightly fill in any sparse areas with small, hair-like strokes to maintain a natural appearance. Focus on creating a balanced, symmetrical look without over-drawing. Next, define the shape by outlining the edges of your brows softly, paying attention to the arch. For added precision, use a concealer to clean up the edges and highlight the brow bone.
Complete the look by setting your brows in place with a clear or tinted brow gel, ensuring they stay groomed and polished throughout the day.
Step 8. Add Color to Cheeks
To add a healthy flush to your cheeks, choose a blush shade that complements your skin tone. Using a fluffy blush brush, lightly swirl it in the product and tap off any excess. Smile to locate the apples of your cheeks, then apply the blush using gentle, circular motions. Blend it outward toward your temples for a soft and natural finish. For a more sculpted look, you can also sweep a bit of the blush along your cheekbones. Remember to start with a light application and build up the color gradually to avoid an overly intense effect.
Step 9. Illuminate with Highlighter
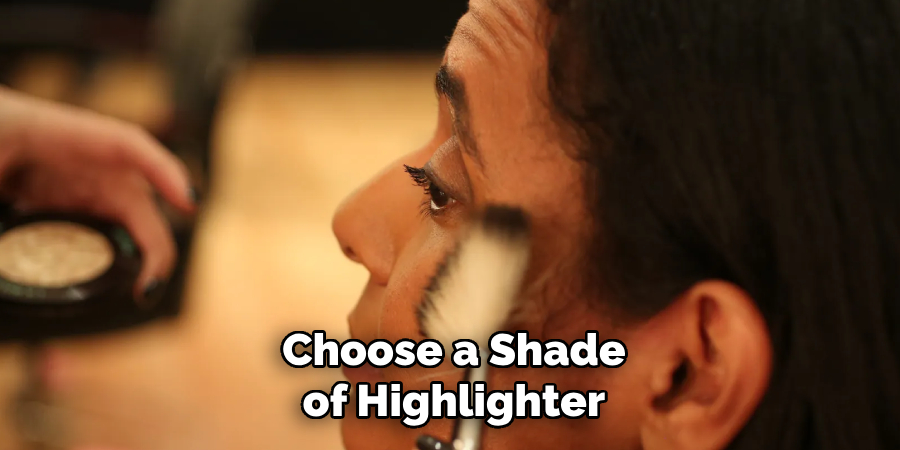
Highlighter adds a beautiful glow to your skin, enhancing your features and giving your makeup look a luminous finish. Using a fan brush or small tapered brush, apply the highlighter to the high points of your face where light naturally hits. Focus on areas such as the tops of your cheekbones, the bridge of your nose, the brow bones, and the cupid’s bow. For a subtle yet radiant effect, use a light hand and build up the glow as needed. You can also dab a little highlighter on the inner corners of your eyes to brighten your gaze.
Choose a shade of highlighter that complements your skin tone for the most flattering results.
Your holiday makeup look is complete! Pair it with confidence and a festive outfit to make a stunning impression.
Conclusion
Achieving the perfect holiday makeup look is all about combining creativity, precision, and personalization.
By focusing on a glowing complexion, striking eyes, and a touch of festive flair, you can create a look that highlights your natural beauty while celebrating the season. Remember to prep your skin, choose shades that complement your features, and take your time to blend seamlessly for a polished finish.
With these tips on How to do holiday makeup, you’ll be ready to shine and enjoy the festivities with confidence.
About the Author
Jane Hubbard is a passionate beauty expert with a wealth of experience in makeup, hair, and overall beauty techniques. After years of working as a hairdresser specialist, she followed her entrepreneurial spirit and started her own consultancy business.
Jane has always been driven by her desire to help others feel confident in their own skin, and she does this by sharing her knowledge, experiences, and practical beauty tips. Through her consultancy, she empowers individuals to embrace their unique beauty, offering tailored guidance that boosts both self-esteem and personal style.
Professional Focus
- Specializes in makeup, hairstyling, and beauty consulting.
- Provides personalized beauty advice, tips, and techniques to help individuals feel confident in their appearance.
- Dedicated to staying up-to-date with the latest industry trends and developments.
- Passionate about creating a comfortable and empowering experience for every client.
Education History
- University of Craft and Design – Bachelor of Fine Arts (BFA) in Woodworking and Furniture Design
- Woodworking Apprenticeships – Extensive hands-on training with skilled craftsmen to refine carpentry and furniture making techniques
- Online Courses & Masterclasses – Continued education in advanced woodworking techniques, design principles, and specialized tools
Expertise:
- Makeup artistry, hairstyling, and beauty consulting.
- Personalized beauty techniques to enhance confidence and self-expression.
- Educating clients on how to maintain their beauty routines at home.