
Are you tired of your plain-looking nose? Do you want a more defined and sculpted look? Nose contouring is a makeup technique that can help you achieve the perfect nose shape.
Contouring your nose can transform your makeup look by enhancing your facial features, creating definition, and achieving a balanced look. Whether you want to make your nose appear slimmer, straighter, or more refined, nose contouring is a versatile technique that can help you achieve your desired aesthetic. With the right tools, products, and a clear understanding of techniques, you can master this makeup skill and tailor it to suit your unique facial structure.
This guide on how to do nose contour will walk you through the basics of nose contouring, providing step-by-step instructions to help you achieve a natural and polished look.

What Are the Benefits of Nose Contouring?
There are several benefits to nose contouring, including:
- Creating the illusion of a slimmer or smaller nose
- Correcting any asymmetry in the nose
- Enhancing or defining the bridge of the nose
- Correcting a crooked or curved nose
- Camouflaging bumps or imperfections on the bridge of the nose
Nose contouring can also help balance out your facial features and give you a more defined and sculpted look. It is a great way to enhance your natural beauty and boost your confidence. Plus, compared to surgical rhinoplasty, it is non-invasive, temporary, and completely customizable.
What Will You Need?
To achieve the perfect nose contour, you will need a few basic makeup products and tools:
- Foundation: Choose a shade that matches your skin tone to create an even base on your nose.
- Concealer: Use a concealer that is one or two shades lighter than your foundation to highlight certain areas of the nose.
- Contour Powder or Cream: This should be a few shades darker than your natural skin tone to create shadows and definition on the nose.
- Highlighter: Opt for a shimmery champagne or light gold shade to add dimension and brightness to specific areas of the nose.
- Angled Brush: This brush helps you apply and blend contour powder or cream onto your nose.
- Small Blending Brush: Use this brush to blend and soften any harsh lines or edges from the contouring and highlighting products.
- Beauty Sponge: This can be used to blend out the concealer, contour powder/cream, and highlighter for a seamless finish.
- Setting Powder: Use a translucent setting powder to set the makeup on your nose and prevent it from fading throughout the day.
9 Easy Steps on How to Do Nose Contour
Step 1. Start with a Clean Base:
Before beginning the contouring process, ensure your face is cleansed, moisturized, and prepped with a primer suitable for your skin type. This step helps create a smooth canvas and allows the makeup to adhere better and last longer.

Apply your foundation and concealer evenly across your face, including your nose, to even out your skin tone. Avoid applying too much product on your nose as it may make it harder for the contour to blend seamlessly. A lightweight foundation is recommended to prevent a cakey appearance. Once your base is applied, gently set it with a translucent powder to avoid smudging later during the contouring process.
Step 2. Choose the Right Products:
Selecting the appropriate products is essential for achieving a flawless contour on your nose. Start with a contour product that is one or two shades darker than your natural skin tone. This can be in the form of a cream, stick, or powder, depending on your preference and skin type. Cream contours are great for a more natural, blended look, while powder contours are ideal for those who prefer a matte finish or have oily skin.
Complement your contour with a highlighter that is one or two shades lighter than your skin tone to enhance the contrast and add dimension. Highlighters can come in various textures, including powder, liquid, or cream—choose one that works well with the rest of your makeup.
Ensure that all the products you use blend well together and cater to your skin’s needs. For example, opt for non-comedogenic or hypoallergenic formulas if you have sensitive or acne-prone skin.
Step 3. Apply Contour to the Sides:
To contour the sides of your face, start by identifying the areas you want to sculpt and define, such as the sides of your nose, your cheekbones, and your jawline. Using a contour product one to two shades darker than your natural skin tone, apply it carefully to these areas.
For the cheekbones, sweep the contour along the hollows of your cheeks, starting from the ear toward the middle of your cheek. On the sides of your nose, apply the product lightly down the bridge for a slimming effect. Be careful to blend thoroughly to prevent harsh lines.
For the jawline, trace the contour under your jaw to create a sharper and more defined look. Always ensure you blend everything seamlessly with a brush, sponge, or your fingertips to achieve a natural finish that complements the rest of your makeup.
Step 4, Define the Tip:
The final step in contouring is defining the tip of your nose. Take a small, angled brush and dip it into a darker shade of powder or cream product. Start at the top of your nose, just below the eyebrows, and draw a thin line down to the tip. Be sure to blend any harsh lines with a blending brush for a more natural look. You can also use this technique to create the illusion of a smaller or straighter nose by drawing parallel lines on either side of your nose.
Step 5. Highlight the Bridge:
After contouring the sides of your nose, it’s essential to highlight the bridge to create dimension and make it appear more defined. Using a lighter shade of powder or cream product, draw a thin line down the center of your nose. This will help to create contrast between the contoured areas and give the illusion of a more prominent bridge.
Step 6. Set with Powder:
To ensure that your contouring lasts all day and doesn’t smudge, it’s essential to set your makeup with a translucent setting powder. Gently dust a small amount of powder over the contoured areas and the highlighted bridge of your nose to set the product. For best results, use a fluffy makeup brush to apply the powder evenly, blending it seamlessly into your skin. This step helps to mattify any shine and prevents the makeup from creasing or moving throughout the day, keeping your nose contour looking natural and polished.
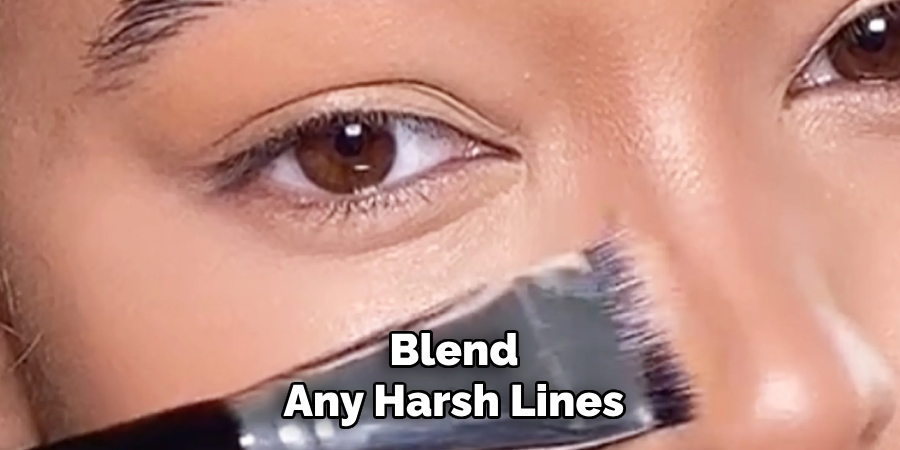
Step 7. Blend Thoroughly:
Blending is one of the most critical steps in achieving a flawless nose contour. Start by using a clean, tapered blending brush or a damp beauty sponge to diffuse any harsh lines gently. Focus on softening the edges of the contour and ensuring it seamlessly transitions into your foundation.
Take your time with this process, as proper blending will make the contour look natural and well-integrated, rather than harsh or overly dramatic. Make light, sweeping motions, and avoid pressing too hard, as this can disturb the base makeup underneath. Remember, the goal is to subtly enhance your natural features, creating a sculpted yet harmonious look. If needed, you can go back with a small amount of powder or foundation to fix any areas that appear uneven.

Step 8. Set with Powder:
Setting your makeup with powder is a crucial step to ensure longevity and a matte finish. Begin by choosing a translucent setting powder for a natural look or a powder that matches your skin tone for added coverage. Use a fluffy powder brush or a makeup sponge to gently press the powder into your skin, focusing on areas prone to excess oil, such as the T-zone (forehead, nose, and chin).
Avoid sweeping motions, as this can disturb the carefully applied makeup underneath. For a flawless finish, consider using a finely-milled setting powder that blurs imperfections and minimizes the appearance of pores. This step not only locks in your makeup but also creates a smooth, velvety texture that lasts throughout the day.
Step 9. Finish the Makeup:
To complete your makeup look, it’s essential to add those finishing touches that bring cohesion and polish to your overall appearance. Start by setting your completed makeup with a setting spray to ensure longevity and achieve a natural, dewy finish or a matte effect, depending on your preference.
Next, check your makeup in different lighting to ensure everything is blended seamlessly, particularly around the edges and jawline, where unevenness can occur. If desired, you can add a bit of highlighter to the high points of your face, such as the tops of your cheekbones, the bridge of your nose, and the Cupid’s bow, for a radiant glow. Don’t forget your lips! Apply your chosen lipstick or gloss, and blot lightly for a longer-lasting effect.
By following these basic steps, you can easily achieve a flawless and natural-looking makeup look.
Conclusion
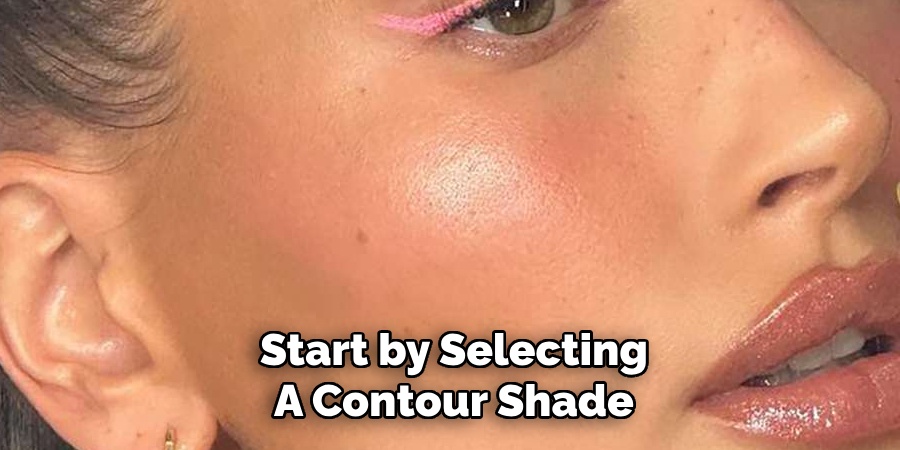
Achieving a well-defined nose contour is all about technique and precision.
Start by selecting a contour shade that is slightly darker than your natural skin tone and a lighter highlight shade. Apply the contour shade along the sides of your nose to create the illusion of a slimmer shape, and blend thoroughly to avoid harsh lines. Then, use the highlight shade to highlight the bridge of your nose, accentuating its length and adding dimension.
Hopefully, the article on how to do nose contouring has provided you with the necessary steps and tips to achieve a flawless and defined nose.
About the Author
Jane Hubbard is a passionate beauty expert with a wealth of experience in makeup, hair, and overall beauty techniques. After years of working as a hairdresser specialist, she followed her entrepreneurial spirit and started her own consultancy business.
Jane has always been driven by her desire to help others feel confident in their own skin, and she does this by sharing her knowledge, experiences, and practical beauty tips. Through her consultancy, she empowers individuals to embrace their unique beauty, offering tailored guidance that boosts both self-esteem and personal style.
Professional Focus
- Specializes in makeup, hairstyling, and beauty consulting.
- Provides personalized beauty advice, tips, and techniques to help individuals feel confident in their appearance.
- Dedicated to staying up-to-date with the latest industry trends and developments.
- Passionate about creating a comfortable and empowering experience for every client.
Education History
- University of Craft and Design – Bachelor of Fine Arts (BFA) in Woodworking and Furniture Design
- Woodworking Apprenticeships – Extensive hands-on training with skilled craftsmen to refine carpentry and furniture making techniques
- Online Courses & Masterclasses – Continued education in advanced woodworking techniques, design principles, and specialized tools
Expertise:
- Makeup artistry, hairstyling, and beauty consulting.
- Personalized beauty techniques to enhance confidence and self-expression.
- Educating clients on how to maintain their beauty routines at home.