
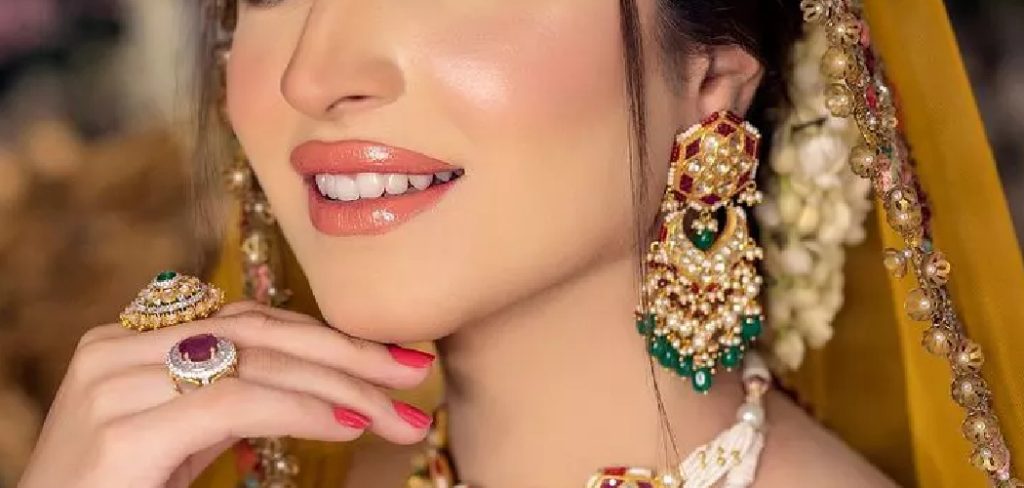
Attending a wedding is a joyous occasion, and while the focus is on the happy couple, you still want to look and feel your best. The challenge is creating a look that is polished, celebratory, and appropriate without upstaging the bride. It needs to be beautiful in person and photograph well, all while lasting through hours of celebration.
If you are wondering exactly how to do wedding guest makeup, you have come to the right place. This guide is designed to walk you through creating a sophisticated, long-lasting look that is perfect for any wedding, from a casual daytime ceremony to a formal evening affair. We will cover everything from skin preparation to the final setting spray, ensuring you feel confident and beautiful all day and night.
When it comes to wedding guest makeup, the key is striking the perfect balance between looking naturally radiant and ensuring your makeup lasts through hours of emotions, dancing, and celebrations. It’s all about enhancing your features in a way that complements the occasion without overshadowing the bride or the event itself. Whether you’re attending a morning garden ceremony or an elegant evening reception, your makeup should feel comfortable, timeless, and versatile enough to suit the day’s theme.
Your Step-by-Step Guide on How to do Wedding Guest Makeup
Step 1: Prep Your Skin for a Flawless Canvas
The secret to makeup that lasts from the ceremony to the final dance is excellent skin preparation. Start by cleansing your face to remove any dirt or oil. Follow up with a hydrating toner to balance your skin’s pH levels. Next, apply a lightweight, fast-absorbing moisturizer suitable for your skin type; this prevents your skin from producing excess oil later, which can break down your makeup. Allow the moisturizer to sink in for a few minutes before moving on. This crucial step not only creates a smooth canvas for foundation but also ensures your makeup looks fresh and vibrant for hours, preventing any caking or patchiness as the day goes on.
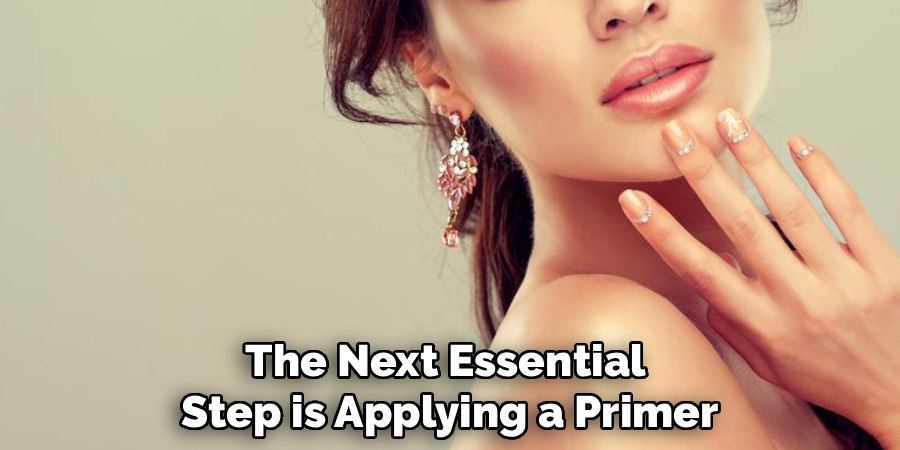
Step 2: Apply a Long-Lasting Primer
After moisturizing, the next essential step is applying a primer. A good primer acts as a barrier between your skin and your makeup, helping to fill in fine lines, blur pores, and create an even texture. More importantly, it gives your foundation something to grip onto, significantly extending its wear time. For a wedding, consider a primer that addresses your specific skin concerns. If you have oily skin, a mattifying primer will control shine in your T-zone. If your skin is on the dry side, a hydrating or illuminating primer will give you a radiant, dewy glow. Apply a thin, even layer across your entire face using your fingertips and let it set for a minute before proceeding.
Step 3: Create an Even Base with Foundation and Concealer
Now it is time to even out your complexion. Choose a foundation with a natural, satin, or demi-matte finish, as these tend to photograph beautifully without looking too flat or overly shiny. Apply it using a damp beauty sponge or a foundation brush, starting from the center of your face and blending outwards. This method ensures the most coverage where you typically need it most and prevents a heavy, mask-like appearance. After foundation, use a creamy, high-coverage concealer to brighten your under-eye area and cover any blemishes or redness. Gently tap the concealer into your skin with your ring finger or a small brush until it blends seamlessly with your foundation.
Step 4: Set Your Base for All-Day Wear
To ensure your foundation and concealer stay put through tears of joy and hours of dancing, you must set them properly. Use a finely milled translucent setting powder to lock everything in place. With a large, fluffy brush, lightly dust the powder all over your face, focusing on areas prone to oiliness, such as the T-zone. For extra staying power, especially under the eyes, you can try the “baking” technique. Apply a generous amount of powder with a damp sponge under your eyes and along your jawline, let it sit for a few minutes to absorb oil, and then gently sweep away the excess with a clean brush.
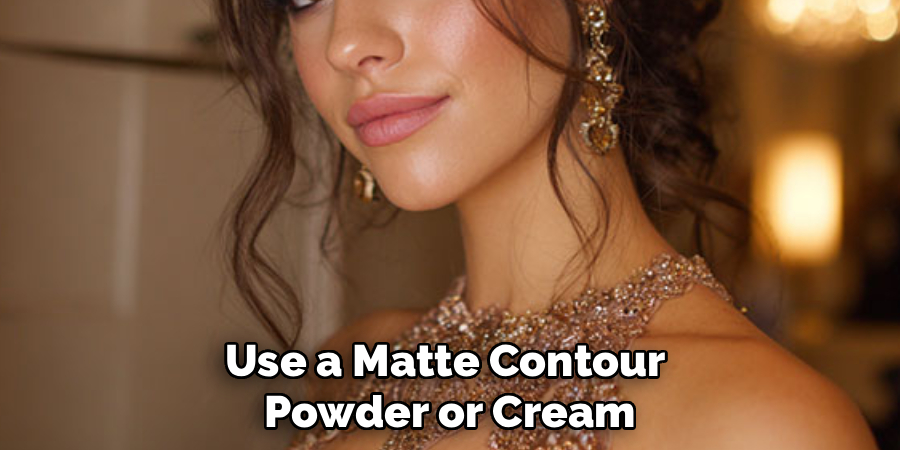
Step 5: Define Your Features with Contour and Blush
Adding dimension back to your face is key to avoiding a flat look in photos. Use a matte contour powder or cream one to two shades deeper than your skin tone to gently sculpt your features. Apply it in the hollows of your cheeks, along your jawline, and on the sides of your nose, blending thoroughly to avoid harsh lines. Next, add a pop of color with blush. A warm peach or soft pink blush applied to the apples of your cheeks and swept upwards toward your temples will give you a healthy, natural-looking flush. This combination of contour and color brings life and definition to your face, making you look vibrant.
Step 6: Master the Eyeshadow for a Sophisticated Look
For wedding guest makeup, a neutral, sophisticated eye look is always a winning choice. Start by applying an eyeshadow primer to prevent creasing and make the colors pop. Then, sweep a light, neutral shade like beige or soft taupe all over your lid as a base. To add dimension, apply a medium-toned brown or bronze shade into your crease, using a fluffy blending brush to soften the edges. For a touch of celebration, press a shimmery champagne or rose-gold shadow onto the center of your eyelid with your fingertip. This simple technique catches the light beautifully and makes your eyes appear brighter without being too dramatic.
Step 7: Define Your Eyes with Eyeliner and Mascara
Defining your eyes will make them stand out in the best way. For a classic and elegant look, use a brown or black liquid or gel eyeliner to draw a thin line as close to your upper lash line as possible. You can extend it into a subtle wing for a slight lift. Avoid heavy or dramatic eyeliner, as the goal is to enhance, not overpower. Next, curl your eyelashes to open up your eyes. Finish with two generous coats of a waterproof mascara on both your top and bottom lashes. Waterproof formula is a non-negotiable for a wedding, as it will withstand any happy tears or humidity.
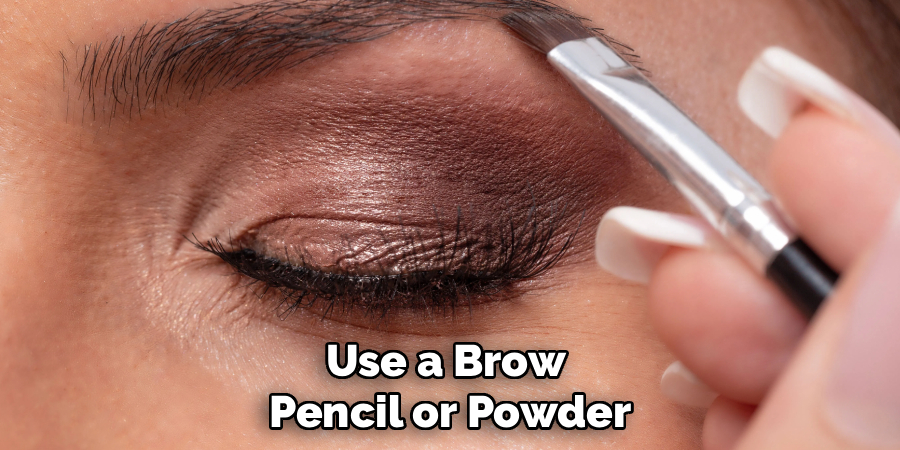
Step 8: Perfect Your Brows and Lips
Well-groomed brows frame your face and complete your entire look. Use a brow pencil or powder that matches your hair color to fill in any sparse areas with light, hair-like strokes. Then, brush them into place with a spoolie and set them with a clear or tinted brow gel to ensure they stay perfectly shaped all day. For your lips, choose a long-wearing formula in a color that complements your overall look, such as a classic nude, soft pink, or muted berry. Line your lips first to prevent feathering, then fill them in. A satin or matte finish is often more durable than a high-gloss one.
Step 9: Use Highlighter for a Wedding-Ready Glow
A touch of highlighter is the perfect finishing step to achieve that ethereal, lit-from-within glow. Choose a powder or liquid highlighter in a shade that complements your skin tone—champagne for fair to medium skin, and gold or bronze for deeper skin tones. Using a small, tapered brush or your fingertip, strategically apply it to the high points of your face where light would naturally hit. This includes the tops of your cheekbones, the bridge of your nose, your brow bone, and your cupid’s bow. A little goes a long way in creating a radiant finish that looks stunning both in person and in photographs.
Step 10: Lock in Your Look with Setting Spray
The final and most important step to ensure your makeup lasts is a generous spritz of setting spray. This magical mist melts all the powder and cream products together, creating a seamless, skin-like finish while locking your entire look in place for hours. Hold the bottle about eight to ten inches from your face, close your eyes, and mist it in an “X” and “T” formation to cover your entire face evenly. Choose a formula based on your desired finish—matte for oil control or dewy for extra radiance. This step is your insurance policy for flawless makeup from the first photo to the last dance.
Frequently Asked Questions
What Is The Best Type Of Foundation To Wear To A Wedding?
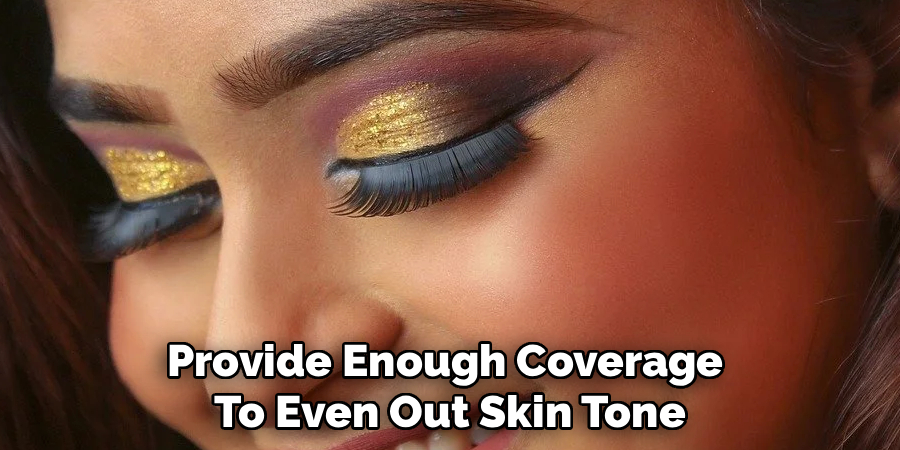
The best foundation is a long-wearing liquid formula with a natural or satin finish. These photograph beautifully without causing flashback and provide enough coverage to even out skin tone. They are comfortable for all-day wear and can be touched up easily if needed, making them a reliable choice.
Should I Wear False Eyelashes As A Wedding Guest?
False eyelashes are a great option if you want to enhance your eyes, but they are not necessary. If you choose to wear them, opt for a natural-looking strip or individual lashes that add volume and length without looking overly dramatic. Always use a strong, reliable lash glue.
How Can I Make My Lipstick Last All Day?
To make your lipstick last, start by exfoliating and moisturizing your lips.
- Apply a lip liner all over your lips as a base.
- Apply one coat of lipstick, blot with a tissue, and then apply a second coat.
- Using a long-wear matte or satin formula will also significantly increase its longevity.
How Do I Prevent Makeup From Transferring Onto My Clothes?
The key to preventing makeup transfer is setting your makeup thoroughly. After applying foundation, use a translucent setting powder to lock it in place. Finish your entire look with a high-quality setting spray, which creates a protective barrier over your makeup, minimizing the risk of it rubbing off on fabric.
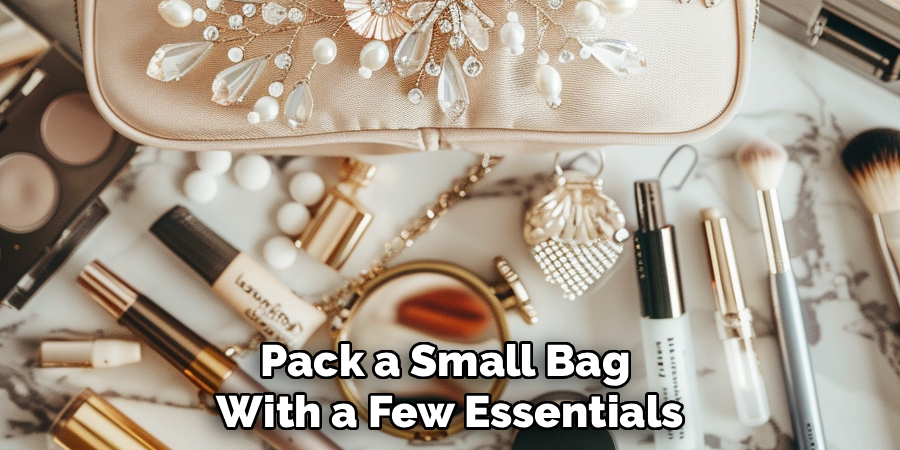
What Should I Pack In My Purse For Touch-Ups?
For touch-ups, pack a small bag with a few essentials. Include your lipstick for reapplication after eating, blotting papers to absorb any excess oil without disturbing your makeup, and a pressed powder for quick mattifying if you get shiny. A travel-sized setting spray can also refresh your look.
Conclusion
Creating a beautiful and lasting look for a wedding does not have to be complicated. By focusing on great skin prep, choosing long-wearing products, and layering your makeup correctly, you can achieve a polished and sophisticated style that will carry you through the entire event with confidence. From the perfect base to the final spritz of setting spray, each step plays a vital role in the final result. Now that you know how to do wedding guest makeup, you have all the tools and techniques needed to look and feel your absolute best while you celebrate the happy couple.
About the Author
Jane Hubbard is a passionate beauty expert with a wealth of experience in makeup, hair, and overall beauty techniques. After years of working as a hairdresser specialist, she followed her entrepreneurial spirit and started her own consultancy business.
Jane has always been driven by her desire to help others feel confident in their own skin, and she does this by sharing her knowledge, experiences, and practical beauty tips. Through her consultancy, she empowers individuals to embrace their unique beauty, offering tailored guidance that boosts both self-esteem and personal style.
Professional Focus
- Specializes in makeup, hairstyling, and beauty consulting.
- Provides personalized beauty advice, tips, and techniques to help individuals feel confident in their appearance.
- Dedicated to staying up-to-date with the latest industry trends and developments.
- Passionate about creating a comfortable and empowering experience for every client.
Education History
- University of Craft and Design – Bachelor of Fine Arts (BFA) in Woodworking and Furniture Design
- Woodworking Apprenticeships – Extensive hands-on training with skilled craftsmen to refine carpentry and furniture making techniques
- Online Courses & Masterclasses – Continued education in advanced woodworking techniques, design principles, and specialized tools
Expertise:
- Makeup artistry, hairstyling, and beauty consulting.
- Personalized beauty techniques to enhance confidence and self-expression.
- Educating clients on how to maintain their beauty routines at home.