
Are you tired of dull and lifeless skin? Do you want to achieve a glowing, radiant complexion without spending a fortune on expensive skincare products? Look no further than how to dry brush face!
Dry brush face is a simple yet effective skincare technique that helps promote a healthy and glowing complexion. This practice involves the gentle use of a soft-bristled brush to exfoliate the skin, remove dead cells, and stimulate circulation. By incorporating dry brushing into your skincare routine, you can improve skin texture, encourage lymphatic drainage, and prepare your face to better absorb moisturizers and serums.
With the right tools and methods, dry brushing can be a relaxing and rejuvenating ritual that supports overall skin health. Let’s dive deeper into the benefits and techniques of dry brushing.
What Are the Benefits of Dry Brushing?
Dry brushing has several potential benefits for the skin, including:
- Exfoliation: The gentle exfoliation from dry brushing helps remove dead skin cells, revealing brighter and smoother skin underneath. This can improve overall skin texture and reduce the appearance of fine lines and wrinkles.
- Lymphatic Drainage: Dry brushing can also help stimulate the lymphatic system, which is responsible for removing toxins and waste from the body. By promoting lymphatic drainage, dry brushing may improve circulation and help reduce puffiness in the face.
- Better Absorption of Skincare Products: By removing dead skin cells and stimulating circulation, dry brushing can prepare your face to better absorb moisturizers, serums, and other skincare products. This can make your products more effective and potentially improve the overall health and appearance of your skin.
- Invigorating Sensation: Many people also enjoy the invigorating sensation that dry brushing provides. The light pressure and gentle exfoliation can feel refreshing and rejuvenating, making it a great addition to your morning routine.
- Improved Overall Skin Health: Regularly dry brushing your face may help improve the overall health of your skin. By removing dead skin cells, promoting circulation, and stimulating lymphatic drainage, you are helping to keep your skin healthy and radiant.
What Will You Need?
- A good quality dry brush with natural bristles
- A clean and dry washcloth or towel
- Your favorite facial cleanser (optional)
Once you have all of your materials gathered, it’s time to start dry brushing!
10 Easy Steps on How to Dry Brush Face
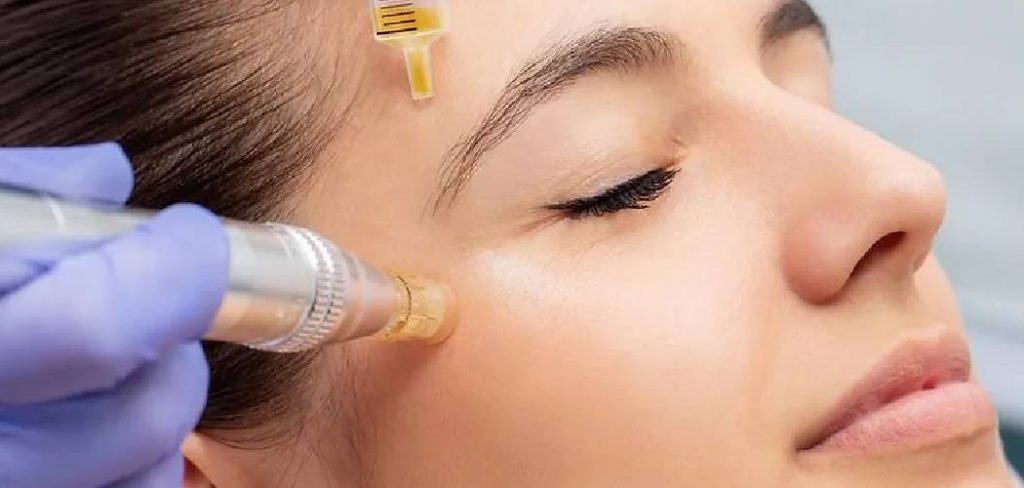
Step 1. Choose the Right Brush
Selecting the perfect brush for dry brushing your face is essential for effective results. Look for a brush specifically designed for facial use, as it will have softer, more delicate bristles compared to body brushes. Brushes made with natural fibers are ideal because they are gentle on the skin and less likely to irritate. Avoid using stiff or coarse-bristled brushes, as these can damage the sensitive skin on your face. Additionally, consider the size and shape of the brush—smaller brushes with ergonomic handles are often easier to maneuver around your facial contours, ensuring a comfortable and efficient routine. Always prioritize quality when choosing your brush to ensure durability and optimal results.

Step 2. Start with Clean, Dry Skin
Starting with clean, dry skin is a crucial step in any effective skincare routine. Begin by washing your face with a gentle cleanser suited to your skin type. This will help remove dirt, oil, and any residual makeup, creating a fresh canvas for the next steps. After cleansing, pat your face dry with a soft, clean towel—avoid rubbing, as this can irritate the skin. Ensuring your skin is completely clean and dry allows skincare products to absorb more effectively, maximizing their benefits.
Step 3. Begin at the Chin
To apply your skincare products effectively, start at the chin and gently work your way upward. Using your fingertips or palms, massage the product into your skin in small, circular motions. This technique helps stimulate blood flow while ensuring an even application of the product. Always apply gentle pressure to avoid tugging or pulling at the skin, which can lead to irritation over time.
Step 4. Move to the Cheeks
After the chin, focus on the cheeks by applying the product in upward, sweeping motions. Use your fingertips to gently massage from the center of each cheek outward toward the hairline. This technique not only ensures thorough coverage but also promotes a lifting effect. Be mindful to treat the skin delicately, especially on sensitive areas, to maintain its natural elasticity and avoid any unnecessary stress.
Step 5. Focus on the Forehead
Apply the product to your forehead using gentle, horizontal strokes. Start at the center of the forehead and work your way outward toward the temples. Use your fingertips to massage the area with light, circular motions, which helps improve absorption and stimulate blood flow. Pay particular attention to fine lines or areas requiring extra care, while being cautious not to press too hard to maintain the skin’s integrity.

Step 6. Gently Brush Around the Eye Area
Using your ring finger, which applies the least pressure, gently dab a small amount of product around the eye area. Start from the inner corner and move outward along the orbital bone, being careful to avoid direct contact with the eyes. Use light tapping motions instead of rubbing to prevent irritating the delicate skin. This technique helps reduce puffiness and supports the absorption of the product for optimal effectiveness.
Step 7. Brush the Nose and Upper Lip
Using a clean brush or applicator, apply a small amount of product to the nose and upper lip area. Focus on even coverage, gently sweeping the product outward to ensure a smooth and natural finish. Pay special attention to any areas that tend to appear dry or show texture, as this step helps refine and balance the skin’s appearance. Be gentle to avoid over-applying and maintain a light touch for the best results.
Step 8. Don’t Forget the Neck
The neck is often overlooked but plays a crucial role in achieving a cohesive and polished look. Using the same product as applied to the face, blend it gently onto the neck, starting from the jawline and working downward. This ensures a seamless transition between the face and neck, avoiding any harsh lines or noticeable differences in tone. Use a light hand to blend evenly, and consider applying less product to maintain a natural appearance. Proper attention to the neck helps create a balanced and flawless finish.
Step 9. Rinse and Cleanse
After completing your makeup application, it’s essential to ensure all tools and products are clean and ready for future use. Begin by rinsing makeup brushes thoroughly with a gentle cleanser designed for cosmetic tools. This removes residue and bacteria, preserving the quality of the brushes and preventing skin irritation. Additionally, cleanse any sponges, palettes, or applicators you’ve used during the process. Allow everything to air dry completely before storing. Maintaining clean tools not only extends their lifespan but also contributes to healthier skin and a more effective makeup application routine.
Step 10. Moisturize
Apply a suitable moisturizer immediately after cleansing to lock in hydration and maintain your skin’s natural barrier. Choose a product that complements your skin type—whether it’s a lightweight gel for oily skin, a rich cream for dry skin, or a soothing formula for sensitive skin. Gently massage the moisturizer into your skin using upward circular motions, which not only promotes absorption but also enhances circulation.
By following a consistent moisturizing routine, your skin will stay hydrated and supple, reducing the appearance of fine lines and wrinkles.
5 Things You Should Avoid
- Using a Brush That is Too Rough
Avoid using a brush with overly stiff or coarse bristles, as it can irritate your skin and cause microtears. Opt for a brush specifically designed for the face with soft, gentle bristles.
- Applying Too Much Pressure
Pressing too hard while dry brushing can damage your skin’s barrier and lead to redness or sensitivity. Always use light, gentle strokes to protect your skin.
- Dry Brushing on Broken or Irritated Skin
Never dry brush over areas with cuts, acne, eczema, or any other skin irritation. This can worsen the condition and may lead to infection or further inflammation.
- Skipping Moisturizing After Dry Brushing
Dry brushing removes dead skin cells and can leave your skin feeling dry. Make sure to apply a hydrating moisturizer or serum afterward to replenish and lock in moisture.
- Overdoing the Practice
Dry brushing your face too often can over-exfoliate the skin, causing redness, sensitivity, and damage. Limit the practice to 2-3 times per week for best results.
By avoiding these common mistakes, you can safely incorporate dry brushing into your skincare routine and enjoy its benefits.
Conclusion
Dry brushing your face can be a valuable addition to your skincare routine when done correctly and with care.
By choosing the right brush, maintaining proper technique, and avoiding common mistakes, you can reap the benefits of exfoliated, glowing skin without causing irritation. Always listen to your skin’s needs and adjust the frequency and intensity of dry brushing as necessary. With consistency and mindfulness, dry brushing can enhance your skincare regimen and contribute to a healthier, more radiant complexion.
Hopefully, the article on how to dry brush face and body has provided useful information and guidance for incorporating this practice into your skincare routine.
About the Author
Jane Hubbard is a passionate beauty expert with a wealth of experience in makeup, hair, and overall beauty techniques. After years of working as a hairdresser specialist, she followed her entrepreneurial spirit and started her own consultancy business.
Jane has always been driven by her desire to help others feel confident in their own skin, and she does this by sharing her knowledge, experiences, and practical beauty tips. Through her consultancy, she empowers individuals to embrace their unique beauty, offering tailored guidance that boosts both self-esteem and personal style.
Professional Focus
- Specializes in makeup, hairstyling, and beauty consulting.
- Provides personalized beauty advice, tips, and techniques to help individuals feel confident in their appearance.
- Dedicated to staying up-to-date with the latest industry trends and developments.
- Passionate about creating a comfortable and empowering experience for every client.
Education History
- University of Craft and Design – Bachelor of Fine Arts (BFA) in Woodworking and Furniture Design
- Woodworking Apprenticeships – Extensive hands-on training with skilled craftsmen to refine carpentry and furniture making techniques
- Online Courses & Masterclasses – Continued education in advanced woodworking techniques, design principles, and specialized tools
Expertise:
- Makeup artistry, hairstyling, and beauty consulting.
- Personalized beauty techniques to enhance confidence and self-expression.
- Educating clients on how to maintain their beauty routines at home.