
Are you tired of your pink hair and want something more natural? Then, dying it brown might be the perfect solution for you.
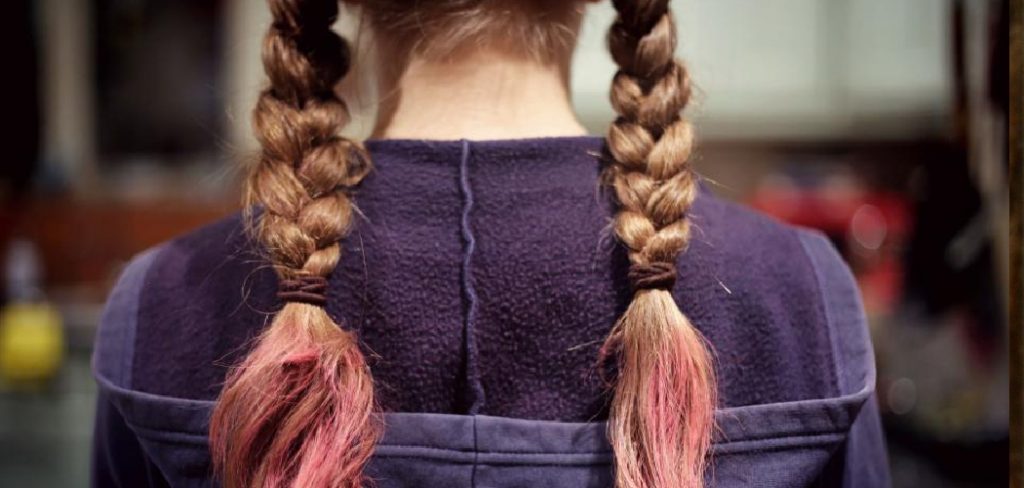
If you’ve been rocking pink hair but are ready for a change, transforming your vibrant pink locks into a rich and sophisticated brown shade can be exciting. Whether you’re looking to switch up your style or need to transition to a more natural color for work or other reasons, dyeing pink hair brown can be achieved with the proper techniques and products.
In this guide on how to dye pink hair brown, we’ll walk you through the step-by-step process to help you successfully achieve a beautiful brown hue while maintaining the health and integrity of your hair. Get ready to embrace a new look that exudes warmth and versatility!
What Are the Benefits of Dyeing Pink Hair Brown?
Before we dive into the steps to dye pink hair brown, let’s first discuss why this might be a good option for you. Here are some benefits of opting for brown hair:
- Natural and Versatile Look: Brown is one of the most common natural hair colors and can provide a more subtle and versatile appearance compared to vibrant pink shades.
- Easier Maintenance: While pink hair may require frequent touch-ups to maintain its brightness, brown hair tends to be easier to maintain as it doesn’t fade as quickly.
- Transition-Friendly: If you plan on returning to your natural color or a different shade in the future, brown is a great intermediary color that blends well with most other colors.
- More Professional and Work-Friendly: Depending on your profession, having pink hair may not be appropriate or allowed. Dyeing it brown can give you a more professional look while still allowing for some creativity and self-expression.
These are just a few of the benefits of dyeing your pink hair brown. Now, let’s move on to the steps for achieving this transformation.
What Will You Need?
Before you begin, gather the following materials:
- Hair bleach: Depending on how vibrant your pink color is, you may need to lighten it before dyeing it brown. Look for a bleach designed explicitly for use on dyed or colored hair.
- Brown hair dye: Choose a shade of brown that complements your skin tone and desired look. If you’re not ready for a long-term commitment, consider using semi-permanent or demi-permanent dyes.
- Developer: This is necessary when using permanent hair dye to activate the color molecules.
- Gloves: To protect your hands from the chemicals in the bleach and dye.
- Tint brush or applicator bottle: These tools will help you evenly apply the dye to your hair.
- Hair clips or hair ties: To section off your hair and make it easier to apply the dye.
- Old t-shirt or towel: Protect your clothes from spills or stains.
Once you have all these materials, you’re ready to begin the dyeing process.
9 Easy Steps on How to Dye Pink Hair Brown
Step 1: Prepare Your Hair
Before starting the dyeing process, preparing your hair to ensure the best results is important. Here’s what you should do:
- Deep Condition Your Hair: Pink hair is usually achieved through bleaching, which can cause damage. So, before proceeding with dyeing, use a deep conditioning treatment to restore moisture and strengthen your strands.
- Avoid Washing Your Hair: It’s recommended to dye your hair when it’s slightly dirty, as the natural oils in your scalp will act as a protective barrier against the chemicals in the bleach and dye.
- Do a Strand Test: If you’ve never dyed your hair before or are using a new product, doing a strand test is essential first. This will help you determine the required processing time and ensure that you’re not allergic to any of the ingredients.
Step 2: Bleach Your Hair (If Needed)
As mentioned earlier, if your pink color is very vibrant, you’ll need to lighten it before applying brown dye. For best results, follow these tips:
- Section Your Hair: Use clips or ties to divide your hair into manageable sections.
- Mix the Bleach: Follow the instructions on your bleach kit, and mix the bleach with the developer in a non-metallic bowl.
- Apply the Bleach: Use a tint brush or applicator bottle to apply the bleach evenly to each section of your hair. Start from the ends and work towards the roots, ensuring all strands are covered.
- Let It Sit: The processing time will vary depending on your current color and desired shade, so refer to the instructions on your bleach kit for accurate timing.
- Rinse Well: Once you’ve reached your desired level of lightness, rinse off the bleach thoroughly with cold water and shampoo and condition your hair.
Step 3: Mix Your Brown Hair Dye
Now that your hair is ready, it’s time to mix your brown hair dye. Follow these steps for the best results:
- Choose the Right Shade: Select a brown shade that suits your skin tone and complements your undertones. Warm brown shades often work well on previously pink hair, but you can also opt for more fabulous shades if that’s your preference.
- Prepare the Dye: Following the instructions on your hair dye kit, mix the hair dye with the developer in a non-metallic bowl. Use the recommended ratio specified in the kit, ensuring the mixture is smooth and well-combined.
- Wear Gloves: Wear gloves to protect your hands from staining and potential irritation caused by the dye.
Once your dye is mixed and ready, you can proceed to the application process.
Step 4: Apply the Brown Hair Dye
This is where the transformation begins! Apply the dye using these simple tips for even coverage and a vibrant result:
- Section Your Hair: Divide your hair into small, manageable sections using clips or hair ties. Start from the back and work to the front to ensure even application.
- Apply Dye from Roots to Ends: Using a tint brush or applicator bottle, apply the dye to your roots first, as this area typically needs more processing time. Once the roots are covered, spread the dye evenly down the length of your hair to the ends.
- Massage for Even Coverage: Use your gloved hands to massage the dye into your hair for consistent coloring gently.
- Check for Missed Spots: Double-check each section to make sure no part of your hair is left undyed.
Step 5: Let the Dye Process
After applying the dye, allow it to process for the recommended time specified on the packaging. Avoid exceeding this time to prevent over-processing, which could damage your hair or result in uneven color. During this time, you can cover your hair with a plastic cap to enhance color absorption and keep your surroundings clean.
Step 6: Rinse and Condition
Once the processing time is complete, follow these steps to finish the coloring process:
- Rinse Thoroughly: Rinse your hair with lukewarm water until the water runs clear. Avoid using hot water, as it may strip the color.
- Apply Conditioner: Most hair dye kits include a special conditioner to help seal in the color and nourish your hair. Apply it generously and leave it on for a few minutes before rinsing.
- Avoid Shampooing Immediately: To ensure your new color lasts longer, avoid shampooing your hair for at least 48 hours after dyeing.
Step 7: Style and Enjoy Your New Brown Hair
Once your hair is dry, give it a quick style and admire your new brown hair! You can add texture or waves to show off the beautiful color dimension. With proper care and maintenance, your new hair color should last for several weeks before needing a touch-up. Ensure to use color-safe hair products and minimize heat styling to prolong the vibrancy of your brown hair.
Step 8: Plan for Future Touch-Ups
As your hair grows, you should touch up your roots or freshen up the color. To prevent over-processing and damage to your hair, it’s essential to space out dyeing sessions and follow best practices for at-home coloring. If you’re not confident in dyeing your hair yourself, you can also visit a professional hairstylist.
Step 9: Maintain Healthy Hair
Dyeing your hair can cause some damage, so it’s crucial to take extra care of your tresses afterward. Here are some tips for maintaining healthy hair:
- Deep Condition Regularly: Use a deep conditioning treatment once a week to keep your hair moisturized and nourished. This will also help maintain your color’s vibrancy.
- Trim Split Ends: Regular trims every 6-8 weeks will help eliminate split ends, keeping your hair healthy and preventing further damage.
- Protect from Heat: Minimize heat styling as much as possible to prevent additional damage to your tresses. If you must use heat tools, use a heat protectant spray first.
- Use Color-Safe Products: To prolong the life and vibrancy of your brown color, invest in shampoos, conditioners, and styling products specifically designed for colored hair.
By following these steps and maintaining healthy hair habits, you can achieve a beautiful and vibrant brown hair color at home.
Conclusion
How to dye pink hair brown may seem like a daunting task, but with the right steps and products, it can be easily achieved at home.
By properly prepping your hair, selecting the right shade of brown, and following the application and aftercare tips, you can transform your bright pink locks into a gorgeous brown hue. Remember to take extra care of your hair to maintain its health and prolong the life of your new color.
With these steps in mind, you’ll have stunning brown hair in no time! So embrace this new chapter in your hair journey with confidence and excitement. Happy coloring!
About the Author
Jane Hubbard is a passionate beauty expert with a wealth of experience in makeup, hair, and overall beauty techniques. After years of working as a hairdresser specialist, she followed her entrepreneurial spirit and started her own consultancy business.
Jane has always been driven by her desire to help others feel confident in their own skin, and she does this by sharing her knowledge, experiences, and practical beauty tips. Through her consultancy, she empowers individuals to embrace their unique beauty, offering tailored guidance that boosts both self-esteem and personal style.
Professional Focus
- Specializes in makeup, hairstyling, and beauty consulting.
- Provides personalized beauty advice, tips, and techniques to help individuals feel confident in their appearance.
- Dedicated to staying up-to-date with the latest industry trends and developments.
- Passionate about creating a comfortable and empowering experience for every client.
Education History
- University of Craft and Design – Bachelor of Fine Arts (BFA) in Woodworking and Furniture Design
- Woodworking Apprenticeships – Extensive hands-on training with skilled craftsmen to refine carpentry and furniture making techniques
- Online Courses & Masterclasses – Continued education in advanced woodworking techniques, design principles, and specialized tools
Expertise:
- Makeup artistry, hairstyling, and beauty consulting.
- Personalized beauty techniques to enhance confidence and self-expression.
- Educating clients on how to maintain their beauty routines at home.