
Are you tired of using heat-styling tools that damage your hair? Do you want to achieve beautiful, bouncy curls without heat?

Achieving gorgeous, bouncy curls without exposing your hair to heat damage is a dream come true for many. Whether you have naturally straight hair or want to give your locks a break from hot styling tools, heatless curls offer a fantastic alternative.
In this guide, we’ll explore various techniques and tips on how to get heatless curls to stay all day. Say goodbye to the frustration of curls that fall flat within hours and hello to long-lasting, beautiful curls that will turn heads wherever you go. Let’s dive in and discover the secrets to achieving heatless curls that stand the test of time.
What Are the Benefits of Heatless Curls?
Before we dive into the techniques, let’s first explore why heatless curls are a great option for your hair.
- No damage: The most significant benefit of heatless curls is that they don’t expose your hair to damaging high temperatures. Heat styling tools such as curling irons and flat irons can cause severe damage to your hair over time, leading to dryness, breakage, and split ends.
- Versatility: With heatless curls, you have more control over the type of curl you want to achieve. Whether you’re after loose waves or tight ringlets, there’s a technique that will help you achieve it.
- Time-saving: Heatless curls require little to no maintenance once set, unlike heat styling, which involves constant touch-ups and re-styling.
- Lasting results: With the right techniques and products, heatless curls can last for days, saving you time and effort in your daily hair routine.
These are just some of the many benefits of heatless curls. Now, let’s look at some techniques to achieve beautiful, long-lasting curls without exposing your hair to damaging heat.
What Will You Need?
Before you begin, you must ensure you have all the necessary tools and products for your chosen heatless curling technique. Here are some essentials you may need:
- Hair ties: To create curls, you must cut your hair into smaller sections. Hair ties will help keep these sections in place.
- Bobby pins: These are useful for securing rolled-up sections of hair as they dry.
- Heatless curlers or rods: Various options are available, such as foam rollers, flexi rods, and twist-in curlers. Choose a type that suits your hair length and desired curl size.
- Hairspray or mousse: These products are crucial for setting the curls and helping them stay in place.
- Hair oil or serum: To add shine and combat frizz, having a hair oil or serum on hand is always a good idea.
Now that you have all the necessary tools let’s explore some heatless curling techniques to help you achieve long-lasting, beautiful curls.
10 Easy Steps on How to Get Heatless Curls to Stay All Day
Step 1. Clean Your Hair
Start by thoroughly washing your hair with a gentle shampoo and conditioner. This step removes any dirt, oil, or product buildup, ensuring your curls have a clean and fresh foundation. Avoid using heavy conditioners or leave-in treatments that may weigh down your hair and make it harder for the curls to form. Once you’ve rinsed out all the residue, gently towel-dry your hair, removing excess moisture without rubbing or causing friction.
Remember, having clean and well-prepared hair sets the stage for achieving the best results with your heatless curling techniques.
Step 2. Apply a Styling Product
Apply a styling product that will help hold and set your curls. For this step, you can use mousse, hairspray, or a heatless curl-specific product. Distribute the product evenly throughout your hair, focusing on the ends and avoiding the roots.
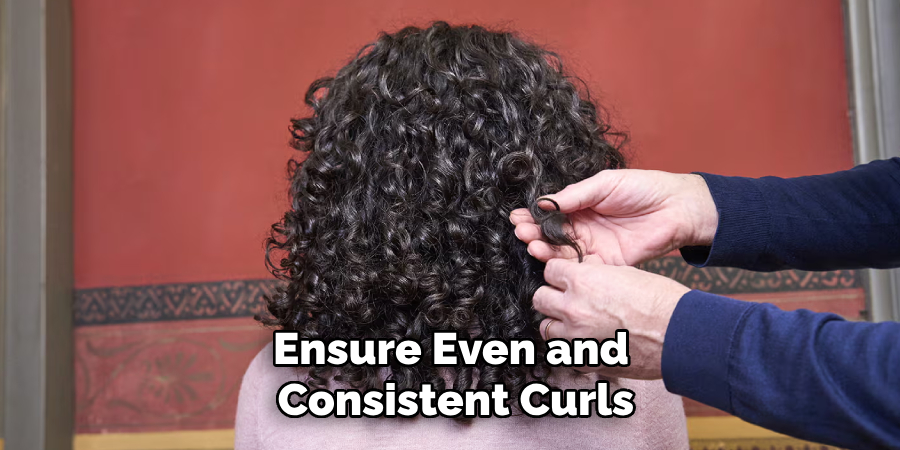
Step 3. Section Your Hair
To ensure even and consistent curls, divide your hair into manageable sections. The number of sections may vary based on your hair thickness and desired result. You may need more sections for thicker hair, while finer hair may require fewer sections. Use hair clips or hair ties to secure each section and keep them separated throughout the curling process.
By sectioning your hair, you create a structured approach that allows you to focus on one area at a time, making it easier to curl each section evenly. This technique also helps prevent tangling and ensures that all parts of your hair receive equal attention and styling.
Step 4. Choose Your Technique
Now that your hair is clean and sectioned, it’s time to choose a heatless curling technique that works best for you. Some popular options include:
- Foam rollers: These are soft and lightweight rollers that come in various sizes and can create big, bouncy curls.
- Flexi rods: Flexible, foam-covered sticks that can bend into different shapes to achieve varying types of curls.
- Twist-in curlers: These are plastic or foam tubes with spiral ridges in the middle where you wrap your hair around to form a curl.
You may also experiment with braiding, twisting, or using tiny socks or headbands to create curls.
Step 5. Start Curling
Take the first section of hair and wrap it around your chosen curling tool, starting at the ends and rolling upwards toward your scalp. Make sure to roll smoothly, without any creases or bumps in the hair. When you reach your scalp, secure the roller or rod with a bobby pin or clip. Repeat this process for all sections of hair until all of your hair is secured in rollers or rods.
Step 6. Let Your Hair Dry
Allowing your hair to dry completely is crucial to achieving long-lasting, defined curls. There are a few options for drying your hair after it has been set in rollers or rods:
- Air drying: This method involves letting your hair dry naturally over time. It can be the gentlest option for your hair, as it minimizes heat exposure and potential damage. However, air drying may take longer, especially with thick or lengthy hair.
- Hooded dryer: If you prefer a quicker drying time, use a hooded dryer. Sit under the hooded dryer with your rollers or rods in place, and adjust the heat and speed settings according to your hair’s needs. This method provides even heat distribution and can help set your curls more efficiently.
- Diffuser attachment: If you are using a blow dryer, attach a diffuser to minimize frizz and maintain the integrity of your curls. Set the blow dryer to a low heat setting and gently dry your hair while cupping the curls in the diffuser. This method can enhance volume and definition while speeding up the drying process.
Step 7. Remove the Rollers or Rods

Once your hair is parched, it’s time to remove the rollers or rods. Be gentle and avoid pulling on the curls as you remove each one. After removing all of them, use your fingers to gently separate and loosen the curls.
Step 8. Apply Finishing Products
Apply a light layer of finishing products to ensure your curls last all day and maintain shape. Start using a small amount of hair oil or serum to coat the curls lightly. This will add shine, reduce frizz, and polish your curls. Be careful not to overapply; too much product can weigh down the curls and make them lose their bounce.
Next, use a flexible-hold hairspray to lock in the curls without making them stiff or crunchy. Hold the hairspray about 10-12 inches away from your hair and lightly mist it evenly over your curls. If you prefer additional volume, gently lift sections of hair and spray the hairspray underneath for added lift.
Step 9. Set Your Curls
After applying your finishing products, setting your curls for maximum longevity is important. One effective way to do this is by gently scrunching your curls upwards with your hands to reinforce their shape while the products fully settle. If you’ve used a hairspray, allow it to dry completely before handling your hair further. Consider lightly pinning sections of your curls to your scalp with clips if you’d like them to maintain a tighter shape for a while longer.
If you’re planning to go out right away, make sure you handle your hair with care to avoid disrupting the curls. For those who styled their curls the night before, you can use a silk or satin scarf to wrap around your head loosely, protecting the curls as you sleep and ensuring they retain their freshness into the next day.
Step 10. Style and Enjoy
Now that your heatless curls are set, it’s time to style them to your preference! You can leave your curls down for a natural, cascading look or pin up sections for a chic, sophisticated vibe. Experiment with different partings or accessories like clips and headbands to complement your outfit or occasion.
By following these steps and techniques, you can achieve beautiful, heatless curls without causing damage to your hair.
Conclusion
Heat styling can be convenient and produce quick results, but it can also cause damage to your hair over time.
By learning and practicing how to get heatless curls to stay all day, you can give your hair a break from excessive heat and still achieve beautiful curls. Experiment with different methods and products to find what works best for your hair type and desired look. With practice, you’ll become a pro at achieving gorgeous, heatless curls that are healthy for your hair and stunning to look at!
So embrace the heatless curling trend and say hello to bouncy, defined curls without the regret of damaging heat tools.
About the Author
Jane Hubbard is a passionate beauty expert with a wealth of experience in makeup, hair, and overall beauty techniques. After years of working as a hairdresser specialist, she followed her entrepreneurial spirit and started her own consultancy business.
Jane has always been driven by her desire to help others feel confident in their own skin, and she does this by sharing her knowledge, experiences, and practical beauty tips. Through her consultancy, she empowers individuals to embrace their unique beauty, offering tailored guidance that boosts both self-esteem and personal style.
Professional Focus
- Specializes in makeup, hairstyling, and beauty consulting.
- Provides personalized beauty advice, tips, and techniques to help individuals feel confident in their appearance.
- Dedicated to staying up-to-date with the latest industry trends and developments.
- Passionate about creating a comfortable and empowering experience for every client.
Education History
- University of Craft and Design – Bachelor of Fine Arts (BFA) in Woodworking and Furniture Design
- Woodworking Apprenticeships – Extensive hands-on training with skilled craftsmen to refine carpentry and furniture making techniques
- Online Courses & Masterclasses – Continued education in advanced woodworking techniques, design principles, and specialized tools
Expertise:
- Makeup artistry, hairstyling, and beauty consulting.
- Personalized beauty techniques to enhance confidence and self-expression.
- Educating clients on how to maintain their beauty routines at home.