
Are you looking for a way to make your eyes stand out and add some serious glam to your look? Do you want those perfect, envy-inducing highlighted inner corners of the eyes but don’t know how? Look no further!
If you follow these simple steps, you can showcase your bright eyes with no trouble at all.
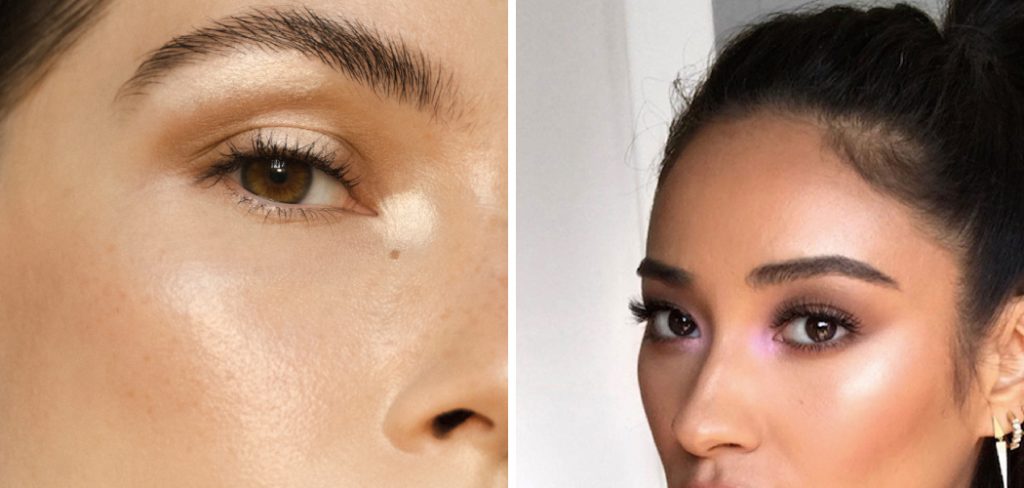
In this post, we’ll be going over all the essential tips and tricks on how to highlight inner corner of eyes like a pro. We’ll cover everything from product recommendations to makeup application techniques designed specifically for highlighting this delicate area. So grab an eye shadow palette, stock up on fixing spray, and acquire yourself a few brushes; it’s time we give those peepers the dramatic transformation they deserve!
What Will You Need?
First, you need to ensure your makeup collection is well-stocked with all the right products. Here are a few items you should have at hand before we move on to the actual application steps:
- Eyeshadow palette of your preference
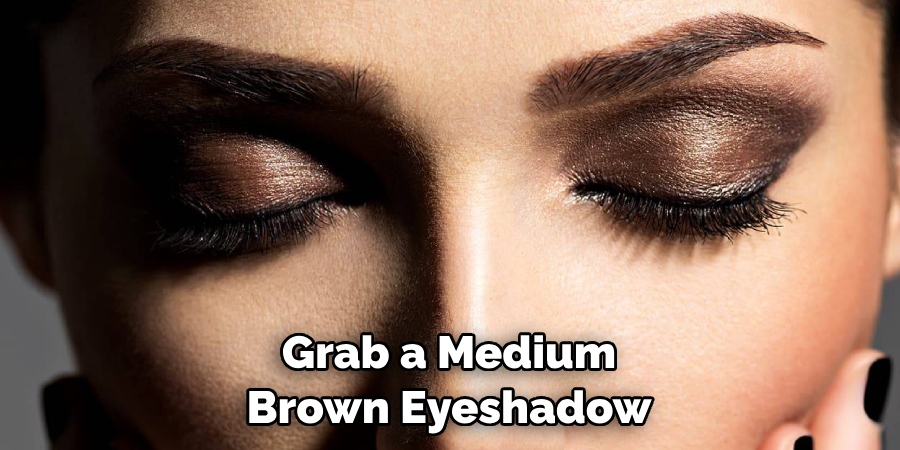
- Light and medium brown eyeshadows
- Matte white4. Shimmery and glittery eyeshadows
- Fixing spray
- Highlighter of your choice (we recommend liquid, cream, or mousse highlighters)
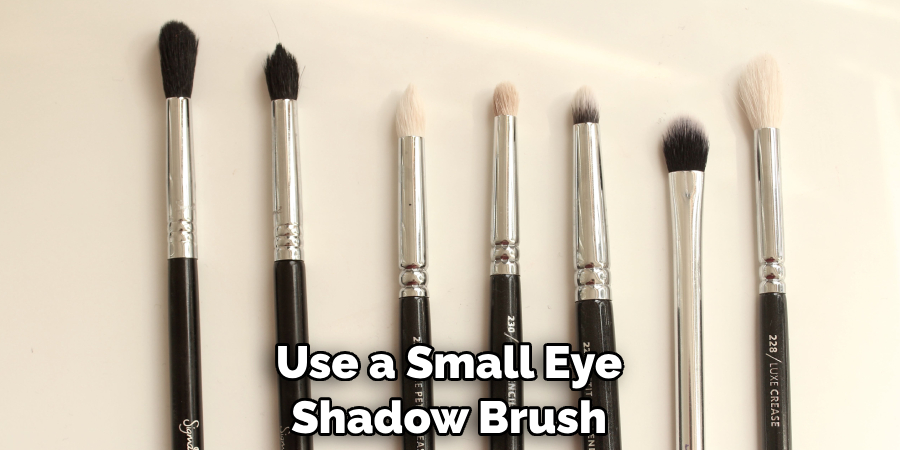
- Medium fluffy brush
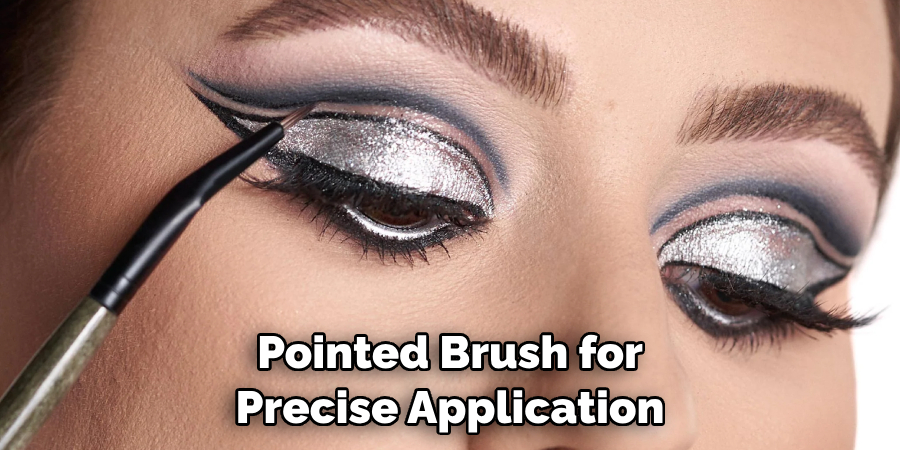
- Small pointy brush
Once you have all these things, you’ll be ready to start highlighting!
10 Easy Steps on How to Highlight Inner Corner of Eyes
Step 1. Prep Your Eyes:
Begin by prepping your eyes. Apply an eye primer to create a smooth canvas for your makeup. It will help the colors pop and last longer. Use your regular foundation or concealer instead if you don’t have an eye primer.
Step 2. Add the Base Shadow:
Grab a medium brown eyeshadow and apply it all over the lid with a flat brush. This acts as a base color, creating a smooth transition for other shades you’ll add later. This step sets the stage for the rest of your eye makeup, giving depth and dimension to your eyes before we proceed with the inner corner highlight.
Step 3. Define Your Crease:
Next, define your crease with a slightly darker brown shade. This adds more depth and contour to your eyes. Use a medium fluffy brush to blend this color into the crease of your eye, making sure to blend it well to avoid harsh lines. The crease color should be subtle yet noticeable – it’s all about creating depth and dimension. Make sure to blend in small, circular motions for a flawless finish. This step is essential for making the highlight of your inner corner stand out.
Step 4. Apply the Highlight:
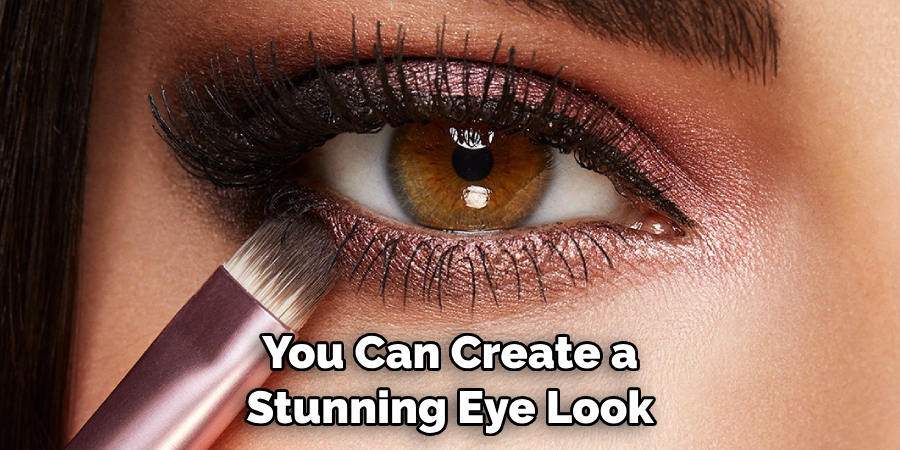
Now, it’s time for the star of the show – the inner corner highlight! Take a small, pointy brush, dampen it with some fixing spray for added intensity, and dip it into your chosen highlighter. Carefully apply this to the inner corner of your eyes, blending it slightly into the base and crease colors. This instantly brightens your eyes, making them appear larger and more awake. Feel free to build up the intensity to your liking, but remember – a little goes a long way! This is how you highlight the inner corner of your eyes effectively, creating a look that truly stands out.
Step 5. Blend the Highlight:
After applying the highlight to your inner corners, the next key step is to blend it properly. Use a clean brush and lightly blend the edges of the highlight into your base and crease shades. This ensures there are no harsh lines, and the highlight seamlessly integrates with the rest of your eye makeup. Remember, the key to perfect highlighting is a well-blended and balanced look. This step will help the inner corner highlight to look more natural and part of the overall eye makeup rather than standing out abruptly.
Step 6. Add Some Shimmer:
To add an extra touch of glam to your look, you can add some shimmer or glitter to your inner corners. Pick up a shimmery eyeshadow from your palette using the same small, pointy brush. Apply this directly over the highlighter, focusing on the very innermost part of your corner. This step accentuates the highlight and adds a mesmerizing sparkle to your eyes. Shimmer or glitter catches the light beautifully, bringing more attention to your eyes and making them pop even more.
Step 7. Reinforce Your Lashes:
For a complete look, make sure to emphasize your lashes. Apply a generous coat of mascara to your upper and lower lashes. This will add volume and length to frame your eyes and further enhance the impact of the highlighted inner corners. If you want an even more dramatic effect, consider using false eyelashes. Lush lashes are a fantastic partner to the glamorous inner corner highlight.
Step 8. Balance Your Eye Makeup:
To ensure your eye makeup is balanced, apply the same medium brown eyeshadow (that you used on the lid) along your lower lash line. Use a small eye shadow brush for this step. This creates a balanced, cohesive look that enhances the overall aesthetic of your makeup. It further frames your eyes and complements the highlighted inner corners, drawing more attention to this area.
Step 9. Highlight Your Brow Bone:
Matching the radiance of your inner corners, it’s crucial to highlight your brow bone. Use the same highlighter or a matte white eyeshadow for a more subtle effect. Apply it directly beneath your eyebrow arch. This uplifts your entire eye area, making your eyebrows appear more arched and your eyes more open. Just like with the inner corner highlight, make sure to blend it well for a naturally luminous look.
Step 10. Final Touch-Up:
Finally, take a step back and inspect your work. Look at your makeup from different angles and in different light settings. You should add a highlight, blend some more, or clean up some fallout. This is also the time to ensure that both eyes match and look symmetrical. Once you’re satisfied with your look, you’re done! Congratulations, you’ve mastered highlighting the inner corner of your eyes, enhancing your natural beauty, and making your eyes pop out with this simple yet impactful makeup technique.
By following these steps, you can easily create an eye-catching look that will turn heads. Now that you know how to highlight the inner corner of your eyes, go ahead and give it a try! With practice, you’ll be a highlighting pro in no time.
5 Additional Tips and Tricks
- Choose the Right Highlighter: For optimal results, select a highlighter shade that is roughly two shades lighter than your skin tone. A champagne or light gold color works well for most skin tones.
- Use a Small Brush: A small, pointed brush will give you the control necessary to apply the highlighter accurately to the inner corners of your eyes.
- Blend Well: For a smooth, natural look, blend the highlighter well into your skin and surrounding eyeshadow.
- Layer Your Highlighter: If you want your look to be more intense, consider layering your highlighter. Apply a thin layer, blend it out, and add more as needed.
- Keep Balance in Mind: Going overboard with your highlight can be tempting, but try not to overdo it. Too much highlighter in the inner corners of your eyes will make them look unnatural and take away from the overall effect you’re going for.
With these tips and tricks, you can create a stunning eye look that emphasizes the inner corners of your eyes!
5 Things You Should Avoid
- Avoid Dark Colors: Dark colors at the inner corner of your eyes can make your eyes appear smaller and less illuminated. Stick with lighter, brighter colors for highlighting.
- No Over-Blending: While blending is key for a natural look, overdoing it can cause the highlight to look muddy and lose its impact. Be careful to blend just enough to soften edges and transitions.
- Refrain from Neglect Eye Care: Taking care of your eyes before and after makeup application is essential. Not doing so can lead to irritation or infection. Always cleanse your eyes properly and use good quality, hypoallergenic makeup products.
- Avoid Over-Powdering: Too much powder can lead to a highlighter looking cakey. It will also make blending more difficult. Use powder sparingly and only where necessary.
- Don’t Rush the Process: Good makeup application takes time. Rushing can lead to mistakes or a poorly blended or balanced look. Take your time to ensure you’re highlighting your inner eye corners effectively.
To avoid these mistakes, always start with a light touch and gradually build up the intensity of your highlighter. Focus on using the right tools – a small, pointed brush for precise application and a good blending brush to ensure a seamless transition.
Conclusion
Beauty trends have come a long way, but makeup tips and tricks still stand the test of time. Applying eyeshadow to the inner corner of our eyes is meant to highlight and add depth to them, creating an eye-catching look that will turn heads. It doesn’t matter if you’re applying the lightest pastel shade or the darkest charcoal hue — with just a few taps from your brush, you can create a stunning look that will make your inner corners pop!
These tips and tricks will help you create a beautiful eye makeup look that emphasizes the inner corners of your eyes. Remember, blending is key for a natural look — but don’t forget to keep balance in mind!
With these steps in mind, experimenting with different colors and techniques is key for mastering this deceptively simple eye makeup trick. So now that you know how to highlight inner corner of eyes, why not practice it a few times until you find the perfect mix of shades and tones? Be adventurous, be creative –the possibilities are endless!
About the Author
Jane Hubbard is a passionate beauty expert with a wealth of experience in makeup, hair, and overall beauty techniques. After years of working as a hairdresser specialist, she followed her entrepreneurial spirit and started her own consultancy business.
Jane has always been driven by her desire to help others feel confident in their own skin, and she does this by sharing her knowledge, experiences, and practical beauty tips. Through her consultancy, she empowers individuals to embrace their unique beauty, offering tailored guidance that boosts both self-esteem and personal style.
Professional Focus
Specializes in makeup, hairstyling, and beauty consulting.
Provides personalized beauty advice, tips, and techniques to help individuals feel confident in their appearance.
Dedicated to staying up-to-date with the latest industry trends and developments.
Passionate about creating a comfortable and empowering experience for every client.
Education History
University of Craft and Design – Bachelor of Fine Arts (BFA) in Woodworking and Furniture Design
Woodworking Apprenticeships – Extensive hands-on training with skilled craftsmen to refine carpentry and furniture making techniques
Online Courses & Masterclasses – Continued education in advanced woodworking techniques, design principles, and specialized tools
Expertise:
Makeup artistry, hairstyling, and beauty consulting.
Personalized beauty techniques to enhance confidence and self-expression.
Educating clients on how to maintain their beauty routines at home.