
Achieving a smooth, flawless makeup application that lasts all day is a common goal. However, it can be frustrating when foundation, concealer, and powder begin to gather in fine lines and wrinkles, accentuating what you intended to soften. This process, often called creasing or caking, can make your complexion look older and less fresh.

The key to preventing this lies not just in the makeup you choose, but in the entire application process, from skin preparation to the final setting spray. By adopting specific techniques and using the right products, you can create a seamless finish that stays put, keeping your skin looking radiant and youthful throughout the day. In this article on how to keep makeup from settling in wrinkles, we will discuss some tips and tricks to achieve a flawless and long-lasting makeup look.
Tools and Materials You’ll Need
- Gentle Facial Cleanser
- Exfoliant (Chemical or Physical)
- Hydrating Serum (E.g., With Hyaluronic Acid)
- Moisturizer
- Silicone-based or Hydrating Primer
- Liquid or Cream Foundation (Light to Medium Coverage)
- Liquid or Cream Concealer
- Makeup Sponge or Foundation Brush
- Translucent Setting Powder
- Fluffy Powder Brush
- Setting Spray
9 Step-by-step Guidelines on How to Keep Makeup From Settling in Wrinkles
Step 1: Start with a Clean and Exfoliated Canvas
The first and most critical step to a smooth makeup application is ensuring your skin is properly prepared. Begin by washing your face with a gentle cleanser to remove any dirt, oil, or residual product. A clean surface prevents makeup from mixing with impurities, which can lead to unevenness and creasing. Once your skin is clean, exfoliation is essential. This process removes dead skin cells that can cause makeup to look patchy and settle into lines, creating a smoother texture for product application.
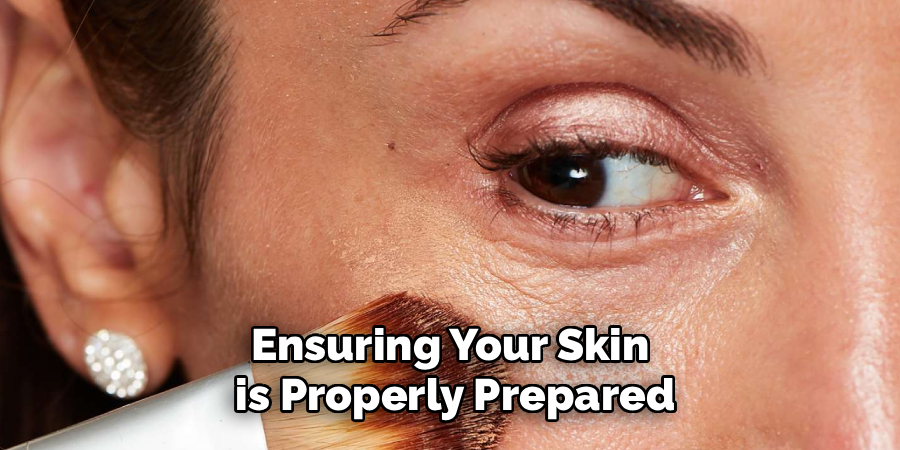
You can choose between a physical exfoliant, like a gentle scrub, or a chemical exfoliant containing AHAs or BHAs. Be careful not to over-exfoliate, as this can irritate the skin; once or twice a week is usually sufficient for most skin types. By creating a fresh, smooth canvas, you ensure that every product you apply afterward will glide on effortlessly and have a much lower chance of gathering in creases.
Step 2: Hydrate and Moisturize Thoroughly
Hydrated skin is plump skin, and plump skin has less prominent fine lines. After cleansing, apply a hydrating serum, particularly one with hyaluronic acid, which attracts and holds moisture in the skin. This instantly helps to fill in the tiny gaps in your skin’s surface, creating a smoother base. Gently pat the serum into your skin, paying special attention to areas where wrinkles are more pronounced, like around the eyes and mouth. Allow the serum a minute to absorb fully before moving on.
Next, lock in that hydration with a good-quality moisturizer. Even if you have oily skin, a lightweight, non-comedogenic moisturizer is crucial. It creates a protective barrier and ensures your skin doesn’t overproduce oil later in the day, which can cause makeup to break down and settle. A well-moisturized face is the foundation for a flawless makeup finish that resists creasing.
Step 3: Apply a Wrinkle-Smoothing Primer
Primer is the bridge between your skincare and your makeup, and it’s non-negotiable for preventing creasing. Its primary function is to fill in imperfections, such as fine lines, pores, and uneven texture, creating a perfectly smooth surface for your foundation. Look for a primer with a silicone base, as silicone-based formulas are excellent at blurring and filling lines, giving your skin an almost airbrushed appearance before you even apply any pigment.
Use your fingertips to gently press a small amount of primer into your skin. Focus on the T-zone, under-eye area, and any other regions where you notice makeup tends to settle. Avoid rubbing the primer, as pressing it in ensures it fills the crevices effectively. Let the primer set for at least a minute; this allows it to form a seamless layer that will grip your foundation and keep it from moving into wrinkles.
Step 4: Choose the Right Foundation Formula
The type of foundation you use can make or break your look. Heavy, full-coverage, and matte foundations are often the biggest culprits when it comes to settling into wrinkles. These formulas can be drying and tend to crack and cake as your face moves throughout the day. Instead, opt for a lightweight liquid or cream foundation that offers light-to-medium coverage. Formulas described as “hydrating,” “luminous,” or “dewy” are generally more forgiving on mature or textured skin.
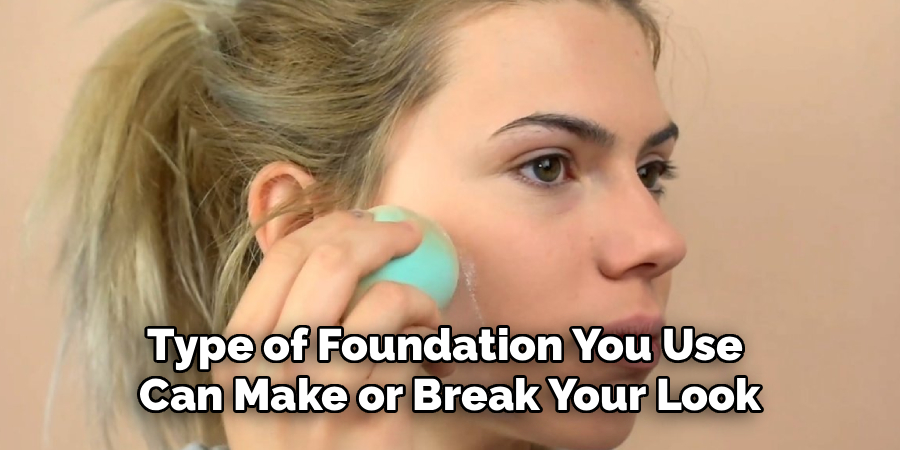
These lighter foundations move with your skin rather than sitting on top of it like a mask. They provide enough coverage to even out your skin tone without emphasizing texture. Remember, the goal is not to completely erase your lines but to soften their appearance. A flexible, hydrating foundation will help you achieve a more natural and youthful finish.
Step 5: Apply Foundation Sparingly
One of the most common mistakes that leads to creasing is applying too much product. When it comes to foundation, less is always more, especially in areas with fine lines. Start with a small amount of foundation on the back of your hand. Using a damp makeup sponge or a foundation brush, begin applying it to the center of your face and blend outwards. A damp sponge is particularly effective as it sheers out the product and presses it into the skin for a seamless, second-skin finish.
Build coverage only where you need it, such as on areas with redness or discoloration. For wrinkle-prone areas like the forehead, around the eyes, and nasolabial folds, use the minimal amount of product left on your sponge or brush. This thin layer provides a hint of color without overloading the skin, significantly reducing the chances of it creasing as you make facial expressions.
Step 6: Be Strategic with Concealer
Concealer is a powerful tool, but it can quickly settle into fine lines if applied incorrectly, especially around the delicate under-eye area. Choose a hydrating, lightweight liquid concealer that is one or two shades lighter than your foundation to brighten the area. Avoid thick, heavy-duty concealers that are formulated for covering blemishes, as they are often too dry for the under-eye region.
Apply a few small dots of concealer only on the inner and outer corners of your under-eye area, where darkness is most prominent. Avoid applying it directly over the fine lines. Then, use the tip of a damp makeup sponge or your ring finger to gently tap and blend the product upwards and outwards. This technique provides brightness and coverage without depositing a thick layer of product that is prone to creasing.
Step 7: Press, Don’t Bake, with Powder
Setting your makeup with powder is crucial for longevity, but the application technique is key. The trend of “baking,” which involves applying a heavy layer of powder and letting it sit, is not ideal for skin with fine lines, as it can be extremely drying and will almost certainly cause creasing. Instead, you should lightly set your makeup using a fine, translucent setting powder and a large, fluffy brush.
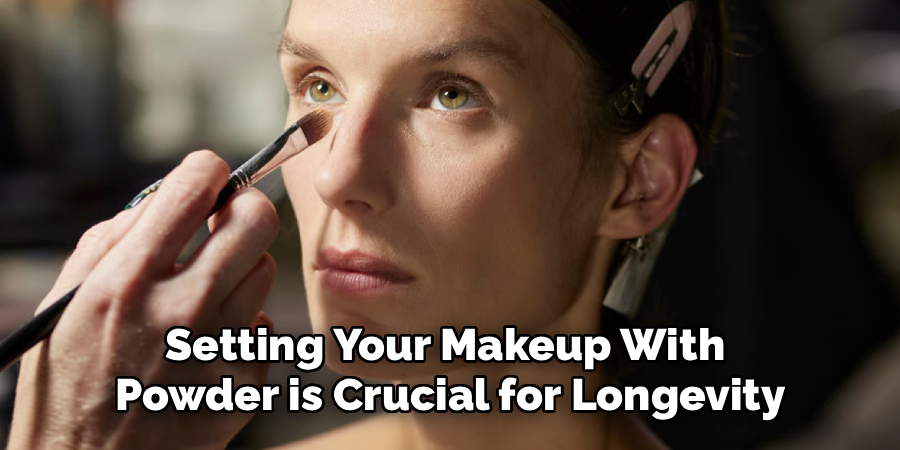
Tap a small amount of powder into the lid of the container, swirl your fluffy brush in it, and then tap off any excess. Gently press or roll the brush over the areas you want to set, such as your T-zone and under your eyes. This light dusting locks your makeup in place without adding texture or absorbing all the moisture from your skin. The pressing motion sets the liquid products without disturbing them.
Step 8: Remove Excess Product
Even with careful application, a small amount of product can sometimes gather in lines immediately after you’ve applied your foundation and powder. This step is a professional trick to ensure a flawless finish. Take a clean, dry makeup sponge (the same one you used for foundation, but a dry part of it) and gently press it over the areas where makeup tends to crease, such as your smile lines and crow’s feet.
This action lifts away any excess product that has already begun to settle without removing the base layer you carefully applied. It’s a quick and easy checkpoint that makes a significant difference in how your makeup wears over time. You are essentially “blotting” with a sponge to absorb any overload, ensuring only a thin, flexible layer of makeup remains on the skin.
Step 9: Lock It All in with a Setting Spray
The final step to seal your look and give your skin a fresh, seamless appearance is a setting spray. A good setting spray does more than just prolong the wear of your makeup; it also helps to meld all the layers of product together—primer, foundation, concealer, and powder—making them look like one cohesive layer of skin. This process reduces any powdery or cakey appearance and restores a natural, skin-like finish.
Hold the bottle about eight to ten inches from your face and mist it lightly in an “X” and “T” formation to ensure even coverage. Look for a hydrating or luminous setting spray, as these formulas add a touch of moisture and prevent your makeup from looking too dry or flat. Allow the spray to air dry completely. This final step will lock everything in place and help your makeup flex with your skin, not fight against it.

Following these steps on how to keep makeup from settling in wrinkles will help you achieve a flawless, smooth complexion that looks natural and radiant. But in addition to these techniques, there are also other ways to prevent makeup from settling into fine lines and wrinkles.
Frequently Asked Questions
Q1: Is Cream or Powder Makeup Better for Wrinkles?
A1: Generally, cream or liquid makeup products are better for skin with fine lines and wrinkles. Powder formulas, including powder foundation and blush, have a tendency to sit on top of the skin and can easily settle into creases, emphasizing texture. Cream products, on the other hand, are more emollient and blend into the skin for a more natural, seamless finish that moves with your facial expressions.
Q2: How Can I Stop My Under-Eye Concealer From Creasing?
A2: To stop under-eye concealer from creasing, start with a hydrated under-eye area using an eye cream. Use a lightweight, hydrating concealer and apply it sparingly, focusing on the darkest areas rather than all over. Blend it with a damp sponge, then immediately set it with a very light dusting of finely milled translucent powder applied with a small, fluffy brush. Avoid baking, as this will dry out the area and worsen creasing.
Q3: Should I Use a Matte or Dewy Foundation?
A3: A dewy or satin-finish foundation is typically more flattering on skin with wrinkles than a matte one. Matte foundations can make the skin look flat and dry, which can accentuate fine lines. Dewy formulas reflect light, creating an illusion of smoother, more hydrated, and plumper skin. This luminosity helps to soften the appearance of wrinkles rather than highlighting them.
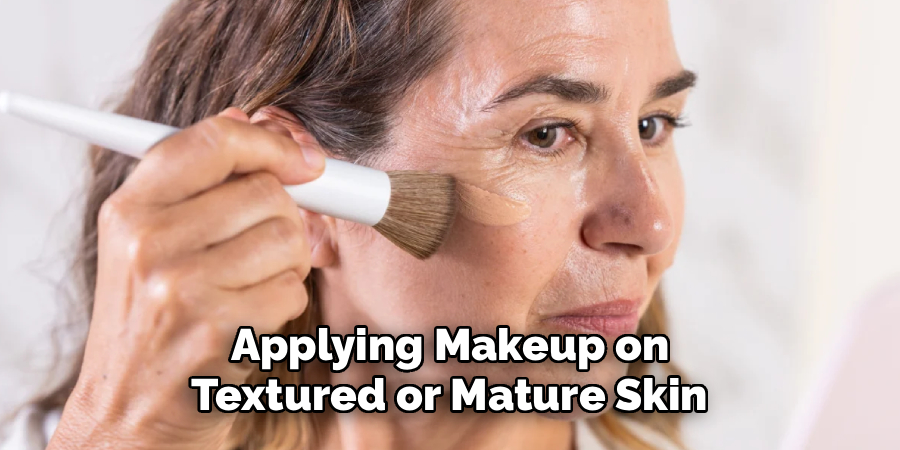
Q4: Does the “Less Is More” Rule Apply to All Makeup?
A4: Yes, the “less is more” rule is the golden principle for applying makeup on textured or mature skin. This applies to foundation, concealer, and especially powder. Using thin layers of product prevents the buildup that leads to caking and creasing. The goal is to even out skin tone and enhance your features, not to mask your skin entirely. Strategic application is more effective than heavy coverage.
Conclusion
Preventing makeup from settling into wrinkles is a multi-step process that emphasizes skin preparation and strategic application. By starting with a clean, hydrated, and primed base, choosing lightweight and hydrating formulas, and applying products sparingly, you can achieve a smooth and lasting finish.
Techniques like using a damp sponge, avoiding over-powdering, and setting your look with a spray all work together to create a flawless complexion. With these guidelines, you can confidently wear makeup that enhances your natural beauty and keeps you looking fresh all day long. Thanks for reading this guide on how to keep makeup from settling in wrinkles.
About the Author
Jane Hubbard is a passionate beauty expert with a wealth of experience in makeup, hair, and overall beauty techniques. After years of working as a hairdresser specialist, she followed her entrepreneurial spirit and started her own consultancy business.
Jane has always been driven by her desire to help others feel confident in their own skin, and she does this by sharing her knowledge, experiences, and practical beauty tips. Through her consultancy, she empowers individuals to embrace their unique beauty, offering tailored guidance that boosts both self-esteem and personal style.
Professional Focus
- Specializes in makeup, hairstyling, and beauty consulting.
- Provides personalized beauty advice, tips, and techniques to help individuals feel confident in their appearance.
- Dedicated to staying up-to-date with the latest industry trends and developments.
- Passionate about creating a comfortable and empowering experience for every client.
Education History
- University of Craft and Design – Bachelor of Fine Arts (BFA) in Woodworking and Furniture Design
- Woodworking Apprenticeships – Extensive hands-on training with skilled craftsmen to refine carpentry and furniture making techniques
- Online Courses & Masterclasses – Continued education in advanced woodworking techniques, design principles, and specialized tools
Expertise:
- Makeup artistry, hairstyling, and beauty consulting.
- Personalized beauty techniques to enhance confidence and self-expression.
- Educating clients on how to maintain their beauty routines at home.