
Are you tired of your dull and dark hair? Do you want to change up your look without breaking the bank by going to a salon? Then why not try lightening your hair at home!

Lighten hair at home can be a fun and cost-effective way to revamp your look without a trip to the salon. Whether you’re aiming for a subtle sun-kissed glow or a more dramatic change, there are a variety of methods to achieve lighter locks from the comfort of your own home. With the right ingredients, proper techniques, and some patience, you can safely and effectively lighten your hair while avoiding unnecessary damage.
This guide on how to lighten hair at home will walk you through popular home hair-lightening methods and essential tips to ensure great results.
What Are the Benefits of Lightening Your Hair at Home?
- Cost-effective: Lightening your hair at home can save you money in the long run compared to frequent salon visits.
- Convenience: You have full control over when and how often you lighten your hair, making it a more convenient option for those with busy schedules.
- Customization: Experimenting with different shades and techniques allows you to achieve a personalized look that suits your style and preferences.
- Natural Ingredients: Many home lightening methods use natural ingredients, minimizing exposure to harsh chemicals found in some salon products.
What Will You Need?
To lighten your hair at home, you will need some basic supplies, including:
- A Hair Lightening Product: This can be in the form of a bleach powder or cream, which is typically mixed with a developer. Alternatively, you can use natural lightening ingredients such as lemon juice or honey.
- Developer: If using a bleach product, you will need to mix it with a developer of the appropriate strength (usually 20 or 30 volume) according to the instructions on the package.
- Gloves: It’s important to protect your hands from any potential irritation or staining by wearing gloves during the lightning process.
- Mixing Bowl and Brush: These are necessary for preparing and applying the lightening mixture to your hair.
- Sectioning Clips: These will help you divide your hair into smaller sections for more precise application.
10 Easy Steps on How to Lighten Hair at Home
Step 1: Prepare Your Space
Before you begin the lighting process, it’s crucial to set up your workspace properly. Choose a well-lit area with access to a mirror so you can see all sections of your hair as you work. Cover nearby surfaces with an old towel or sheet to protect them from spills or stains. Ensure you have all your tools and supplies within arm’s reach, as this will make the process more efficient and less stressful. Additionally, wear an old shirt or a protective cape to prevent any accidental bleaching or staining of your clothing. Proper preparation of your space will help ensure a smoother and cleaner lightning experience.

Step 2: Perform a Strand Test
Select a small, inconspicuous section of your hair to perform the strand test. This step is crucial to determine how your hair will react to the lightning product and to avoid any unexpected results. Follow the instructions on the product packaging to mix a small amount of the solution and apply it to the chosen strand. Allow the product to process for the recommended time, then rinse and dry the strand thoroughly. Evaluate the color and texture of the hair to decide if any adjustments need to be made to the processing time or method before proceeding with the rest of your hair. This test will help minimize potential damage and ensure you achieve the desired result.
Step 3: Protect Your Skin
Before applying the product, take measures to protect your skin from potential irritation or staining. Apply a thin layer of petroleum jelly or a similar barrier cream around your hairline, ears, and neck. This creates a protective shield that prevents the product from coming into direct contact with your skin. Additionally, wear gloves to safeguard your hands throughout the application process.
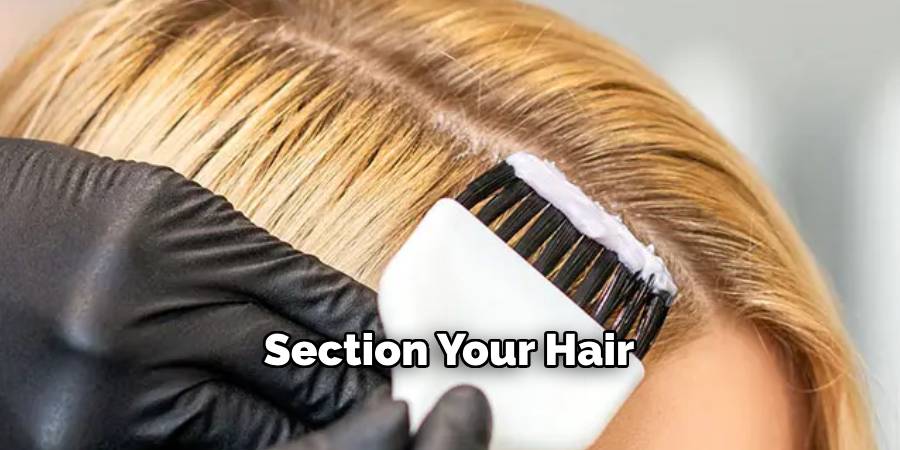
Step 4: Section Your Hair
Divide your hair into manageable sections to ensure even application of the product. Using a comb or your fingers, part your hair into four equal quadrants—two at the front and two at the back. Clip each section securely using hair clips or ties. This method allows you to focus on one section at a time, making the process more organized and less overwhelming. Proper sectioning is especially important for thorough coverage, particularly if you have thick or long hair.
Step 5: Mix the Lightning Solution
Follow the instructions provided with your lightning kit to mix the solution correctly. Typically, this involves combining the lightening powder and developer in a non-metallic bowl. Use the measuring tools included in the kit to ensure the correct ratio of ingredients. Stir the mixture thoroughly with the applicator brush or a plastic spoon until it forms a smooth, creamy consistency. A well-mixed solution ensures even application and minimizes patchiness, so take your time to blend it properly. Always wear gloves during this step to protect your skin from irritation caused by the chemicals.
Step 6: Apply the Lightener
Using the applicator brush, section your hair into small, manageable parts to ensure even coverage. Begin applying the lightener at the mid-lengths and ends of your hair first, as these areas typically take longer to lighten. Once the mid-lengths and ends are coated, move to the roots, applying the lightener close to the scalp without overlapping onto already lightened sections. Work methodically, ensuring that all strands are evenly saturated. Be mindful of timing, as leaving the lighter on for too long can cause damage. Refer to the instructions provided with your kit for the recommended processing time.
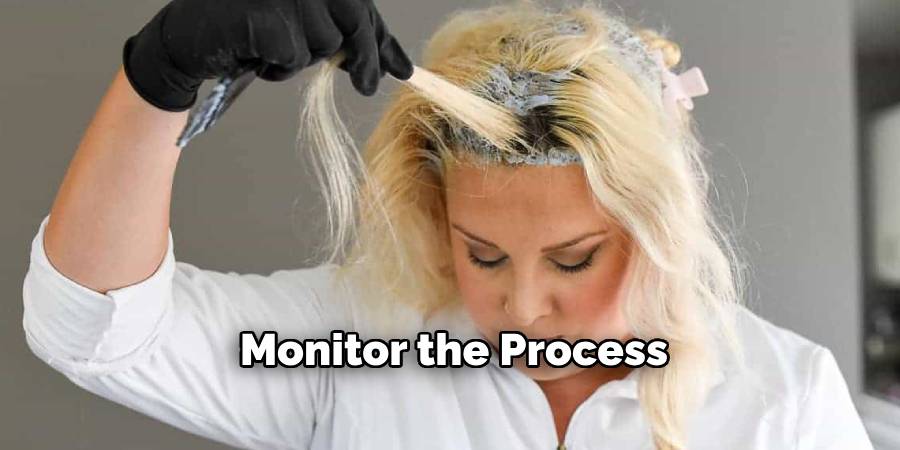
Step 7: Monitor the Process
While the lightener is processing, check your hair at regular intervals to ensure it reaches the desired level of lightness. Use a strand test by gently wiping a small section of hair to assess the progress. If the color still isn’t light enough, reapply the lightener to that section and allow more time, being careful not to exceed the total recommended duration. Keep an eye on the condition of your hair to avoid overprocessing, and remember that patience is key to achieving even, healthy results.
Step 8: Rinse Thoroughly
Once your hair has reached the desired level of lightness, it’s time to rinse out the lightener completely. Use lukewarm water to thoroughly wash your hair, making sure there are no traces of the product left. Gently massage your scalp and hair with your fingers to ensure all areas are cleaned. This step is crucial to stop the lightening process and protect your hair from overprocessing. After rinsing, proceed with a sulfate-free shampoo and a deep conditioner to restore moisture and maintain the health of your hair.
Step 9: Deep Condition Your Hair
After rinsing and shampooing, apply a deep conditioner generously throughout your hair, focusing on the ends, which are often the most prone to dryness and damage. Comb it through with a wide-tooth comb to ensure even distribution and to detangle your hair gently. Allow the conditioner to sit for the recommended time on the product label—usually around 5 to 10 minutes—to fully penetrate and nourish the strands. For an even more intense treatment, you can wrap your hair in a shower cap or a warm towel during this time.
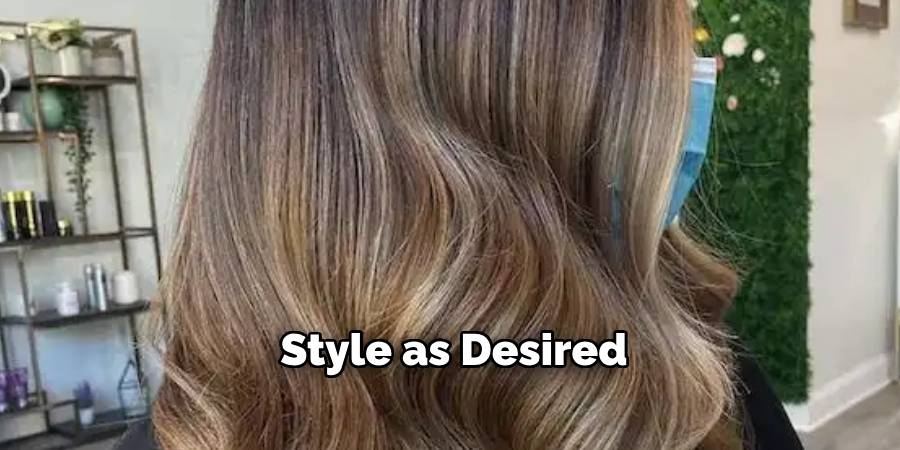
Step 10: Style as Desired
After rinsing out the conditioner thoroughly, gently pat your hair dry with a microfiber towel or an old T-shirt to minimize frizz and breakage. Avoid harsh rubbing, as it can cause unnecessary damage to your strands. Depending on your preference and hair type, apply a leave-in conditioner, heat protectant, or your favorite styling products to achieve your desired look. Whether you choose to air-dry, blow-dry, or use styling tools, be sure to handle your hair with care to maintain its health and shine. Don’t forget to embrace your natural texture or try new styles to express your individuality.
By following a consistent hair care routine, you can keep your locks looking healthy and beautiful every day.
5 Things You Should Avoid
- Using Harsh Chemicals Without Knowledge
Avoid using strong bleaching agents or chemical lighteners without proper understanding or guidance. These products can damage your hair, leading to dryness, breakage, or even scalp irritation if misused.
- Skipping a Strand Test
Never skip a strand test before applying any lightening product to your entire head. This test helps you see how your hair will react to the treatment and ensures you avoid unwanted results or excessive damage.
- Overexposure to Heat or Sunlight
While sunlight can naturally lighten hair, overexposure without protection can cause dryness and damage. If using heat-based lightening methods, ensure you use a heat protectant and moderate the exposure time.
- Applying Lightening Products to Dirty or Damaged Hair
Lightening products can be harsh on hair, and starting with dirty or already brittle strands can exacerbate damage. Always work on clean, conditioned, and healthy hair for the best results.
- Ignoring Aftercare Needs
After lightning, your hair requires extra hydration and nourishment. Failing to moisturize, deep condition, or repair the hair properly post-treatment can leave it weak, making it prone to breakage and dullness.
Conclusion
How to lighten hair at home can be a convenient and rewarding process if approached with care and preparation.
By avoiding common mistakes such as skipping strand tests or neglecting aftercare, you can achieve your desired look while maintaining your hair’s health and integrity. Always invest in quality products, follow instructions closely, and prioritize hydration and nourishment post-treatment.
With patience and attention to detail, you can safely lighten your hair at home and enjoy a fresh, vibrant style.
About the Author
Jane Hubbard is a passionate beauty expert with a wealth of experience in makeup, hair, and overall beauty techniques. After years of working as a hairdresser specialist, she followed her entrepreneurial spirit and started her own consultancy business.
Jane has always been driven by her desire to help others feel confident in their own skin, and she does this by sharing her knowledge, experiences, and practical beauty tips. Through her consultancy, she empowers individuals to embrace their unique beauty, offering tailored guidance that boosts both self-esteem and personal style.
Professional Focus
- Specializes in makeup, hairstyling, and beauty consulting.
- Provides personalized beauty advice, tips, and techniques to help individuals feel confident in their appearance.
- Dedicated to staying up-to-date with the latest industry trends and developments.
- Passionate about creating a comfortable and empowering experience for every client.
Education History
- University of Craft and Design – Bachelor of Fine Arts (BFA) in Woodworking and Furniture Design
- Woodworking Apprenticeships – Extensive hands-on training with skilled craftsmen to refine carpentry and furniture making techniques
- Online Courses & Masterclasses – Continued education in advanced woodworking techniques, design principles, and specialized tools
Expertise:
- Makeup artistry, hairstyling, and beauty consulting.
- Personalized beauty techniques to enhance confidence and self-expression.
- Educating clients on how to maintain their beauty routines at home.