
Mature sophistication and self-assured presence can be expressed beautifully through the art of makeup. Whether you’re attending a job interview, stepping onto a formal stage, or simply seeking to project more authority, knowing how to look older with makeup is a valuable skill. This approach isn’t about hiding your true self or adding years—it’s about enhancing maturity by using structure, shadow, and refined finishes that signal purpose and poise.
In this guide, you’ll learn not just which products to choose, but also exactly how to place, blend, and set them for a polished, seasoned result. From foundation placement and subtle sculpting to the nuances of blush and the finishing touches that define an experienced look, each section walks you through professional-grade techniques and reasoning. You’ll also discover solutions for covering dark spots and redness as well as tips for removal and storage, ensuring every part of your routine supports your most confident, intentional self. If you’re ready to wield your brushes with a new sense of direction, this comprehensive walk-through is for you.
Know Your Goal: Features That Signal Maturity
Structural Cues vs. Youthful Softness
A mature appearance is often recognized by pronounced structures—defined cheekbones, sharper jawlines, and balanced features. Unlike the gentle roundness and dewy gloss celebrated in youthful trends, maturity in makeup emerges through the strategic use of contour, sculpted brows, and finishes that read more polished than playful.
Texture and Finish: Refined, Not Shiny
While youthful looks often lean on glossy highlighters and super-sheer textures, sophistication pairs best with satin or matte finishes. Aim for foundation and powder that refine texture without turning the skin flat or lifeless. This balance projects an even, smooth surface and avoids the soft, blurred glow that signals youth.
Color Temperature and Depth
Color makes a clear statement about maturity. Muted, mid-tone, or deeper shades—rather than soft pinks or peaches—add seriousness. Warm neutrals, taupes, plums, and deep reds bring gravitas to features, whether on eyes or lips. Strategic restraint in color choices conveys experience without being harsh.
Skin Prep That Reads Sophisticated
Hydrate, Then Refine
Effective makeup always begins with a properly prepared base. Apply moisturizer suited to your skin type, focusing on lightweight products that offer hydration but do not leave behind an oily residue. After your skin feels comfortable, follow with a smoothing primer to minimize the look of pores and fine lines. This provides the ideal canvas for the foundation to adhere smoothly and last throughout the day.
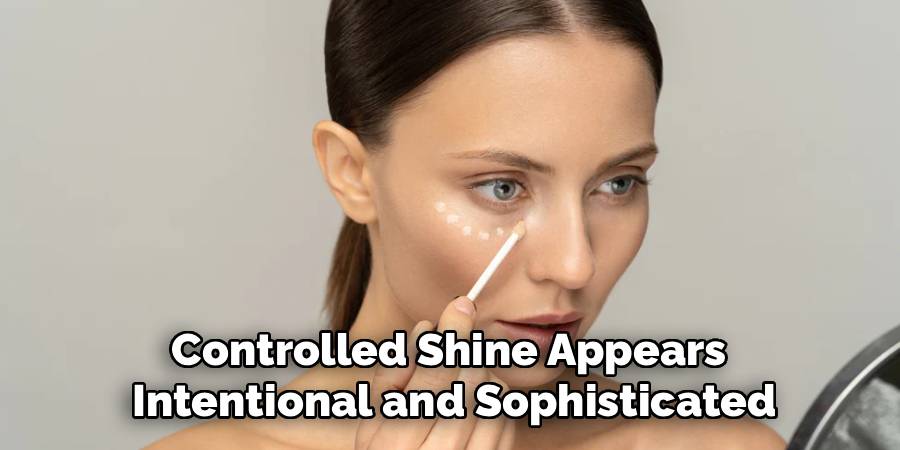
Targeted Mattifying for Controlled Sheen
Controlled shine appears intentional and sophisticated. Apply a light mattifying product selectively to the center of the forehead, sides of the nose, and chin. Let your cheekbones or the high points of the face keep a gentle, natural sheen, avoiding an all-over matte finish that can seem harsh.
Prepping for Longevity
Sophisticated makeup should endure. Set your skincare with a quick tissue press to remove excess before makeup application. Opt for primers that promise extended hold, and consider a lightweight setting spray once your skincare is on to further grip foundation and color.
Base Building: Foundation Placement and Finish
Choosing Shade and Formula
For a look that reads mature, select a satin-matte liquid or cream foundation with medium coverage. This option provides a polished base that evens tone and texture while still reflecting natural dimension. Match your shade to your neck and jawline for a seamless transition, leaning gently toward neutral or slightly warm undertones.
How to Apply Makeup with a Foundation Brush for Structure
Use a foundation brush to create structure in your base. Begin by dispensing product onto the back of your hand, picking up a small amount with a firm, flat, or buffing brush. Start application at the center of your face—often the most uneven area—and sweep outward using downward and slightly outward strokes. This buffs pigment into the skin while allowing for precision around jawlines and hairlines. Building up coverage in thin layers with a brush delivers control and avoids a mask-like finish.
Setting Strategically
Depart from the “set everything” mindset—instead, apply translucent setting powder sparingly. Focus on the T-zone, under the eyes, and around the mouth, where creasing or shine may develop as the day progresses. Leave the perimeter of the face slightly radiant. This targeting locks makeup in place and subtly enhances natural structure.
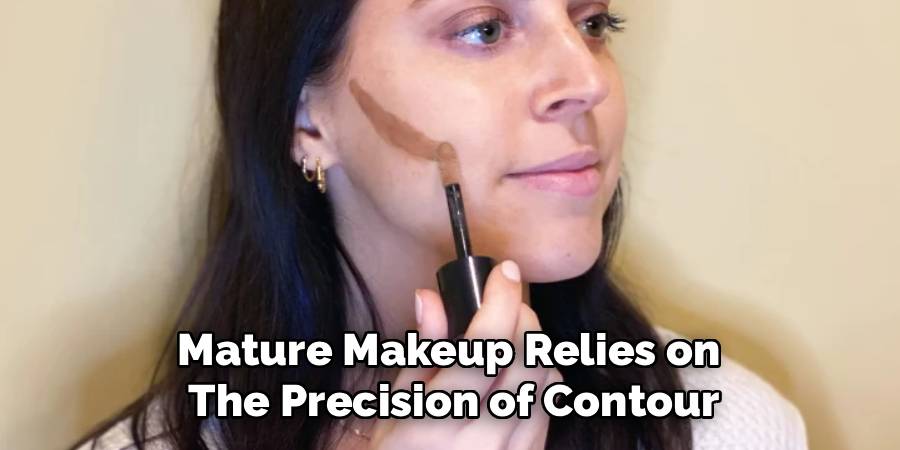
Contour and Bronzer: Sculpt With Intent
Mapping Shadows for Shape
Contouring is your tool for adding instant structure and maturity. Load a cool-contour shade onto a small, dense brush, then follow the natural hollows of your cheeks, sweeping product just beneath the cheekbone toward the ear. Shadow the jawline discreetly to sharpen and anchor the face. Blending is crucial—well-placed, well-faded contours suggest definition without obvious lines.
Contour vs. Bronzer: Choosing the Right Tool
While bronzers impart warmth, mature makeup relies on the precision of contour. Opt for matte, cool-leaning powders or creams for contouring. Bronzer can still be used to bring life and dimension, but keep it away from the hollows and focus on the temples and outer perimeters to softly warm the face.
Blending Edges for Natural Definition
After placement, curve a clean brush just along the edges of your contour to blend without removing too much pigment. This maintains sharpness but avoids a painted-on look. Use light, circular buffing motions for a gradient that melts seamlessly into foundation.
A Complete Process: How to Look Older with Makeup
- Begin with clean, dry skin. Allow moisturizer and primer to absorb for a few minutes.
- Apply foundation using a brush. Start at the center and blend outward, building up where coverage is needed.
- Use concealer only where required—for under eyes, around the nose, or to spot-correct.
- Strategically place contour under cheekbones, along the jawline, and at the sides of the nose for depth.
- Apply bronzer lightly to the temples and outer edges of the forehead, ensuring it is well blended.
- Refine brows with a brow pencil or powder, focusing on a straighter shape and controlled ends.
- Define eyes using matte neutrals, shading the crease and outer corners for depth. Add a medium brown or taupe to the lower lash line for extra intensity.
- Line upper lash line with dark brown or charcoal. Add a subtle extension or a soft wing if desired for a widened eye.
- Mask dark spots or melasma by color correcting first, then precisely layering on concealer. Pat gently to fuse the product into the skin, then set with powder.
- Choose a muted blush and apply laterally and just beneath the cheekbone.
- Outline and fill lips using a liner and mature shades such as berries or brick reds. Blot, layer, and repeat for longevity.
- Set makeup deliberately—micro-fine powder to high-movement areas, setting spray where needed.
- Finish with a lighting check to make sure the sheen and finish appear balanced and controlled.
Each step is a “checkpoint” that allows you to pause, assess progress, and adjust as necessary for the most polished, mature finish.
Blush Strategy: Refined, Not Rosy
Muted, Mid-Tone Shades for Seriousness
When aiming to look older with makeup, opt for blush tones that reflect muted or mid-tone hues. Shades of mauve, rosewood, and terracotta read more sophisticated than baby pinks or corals.
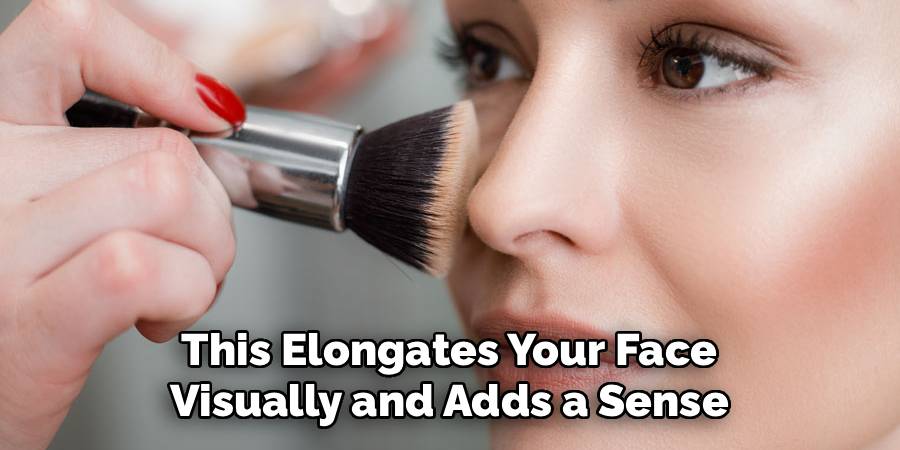
Placement for Maturity
Blush placement makes a major difference. Apply color laterally on the cheekbones, extending slightly out and downward rather than focusing on the apples. This elongates your face visually and adds a sense of refinement.
Matte and Satin Finishes
Stick to matte or low-sheen satin blushes. These reflect just enough light to avoid a flat appearance while steering clear of overly shiny or dewy finishes that skew youthful.
Eye Makeup That Ages Up Elegantly
Brows: Straighter, Refined, and Controlled
Well-groomed brows offer the most immediate step toward a structured, mature look. Shape your brows in a straighter line with a gentle downward tail—avoid severe arches. Focus on filling sparse areas with hair-like strokes and keep the brow tail defined but not exaggerated.
Lids: Matte, Depth, and Outer-Third Focus
Mature eyeshadow favors matte, neutral tones—think taupe, deep brown, and charcoal. Sweep a mid-tone shade over the lid and build depth in the crease and outer corners. This defines the eyes, making them appear deeper set and more experienced. Avoid frosty shimmers, and blend edges softly.
Liner and Lashes: Balanced, Not Overdone
Apply eyeliner with a medium weight, focusing on the upper lash line. Work the product in between lashes for density. Coat lashes with lengthening mascara, but skip clumpy volume formulas—lashes should frame rather than dominate the eye. Balance the look by subtly defining lower lashes, which anchor the gaze.
Targeted Coverage: Dark Spots, Melasma, and Redness
How to Cover Dark Spots with Makeup
Begin with a peach or orange corrector, depending on your skin tone, to cancel deep discoloration. Layer a full-coverage concealer in thin amounts over just the dark spots, pressing it in with a small brush or fingertip. Set with a pinpointed dusting of micro-fine powder. This triple-step—correct, conceal, set—delivers camouflaged spots that don’t look heavy.
How to Conceal Melasma with Makeup
Melasma often covers broader, more diffuse patches. Apply color corrector first, then tap a light layer of creamy concealer over the patch, blending outward at the edges. Build up coverage gradually and use a powder puff or soft brush to set only where necessary. Always match undertone carefully to avoid grey or ashy tones.
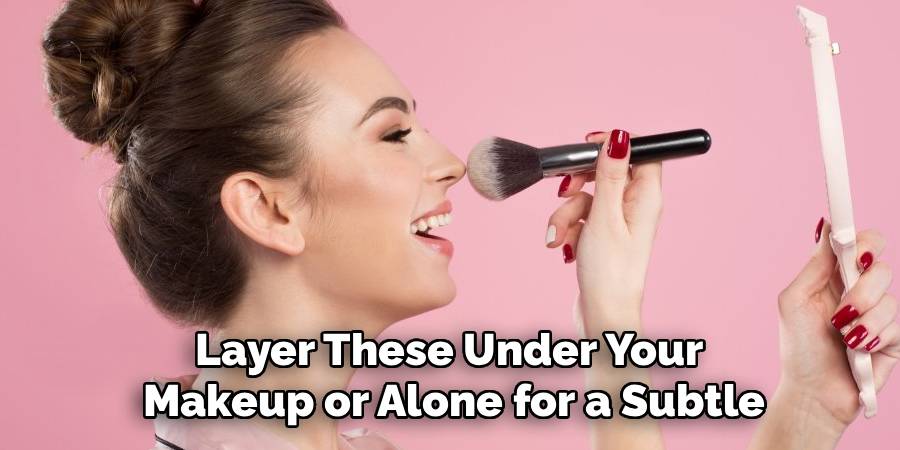
How to Hide Rosacea Without Makeup
If you prefer not to use makeup on redness, employ skincare with calming, green-tinted ingredients—think mineral SPF and anti-inflammatory serums. Layer these under your makeup or alone for a subtle, optical neutralizing effect that blurs and softens visible redness.
Lips: From Gloss to Polish
Sharpening the Lip Line
Use a lip pencil that matches your natural lip color or lip product. Line just outside your natural line for a fuller, more defined look, then fill in the lips fully for a long-wearing base.
Mature Color Families
Select lipsticks in deeper neutrals, berries, wine, or brick reds for an elevated, mature finish. These shades exude sophistication and last longer than sheer or super-glossy options.
Layering and Blotting for Longevity
Apply your lipstick in layers, pressing gently between coats with a tissue to set color. This prevents feathering, improves wear time, and lets you control pigment depth precisely.
Finishing Touches: Set, Don’t Shine
Micro-Fine Powder Placement
Use only a small amount of micro-fine or translucent powder and target it to areas most prone to shine—of the forehead, sides of the nose, and chin. Let cheeks and the outer face keep their natural glow for a deliberate, controlled finish.
Setting Spray: Selection Matters
Choose a setting spray that delivers either a natural finish or, if your skin is drier, a subtle glow. Avoid ultra-dewy or glitter-infused sprays.
Lighting Checks
Check makeup in natural light and a secondary, cooler light source before heading out. Look for evenness of finish, controlled sheen, and make sure contour and blush blend invisibly into the skin.
Troubleshooting: Quick Fixes for Common Pitfalls
Dialing Back Excess Dew or Shine
If your face ends up too dewy, press a thin tissue gently into the skin, then add a light dusting of powder exactly where needed. Avoid layering on more product than necessary.
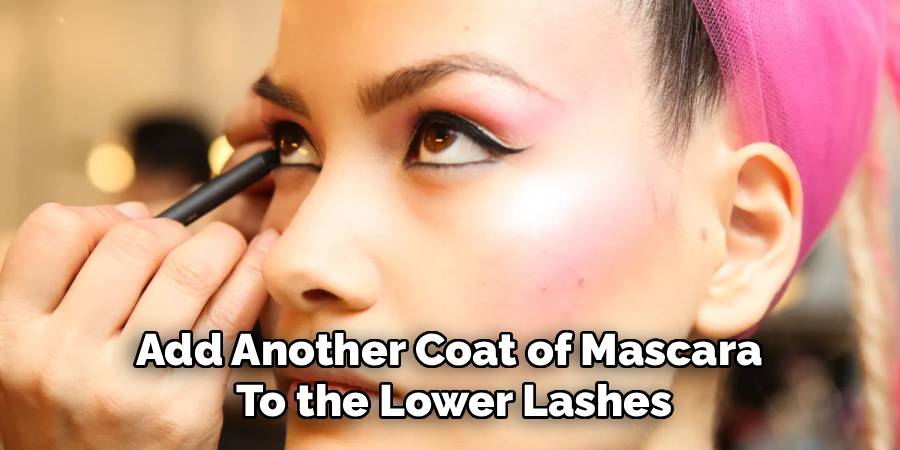
Refine Liner and Lashes
Fluttery, doll-like lashes may look youthful, but a mature, confident gaze needs definition. Add another coat of mascara to the lower lashes or refine eyeliner weight for better balance.
Blush and Lip Tone Adjustments
If blush or gloss looks too pink or playful, swap for a muted hue. Mauves and earthy reds create a more grown-up vibe instantly.
Removal, Storage, and Prep for Next Time
How to Remove Waterproof Makeup Without Stripping
Use a biphase oil remover or a cleansing balm, gently massaging over eyes and lips to dissolve long-wear products. Avoid harsh rubbing; use soft cotton pads or reusable cloths instead. Double cleanse to protect your barrier.
How to Store Makeup for Performance and Hygiene
Store makeup in a cool, dry place, away from sunlight. Ensure lids are tightly closed, clean brushes regularly, and check for expired products to prevent irritation and support product longevity.
Preventing Clogged Pores and Blackheads
Immediately after makeup removal, follow with a gentle, balancing cleanser and occasional exfoliation suited to your skin type. Avoid using heavy, occlusive products unless necessary, as they may contribute to congestion.

Conclusion
Mastering how to look older with makeup is all about strategic placement, sophisticated finishes, and subtle color choices that amplify your best features without overwhelming them. By focusing on structure, intentional shading, refined color, and precise setting, you communicate assurance and maturity—both in looks and presence. Take time to practice these techniques, tweak them for your unique features, and revisit sections of this guide as you evolve your style. Step forward knowing you control the story your makeup tells: one of confidence, polish, and poise.
About the Author
Jane Hubbard is a passionate beauty expert with a wealth of experience in makeup, hair, and overall beauty techniques. After years of working as a hairdresser specialist, she followed her entrepreneurial spirit and started her own consultancy business.
Jane has always been driven by her desire to help others feel confident in their own skin, and she does this by sharing her knowledge, experiences, and practical beauty tips. Through her consultancy, she empowers individuals to embrace their unique beauty, offering tailored guidance that boosts both self-esteem and personal style.
Professional Focus
- Specializes in makeup, hairstyling, and beauty consulting.
- Provides personalized beauty advice, tips, and techniques to help individuals feel confident in their appearance.
- Dedicated to staying up-to-date with the latest industry trends and developments.
- Passionate about creating a comfortable and empowering experience for every client.
Education History
- University of Craft and Design – Bachelor of Fine Arts (BFA) in Woodworking and Furniture Design
- Woodworking Apprenticeships – Extensive hands-on training with skilled craftsmen to refine carpentry and furniture making techniques
- Online Courses & Masterclasses – Continued education in advanced woodworking techniques, design principles, and specialized tools
Expertise:
- Makeup artistry, hairstyling, and beauty consulting.
- Personalized beauty techniques to enhance confidence and self-expression.
- Educating clients on how to maintain their beauty routines at home.