
Are you tired of constantly buying expensive lip balms that don’t work? Why not make your own at home with natural ingredients? Not only is it cost-effective, but you can also customize the scent and flavor to your liking.
How to make a lip balm at home is a simple and rewarding process that allows you to customize the ingredients to suit your preferences and needs. With just a few natural components, you can create a nourishing product that helps keep your lips soft and hydrated. Not only is it cost-effective, but it also ensures you’re avoiding harsh chemicals often found in store-bought lip balms.
Whether you’re new to DIY projects or an experienced creator, crafting your own lip balm is both fun and practical. Let’s dive into the step-by-step process of making a lip balm at home.

What Are the Benefits of Making Your Lip Balm?
Before we jump into the process, let’s discuss why making your lip balm is beneficial. Here are some reasons to consider:
- It’s Cost-effective: Making your lip balm at home can save you money in the long run. The ingredients used are often affordable and easily accessible.
- You Control the Ingredients: By making your lip balm, you have complete control over what goes into it. This means you can avoid harsh chemicals and add natural nourishing elements.
- Customization: Store-bought lip balms may not always have the flavor or scent you prefer. You can customize your lip balm’s flavor, aroma, and even color by DIY-ing.
- Eco-friendly: Making your lip balm means using reusable containers instead of constantly purchasing disposable ones. This is better for the environment, reduces waste, and saves you money in the long run.
Now that we’ve discussed the benefits let’s get into the step-by-step process of making a lip balm at home.
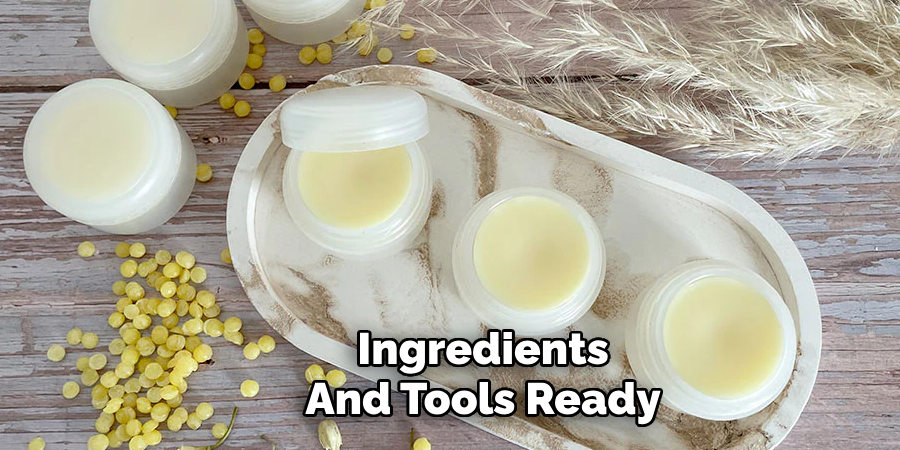
What Will You Need?
- 1 tablespoon beeswax pellets
- 1 tablespoon cocoa butter
- 2 tablespoons coconut oil
- Essential oils of your choice (optional)
- Small heat-safe container or jar
- Double boiler or a heat-proof bowl and pot
- Stirring utensil (e.g. spoon, spatula)
It’s time to start the process once you have all your ingredients and tools ready.
8 Easy Steps on How to Make a Lip Balm
Step 1. Melt the Ingredients
Place the beeswax pellets, cocoa butter, and coconut oil into a double boiler or a heat-proof bowl over a pot of simmering water. Stir the ingredients gently as they melt to ensure even mixing. Be patient; the beeswax can take slightly longer to melt entirely than the other ingredients.
Ensure the heat is kept low to avoid overheating the mixture or damaging the natural properties of the ingredients. Once everything has melted into a smooth, consistent liquid, you’re ready to proceed to the next step.
Step 2. Add Essential Oils (Optional)
Remove the melted mixture from the heat and cool slightly for a minute or two. This ensures the heat does not degrade the essential oils’ properties. If you choose to add essential oils, now is the time to do so. Add a few drops of your favorite essential oil(s) to the melted mixture, adjusting the quantity based on your preferred scent strength. Stir well to distribute the oils throughout the mixture evenly.
Step 3. Pour Into Containers
Carefully pour the melted mixture into your prepared containers while it is still liquid. Use a funnel or steady pouring technique to minimize spills and evenly distribute the mixture. Allow the filled containers to cool undisturbed at room temperature until the mixture hardens completely.
This may take a few hours. Once solidified, your homemade creation is ready to use. Label the desired containers and store them in a cool, dry place to preserve their quality.
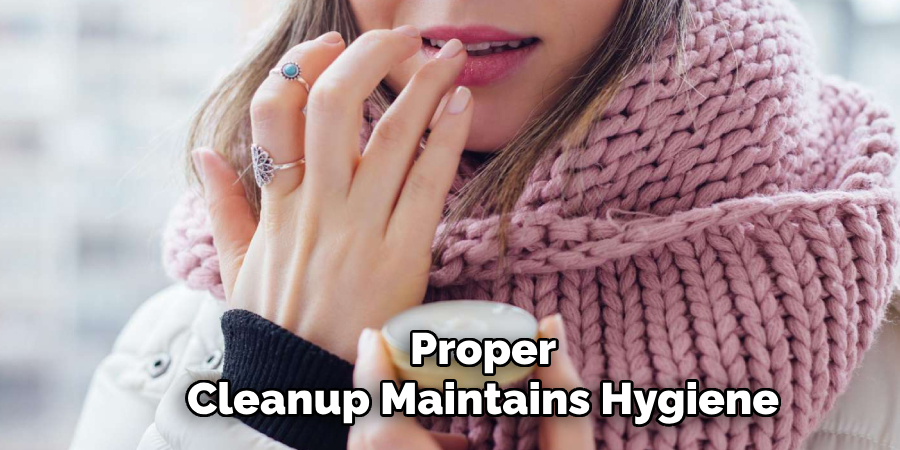
Step 4. Clean Up and Enjoy
Once your containers are filled and the mixture has solidified, take a moment to clean up your workspace. Ensure all utensils, bowls, and tools are thoroughly cleaned to remove any residue. Proper cleanup maintains hygiene and ensures your tools are ready for the next project. Finally, enjoy your homemade creation and share it with friends or family if desired. These personalized items can also make thoughtful and unique gifts!
Step 5. Troubleshooting and Tips
If you encounter any issues during the process, don’t worry—minor adjustments can often fix them. For instance, if the mixture doesn’t solidify as expected, double-check your ingredient measurements and ensure it was left to cool long enough. If the texture seems off, it might be due to variations in temperature or mixing.
Always experiment in small batches if trying new variations to avoid waste. Additionally, keep notes on your process to refine your method over time. With practice and attention, you’ll improve your results and enjoy the process even more!
Step 6. Storing Your Creation
Proper storage is essential to maintain the quality and longevity of your homemade creation. Ensure the finished product is kept in a clean, airtight container to prevent exposure to air and moisture, which could affect its texture or effectiveness. Store it in a cool, dry place away from direct sunlight, as excessive heat or light can degrade the ingredients.
Label the container with the date it was made to track its freshness and be mindful of any natural expiration dates based on the ingredients used. With the proper storage methods, your creation can be enjoyed for weeks or even months!
Step 7. Using Your Product
Now that your homemade creation is ready, it’s time to enjoy the fruits of your labor. Before using, read any notes you’ve taken during the creation process to ensure you’re applying it as intended. Whether it’s a skincare product, a kitchen recipe, or a craft project, follow any recommended application methods for the best results.
Begin with a small amount to test its effectiveness and adjust accordingly if needed. Take pleasure in using something you’ve made yourself, and don’t hesitate to share it with friends or loved ones who may appreciate your handiwork.
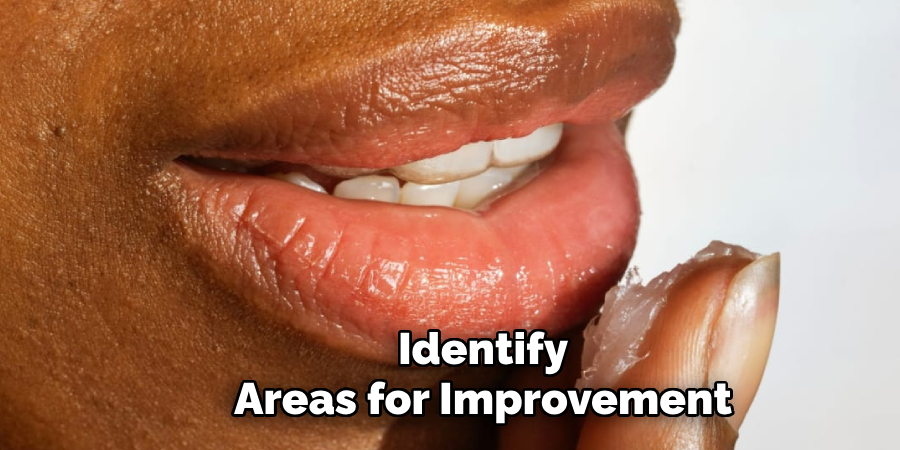
Step 8. Sharing and Receiving Feedback
A great way to refine your homemade creations is by sharing them with others and gathering feedback. Offer your product to friends, family, or colleagues who can provide honest opinions about its effectiveness or quality.
Be open to constructive criticism, as it can help you identify areas for improvement. Sharing also allows you to spread joy and showcase your skills, inspiring others to try making their creations. Remember to be mindful of individual preferences or sensitivities, especially for products like skincare or food. Use feedback to enhance your product and make future versions even better.
By following these ten easy steps, you’ve learned how to make a lip balm using simple, natural ingredients.
5 Things You Should Avoid
- Using Low-Quality Ingredients: Avoid using low-quality or impure ingredients, as they can negatively impact the effectiveness and safety of your lip balm. Always opt for organic, high-grade components to ensure the final product is safe and nourishing.
- Skipping Proper Measurements: Precise measurements are key in creating a balanced lip balm. Overusing oils or waxes can result in a product that is either too greasy or hard. Stick to tested recipes and measure carefully.
- Neglecting Hygiene Standards: Failing to maintain a clean workspace or sterilize tools can introduce harmful bacteria or contaminants into your lip balm, making it unsafe.
- Adding Too Much Fragrance or Essential Oils: Too much fragrance or essential oils can cause skin irritation or allergic reactions. Use these ingredients sparingly and follow recommended safe usage guidelines.
- Improper Storage: Storing your lip balm in unsuitable conditions, such as extreme heat or direct sunlight, can cause it to melt, degrade, or lose its beneficial properties. Always store the product in a cool, dry place.
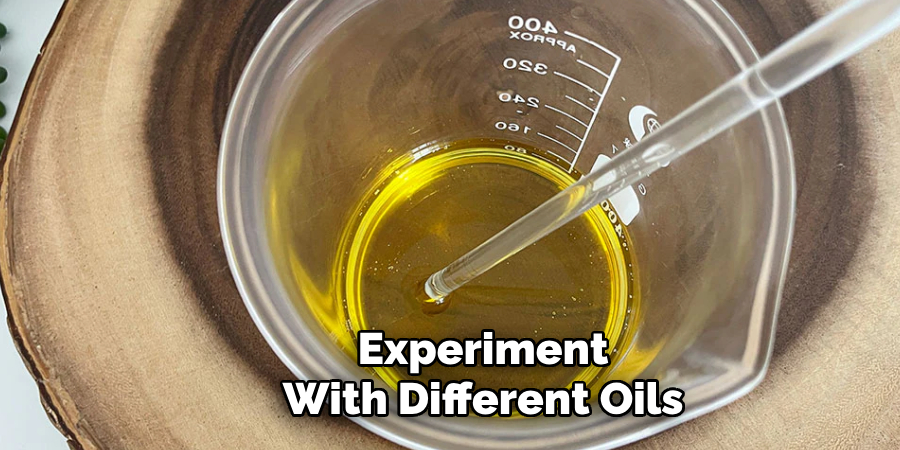
What Type of Fruit Lip Balms Can You Make?
The type of fruit lip balms you can make is only limited by your imagination and creativity. Some popular options include strawberry, cherry, lemon, orange, grapefruit, watermelon, peach, and raspberry. You can also mix and match different fruits to create unique flavor combinations.
For nourishment and scent, experiment with different oils and butter, such as avocado or cocoa butter. Don’t be afraid to try new fruits or ingredients to discover your perfect homemade lip balm recipe! So go ahead and have fun making fruity lip balms that will not only keep your lips soft and moisturized but also give them a delicious natural scent.
Conclusion
How to make a lip balm at home is a simple and rewarding process that allows you to control the ingredients and tailor the product to your preferences.
Using natural oils, butter, and optional additives like fruit extracts or essential oils, you can create a lip balm that nourishes your lips and suits your taste. You can craft a high-quality product with just a few basic steps—melting the ingredients, mixing them, and pouring the blend into containers.
Whether you stick to classic recipes or experiment with creative combinations, homemade lip balms are a fun and practical way to care for your lips while expressing your creativity.
About the Author
Jane Hubbard is a passionate beauty expert with a wealth of experience in makeup, hair, and overall beauty techniques. After years of working as a hairdresser specialist, she followed her entrepreneurial spirit and started her own consultancy business.
Jane has always been driven by her desire to help others feel confident in their own skin, and she does this by sharing her knowledge, experiences, and practical beauty tips. Through her consultancy, she empowers individuals to embrace their unique beauty, offering tailored guidance that boosts both self-esteem and personal style.
Professional Focus
- Specializes in makeup, hairstyling, and beauty consulting.
- Provides personalized beauty advice, tips, and techniques to help individuals feel confident in their appearance.
- Dedicated to staying up-to-date with the latest industry trends and developments.
- Passionate about creating a comfortable and empowering experience for every client.
Education History
- University of Craft and Design – Bachelor of Fine Arts (BFA) in Woodworking and Furniture Design
- Woodworking Apprenticeships – Extensive hands-on training with skilled craftsmen to refine carpentry and furniture making techniques
- Online Courses & Masterclasses – Continued education in advanced woodworking techniques, design principles, and specialized tools
Expertise:
- Makeup artistry, hairstyling, and beauty consulting.
- Personalized beauty techniques to enhance confidence and self-expression.
- Educating clients on how to maintain their beauty routines at home.