
Do you suffer from pesky pimples that just won’t disappear? If so, you’re not alone – many people with oily skin experience frequent breakouts. Rather than relying on harsh chemicals and over-the-counter products, why not try out a more natural approach and learn how to make an effective pimple patch at home?
Making your own patch using simple ingredients such as tea tree oil and aloe vera can help reduce redness, inflammation, and the size of any blemish without irritating the skin or clogging pores.
Whether you’re looking for an easy solution to zap that pimple fast or want to try something new, here’s how to make a homemade pimple patch.
In this post, we will explore how to make a pimple patch at home so that you can take charge of your skincare routine!
What Will You Need?
Before getting started, it’s important to gather the necessary supplies. Here is a list of items that you will need for your homemade pimple patch:
- One teaspoon of distilled water
- ½ teaspoon of aloe vera gel
- 2 drops of tea tree oil
- ¼ teaspoon of witch hazel
- The bandage or medical tape
Once you have the ingredients, follow these simple steps.
10 Easy Steps on How to Make a Pimple Patch at Home
Step 1: Mix the Ingredients Together
Mix the distilled water, aloe vera gel, and tea tree oil in a small bowl until it forms a paste. You can adjust the amounts of each ingredient depending on how thick or thin you want the paste to be. If it gets too thick, add more water to thin it out.
Step 2: Add Witch Hazel
Once the ingredients are mixed, add the witch hazel and mix until fully incorporated. Witch hazel has astringent properties that can help reduce inflammation and redness, which makes it an ideal addition to this homemade pimple patch. As with the other ingredients, feel free to adjust the amount of witch hazel you use according to your desired consistency.
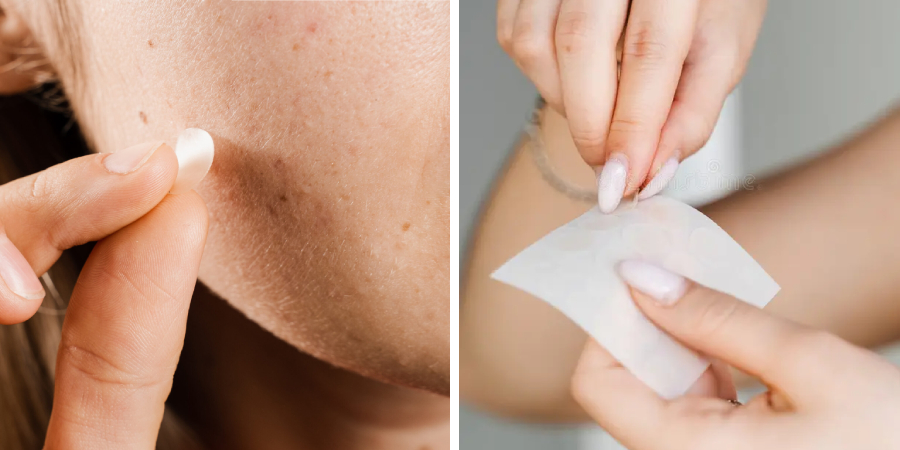
Step 3: Apply the Patch
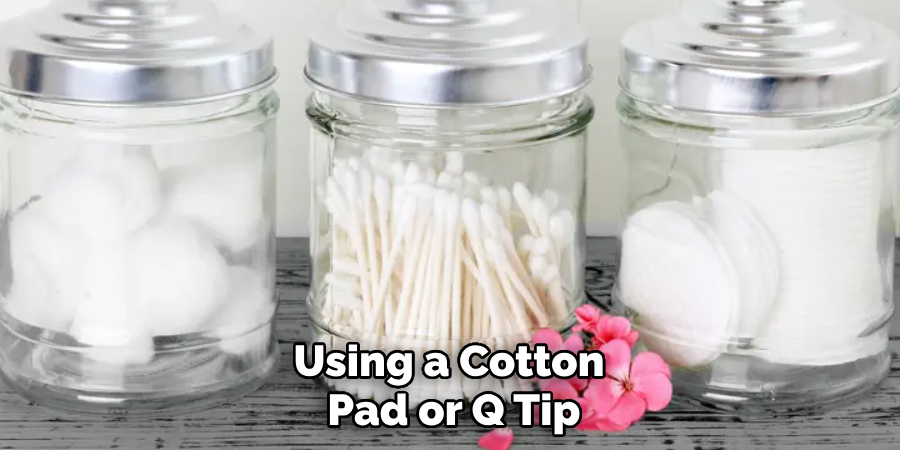
Apply the paste directly onto the blemish using a cotton pad or Q-tip. Ensure it is completely covered, and let it sit for 10 minutes. If you have sensitive skin, it’s best to gently touch when applying the patch.
Step 4: Remove the Paste
After 10 minutes, remove the paste from your skin by carefully wiping it off with a damp cloth or paper towel. Be careful not to rub too hard, as this could irritate you. Try to wipe away as much of the paste as possible without scrubbing.
Step 5: Place Bandage
Once you have removed all the paste from your face, apply a bandage or medical tape over the pimple to secure it. This will help ensure that the patch stays on overnight and provides maximum results. Ensure that the bandage is securely applied and won’t come off easily.
Step 6: Leave Overnight
Leave your homemade pimple patch in place overnight. The ingredients will work their magic as you sleep and help reduce redness, inflammation, and blemish size. Another benefit of leaving it on overnight is keeping the patch away from dirt and bacteria, which can irritate your skin.
Step 7: Remove the Patch
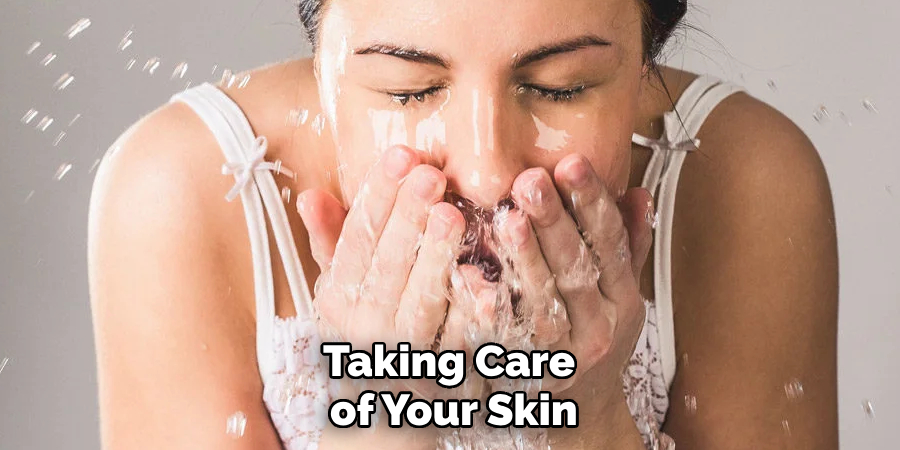
In the morning, discard the bandage or medical tape from your face. Carefully wipe away any residue from the patch with a damp cloth or paper towel. Otherwise, you can rinse your face with lukewarm water to ensure all ingredients have been removed.
Step 8: Rinse off the Paste
Rinse off any remaining paste with lukewarm water and pat dry with a towel. You can use a gentle cleanser to remove any residue if necessary. Another option is to use micellar water, which can help remove oil and dirt from your skin without irritating or over drying.
Step 9: Moisturize Skin
Once all traces of the paste have been removed, take a few moments to pamper your skin by applying moisturizer or facial oil to keep it hydrated throughout the day. Keep in mind that dry skin can worsen acne, so make sure to use a product specifically designed for oily or acne-prone skin. Moreover, avoid picking at or touching your pimple, which can cause further irritation.
Step 10: Repeat Daily
To maximize results, repeat this process once a day for several days or until the blemish has completely cleared up. Remember, consistency is key when it comes to treating breakouts and taking care of your skin. Just remember that results may vary from person to person, and it may take a few days or weeks to see an improvement.
And there you have it – 10 easy steps on how to make a pimple patch at home! With just a few simple ingredients and tools, you can now take charge of your skincare routine and tackle those pesky pimples quickly. Best of luck!
5 Additional Tips and Tricks
1. Use a soft face brush or cotton swab when applying the patch. This will help ensure the patch adheres properly to your skin and won’t cause irritation.
2. Create a clean workspace by sterilizing the area with rubbing alcohol before beginning. This will help minimize the risk of infection and ensure that you don’t introduce bacteria into the patch.
3. Consider using an acne spot treatment gel to apply under the patch, or alternatively, try applying a moisturizer such as aloe vera or coconut oil first. This can help soothe any redness or inflammation around the pimple.
4. For best results, make sure to keep your patch on for at least 8 hours; this will give it enough time to absorb some of the fluid from your pimple and reduce swelling overnight!
5. Replace your patch daily to stay clean and effective. You can also opt for a patch with an adhesive backing to ensure it stays in place as you move around.
Following these additional tips and tricks will help ensure that your DIY pimple patch is both safe and effective! With some planning and the right supplies, making your own pimple patches at home can be easy and cost-effective too.
5 Things You Should Avoid

1. Never apply the patch directly to an open wound. This can lead to infection and further irritation.
2. Do not use any harsh ingredients on your skin when applying the patch, as this may irritate your skin or cause a reaction.
3. Don’t leave the patch on for too long, as it can cause excessive drying of the surrounding skin and even create scarring over time if left on for too long.
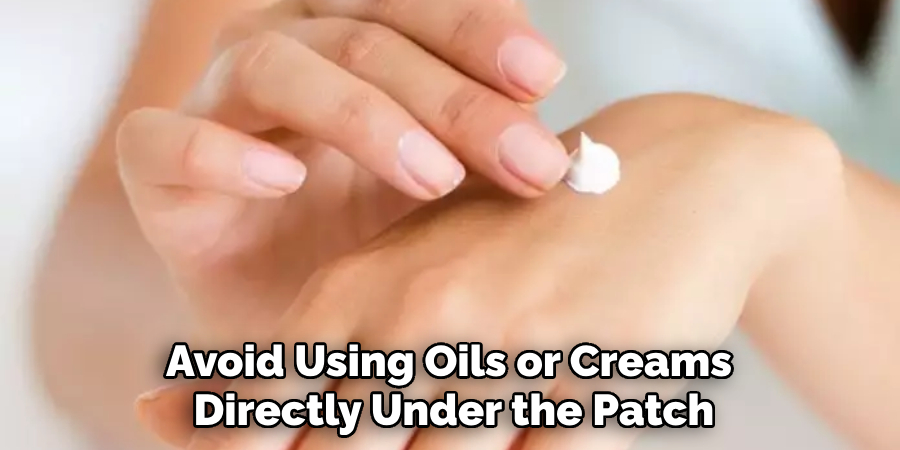
4. Avoid using oils or creams directly under the patch, as these can decrease its effectiveness by blocking out air circulation needed for healing.
5. Finally, never share your pimple patches with someone else – bacteria can spread from person to person through shared patches! Keep them clean and all for yourself.
Making your own pimple patch at home can be an easy way to help reduce the appearance of blemishes and assist in healing skin irritation. Following these tips and tricks will ensure you create a safe, effective patch with minimal risk of irritation or infection.
Is It Necessary to Patch a Pimple?
No, it is not necessary to patch a pimple. In some cases, like if the pimple is very large or inflamed, it may be better to leave it untreated and allow the skin to heal naturally. Patches can help protect the area from further infection and decrease inflammation; however, they should only be used when necessary and according to instructions. If you are unsure what steps to take with a particular pimple, consult a dermatologist for advice before attempting anything yourself.
It is also important to remember that patches are not suitable for every type of blemish – some conditions may require different treatments or medications prescribed by a doctor. Self-care measures such as keeping your face clean and moisturized can also prevent further breakouts.
Conclusion
In conclusion, making a pimple patch at home is a great way to avoid harsh ingredients and expensive costs. Whether a clay-based face mask or an overnight hydrocolloid bandage, the homemade solutions have the same effect as their store-bought counterparts.
Not only do they help reduce the size of the pimple, but they also prevent future breakouts from occurring. Additionally, the convenience of making them in your own kitchen saves you both time and money. Making your own pimple patches is easy to do and can be beneficial to any skincare routine or emergency situation where you need fast relief. So next time you feel that telltale bump on your face, try one of these homemade remedies!
Hopefully, the article on how to make a pimple patch at home has been helpful and informative. With some planning and the right supplies, making your pimple patches can be easy and cost-effective. Be sure to follow all safety instructions, and always consult your dermatologist if you have any doubts or concerns about using a patch on your skin. Good luck!
About the Author
Jane Hubbard is a passionate beauty expert with a wealth of experience in makeup, hair, and overall beauty techniques. After years of working as a hairdresser specialist, she followed her entrepreneurial spirit and started her own consultancy business.
Jane has always been driven by her desire to help others feel confident in their own skin, and she does this by sharing her knowledge, experiences, and practical beauty tips. Through her consultancy, she empowers individuals to embrace their unique beauty, offering tailored guidance that boosts both self-esteem and personal style.
Professional Focus
- Specializes in makeup, hairstyling, and beauty consulting.
- Provides personalized beauty advice, tips, and techniques to help individuals feel confident in their appearance.
- Dedicated to staying up-to-date with the latest industry trends and developments.
- Passionate about creating a comfortable and empowering experience for every client.
Education History
- University of Craft and Design – Bachelor of Fine Arts (BFA) in Woodworking and Furniture Design
- Woodworking Apprenticeships – Extensive hands-on training with skilled craftsmen to refine carpentry and furniture making techniques
- Online Courses & Masterclasses – Continued education in advanced woodworking techniques, design principles, and specialized tools
Expertise:
- Makeup artistry, hairstyling, and beauty consulting.
- Personalized beauty techniques to enhance confidence and self-expression.
- Educating clients on how to maintain their beauty routines at home.